Geberit Rapid 616.190.00.1 Betriebsanleitung
Hygienespülung
Vorschau ausblenden
Andere Handbücher für Rapid 616.190.00.1:
- Betriebsanleitung (229 Seiten) ,
- Instandhaltungsanleitung (105 Seiten)

Verwandte Anleitungen für Geberit Rapid 616.190.00.1


Inhaltszusammenfassung für Geberit Rapid 616.190.00.1
- Seite 1 OPERATION MANUAL BETRIEBSANLEITUNG MANUEL DʼUTILISATION ISTRUZIONI DI FUNZIONAMENTO...
- Seite 3 Deutsch ................. English................... Français................. Italiano ................... Nederlands ................Español ................. Polski ..................Čeština .................. Slovenščina ................18014401053566091-1 © 07-2018 967.986.00.0 (01)
-
Seite 4: Bestimmungsgemässe Verwendung
Geberit Hygienespülungen sind zum automatischen, periodischen Wasseraustausch in Trinkwasserinstallationen bestimmt. Jede andere Verwendung gilt als nicht bestimmungsgemäss. Geberit übernimmt keine Haftung für die Folgen aus nicht bestimmungsgemässer Verwendung. Allgemeine Sicherheitshinweise • Bedienung, Pflege und Instandhaltung dürfen nur so weit durch den Betreiber ausgeführt werden wie in dieser Betriebsanleitung beschrieben. -
Seite 5: Sicherheitshinweise Für Hygienespülung Rapid Mit Siphon
Direkte Sonneneinstrahlung kann den Deckel der Steuereinheit verfärben. Sicherheitshinweise für Hygienespülung Rapid mit Siphon • Geberit Hygienespülung Rapid nur in vertikaler Position betreiben. • Geberit Hygienespülung Rapid mit 4 Befesti- gungsschrauben an der Wand fixieren. • Keinen zusätzlichen Siphon in die Abwasserleitung einbauen. - Seite 6 Sicherheitshinweise für Geberit Steuereinheit für Hygienespülung Rapid • Steuereinheit nur an eine fest montierte Versorgungsleitung anschliessen. • Steuereinheit nicht in Wasser tauchen. • Zwischen Auslauf und Abwasserleitung einen Abstand von mindestens 20 mm vorsehen (freier Auslauf gemäss DIN EN 1717:2011-08). 18014401053566091-1 © 07-2018...
-
Seite 7: Produktbeschreibung
Produktbeschreibung Aufbau Geberit Hygienespülung Rapid Abbildung 1: Geberit Hygienespülung Rapid Korbfilter Steuereinheit Bedienfeld Batterie Deckel des Batteriefachs Deckel der Steuereinheit Gehäuse Überlauf Siphon Unterteil Siphon Oberteil 18014401053566091-1 © 07-2018 967.986.00.0 (01) -
Seite 8: Aufbau Geberit Steuereinheit Für Hygienespülung Rapid
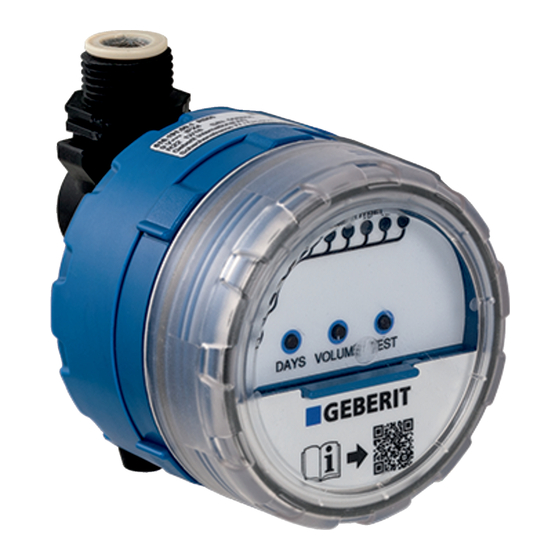
Aufbau Geberit Steuereinheit für Hygienespülung Rapid Abbildung 2: Geberit Steuereinheit für Hygienespülung Rapid Korbfilter Steuereinheit Bedienfeld Batterie Deckel des Batteriefachs Deckel der Steuereinheit Auslauf 18014401053566091-1 © 07-2018 967.986.00.0 (01) -
Seite 9: Technische Daten
Technische Daten Schutzart IPX4 Betriebsspannung 9 V DC Batterietyp Alkali-Batterie 6LR61 (9 V) Lebensdauer der Batterie bei > 1,5 Jahre Spülintervall = 1 Tag Fliessdruck 0,2–10 bar Betriebstemperatur 0–70 °C Spülleistung 3 l/min Spülzeit Werkseinstellung 2 min Spülintervall Werkseinstellung 24 h Maximale Spülzeit 15 min Wasserverbrauch pro Jahr... -
Seite 10: Bedienung
Bedienung Bedienfeld Symbol Funktion <1> Spülintervall = 1 Tag (spült jeden Tag) <3> Spülintervall = 3 Tage (spült alle 3 Tage) <7> Spülintervall = 7 Tage (spült alle 7 Tage) <2 MIN> Spülzeit = 2 Minuten <SET> Spülzeit einstellbar Spülzeit ermitteln und einstellen. → Siehe <FLUSH Taste „Spülintervall und Spülzeit einstellen“,... -
Seite 11: Standby-Modus
Symbol Funktion Ladezustand Batterie. → Siehe „Störungen beheben“, Seite 18. Betriebsmodi Die Geberit Hygienespülung Rapid kann in den folgenden Betriebsmodi betrieben werden: Modus Spülzeit Spülintervall <DAYS> 1 Tag <1> 2 Minuten <2 MIN> 3 Tage <3> 7 Tage <7> Einstellbar (min- 1 Tag <1>... -
Seite 12: Spülintervall Und Spülzeit Einstellen
0–15 15–30 30–45 0–17 17–25 25–34 Werkseinstellung Tabelle 2: Empfohlene Rohrdimensionen Rohrleitungssys- DN 12 DN 15 DN 20 [mm] [mm] [mm] Geberit Mapress 15 x 1,0 18 x 1,0 22 x 1,2 Geberit Mepla 16 x 2,25 20 x 2,5 26 x 3,0 Geberit PushFit 16 x 2,0 20 x 2,0 25 x 2,5 Geberit Volex 16 x 2,0 20 x 2,0 26 x 3,0 18014401053566091-1 ©... - Seite 13 Spülintervall ermitteln Die folgende Tabelle dient zur Ermittlung des Spülintervalls. Ab Werk ist ein Spülintervall von 1 Tag eingestellt. Tabelle 3: Ermittlung des Spülintervalls Mindestanforderungen nach Spülintervall [Tage] DIN EN 806-4:2010-06 VDI/DVGW 6023:2013-04 Erhöhte Anforderungen Werkseinstellung 18014401053566091-1 © 07-2018 967.986.00.0 (01)
- Seite 14 Betriebsmodi 1–3 einstellen (Spülzeit 2 Minuten) ▶ Taste <MODE> wiederholt drücken, bis LED <2 MIN> und das gewünschte Spülintervall (<1>, <3> oder <7 DAYS>) leuchten. Ergebnis ✓ Die Einstellungen sind gespeichert. ✓ Das Spülintervall startet ab dem Zeitpunkt der Einstellungen. Die erste Spülung wird nach Ablauf des Spülintervalls ausgelöst.
- Seite 15 Betriebsmodi 4–6 einstellen (Spülzeit einstellbar) Taste <MODE> wiederholt drücken, bis LED <SET> und das gewünschte Spülintervall (<1>, <3> oder <7 DAYS>) leuchten. 18014401053566091-1 © 07-2018 967.986.00.0 (01)
- Seite 16 Taste <FLUSH TIME> für die gewünschte Spülzeit gedrückt halten (1 Sekunde bis 15 Minuten). Beispiel: Für eine Spülzeit von 4 Minuten Taste 4 Minuten gedrückt halten. ✓ Während die Taste gedrückt gehalten wird, fliesst das Wasser. Ergebnis ✓ Die Einstellungen sind gespeichert. ✓...
-
Seite 17: Eingestellte Spülzeit Überprüfen
Eingestellte Spülzeit überprüfen ▶ Taste <TEST> für 1 Sekunde drücken. DAYS 2 MIN MODE TEST FLUSH TIME ✓ Das Magnetventil öffnet, und es fliesst Wasser. ✓ Das Magnetventil schliesst automatisch nach Ablauf der eingestellten Spülzeit. 18014401053566091-1 © 07-2018 967.986.00.0 (01) -
Seite 18: Störungen Beheben
Störungen beheben Störung Ursache Behebung blinkt ▶ Batterie ersetzen. → alle 2 Sekun- Batterie fast ver- Siehe „Batterie ersetzen“, den, keine braucht Seite 21. Spülauslösung. ▶ Taste <TEST> drücken. Steuereinheit im Steuereinheit zeigt Stand-by-Modus aktuellen Betriebsmodus Keine LED ▶ Taste <TEST> drücken. leuchtet. - Seite 19 15 Minuten ist eingestellt). Wenn die Batterie fast verbraucht ist, finden keine Spülauslösungen mehr statt. Fachkräfte finden weitere Informationen zur Störungs- behebung in der Instandhaltungsanleitung 967.987.00.0 auf der Website der jeweiligen Geberit Vertriebsgesellschaft oder unter nebenstehendem QR-Code. 18014401053566091-1 © 07-2018 967.986.00.0 (01)
-
Seite 20: Wartung
Instandhaltung Funktionsprüfung Empfehlung: Nachfolgend beschriebene Funktionsprüfung regelmässig durchführen. Tätigkeit Resultat Aktion ▶ Falls LED blinkt, Batterie über- – ersetzen. → Siehe prüfen. „Batterie ersetzen“, Seite 21. ▶ Falls keine LED Steuereinheit zeigt leuchtet, Batterie Taste <TEST> aktuellen Betriebsmo- ersetzen. → Siehe drücken. -
Seite 21: Batterie Ersetzen
Batterie ersetzen Wasserzufuhr schliessen. Deckel der Steuereinheit öffnen. 18014401053566091-1 © 07-2018 967.986.00.0 (01) - Seite 22 Deckel des Batteriefachs öffnen. 18014401053566091-1 © 07-2018 967.986.00.0 (01)
- Seite 23 Batterie entnehmen und entsorgen. 18014401053566091-1 © 07-2018 967.986.00.0 (01)
- Seite 24 Neue Batterie einsetzen. 18014401053566091-1 © 07-2018 967.986.00.0 (01)
- Seite 25 Deckel des Batteriefachs schliessen. Wasserzufuhr öffnen. 18014401053566091-1 © 07-2018 967.986.00.0 (01)
- Seite 26 Spülauslösung testen. Mit Taste <TEST> Magnetventil öffnen. 18014401053566091-1 © 07-2018 967.986.00.0 (01)
- Seite 27 Mit Taste <TEST> Magnetventil schliessen. Die Geberit Hygienespülung Rapid arbeitet jetzt mit Werkseinstellungen. Falls erforderlich, Spülintervall und Spülzeit erneut einstellen. → Siehe „Spülintervall und Spülzeit einstellen“, Seite 12. 18014401053566091-1 © 07-2018 967.986.00.0 (01)
- Seite 28 Deckel der Steuereinheit schliessen. 18014401053566091-1 © 07-2018 967.986.00.0 (01)
-
Seite 29: Entsorgung Von Elektro- Und Elektronik-Altgeräten
Das Symbol gibt an, dass das Produkt nicht zusammen mit dem Restmüll entsorgt werden darf. Altgeräte sind zur fachgerechten Entsorgung direkt an Geberit zurückzugeben. Adressen der Annahmestellen können bei der zuständigen Geberit Vertriebsgesellschaft erfragt werden. 18014401053566091-1 © 07-2018 967.986.00.0 (01) -
Seite 30: Intended Use
• Operation, care and maintenance work may only be performed by the operator as described in this operation manual. • Do not attempt to repair the Geberit sanitary flush Rapid yourself. • Do not modify the product or add any additional modules. - Seite 31 • Protect from direct sunlight. Exposure to direct sunlight can discolour the control unit cover. Safety notes for sanitary flush Rapid with trap • Only operate the Geberit sanitary flush Rapid in an upright position. • Mount the Geberit sanitary flush Rapid on the wall using 4 fastening screws.
-
Seite 32: Product Description
Product description Structure of Geberit sanitary flush Rapid Figure 1: Geberit sanitary flush Rapid Basket filter Control unit Control panel Battery Battery compartment cover Control unit cover Housing Overflow Lower part of trap Upper part of trap 18014401053566091-1 © 07-2018 967.986.00.0 (01) - Seite 33 Structure of Geberit control unit for sanitary flush Rapid Figure 2: Geberit control unit for sanitary flush Rapid Basket filter Control unit Control panel Battery Battery compartment cover Control unit cover Outlet 18014401053566091-1 © 07-2018 967.986.00.0 (01)
-
Seite 34: Technical Data
Technical data Protection degree IPX4 Operating voltage 9 V DC Battery type Alkaline battery 6LR61 (9 V) Battery service life at flush > 1.5 years interval = 1 day Flow pressure 0.2–10 bar Operating temperature 0–70 °C Flush performance 3 l/min Flush time factory setting 2 min Flush interval factory setting 24 h... -
Seite 35: Operation
Operation Control panel Symbol Type Function <1> Flush interval = 1 day (flushes daily) Flush interval = 3 days (flushes every <3> 3 days) Flush interval = 7 days (flushes every <7> 7 days) <2 MIN> Flush time = 2 minutes <SET> Flush time can be set Calculating and setting the flush time. -
Seite 36: Operation Modes
Testing the solenoid valve. → See <TEST> Button "Function test", page 45. Battery capacity. → See "Rectifying malfunctions", page 43. Operation modes The Geberit sanitary flush Rapid can be operated in the following operation modes: Mode Flush time Flush interval LED <DAYS> 1 day <1>... - Seite 37 Piping system DN 12 DN 15 DN 20 [mm] [mm] [mm] Geberit Mapress 15 x 1 .0 18 x 1 .0 22 x 1 .2 Geberit Mepla 16 x 2 .25 20 x 2 .5 26 ...
- Seite 38 Calculating the flush interval The following table is used to calculate the flush interval. A flush interval of 1 day is set at the factory. Table 3: Calculating the flush interval Minimum requirements in accordance with Flush interval [Days] DIN EN 806-4:2010-06 VDI/DVGW 6023:2013-04 Increased requirements Factory setting...
- Seite 39 Setting operation modes 1–3 (flush time of 2 minutes) ▶ Press and hold the <MODE> button until the LED <2 MIN> and the desired flush interval (<1>, <3> or <7 DAYS>) light Result ✓ The settings are saved. ✓ The flush interval begins from the point that the settings are made.
- Seite 40 Setting operation modes 4–6 (flush time can be set) Press and hold the <MODE> button until the LED <SET> and the desired flush interval (<1>, <3> or <7 DAYS>) light 18014401053566091-1 © 07-2018 967.986.00.0 (01)
- Seite 41 Press and hold the <FLUSH TIME> button to select the desired flush time (1 second to 15 minutes). Example: for a flush time of 4 minutes, press and hold the button for 4 minutes. ✓ Water will flow so long as the button is pressed. Result ✓...
- Seite 42 Checking the set flush time ▶ Press the <TEST> button for 1 second. DAYS 2 MIN MODE TEST FLUSH TIME ✓ The solenoid valve opens and water begins to flow. ✓ The solenoid valve closes automatically after the set flush time. 18014401053566091-1 ©...
-
Seite 43: Rectifying Malfunctions
Rectifying malfunctions Malfunction Cause Rectification ▶ Replace the battery. → flashes every Battery almost See "Replacing the 2 seconds, no dead battery", page 46. flush actuation. ▶ Press the <TEST> Control unit is in button. Control unit standby mode shows the current operation mode. - Seite 44 Flush actuations will no longer take place if the battery is almost dead. Skilled persons will find further information on troubleshooting in the maintenance manual 967.987.00.0 on the website of the respective Geberit sales company or via the adjacent QR code. 18014401053566091-1 © 07-2018...
-
Seite 45: Maintenance
Maintenance Function test Recommendation: regularly perform the function test described below. Task Result Action ▶ If LED flashing, replace the Check LED – battery. → See "Replacing the battery", page 46. ▶ Replace the battery Press the Control unit shows the if no LED lights up. -
Seite 46: Replacing The Battery
Replacing the battery Close the water supply valve. Open the control unit cover. 18014401053566091-1 © 07-2018 967.986.00.0 (01) - Seite 47 Open the battery compartment cover. 18014401053566091-1 © 07-2018 967.986.00.0 (01)
- Seite 48 Remove and dispose of the battery. 18014401053566091-1 © 07-2018 967.986.00.0 (01)
- Seite 49 Insert the new battery. 18014401053566091-1 © 07-2018 967.986.00.0 (01)
- Seite 50 Close the battery compartment cover. Open the water supply valve. 18014401053566091-1 © 07-2018 967.986.00.0 (01)
- Seite 51 Test the flush actuation. Open the solenoid valve with the <TEST> button. 18014401053566091-1 © 07-2018 967.986.00.0 (01)
- Seite 52 Close the solenoid valve with the <TEST> button. The Geberit sanitary flush Rapid now operates with factory settings. Reset the flush interval and flush time, if required. → See "Setting the flush interval and flush time", page 37. 18014401053566091-1 © 07-2018...
- Seite 53 Close the control unit cover. 18014401053566091-1 © 07-2018 967.986.00.0 (01)
-
Seite 54: Disposal Of Old Electrical And Electronic Equipment
The symbol indicates that the product cannot be disposed of with non-recyclable waste. Old equipment should be returned directly to Geberit where it will be disposed of appropriately. Addresses to which equipment can be returned can be requested from the relevant Geberit sales company. -
Seite 55: Utilisation Conforme
Les rinçages forcés hygiéniques Geberit sont destinés à échanger l'eau automatiquement et périodiquement dans les installations d'eau potable. Toute autre utilisation est considérée comme non conforme. Geberit ne saura être tenu responsable des conséquences d'une utilisation non conforme. Consignes générales de sécurité... - Seite 56 Rapid avec siphon • Utiliser le rinçage forcé hygiénique Geberit Rapid uniquement en position verticale. • Fixer le rinçage forcé hygiénique Geberit Rapid sur la paroi à l'aide de 4 vis de fixation. • Ne pas monter de siphon supplémentaire dans la conduite d'évacuation.
- Seite 57 • En cas d'engorgement de l'écoulement, de l'eau risque de s'échapper du trop-plein du rinçage forcé hygiénique Geberit Rapid. Consignes de sécurité pour le module de commande Geberit pour rinçage forcé hygiénique Rapid • Raccorder le module de commande uniquement à une conduite d’alimentation montée de manière fixe.
-
Seite 58: Descriptif Du Produit
Descriptif du produit Structure du rinçage forcé hygiénique Geberit Rapid Illustration 1: Rinçage forcé hygiénique Geberit Rapid Filtre panier Module de commande Commande fixe Pile Couvercle du compartiment de pile Couvercle du module de commande Boîtier Trop-plein Siphon partie inférieure Siphon partie supérieure 18014401053566091-1 ©... - Seite 59 Structure du module de commande Geberit pour rinçage forcé hygiénique Rapid Illustration 2: Module de commande pour rinçage forcé hygiénique Geberit Rapid Filtre panier Module de commande Commande fixe Alimentation par pile Couvercle du compartiment de pile Couvercle du module de commande Evacuation 18014401053566091-1 ©...
-
Seite 60: Caractéristiques Techniques
Caractéristiques techniques Degré de protection IPX4 Tension de fonctionnement 9 V c.c. Type de pile Pile alcaline 6LR61 (9 V) Durée de vie de la pile en cas > 1,5 an d’intervalle de rinçage = 1 jour Plage de pression d’alimentation 0,2–10 bars Température de service 0–70 °C Capacité... - Seite 61 Utilisation Commande fixe Symbole Type Fonction Intervalle de rinçage = 1 jour (rinçage <1> quotidien) Intervalle de rinçage = 3 jours (rinçage <3> tous les 3 jours) Intervalle de rinçage = 7 jours (rinçage <7> tous les 7 jours) <2 MIN> Temps de rinçage = 2 ...
-
Seite 62: Modes D'exploitation
1 → 2 → 3 → 4 → 5 → 6 → 1 → 2 → 3, etc. Mode standby La commande fixe du rinçage forcé hygiénique Geberit Rapid se met en mode standby après environ 2 minutes d'inactivité. Toutes les LED s'éteignent. - Seite 63 0–17 17–25 25–34 Réglage d’usine Tableau 2: Dimensions de tuyau recommandées Système de tuyau- DN 12 DN 15 DN 20 terie [mm] [mm] [mm] Geberit Mapress 15 x 1,0 18 x 1,0 22 x 1,2 Geberit Mepla 16 x 2,25 20 x 2,5 26 x 3,0 Geberit PushFit 16 x 2,0 20 x 2,0 25 x 2,5 Geberit Volex 16 x 2,0...
- Seite 64 Déterminer l'intervalle de rinçage Le tableau suivant sert à déterminer l’intervalle de rinçage. Un intervalle de rinçage d’un jour est réglé en usine. Tableau 3: Détermination de l’intervalle de rinçage Exigences minimales selon Intervalle de rinçage [Jours] DIN EN 806-4:2010-06 VDI/DVGW 6023:2013-04 Exigences plus élevées Réglage d’usine 18014401053566091-1 ©...
- Seite 65 Régler les modes d'exploitation 1–3 (temps de rinçage 2 minutes) ▶ Appuyer plusieurs fois sur la touche <MODE> jusqu'à ce que la LED <2 MIN> et l'intervalle de rinçage souhaité (<1>, <3> ou<7 DAYS>) s'allument. Résultat ✓ Les réglages ont été enregistrés. ✓...
- Seite 66 Régler les modes d'exploitation 4–6 (temps de rinçage réglable) Appuyer plusieurs fois sur la touche <MODE> jusqu'à ce que la LED <SET> et l'intervalle de rinçage souhaité (<1>, <3> ou<7 DAYS>) s'allument. 18014401053566091-1 © 07-2018 967.986.00.0 (01)
- Seite 67 Maintenir enfoncée la touche <FLUSH TIME> pour le temps de rinçage souhaité (de 1 seconde à 15 minutes). Exemple : pour un temps de rinçage de 4 minutes, maintenir la touche enfoncée pendant 4 minutes. ✓ L'eau coule pendant que la touche est maintenue enfoncée.
-
Seite 68: Dépannage
Vérifier le temps de rinçage réglé ▶ Appuyer sur la touche <TEST> pendant 1 seconde. DAYS 2 MIN MODE TEST FLUSH TIME ✓ L’électrovanne s’ouvre et de l’eau s’écoule. ✓ L’électrovanne se ferme automatiquement après écoulement du temps de rinçage réglé. Dépannage Dérangement Cause... - Seite 69 Dérangement Cause Dépannage ▶ Appuyer sur la touche Module de com- <TEST>. Le module de mande en mode commande indique le standby mode d’exploitation en cours. Aucune LED n’est allumée. ▶ Appuyer sur la touche <TEST>. Si aucun Pile usée affichage, remplacer la pile.
- Seite 70 Les personnes qualifiées trouveront plus d’informa- tions pour le dépannage dans le manuel d’entre- tien 967.987.00.0 disponible sur le site web de la so- ciété de distribution correspondante Geberit ou sous le code QR en regard. 18014401053566091-1 © 07-2018 967.986.00.0 (01)
-
Seite 71: Test De Fonctionnement
Maintenance Test de fonctionnement Recommandation : effectuer régulièrement le test de fonctionnement décrit ci-après. Activité Résultat Action ▶ Si la LED clignote, remplacer Vérifier – la pile. → Voir LED. « Remplacer la pile », page 72. ▶ Si aucune LED ne Le module de com- Appuyer sur la s’allume, remplacer mande indique le... -
Seite 72: Remplacer La Pile
Remplacer la pile Couper l’arrivée d’eau. Ouvrir le couvercle du module de commande. 18014401053566091-1 © 07-2018 967.986.00.0 (01) - Seite 73 Ouvrir le couvercle du compartiment de la pile. 18014401053566091-1 © 07-2018 967.986.00.0 (01)
- Seite 74 Retirer et éliminer la pile. 18014401053566091-1 © 07-2018 967.986.00.0 (01)
- Seite 75 Introduire une nouvelle pile. 18014401053566091-1 © 07-2018 967.986.00.0 (01)
- Seite 76 Fermer le couvercle du compartiment de la pile. Ouvrir l’arrivée d’eau. 18014401053566091-1 © 07-2018 967.986.00.0 (01)
- Seite 77 Tester le déclenchement du rinçage. Ouvrir l’électrovanne avec la touche <TEST>. 18014401053566091-1 © 07-2018 967.986.00.0 (01)
- Seite 78 Fermer l’électrovanne avec la touche <TEST>. Le rinçage forcé hygiénique Geberit Rapid fonctionne à présent avec les réglages d’usine. Si nécessaire, régler à nouveau l’intervalle de rinçage et le temps de rinçage. → Voir « Régler l'intervalle et le temps de rinçage », page 63.
- Seite 79 Fermer le couvercle du module de commande. 18014401053566091-1 © 07-2018 967.986.00.0 (01)
- Seite 80 Ce symbole indique que le produit ne doit pas être jeté avec les autres déchets. Les appareils usagés doivent être directement retournés à Geberit pour être mis au rebut de manière appropriée. Vous pouvez demander les adresses des centres de collecte auprès de la société...
-
Seite 81: Utilizzo Conforme
Informazioni relative a questo documento Il presente documento è destinato agli operatori dei seguenti prodotti: • aggregato antiristagno Geberit Rapid • unità di comando Geberit per aggregato antiristagno Rapid Utilizzo conforme Gli aggregati antiristagno Geberit sono indicati per il ricambio d’acqua automatico periodico negli impianti di acqua potabile. - Seite 82 Avvertenze di sicurezza per aggregato antiristagno Rapid con sifone • Far funzionare l'aggregato antiristagno Geberit Rapid solo in posizione verticale. • Fissare l’aggregato antiristagno Geberit Rapid alla parete con 4 viti di fissaggio.
- Seite 83 • In caso di ostruzione dello scarico può fuoriuscire acqua dal troppopieno dell’aggregato antiristagno Geberit Rapid. Avvertenze di sicurezza per l'unità di comando Geberit per aggregato antiristagno Rapid • Collegare l'unità di comando esclusivamente a un condotto di alimentazione fisso.
-
Seite 84: Descrizione Del Prodotto
Descrizione del prodotto Struttura dell’aggregato antiristagno Geberit Rapid Figura 1: Aggregato antiristagno Geberit Rapid Filtro a cestello Unità di comando Pannello di controllo Batteria Coperchio del vano batterie Coperchio dell’unità di comando Scatola Troppopieno Sifone parte inferiore Sifone parte superiore 18014401053566091-1 © 07-2018... - Seite 85 Struttura dell'unità di comando Geberit per aggregato antiristagno Rapid Figura 2: Unità di comando Geberit per aggregato antiristagno Rapid Filtro a cestello Unità di comando Pannello di controllo Batteria Coperchio del vano batterie Coperchio dell’unità di comando Uscita 18014401053566091-1 © 07-2018...
-
Seite 86: Dati Tecnici
Dati tecnici Grado di protezione IPX4 Tensione d'esercizio 9 V C C Batteria alcalina al manganese Tipo di batteria 6LR61 (9 V) Durata della batteria con inter- > 1,5 anni vallo di risciacquo = 1 giorno Pressione dinamica 0,2–10 bar Temperatura d'esercizio 0–70 °C Capacità... -
Seite 87: Pannello Di Controllo
Comando Pannello di controllo Simbolo Tipo Funzione Intervallo di risciacquo = 1 giorno <1> (risciacquo ogni giorno) Intervallo di risciacquo = 3 giorni <3> (risciacquo ogni 3 giorni) Intervallo di risciacquo = 7 giorni <7> (risciacquo ogni 7 giorni) <2 MIN> Tempo di risciacquo = 2 ... -
Seite 88: Modalità Di Funzionamento
<TEST> Vedere "Verifica del funzionamento", comando pagina 98. Stato di carica della batteria. → Vedere "Eliminazione dei guasti", pagina 94. Modalità di funzionamento L'aggregato antiristagno Geberit Rapid può funzionare nelle seguenti modalità di funzionamento: Moda- Tempo di risciac- Intervallo di lità risciacquo <DAYS>... -
Seite 89: Modalità Standby
Modalità standby Dopo circa 2 minuti di inattività, il pannello di controllo dell’aggregato antiristagno Geberit Rapid passa in modalità standby. In tal caso tutti i LED si spengono. 1. Per interrompere la modalità standby premere un tasto di comando qualsiasi. Viene visualizzata la modalità di funzionamento attuale. - Seite 90 Tabella 2: Dimensioni dei tubi raccomandate Sistema di tuba- DN 12 DN 15 DN 20 zioni [mm] [mm] [mm] Geberit Mapress 15 x 1,0 18 x 1,0 22 x 1,2 Geberit Mepla 16 x 2,25 20 x 2,5 26 x 3,0 Geberit PushFit 16 x 2,0 20 x 2,0 25 x 2,5 Geberit Volex 16 x 2,0 20 x 2,0 26 x 3,0 Calcolo dell’intervallo di risciacquo La seguente tabella serve al calcolo dell'intervallo di risciacquo.
- Seite 91 Impostare le modalità di funzionamento 1–3 (tempo di risciacquo 2 minuti) ▶ Premere ripetutamente il tasto di comando <MODE> fino a quando non si accendono il LED <2 MIN> e l’intervallo di risciacquo desiderato (<1>, <3> o <7 DAYS>). Risultato ✓...
- Seite 92 Impostare le modalità di funzionamento 4–6 (tempo di risciacquo regolabile) Premere ripetutamente il tasto di comando <MODE> fino a quando non si accendono il LED <SET> e l’intervallo di risciacquo desiderato (<1>, <3> o <7 DAYS>). 18014401053566091-1 © 07-2018 967.986.00.0 (01)
- Seite 93 Tenere premuto il tasto <FLUSH TIME> per il tempo di risciacquo desiderato (da 1 secondo a 15 minuti). Esempio: per un tempo di risciacquo di 4 minuti tenere premuto il tasto di comando per 4 minuti. ✓ L’acqua scorre per tutto il tempo in cui si tiene premuto il tasto di comando.
-
Seite 94: Eliminazione Dei Guasti
Verificare il tempo di risciacquo impostato ▶ Premere il tasto di comando <TEST> per 1 secondo. DAYS 2 MIN MODE TEST FLUSH TIME ✓ La valvola elettromagnetica si apre e l'acqua scorre. ✓ La valvola elettromagnetica si chiude automaticamente dopo il termine del tempo di risciacquo impostato. Eliminazione dei guasti Malfunziona- Causa... - Seite 95 Malfunziona- Causa Rimedio mento ▶ Premere il tasto di Unità di comando comando <TEST>. in modalità L’unità di comando standby visualizza la modalità di funzionamento attuale. ▶ Premere il tasto di Nessun LED è comando <TEST>. Se acceso. non viene visualizzato niente, sostituire la Batteria esaurita batteria.
- Seite 96 Malfunziona- Causa Rimedio mento Valvola elettro- ▶ magnetica o Contattare una persona unità di comando addestrata. difettosa ▶ Sostituire la batteria. → Batteria esaurita Vedere "Sostituire la Non risciacqua. batteria", pagina 99. Pressione ▶ Contattare una persona dell'impianto addestrata. insufficiente ▶ Filtro a cestello Contattare una persona intasato...
- Seite 97 Le persone addestrate possono trovare ulteriori infor- mazioni sull’eliminazione dei guasti nelle istruzioni per la manutenzione 967.987.00.0 sul sito web della rispettiva società di vendita Geberit oppure possono utilizzare il codice QR qui accanto. 18014401053566091-1 © 07-2018 967.986.00.0 (01)
-
Seite 98: Manutenzione
Manutenzione Verifica del funzionamento Consiglio: eseguire regolarmente la verifica del funzionamento descritta di seguito. Attività Risultato Istruzione ▶ Se il LED lampeggia, sostituire Controllare il la batteria. → – LED. Vedere "Sostituire la batteria", pagina 99. ▶ Se non si accende Premere il L’unità... -
Seite 99: Sostituire La Batteria
Sostituire la batteria Chiudere l'alimentazione dell'acqua. Aprire il coperchio dell’unità di comando. 18014401053566091-1 © 07-2018 967.986.00.0 (01) - Seite 100 Aprire il coperchio del vano batterie. 18014401053566091-1 © 07-2018 967.986.00.0 (01)
- Seite 101 Rimuovere la batteria e smaltirla. 18014401053566091-1 © 07-2018 967.986.00.0 (01)
- Seite 102 Inserire la nuova batteria. 18014401053566091-1 © 07-2018 967.986.00.0 (01)
- Seite 103 Chiudere il coperchio del vano batterie. Aprire l’alimentazione dell’acqua. 18014401053566091-1 © 07-2018 967.986.00.0 (01)
- Seite 104 Verificare l’azionamento del risciacquo. Con il tasto di comando <TEST> aprire la valvola elettromagnetica. 18014401053566091-1 © 07-2018 967.986.00.0 (01)
- Seite 105 Con il tasto di comando <TEST> chiudere la valvola elettromagnetica. Ora l'aggregato antiristagno Geberit Rapid funziona con le impostazioni predefinite. Se necessario, ripetere l'impostazione di intervallo di risciacquo e tempo di risciacquo. → Vedere "Impostare l’intervallo e il tempo di risciacquo", pagina 89.
- Seite 106 Chiudere il coperchio dell’unità di comando. 18014401053566091-1 © 07-2018 967.986.00.0 (01)
- Seite 107 Gli apparecchi usati devono essere restituiti direttamente a Geberit, che si occuperà del corretto smaltimento. Gli indirizzi dei punti di raccolta possono essere chiesti alla società di vendita Geberit competente.
-
Seite 108: Reglementair Gebruik
• Geberit hygiënespoeling Rapid • Geberit besturingseenheid voor hygiënespoeling Rapid Reglementair gebruik Geberit hygiënespoelingen zijn bestemd voor de automatische, periodieke wateruitwisseling in drinkwaterinstallaties. Elk ander gebruik geldt als niet-reglementair. Geberit kan niet aansprakelijk worden gesteld voor de gevolgen van niet- reglementair gebruik. - Seite 109 Veiligheidsinstructies voor hygiënespoeling Rapid met sifon • Geberit hygiënespoeling Rapid alleen in verticale positie bedrijven. • Geberit hygiënespoeling Rapid met 4 bevesti- gingsschroeven aan de wand bevestigen. • Installeer geen extra sifon in de vuilwaterafvoerleiding. De Geberit hygiënespoeling Rapid beschikt over een geïntegreerde sifon.
- Seite 110 Veiligheidsinstructies voor Geberit besturingseenheid voor hygiënespoeling Rapid • De besturingseenheid alleen op een vast gemonteerde aanvoerleiding aansluiten. • De besturingseenheid niet in water dompelen. • Tussen uitloop en vuilwaterafvoerleiding een afstand van ten minste 20 mm voorzien (vrije uitloop volgens DIN EN 1717:2011-08).
-
Seite 111: Productbeschrijving
Productbeschrijving Opbouw Geberit hygiënespoeling Rapid Afbeelding 1: Geberit hygiënespoeling Rapid Korffilter Besturingseenheid Bedieningspaneel Batterij Deksel van het batterijvak Deksel van de besturingseenheid Behuizing Overloop Onderstuk sifon Bovendeel sifon 18014401053566091-1 © 07-2018 967.986.00.0 (01) - Seite 112 Opbouw Geberit besturingseenheid voor hygiënespoeling Rapid Afbeelding 2: Geberit besturingseenheid voor hygiënespoeling Rapid Korffilter Besturingseenheid Bedieningspaneel Batterij Deksel van het batterijvak Deksel van de besturingseenheid Uitloop 18014401053566091-1 © 07-2018 967.986.00.0 (01)
-
Seite 113: Technische Gegevens
Technische gegevens Beschermingsgraad IPX4 Bedrijfsspanning 9 V DC Batterijtype Alkaline batterij 6LR61 (9 V) Levensduur van de batterij bij > 1,5 jaar spoelinterval = 1 dag Stromingsdruk 0,2–10 bar Bedrijfstemperatuur 0–70 °C Spoelcapaciteit 3 l/min Fabrieksinstelling spoeltijd 2 min Spoelinterval fabrieksinstelling 24 h Maximale spoeltijd 15 min... - Seite 114 Bediening Bedieningspaneel Symbool Type Functie <1> Spoelinterval = 1 dag (spoelt elke dag) Spoelinterval = 3 dagen (spoelt om de <3> 3 dagen) Spoelinterval = 7 dagen (spoelt om de <7> 7 dagen) <2 MIN> Spoeltijd = 2 minuten <SET> Spoeltijd instelbaar Spoeltijd bepalen en instellen. → Zie <FLUSH Toets "Spoelinterval en spoeltijd instellen",...
- Seite 115 Functie Magneetventiel testen. → Zie <TEST> Toets "Functiecontrole", pagina 124. Laadtoestand batterij. → Zie "Storingen verhelpen", pagina 122. Bedrijfsmodi De Geberit hygiënespoeling Rapid kan in de volgende bedrijfsmodi worden bedreven: Modus Spoeltijd Spoelinterval LED <DAYS> 1 dag <1> 2 minuten <2 MIN>...
- Seite 116 0–15 15–30 30–45 0–17 17–25 25–34 Fabrieksinstelling Tabel 2: Aanbevolen buisdiameters Leidingsysteem DN 12 DN 15 DN 20 [mm] [mm] [mm] Geberit Mapress 15 x 1,0 18 x 1,0 22 x 1,2 Geberit Mepla 16 x 2,25 20 x 2,5 26 x 3,0 Geberit PushFit 16 x 2,0 20 x 2,0 25 x 2,5 Geberit Volex 16 x 2,0 20 x 2,0 26 x 3,0 18014401053566091-1 ©...
- Seite 117 Spoelinterval bepalen De volgende tabel wordt gebruikt om het spoelinterval te bepalen. Vanaf de fabriek is een spoelinterval van 1 dag ingesteld. Tabel 3: Bepaling van de spoelinterval Minimumeisen volgens Spoelinterval [dagen] DIN EN 806-4:2010-06 VDI/DVGW 6023:2013-04 Versterkte eisen Fabrieksinstelling 18014401053566091-1 © 07-2018 967.986.00.0 (01)
- Seite 118 Bedrijfsmodi 1–3 instellen (spoeltijd 2 minuten) ▶ Toets <MODE> herhaaldelijk indrukken, tot LED <2 MIN> en het gewenste spoelinterval (<1>, <3> of <7 DAYS>) branden. Resultaat ✓ De instellingen zijn opgeslagen. ✓ Het spoelinterval begint vanaf het tijdstip van de instellingen.
- Seite 119 Bedrijfsmodi 4–6 instellen (spoeltijd instelbaar) Toets <MODE> herhaaldelijk indrukken, tot LED <SET> en het gewenste spoelinterval (<1>, <3> of <7 DAYS>) branden. 18014401053566091-1 © 07-2018 967.986.00.0 (01)
- Seite 120 Toets <FLUSH TIME> voor de gewenste spoeltijd ingedrukt houden (1 seconde tot 15 minuten). Voorbeeld: voor een spoeltijd van 4 minuten toets 4 minuten ingedrukt houden. ✓ Terwijl de toets ingedrukt wordt gehouden, stroomt het water. Resultaat ✓ De instellingen zijn opgeslagen. ✓...
- Seite 121 Ingestelde spoeltijd controleren ▶ Toets <TEST> 1 seconde lang indrukken. DAYS 2 MIN MODE TEST FLUSH TIME ✓ Het magneetventiel gaat open en er stroomt water. ✓ Het magneetventiel sluit automatisch na de ingestelde spoeltijd. 18014401053566091-1 © 07-2018 967.986.00.0 (01)
-
Seite 122: Storingen Verhelpen
Storingen verhelpen Storing Oorzaak Oplossing knip- ▶ pert om de Batterij vervangen. → Zie Batterij bijna 2 seconden, "Batterij vervangen", leeg geen spoelacti- pagina 125. vering. ▶ Besturingseen- Toets <TEST> indrukken. heid in stand-by- Besturingseenheid toont modus actuele bedrijfsmodus. Er brandt geen ▶... - Seite 123 Wanneer de batterij bijna leeg is, worden er geen spoelactiveringen meer uitgevoerd. Techniche experts vinden meer informatie over het verhelpen van storingen in de onderhoudshandleiding 967.987.00.0 op de website van het desbetreffende Geberit verkoopkantoor of onder de hiernaast afge- beelde QR-code. 18014401053566091-1 © 07-2018 967.986.00.0 (01)
- Seite 124 Onderhoud Functiecontrole Aanbeveling: voer de volgende functiecontrole regelmatig uit. Activiteit Resultaat Actie ▶ Indien LED knippert, batterij con- – vervangen. → Zie troleren. "Batterij vervangen", pagina 125. ▶ Indien geen LED Besturingseenheid brandt, batterij Toets <TEST> toont actuele bedrijfs- vervangen. → Zie indrukken.
-
Seite 125: Batterij Vervangen
Batterij vervangen Watertoevoer sluiten. Deksel van de besturingseenheid openen. 18014401053566091-1 © 07-2018 967.986.00.0 (01) - Seite 126 Deksel van het batterijvak openen. 18014401053566091-1 © 07-2018 967.986.00.0 (01)
- Seite 127 Batterij verwijderen en afvoeren. 18014401053566091-1 © 07-2018 967.986.00.0 (01)
- Seite 128 Nieuwe batterij aanbrengen. 18014401053566091-1 © 07-2018 967.986.00.0 (01)
- Seite 129 Deksel van het batterijvak sluiten. Watertoevoer openen. 18014401053566091-1 © 07-2018 967.986.00.0 (01)
- Seite 130 Spoelactivering testen. Met toets <TEST> magneetventiel openen. 18014401053566091-1 © 07-2018 967.986.00.0 (01)
- Seite 131 Met toets <TEST> magneetventiel sluiten. De Geberit hygiënespoeling Rapid werkt nu met fabrieksinstellingen. Pas indien nodig het spoelinterval en de spoeltijd opnieuw aan. → Zie "Spoelinterval en spoeltijd instellen", pagina 116. 18014401053566091-1 © 07-2018 967.986.00.0 (01)
- Seite 132 Deksel van de besturingseenheid sluiten. 18014401053566091-1 © 07-2018 967.986.00.0 (01)
- Seite 133 Het symbool geeft aan dat het product niet met normaal afval mag worden afgevoerd. Oude apparaten moeten voor vakkundige afvoer direct aan Geberit worden geretourneerd. Inleveradressen kunnen bij het verantwoordelijke Geberit verkoopkantoor worden aangevraagd.
-
Seite 134: Uso Previsto
Respecto al presente documento Este documento está dirigido a los propietarios de los siguientes productos: • descarga higiénica Geberit Rapid • unidad de control Geberit para la descarga higiénica Rapid Uso previsto Las descargas higiénicas Geberit están destinadas al intercambio de agua periódico automático en instalaciones de agua potable. - Seite 135 Rapid con sifón antiolores • Utilizar la descarga higiénica Geberit Rapid solamente en posición vertical. • Fijar la descarga higiénica Geberit Rapid a la pared con 4 tornillos de fijación. • No montar ningún sifón antiolores adicional en la tubería de evacuación. La descarga higiénica Geberit Rapid cuenta con un sifón antiolores...
- Seite 136 Indicaciones de seguridad para la unidad de control Geberit para la descarga higiénica • Conectar la unidad de control únicamente a una tubería de alimentación que esté montada de forma fija. • No sumergir la unidad de control en el agua.
-
Seite 137: Descripción Del Producto
Descripción del producto Construcción de la descarga higiénica Geberit Rapid Figura 1: Descarga higiénica Geberit Rapid Filtro de cesta Unidad de control Panel de control Pila Tapa del compartimento de la pila Tapa de la unidad de control Carcasa Rebosadero Parte inferior del sifón antiolores Parte superior del sifón antiolores... - Seite 138 Construcción de la unidad de control Geberit para la descarga higiénica Rapid Figura 2: Unidad de control Geberit para la descarga higiénica Rapid Filtro de cesta Unidad de control Panel de control Pila Tapa del compartimento para pilas Tapa de la unidad de control Salida 18014401053566091-1 ©...
-
Seite 139: Información Técnica
Información técnica Grado de protección IPX4 Tensión de funcionamiento 9 V CC Tipo de batería Batería alcalina 6LR61 (9 V) Vida útil de la pila con intervalo > 1,5 años de descarga = 1 día Presión dinámica 0,2–10 bar Temperatura de servicio 0–70 °C Capacidad de descarga 3 l/min... -
Seite 140: Panel De Control
Manejo Panel de control Símbolo Tipo Función Intervalo de descarga = 1 día <1> (descarga cada día) Intervalo de descarga = 3 días <3> (descarga cada 3 días) Intervalo de descarga = 7 días <7> (descarga cada 7 días) <2 MIN> Tiempo de descarga = 2 m inutos <SET>... -
Seite 141: Modos De Funcionamiento
→ Véase “Prueba de funcionamiento”, página 151. Estado de carga de la pila. → Véase “Solución de fallos”, página 148. Modos de funcionamiento La descarga higiénica Geberit Rapid se puede utilizar en los siguientes modos de funcionamiento: Modo Tiempo de des- Intervalo de... - Seite 142 Modo en espera Después de 2 minutos aprox. sin actividad, el panel de control de la descarga higiénica Geberit Rapid cambia al modo en espera. Todos los LED se apagan. 1. Para salir del modo en espera, pulsar cualquier tecla. Se muestra el modo de funcionamiento actual.
- Seite 143 0–17 17–25 25–34 Ajuste de fábrica Tabla 2: Dimensiones de tubería recomendadas Sistema de tubería DN 12 DN 15 DN 20 [mm] [mm] [mm] Geberit Mapress 15 x 1,0 18 x 1,0 22 x 1,2 Geberit Mepla 16 x 2,25 20 x 2,5 26 x 3,0 Geberit PushFit 16 x 2,0 20 x 2,0 25 x 2,5 Geberit Volex 16 x 2,0...
- Seite 144 Ajustar modos de funcionamiento 1–3 (tiempo de descarga 2 minutos) ▶ Pulsar la tecla <MODE> varias veces hasta que se enciendan el LED <2 MIN> y el intervalo de descarga deseado (<1>, <3> o <7 DAYS>). Resultado ✓ Se han guardado los ajustes. ✓...
- Seite 145 Ajustar modos de funcionamiento 4–6 (tiempo de descarga ajustable) Pulsar la tecla <MODE> varias veces hasta que se enciendan el LED <SET> y el intervalo de descarga deseado (<1>, <3> o <7 DAYS>). 18014401053566091-1 © 07-2018 967.986.00.0 (01)
- Seite 146 Mantener pulsada la tecla <FLUSH TIME> el tiempo de descarga deseado (de 1 segundo a 15 minutos). Ejemplo: para un tiempo de descarga de 4 minutos, mantener pulsada la tecla durante 4 minutos. ✓ El agua fluye mientras la tecla se mantiene pulsada. Resultado ✓...
- Seite 147 Comprobar el tiempo de descarga ajustado ▶ Pulsar la tecla <TEST> durante 1 segundo. DAYS 2 MIN MODE TEST FLUSH TIME ✓ La electroválvula se abre y el agua fluye. ✓ La electroválvula se cierra automáticamente una vez transcurrido el tiempo de descarga ajustado. 18014401053566091-1 ©...
-
Seite 148: Solución De Fallos
Solución de fallos Fallo Causa Solución El LED parpadea cada ▶ Sustituir la pila. → Véase 2 segundos, no Pila casi ago- “Sustituir la pila”, hay acciona- tada página 152. miento de la descarga. ▶ Pulsar la tecla <TEST>. Unidad de control La unidad de control en modo en indica el modo de... - Seite 149 Fallo Causa Solución Electroválvula o ▶ Contactar con una unidad de control persona cualificada. defectuosa ▶ Sustituir la pila. → Véase Pila agotada “Sustituir la pila”, No hay des- página 152. carga. ▶ Presión insufi- Contactar con una ciente en la red persona cualificada.
- Seite 150 967.987.00.0 en la página web de la empresa distribuidora correspondiente de Geberit o con el código QR que se encuentra al mar- gen. 18014401053566091-1 © 07-2018 967.986.00.0 (01)
-
Seite 151: Mantenimiento
Mantenimiento Prueba de funcionamiento Recomendación: llevar a cabo regularmente la prueba de funcionamiento que se describe a continuación. Actividad Resultado Acción ▶ En caso de que el parpadee, Comprobar el – sustituir la pila. → Véase “Sustituir la pila”, página 152. ▶... - Seite 152 Sustituir la pila Cerrar la llave de paso. Abrir la tapa de la unidad de control. 18014401053566091-1 © 07-2018 967.986.00.0 (01)
- Seite 153 Abrir la tapa del compartimento para pilas. 18014401053566091-1 © 07-2018 967.986.00.0 (01)
- Seite 154 Sacar la pila y desecharla. 18014401053566091-1 © 07-2018 967.986.00.0 (01)
- Seite 155 Insertar la pila nueva. 18014401053566091-1 © 07-2018 967.986.00.0 (01)
- Seite 156 Cerrar la tapa del compartimento para pilas. Abrir la llave de paso. 18014401053566091-1 © 07-2018 967.986.00.0 (01)
- Seite 157 Probar el accionamiento de la descarga. Abrir la electroválvula con la tecla <TEST>. 18014401053566091-1 © 07-2018 967.986.00.0 (01)
- Seite 158 Cerrar la electroválvula con la tecla <TEST>. Ahora, la descarga higiénica Geberit Rapid funciona con los ajustes de fábrica. Si es necesario, ajustar de nuevo el intervalo de descarga y el tiempo de descarga. → Véase “Ajustar el intervalo de descarga y el tiempo de descarga”, página 142.
- Seite 159 Cerrar la tapa de la unidad de control. 18014401053566091-1 © 07-2018 967.986.00.0 (01)
-
Seite 160: Eliminación De Desechos
El símbolo indica que el producto no debe eliminarse junto con otros desechos. Para una correcta eliminación, los aparatos usados deben devolverse directamente a Geberit. En la empresa distribuidora Geberit pertinente podrá consultar las direcciones de los puntos de recogida. -
Seite 161: Użycie Zgodne Z Przeznaczeniem
Bezpieczeństwo O niniejszym dokumencie Niniejszy dokument jest skierowany do użytkowników następujących produktów: • spłukiwanie higieniczne Geberit Rapid • jednostka sterująca Geberit do spłukiwania higienicznego Rapid Użycie zgodne z przeznaczeniem Spłukiwania higieniczne Geberit są przeznaczone do automatycznej, cyklicznej wymiany wody w instalacjach wody pitnej. - Seite 162 Wskazówki bezpieczeństwa dotyczące spłukiwania higienicznego Rapid z syfonem • Spłukiwanie higieniczne Geberit Rapid może być eksploatowane tylko w pozycji pionowej. • Przymocować spłukiwanie higieniczne Geberit Rapid za pomocą 4 śrub mocujących do ściany.
- Seite 163 Wskazówki bezpieczeństwa dotyczące jednostki sterującej Geberit do spłukiwania higienicznego Rapid • Jednostkę sterującą można podłączyć tylko do zamontowanej na stałe instalacji wodociągowej. • Nie zanurzać jednostki sterującej w wodzie. • Między wylewką a rurociągiem kanalizacyjnym zachować odległość przynajmniej 20 mm (swobodna wylewka według DIN EN 1717:2011-08).
-
Seite 164: Opis Produktu
Opis produktu Budowa spłukiwania higienicznego Geberit Rapid Rysunek 1: Spłukiwanie higieniczne Geberit Rapid Filtr koszyczkowy Jednostka sterująca Panel sterujący Bateria Pokrywa kieszeni na baterię Pokrywa jednostki sterującej Obudowa Przelew Dolna część syfonu Górna część syfonu 18014401053566091-1 © 07-2018 967.986.00.0 (01) - Seite 165 Budowa jednostki sterującej Geberit do spłukiwania higienicznego Rapid Rysunek 2: Jednostka sterująca Geberit do spłukiwania higienicznego Rapid Filtr koszyczkowy Jednostka sterująca Panel sterujący Bateria Pokrywa kieszeni na baterię Pokrywa jednostki sterującej Wylewka 18014401053566091-1 © 07-2018 967.986.00.0 (01)
-
Seite 166: Dane Techniczne
Dane techniczne Stopień ochrony IPX4 Napięcie robocze 9 V DC Typ baterii Bateria alkaliczna 6LR61 (9 V) Żywotność baterii przy odstępie czasu między wypływami = > 1,5 roku 1 dzień Zakres ciśnień 0,2–10 bar Temperatura pracy 0–70°C Wydajność spłukiwania 3 l/min Ustawienie fabryczne czasu 2 min spłukiwania... -
Seite 167: Panel Sterujący
Obsługa Panel sterujący Symbol Funkcja Odstęp czasu między wypływami = <1> Kontrolka 1 dzień (spłukiwanie każdego dnia) Odstęp czasu między wypływami = <3> Kontrolka 3 dni (spłukiwanie co 3 dni) Odstęp czasu między wypływami = <7> Kontrolka 7 dni (spłukiwanie co 7 dni) <2 MIN>... -
Seite 168: Tryby Pracy
Przetestować zawór elektromagnetycz- <TEST> Przycisk ny. → Patrz „Kontrola działania”, strona 178. Poziom naładowania baterii. → Patrz Kontrolka „Usuwanie usterek”, strona 174. Tryby pracy Spłukiwanie higieniczne Geberit Rapid może pracować w następujących trybach pracy: Tryb Czas spłukiwania Kontrolka Odstęp cza- Kontrol- su między wypływami <DAYS>... -
Seite 169: Tryb Gotowości
Tryb gotowości W przypadku braku aktywności przez ok. 2 minuty panel sterujący spłukiwania higienicznego Geberit Rapid przechodzi na tryb gotowości. Wtedy wszystkie kontrolki gasną. 1. Aby opuścić tryb gotowości, wystarczy nacisnąć dowolny przycisk. Wyświetlony zostanie aktualny tryb pracy. 2. Aby wykonać żądaną funkcję, należy nacisnąć odpowiedni przycisk. - Seite 170 Tabela 2: Zalecane wymiary rur System rurowy DN 12 DN 15 DN 20 [mm] [mm] [mm] Geberit Mapress 15 x 1,0 18 x 1,0 22 x 1,2 Geberit Mepla 16 x 2,25 20 x 2,5 26 x 3,0 Geberit PushFit 16 x 2,0 20 x 2,0 25 x 2,5 Geberit Volex 16 x 2,0 20 x 2,0 26 x 3,0 Ustalanie odstępu czasu między wypływami Poniższa tabela służy do ustalania odstępu czasu między...
- Seite 171 Ustawianie trybów pracy 1–3 (czas spłukiwania 2 minuty) ▶ Naciskać przycisk <MODE> tak długo, aż zaświeci się kontrolka <2 MIN> i żądany odstęp czasu między wypływami (<1>, <3> lub <7 DAYS>). Wynik ✓ Ustawienia zostały zapamiętane. ✓ Odstęp czasu między wypływami jest liczony od momentu wprowadzenia ustawień.
- Seite 172 Ustawianie trybów pracy 4–6 (regulowany czas spłukiwania) Naciskać przycisk <MODE> tak długo, aż zaświeci się kontrolka <SET> i żądany odstęp czasu między wypływami (<1>, <3> lub <7 DAYS>). 18014401053566091-1 © 07-2018 967.986.00.0 (01)
- Seite 173 Przytrzymać przycisk <FLUSH TIME>, aby ustawić odpowiedni czas spłukiwania (od 1 sekundy do 15 minut). Przykład: aby ustawić czas spłukiwania wynoszący 4 minuty, należy przytrzymać przycisk przez 4 minuty. ✓ Gdy przycisk jest naciśnięty, woda płynie. Wynik ✓ Ustawienia zostały zapamiętane. ✓ Odstęp czasu między wypływami jest liczony od momentu wprowadzenia ustawień.
-
Seite 174: Usuwanie Usterek
Sprawdzanie ustawionego czasu spłukiwania ▶ Nacisnąć przycisk <TEST> i przytrzymać go przez 1 sekundę. DAYS 2 MIN MODE TEST FLUSH TIME ✓ Zawór elektromagnetyczny otwiera się i woda płynie. ✓ Zawór elektromagnetyczny zamyka się automatycznie po upływie ustawionego czasu spłukiwania. Usuwanie usterek Usterka Przyczyna... - Seite 175 Usterka Przyczyna Usuwanie ▶ Nacisnąć przycisk Jednostka steru- <TEST>. Jednostka jąca w trybie go- sterująca pokazuje towości aktualny tryb pracy. Żadna kontrol- ▶ Nacisnąć przycisk ka nie świeci <TEST>. W przypadku się. Bateria jest zuży- braku wskazania wymienić baterię. → Patrz instrukcja obsługi 967.986.00.0.
- Seite 176 Usterka Przyczyna Usuwanie Uszkodzony za- wór elektroma- ▶ Skontaktować się z gnetyczny lub osobą wykwalifikowaną. jednostka steru- jąca ▶ Wymienić baterię. → Brak spłukiwa- Bateria jest zuży- Patrz „Wymiana baterii”, nia. strona 179. ▶ Zbyt niskie ci- Skontaktować się z śnienie osobą...
- Seite 177 Osoby wykwalifikowane mogą znaleźć więcej informa- cji o usuwaniu usterek w instrukcji serwisowej 967.987.00.0 dostępnej na stronie www określonego dystrybutora Geberit lub po zeskanowaniu przedsta- wionego obok kodu QR. 18014401053566091-1 © 07-2018 967.986.00.0 (01)
-
Seite 178: Kontrola Działania
Serwis Kontrola działania Zalecenie: należy regularnie wykonywać opisaną poniżej kontrolę działania. Czynność Wynik Polecenie ▶ Jeśli kontrolka miga, należy Sprawdzić – wymienić baterię. → kontrolkę. Patrz „Wymiana baterii”, strona 179. ▶ Jeśli żadna kontrolka nie miga, Jednostka sterująca Nacisnąć przy- należy wymienić pokazuje aktualny cisk <TEST>. -
Seite 179: Wymiana Baterii
Wymiana baterii Zamknąć przyłącze wodne. Otworzyć pokrywę jednostki sterującej. 18014401053566091-1 © 07-2018 967.986.00.0 (01) - Seite 180 Otworzyć pokrywę kieszeni na baterię. 18014401053566091-1 © 07-2018 967.986.00.0 (01)
- Seite 181 Wyjąć i zutylizować baterię. 18014401053566091-1 © 07-2018 967.986.00.0 (01)
- Seite 182 Włożyć nową baterię. 18014401053566091-1 © 07-2018 967.986.00.0 (01)
- Seite 183 Zamknąć pokrywę kieszeni na baterię. Otworzyć przyłącze wodne. 18014401053566091-1 © 07-2018 967.986.00.0 (01)
- Seite 184 Przetestować uruchamianie spłukiwania. Otworzyć zawór elektromagnetyczny za pomocą przycisku <TEST>. 18014401053566091-1 © 07-2018 967.986.00.0 (01)
- Seite 185 Zamknąć zawór elektromagnetyczny za pomocą przycisku <TEST>. Spłukiwanie higieniczne Geberit Rapid pracuje teraz z ustawieniami fabrycznymi. W razie potrzeby ponownie ustawić odstęp czasu między wypływami i czas spłukiwania. → Patrz „Ustawianie odstępu czasu między wypływami i czasu spłukiwania”, strona 169. 18014401053566091-1 © 07-2018...
- Seite 186 Zamknąć pokrywę jednostki sterującej. 18014401053566091-1 © 07-2018 967.986.00.0 (01)
- Seite 187 Ten symbol informuje, że dany produkt nie może być utylizowany razem z pozostałymi odpadami. W celu profesjonalnej utylizacji zużyte urządzenia należy zwracać bezpośrednio do firmy Geberit. Adresy punktów, w których można dokonać zwrotu starych urządzeń, są dostępne u dystrybutora firmy Geberit.
-
Seite 188: Všeobecné Bezpečnostní Pokyny
K tomuto dokumentu Tento dokument je určen uživatelům následujících umyvadlových armatur: • Geberit hygienický proplach Rapid • Geberit řídicí jednotka pro hygienický proplach Rapid Použití v souladu s určením Geberit hygienický proplach je určen k pravidelné, automatické výměně vody v zařízeních na pitnou vodu. - Seite 189 • Opravy může provádět pouze odborný pracovník pomocí originálních náhradních dílů a dílů příslušenství. • Před zařízení Geberit hygienický proplach Rapid nainstalujte uzavírací ventil. • Baterii neodstraňujte během proplachu. Vyjmutí baterie způsobí, že nedojde k automatickému uzavření elektromagnetického ventilu. • Chraňte před přímým slunečním zářením. Přímé...
- Seite 190 Bezpečnostní pokyny pro řídící jednotku Geberit hygienického proplachu Rapid • Řídící jednotku připojujte pouze na pevně instalované přívodní potrubí. • Řídící jednotku neponořujte do vody. • Mezi odtokem a kanalizačním potrubím dodržujte rozestup alespoň 20 mm (volný výtok podle DIN EN 1717:2011-08). 18014401053566091-1 © 07-2018...
-
Seite 191: Popis Výrobku
Popis výrobku Uspořádání Geberit hygienického proplachu Rapid Obrázek 1: Geberit hygienický proplach Rapid Košíkový filtr Řídicí jednotka Ovládací panel Baterie Víko pouzdra pro baterii Víko řídící jednotky Pouzdro Přepad Spodní díl zápachové uzávěrky Horní díl zápachové uzávěrky 18014401053566091-1 © 07-2018 967.986.00.0 (01) - Seite 192 Uspořádání řídící jednotky Geberit hygienického proplachu Rapid Obrázek 2: Geberit řídicí jednotka pro hygienický proplach Rapid Košíkový filtr Řídicí jednotka Ovládací panel Baterie Víko pouzdra pro baterii Víko řídící jednotky Odtok 18014401053566091-1 © 07-2018 967.986.00.0 (01)
-
Seite 193: Technické Informace
Technické informace Druh ochrany IPX4 Provozní napětí 9 V DC Typ baterie Alkalická baterie 6LR61 (9 V) Životnost baterie při intervalu > 1,5 roku splachování = 1 den Tlak při průtoku 0,2–10 barů Provozní teplota 0–70 °C Výkon splachování 3 l/min Doba proplachování - nastavení 2 min ve výrobě... -
Seite 194: Ovládací Panel
Obsluha Ovládací panel Symbol Funkce Proplachovací interval = 1 den (propla- <1> chuje každý den) Proplachovací interval = 3 dny (propla- <3> chuje všechny 3 dny) Proplachovací interval = 7 dny (propla- <7> chuje všechny 7 dny) <2 MIN> Splachovací doba = 2 minuty <SET>... -
Seite 195: Provozní Režimy
Přezkoušet elektromagnetický ventil. <TEST> Tlačítko → Viz „Funkční test“, strana 204. Stav dobití baterie. → Viz „Odstraňování poruch“, strana 202. Provozní režimy Geberit hygienický proplach Rapid lze provozovat v následujících provozních režimech: Režim Doba proplachu Interval pro- plachu <DAYS> 1 den <1>... - Seite 196 Pohotovostní režim Ovládací panel Geberit hygienický proplach Rapid se po uplynutí cca. 2 minut bez činnosti přepne do pohotovostního stavu. Při tom zhasnou všechny LED. 1. Pro návrat z pohotovostního stavu stiskněte libovolné tlačítko. Zobrazí se aktuální provozní režim. 2. Chcete-li spustit požadovanou funkci, stiskněte odpovídající...
- Seite 197 Tabulka 2: Doporučené rozměry trubky Potrubní systém DN 12 DN 15 DN 20 [mm] [mm] [mm] Geberit Mapress 15 x 1,0 18 x 1,0 22 x 1,2 Geberit Mepla 16 x 2,25 20 x 2,5 26 x 3,0 Geberit PushFit 16 x 2,0 20 x 2,0 25 x 2,5 Geberit Volex 16 x 2,0 20 x 2,0 26 x 3,0 Určení intervalu proplachu Následující tabulka slouží ke stanovení intervalu proplachu. Ve výchozím nastavení...
- Seite 198 Nastavení provozních režimů 1–3 (doba proplachu 2 minuty) ▶ Opakovaně stiskněte tlačítko <MODE> , dokud se nerozsvítí kontrolka LED <2 MIN> a požadovaný interval proplachu (<1>, <3> nebo <7 DAYS>). Výsledek ✓ Nastavení jsou uložena. ✓ Interval proplachu začíná běžet od času nastavení. První...
- Seite 199 Nastavení provozních režimů 4–6 (nastavitelná doba proplachu) Opakovaně stiskněte tlačítko <MODE>, dokud se nerozsvítí kontrolka LED <SET> a požadovaný interval proplachu (<1>, <3> nebo <7 DAYS>). 18014401053566091-1 © 07-2018 967.986.00.0 (01)
- Seite 200 Přidržte tlačítko <FLUSH TIME>, dokud se neobjeví požadovaná doba proplachu (1 vteřina až 15 minut). Příklad: Pro dobu proplachu v délce 4 minut přidržte zmáčknuté tlačítko 4 minuty. ✓ Po dobu, po kterou je tlačítko stisknuté, poteče voda. Výsledek ✓ Nastavení jsou uložena. ✓...
- Seite 201 Zkontrolujte nastavenou dobu proplachu ▶ Stiskněte tlačítko <TEST> na dobu 1 s. DAYS 2 MIN MODE TEST FLUSH TIME ✓ Elektromagnetický ventil se otevře a vyteče voda. ✓ Elektromagnetický ventil se automaticky uzavře, jakmile vyprší nastavená doba proplachu. 18014401053566091-1 © 07-2018 967.986.00.0 (01)
-
Seite 202: Odstraňování Poruch
Odstraňování poruch Porucha Příčina Odstranění bliká ▶ Vyměňte baterii. → Viz každé 2 vteři- Baterie téměř vy- „Vyměňte baterii“, ny, ovládání bitá strana 205. splachování. ▶ Stiskněte tlačítko Řídící jednotka v <TEST>. Řídící jednotka pohotovostním ukazuje aktuální provozní stavu režim. Nesvítí žádná ▶... - Seite 203 Pokud je baterie téměř vybita, neuskuteční se již žádná relace ovládání splachování. Odborní pracovníci najdou další informace o odstra- ňování závad v návodu údržby 967.987.00.0 na webové prezentaci Geberit distribuční společnosti ne- bo vedle uvedeného QR kódu. 18014401053566091-1 © 07-2018 967.986.00.0 (01)
- Seite 204 Údržba Funkční test Doporučení: Níže popsané přezkoušení funkce je nutno provádět pravidelně. Činnost Výsledek Akce ▶ Pokud LED Bliká, vyměňte - pře- – baterie. → Viz zkoušení. „Vyměňte baterii“, strana 205. ▶ Pokud se nerozsvítí Řídící jednotka žádná LED, vyměňte Stiskněte tlačít- ukazuje aktuální...
- Seite 205 Vyměňte baterii Uzavřete přívod vody. Otevřete víko řídí jednotky. 18014401053566091-1 © 07-2018 967.986.00.0 (01)
- Seite 206 Otevřete víko pouzdra baterie. 18014401053566091-1 © 07-2018 967.986.00.0 (01)
- Seite 207 Vyjměte a zlikvidujte baterii. 18014401053566091-1 © 07-2018 967.986.00.0 (01)
- Seite 208 Vložte novou baterii. 18014401053566091-1 © 07-2018 967.986.00.0 (01)
- Seite 209 Uzavřete víko pouzdra baterie. Otevřete přívod vody. 18014401053566091-1 © 07-2018 967.986.00.0 (01)
- Seite 210 Otestovat ovládání splachování. Tlačítkem <TEST> otevřete elektromagnetický ventil. 18014401053566091-1 © 07-2018 967.986.00.0 (01)
- Seite 211 Tlačítkem <TEST> uzavřete elektromagnetický ventil. Geberit hygienický proplach Rapid nyní funguje podle nastavení z výroby. V případě nutnosti znovu nastavte interval a dobu proplachu. → Viz „Nastavení intervalu a doby proplachu“, strana 196. 18014401053566091-1 © 07-2018 967.986.00.0 (01)
- Seite 212 Zavřete víko řídící jednotky. 18014401053566091-1 © 07-2018 967.986.00.0 (01)
- Seite 213 řádně zlikvidovat. Tento symbol znamená, že se výrobek nesmí vyhazovat do zbytkového odpadu. Stará zařízení je nutno vrátit přímo firmě Geberit, která zajistí jejich odbornou likvidaci. Na adresy sběrných míst je možné se dotázat u příslušné distribuční společnosti Geberit.
-
Seite 214: Namenska Uporaba
Varnost O tem dokumentu Ta dokument je namenjen upravljavcem naslednjih izdelkov: • higiensko splakovanje Geberit Rapid • krmilna enota Geberit za higiensko splakovanje Rapid Namenska uporaba Geberit higienski splakovalci so primerni za samodejno periodično izmenjevanje vode v inštalacijah za pitno vodo. Vsaka drugačna uporaba ni skladna z določili. - Seite 215 4 pritrdilnimi vijaki. • V kanalizacijski vod ne nameščajte nobenega dodatnega sifona. V Geberit higienski splakovalec Rapid je vgrajen sifon. • Če se odtok zamaši, lahko iz preliva Geberit higienskega splakovalca Rapid izteka voda. 18014401053566091-1 © 07-2018 967.986.00.0 (01)
- Seite 216 Varnostna navodila za krmilno enoto Geberit za higienski splakovanje Rapid • Krmilno enoto priključite samo na trdno nameščen oskrbovalni vod. • Krmilne enote ne potapljajte v vodo. • Med odtokom in kanalizacijskim vodom odtoka pustite najmanj 20 mm (prosti odtok v skladu z DIN EN 1717:2011-08).
-
Seite 217: Opis Proizvoda
Opis proizvoda Sestava Geberit higienskega splakovalca Rapid Slika 1: Geberit higienski splakovalec Rapid Filtrski koš Krmilna enota Tipkovnica Baterija Pokrov predala za baterijo Pokrov krmilne enote Ohišje Pretok Spodnji del sifona Zgornji del sifona 18014401053566091-1 © 07-2018 967.986.00.0 (01) - Seite 218 Sestava krmilne enote Geberit za higiensko splakovanje Rapid Slika 2: Krmilna enota Geberit za higiensko splakovanje Rapid Filtrski koš Krmilna enota Tipkovnica Baterija Pokrov predala za baterijo Pokrov krmilne enote Odtok 18014401053566091-1 © 07-2018 967.986.00.0 (01)
-
Seite 219: Tehnični Podatki
Tehnični podatki Vrsta zaščite IPX4 Obratovalna napetost 9 V DC Tip baterije Alkalna baterija 6LR61 (9 V) Življenjska doba baterije, če je > 1,5 leta splakovalni interval = 1 dan Tlak pretoka 0,2–10 barov Obratovalna temperatura 0–70 °C Zmogljivost splakovanja 3 l/min Tovarniška nastavitev časa 2 min... - Seite 220 Upravljanje Tipkovnica Simbol Delovanje Splakovalni interval = 1 dan (splakuje <1> LED-dioda vsak dan) Splakovalni interval = 3 dni (splakuje <3> LED-dioda vse 3 dni) Splakovalni interval = 7 dni (splakuje <7> LED-dioda vse 7 dni) <2 MIN> LED-dioda Čas splakovanja = 2 minuti <SET>...
-
Seite 221: Načini Obratovanja
časa splakovanja«, stran 222. Preizkusite magnetni ventil. → Glejte <TEST> Tipka »Preizkus delovanja«, stran 230. Napolnjenost baterije. → Glejte LED-dioda »Odpravljanje motenj«, stran 228. Načini obratovanja Higiensko splakovanje Geberit Rapid lahko uporabljate v naslednjih načinih obratovanja: Način Čas splakovanja LEDdioda Splakovalni LED- interval dioda <DAYS>... -
Seite 222: Način Stanja Pripravljenosti
Način stanja pripravljenosti Tipkovnica Geberit higienskega splakovalca Rapid se po pribl. 2 minutah neaktivnosti preklopi v stanje pripravljenosti. Pri tem ugasnejo vse LED diode. 1. Za izhod iz stanja pripravljenosti pritisnite poljubno tipko. Prikazal se bo aktiviran način obratovanja. 2. Da bi izvedli želeno funkcijo, pritisnite ustrezno tipko. - Seite 223 Tabela 2: Priporočene dimenzije cevi Cevni sistem DN 12 DN 15 DN 20 [mm] [mm] [mm] Geberit Mapress 15 x 1,0 18 x 1,0 22 x 1,2 Geberit Mepla 16 x 2,25 20 x 2,5 26 x 3,0 Geberit PushFit 16 x 2,0 20 x 2,0 25 x 2,5 Geberit Volex 16 x 2,0 20 x 2,0 26 x 3,0 Določanje splakovalnega intervala Določanju splakovalnega intervala služi naslednja tabela.
- Seite 224 Nastavljanje načinov obratovanja 1–3 (pri času splakovanja 2 minuti) ▶ Pritiskajte tipko <MODE>, dokler ne sveti LED dioda <2 MIN> in želen splakovalni interval (<1>, <3> ali <7 DAYS>). Rezultat ✓ Nastavitve so shranjene. ✓ Splakovalni interval se začne izvajati v času nastavitve. Prvo splakovanje se bo sprožilo po izteku splakovalnega intervala.
- Seite 225 Nastavljanje načinov obratovanja 4–6 (nastavljiv čas splakovanja) Pritiskajte tipko <MODE>, dokler ne sveti LED dioda <SET> in želen splakovalni interval (<1>, <3> ali <7 DAYS>). 18014401053566091-1 © 07-2018 967.986.00.0 (01)
- Seite 226 Pritisnite in držite tipko <FLUSH TIME>, da nastavite želen čas splakovanja (1 sekunda do 15 minut). Primer: Da bi čas splakovanja nastavili na 4 minute, morate pritisniti tipko in jo držati 4 minute. ✓ Dokler boste držali tipko, bo tekla voda. Rezultat ✓...
- Seite 227 Preverjanje nastavljenega časa splakovanja ▶ Pritisnite in 1 s držite tipko <TEST>. DAYS 2 MIN MODE TEST FLUSH TIME ✓ Magnetni ventil se bo odprl in pritekla bo voda. ✓ Po preteku nastavljenega časa splakovanja se bo magnetni ventil samodejno zaprl. 18014401053566091-1 ©...
-
Seite 228: Odpravljanje Motenj
Odpravljanje motenj Motnja Vzrok Odprava LED-dioda ▶ utripne Zamenjajte baterijo. → Baterija je skoraj vsaki 2 sekun- Glejte »Zamenjajte prazna di, splakovanje baterije«, stran 231. ni aktivirano. ▶ Krmilna enota v Pritisnite tipko <TEST>. stanju pripravlje- Krmilna enota prikazuje nosti aktivni način obratovanja. Nobena LED- ▶... - Seite 229 Ko je baterija skoraj prazna, se splakovanje več ne aktivira. Strokovnjakom so dodatne informacije za odpravljanje motenj na voljo v navodilih za vzdrževanje 967.987.00.0 na spletni strani posameznega prodaj- nega podjetja Geberit ali s pomočjo priložene kode 18014401053566091-1 © 07-2018 967.986.00.0 (01)
-
Seite 230: Preizkus Delovanja
Vzdrževanje Preizkus delovanja Priporočilo: Redno opravljajte preizkus delovanja, opisan v nadaljevanju. Dejavnost Rezultat Dejanje ▶ Če utripa LED-dioda , zamenjajte Preverite LED- – baterijo. → Glejte diodo »Zamenjajte baterije«, stran 231. ▶ Če ne sveti nobena LED-dioda, Krmilna enota prika- Pritisnite tipko zamenjajte baterijo. - Seite 231 Zamenjajte baterije Zaprite dovod vode. Odprite pokrov krmilne enote. 18014401053566091-1 © 07-2018 967.986.00.0 (01)
- Seite 232 Odprite pokrov predala za baterijo. 18014401053566091-1 © 07-2018 967.986.00.0 (01)
- Seite 233 Odstranite baterijo in jo zavrzite. 18014401053566091-1 © 07-2018 967.986.00.0 (01)
- Seite 234 Vstavite nove baterije. 18014401053566091-1 © 07-2018 967.986.00.0 (01)
- Seite 235 Zaprite pokrov predala za baterijo. Odprite dovod vode. 18014401053566091-1 © 07-2018 967.986.00.0 (01)
- Seite 236 Preverite aktiviranje splakovanja. Magnetni ventil odprete s tipko <TEST>. 18014401053566091-1 © 07-2018 967.986.00.0 (01)
- Seite 237 Magnetni ventil zaprete s tipko <TEST>. Geberit higienski splakovalec Rapid je zdaj nastavljeno na tovarniške nastavitve. Po potrebi ponovno nastavite splakovalni interval in čas splakovanja. → Glejte »Nastavitev splakovalnega intervala in časa splakovanja«, stran 222. 18014401053566091-1 © 07-2018 967.986.00.0 (01)
- Seite 238 Zaprite pokrov krmilne enote. 18014401053566091-1 © 07-2018 967.986.00.0 (01)
- Seite 239 Simbol opozarja, da izdelka ni dovoljeno odvreči med ostale odpadke. Odpadno opremo vrnite podjetju Geberit, kjer bodo poskrbeli za strokovno odstranitev. Naslove sprejemnih mest lahko najdete pri pristojnem prodajnem podjetju Geberit.
- Seite 240 Geberit International AG Schachenstrasse 77, CH-8645 Jona documentation@geberit.com www.geberit.com 18014401053566091-1 © 07-2018 967.986.00.0 (01)