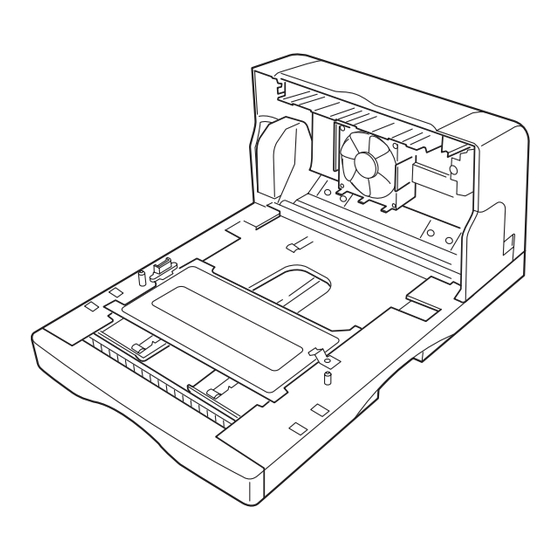
Inhaltszusammenfassung für Kyocera FS-C5016N
- Seite 1 Operation Guide Manuel d’utilisation Bedienungsanleitung Guía de instrucciones Guida operativa 使用説明書 Duplexer Unité de duplexage Duplexeinheit Duplexor Unità duplex 両面ユニット Downloaded from www.Manualslib.com manuals search engine...
- Seite 2 Downloaded from www.Manualslib.com manuals search engine...
-
Seite 3: Inhaltsverzeichnis
English Table of Contents Introduction ..................4 Packing List ..................5 Names of Parts..................6 Installation................... 8 Removing Paper Jams............... 11 Specifications ..................14 Français Table des matières Introduction ..................4 Contenu du paquet ................5 Nomenclature..................6 Installation................... 8 Solution pour les bourrages papier........... -
Seite 4: Table Of Contents Introduction
English Introduction Thank you for purchasing this optional duplexer. Before using the optional duplexer, please read this guide, then carefully follow all instructions given for installing and using the duplexer. This product is an auxiliary unit designed for use with the our company’s page printers. Using the duplexer, you can automatically print on both sides of the paper. -
Seite 5: Packing List
English Packing List Make sure that the optional duplexer package contains each of the following items in the indicated quantities. • Duplexer, 1 • Operation Guide (this booklet), 1 Français Contenu du paquet S’assurer que le kit de l’unité de duplexage optionnelle contient le nombre indiqué d’éléments suivants. •... -
Seite 6: Names Of Parts
English Names of Parts Before installing the optional duplexer, please read the following list of names. These names are used in describing procedures for installing and using the optional duplexer. A Connector: When you install the duplexer, this connector plugs into a connector located inside the bottom of the printer. B Positioning Pins: These pins fit into two holes in the bottom of the printer. - Seite 7 English D Rear Unit: Pull out to clear paper jams. E Rear unit lever: Use this lever to pull out the rear unit. Top Cover: Open to clear paper jams. Français D Unité arrière: extraire pour éliminer le bourrage papier. E Levier de l’unité...
-
Seite 8: Installation
English Installation Use the duplexer’s rear unit lever (A) to pull out the rear unit (B). This section describes how to install the duplexer. Install the duplexer by following the procedure below. Before installing (or removing) the duplexer, be sure to turn off the printer’s power and unplug the printer’s power plug from the power outlet. - Seite 9 English Place the printer on top of the duplexer. Connect the printer cable (C) to the printer and pass it through the opening in the duplexer. Connect the power cord (D) to the printer and secure it to the duplexer. Français Placer l’imprimante au-dessus de l’unité...
- Seite 10 English Return the rear unit to its original position. Français Remettre l’unité arrière dans sa position d’origine. Deutsch Stellen Sie die hintere Einheit an ihre Ausgangsposition zurück. Español Vuelva la unidad posterior a su posición original. Italiano Collocare di nuovo l’unità posteriore nella sua posizione originale. 日本語...
-
Seite 11: Removing Paper Jams
English Removing Paper Jams Use the duplexer’s rear unit lever (A) to pull out the rear unit (B). In the event of a paper jam, the Paper jam Duplexer message appears on the printer’s message display. Clear the jammed paper by following the procedure below. Français Solution pour les bourrages papier En utilisant le levier de l’unité... - Seite 12 English Remove the jammed paper. Open the top cover (C) of the duplexer and remove the jammed paper. Français Retirer le papier coincé. Ouvrir le capot supérieur (C) de l’unité de duplexage et retirer le papier coincé. Deutsch Entfernen Sie das gestaute Papier. Öffnen Sie die obere Abdeckung (C) und entfernen Sie das gestaute Papier.
- Seite 13 English Pull out the duplex drawer (D). Remove the jammed paper. Close the top cover, and return the rear unit and duplex drawer to its original position. The printer automatically warms up, goes on- line, and continues printing. Français Extraire le casier de l’unité de duplexage (D). Retirer le papier coincé.
-
Seite 14: Specifications
English Français Specifications Spécifications Item Specification Article Spécifications Applicable Page printers Imprimantes Imprimantes à page printers applicables Paper size ISO A4 (210 × 297 mm) / JIS B5 (182 × 257 mm) Format papier ISO A4 (210 × 297 mm) / JIS B5 (182 × 257 mm) ISO A5 (148 ×... - Seite 15 Downloaded from www.Manualslib.com manuals search engine...
- Seite 16 2003.4 7KKTDU300+XX Printed in Japan Downloaded from www.Manualslib.com manuals search engine...


