Inhaltsverzeichnis
Werbung
Verfügbare Sprachen
Verfügbare Sprachen
Werbung
Inhaltsverzeichnis

Inhaltszusammenfassung für auna 10019486
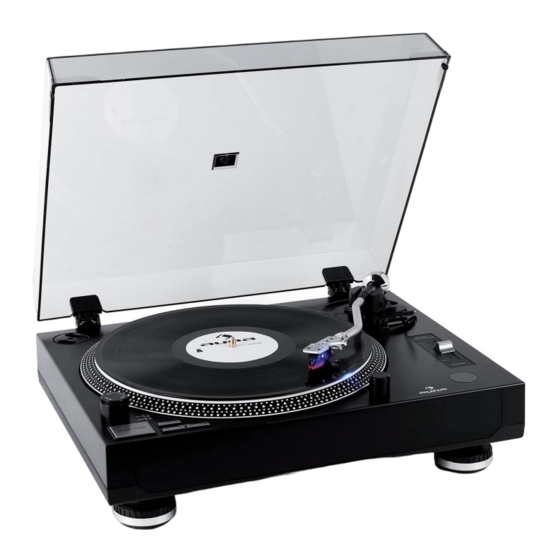
- Seite 1 Plattenspieler USB / LED 10019486 10019487 http://www.auna-multimedia.com...
-
Seite 2: Sicherheitshinweise
Sehr geehrter Kunde, Wir gratulieren Ihnen zum Erwerb Ihres Gerätes. Lesen Sie die folgenden Anschluss- und Anwendungshinweise sorgfältig durch und befolgen Sie diese, um möglichen technischen Schäden vorzubeugen. Für Schäden, die durch Missachtung der Sicherheitshinweise und unsachgemäßen Gebrauch entstehen, übernehmen wir keine Haftung. Sicherheitshinweise Zur Reduzierung der Gefahr von Brand, elektrischem Schlag und Beschädigung: •... - Seite 3 Bestimmungsgemäßer Gebrauch • Dieses Gerät dient dem Trocknen von Lebensmitteln. Es ist ausschließlich für diesen Zweck bestimmt und darf nur zu diesem Zweck verwendet werden. Es darf nur in der Art und Weise benutzt werden, wie es in dieser Ge- brauchsanleitung beschrieben ist.
-
Seite 4: Bedienung
Bedienung • Bringen Sie die Staubschutzabdeckung wie abgebildet an. • Riemenantrieb: Setzen Sie den Gummiriemen wie abgebildet ein. • Platzieren Sie den Plattenteller auf der Plattenachse. • Legen Sie die Slipmat auf den Plattenteller. • Bringen Sie den Tonabnehmer wie abgebildet auf em Tonarm an. Fixieren Sie den Tonabnehmer indem Sie ihn fest mit dem Tonarm verschrauben. - Seite 5 • Schrauben Sie das Gegengewicht an das Ende des Tonarms. Der empfohlene Wert liegt bei 5. • Wählen Sie einen korrespondierenden Anti-Skating-Wert ein. Der empfoh- lene Wert für die mitgelieferte Nadel liegt bei 4.5 bis 5g. Befestigen Sie die Befußung wie abgebildet. Korrekt ausbalancierter Tonarm Schlecht ausbalancierter Tonarm mit zu kräftig eingestelltem Gegengewicht...
-
Seite 6: Hinweise Zur Entsorgung
Phono / Line-Umstellung Die Phono-Line-Umstellung befi ndet sich unter dem Plattenteller und kann mit Hil- fe eines Schrauberziehers oder eines vergleichbaren Gegenstandes umgelegt wer- den. Platten abspielen • Entfernen Sie die Nadelabdeckung. • Schalten Sie das Gerät mit dem An-/Anschalter aus und drücken Sie Start, um die Plattenlauf zu starten. •... -
Seite 7: Safety Instructions
Dear Customer, Congratulations on purchasing this equipment. Please read this manual carefully and take care of the following hints to avoid damages. Any failure caused by ignoring the mentioned items and cautions mentioned in the inst- ruction manual are not covered by our warranty and any liability. Safety Instructions To reduce the risk of fire, electric shock and damage: •... -
Seite 8: Product Description
Intended Use • This device is used for draing food. It is exclusively meant for this purpose and must only be used for this pur- pose. It may only be used in the manner as described in this manual. • This product is not designed for use by persons (including children) who have reduced physical, sensory or men- tal capacities or persons with no experience or knowledge, unless they are instructed and supervised in the use of the appliance by a person responsible for their safety. -
Seite 9: Operation
Operation • Install the dust cover into hinge on the upper cabinet. • Set the turntable platter onto the center spindle. • Attach the drive belt: position the belt on the motor pully, the drive belt is tightened under the turntable platter. - Seite 10 • Slide counterweight onto the tonearm. Twist it lightly and it will screw inwards onto the rear end of the tonearm. Slide counterweight onto the tonearm. Twist it lightly and it will screw inwards onto the rear end of the tonearm. •...
-
Seite 11: Hints On Disposal
Pickup Selector Pickup selector is located on the turntable deck. Select “phono” if the defalut ruby needle is used. If change to other needle or cartridge, put a screw driver into pick- up selector to select “line”. In this case, connect the product with suitable external amplifi er (depends on the specifi cation of the othe needle or cartridge) via rca jack. -
Seite 12: Indicaciones De Seguridad
Estimado cliente: Le felicitamos por la adquisición de este producto. Lea atentamente el siguiente manual y siga cuidadosamente las instrucciones de uso con el fin de evitar posibles daños. La empresa no se responsabiliza de los daños ocasio- nados por un uso indebido del producto o por haber desatendido las indicaciones de seguridad. Indicaciones de seguridad Para reducir el riesgo de quemaduras, descargas eléctricas y daños: •... -
Seite 13: Elementos De Control
Uso del aparato • Este aparato ha sido concebido para deshidratar alimentos. Se ha diseñado solamente para tal efecto y no debe ser utilizado con ningún otro fin distinto al del indicado en estas instrucciones de uso. • Este aparato sólo debe ser utilizado por personas adultas. El aparato no está creado para ser usa- do por niños o personas con discapacidad física, sensorial o mental o con falta de experiencia o/y escaso conocimiento, a no ser que haya una persona que vele por su seguridad o dé... - Seite 14 Funcionamiento • Coloque la cubierta antipolvo como se muestra en la imagen. • Correa de transmisión: coloque la correa de goma como se muestra en la imagen. • Posicione el plato giratorio en el eje. • Coloque el slipmat en el plato. •...
- Seite 15 • Atornille el contrapeso a un final del brazo de la aguja. El valor recomendado se encuentra en 5. • Elija un valor antiskating correspondiente. El valor recomendado para la aguja suministrada es de entre 4,5 hasta 5 g. Fije el pie del tocadiscos como se muestra en la imagen.
-
Seite 16: Indicaciones Sobre La Retirada Del Aparato
Cambio de fono /línea El cabio de fono/línea se encuentra debajo del plato giratorio y se realiza con la ayuda de un destornillador o un objeto similar. Reproducir discos • Retire la cubierta de la aguja. • Enciende el dispositivo presionando el interruptor de encendido/apagado y pulse la tecla Start para empezar la reproducción del disco.


