Inhaltsverzeichnis
Werbung
Quicklinks
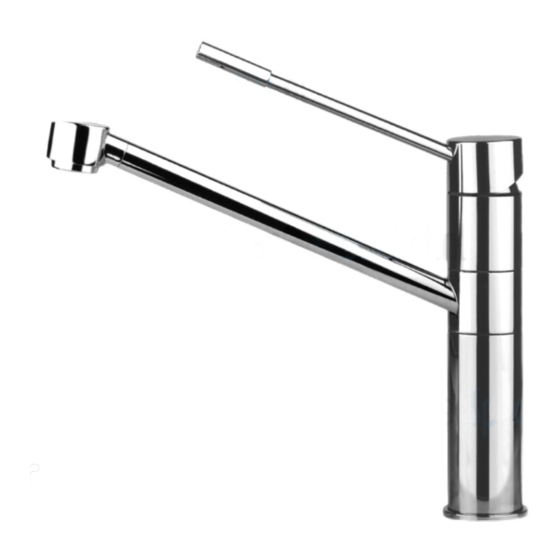
PROGRAMMA MISCELAZIONE CUCINA
KITCHEN MIXING PROGRAM
PROGRAMME DU MITIGEUR POUR LA CUISINE
KÜCHEN-MISCHUNGSPROGRAMM
PROGRAMA MEZCLADORES COCINA
OXYGENE HT
Art. 23521
Gessi SpA - Parco Gessi
13037 Serravalle Sesia (Vercelli) - Italy
Phone +39 0163 454111 - Facsimile +39 0163 459273
www.gessi.com - gessi@gessi.it
Werbung
Inhaltsverzeichnis

Verwandte Anleitungen für Gessi OXYGENE HT serie


Inhaltszusammenfassung für Gessi OXYGENE HT serie
- Seite 1 KITCHEN MIXING PROGRAM PROGRAMME DU MITIGEUR POUR LA CUISINE KÜCHEN-MISCHUNGSPROGRAMM PROGRAMA MEZCLADORES COCINA OXYGENE HT Art. 23521 Gessi SpA - Parco Gessi 13037 Serravalle Sesia (Vercelli) - Italy Phone +39 0163 454111 - Facsimile +39 0163 459273 www.gessi.com - gessi@gessi.it...
- Seite 2 PRELIMINARI - PRE-INSTALLATION INFORMATION - PRÉALABLES - VORBEREITUNG - PRELIMINARES dimensioni in mm - measures in mm - dimensions en mm - Maß im mm - medidas en mm DATI TECNICI · Pressione minima d’esercizio 0,5 bar · Pressione massima d’esercizio 5 bar ·...
- Seite 3 PRELIMINARI - PRE-INSTALLATION INFORMATION - PRÉALABLES - VORBEREITUNG - PRELIMINARES PRIMA DELL’INSTALLAzIONE E MESSA IN FUNzIONE Attenzione! I tubi d’alimentazione devono essere sciacquati con cura prima dell’installazione del miscela- tore, in modo che non rimangano trucioli, residui di saldatura o canapa, o altre impurità all’interno dei tubi. Attraverso tubazioni non sciacquate a fondo o attraverso la rete idrica generale, nel miscelatore possono entrare corpi estranei in grado di danneggiare le guarnizioni/guarnizioni ad anello e/o cartucce/vitoni.
- Seite 4 PRELIMINARI - PRE-INSTALLATION INFORMATION - PRÉALABLES - VORBEREITUNG - PRELIMINARES - Il rispetto di tali indicazioni, mantiene i diritti di garanzia, garantisce le caratteristiche dichiarate dei prodotti e ne assicura la completa affidabilità. - Respecting this indications, will mantain the warranty rights, ensures the declared properties of the products and warrant the complete reliability.
- Seite 5 PRELIMINARI - PRE-INSTALLATION INFORMATION - PRÉALABLES - VORBEREITUNG - PRELIMINARES - Il contatto prolungato con sostanze pur blandamente aggressive, può determinare il danneggiamento della treccia ed il conseguente scoppio del flessibile. - Prolonged contact wit any substance, even scarcely aggressive, can cause external braid damage and subsquent flexible burst.
-
Seite 6: Installazione
INSTALLAzIONE - INSTALLATION - INSTALLATION - INSTALLATION - INSTALACIóN dimensioni in mm - measures in mm - dimensions en mm - Maß im mm - medidas en mm Fig.1 Fig.2 1-2 mm Ch. 11mm Fig.3 Ch. 19 mm Ch. 19 mm INSTALLAzIONE Prima di inserire il monocomando nel foro del lavello assicurarsi che la guarnizione di base sia ben posizio- nata nella propria sede e che i flessibili di alimentazione siano ben avvitati al corpo del rubinetto. -
Seite 7: Installation
INSTALLAzIONE - INSTALLATION - INSTALLATION - INSTALLATION - INSTALACIóN INSTALLATION Before inserting the single lever group in the hole of the sink, make sure that the base gasket is properly positioned in its seat and that the flexible hoses are well tightened to the body of the tap. Place the single lever group in the hole of the sink, orienting the spout toward the sink tank. -
Seite 8: Sostituzione Della Cartuccia
MANUTENzIONE - MAINTENANCE - ENTRETIEN - wARTUNG - MANTENIMIENTO 2.5mm Ch. 28 mm SOSTITUzIONE DELLA CARTUCCIA Prima di sostituire la cartuccia, accertarsi che il raccordo dell’acqua sia chiuso. Svitare la vite di fissaggio (A) utilizzando una chiave a brugola, estrarre quindi la maniglia (B) sfilandola dalla cartuccia (F). -
Seite 9: Austauschen Der Kartusche
MANUTENzIONE - MAINTENANCE - ENTRETIEN - wARTUNG - MANTENIMIENTO AUSTAUSCHEN DER kARTUSCHE Bevor man die Kartusche austauscht muß man sich vergewissern, dass das Wasserversorgungsnetz geschlossen ist. Die Befestigungsschraube (A) unter Einsatz eines Sechskantschlüssel losschrauben, dann den Griff (B) herausziehen, indem man ihn von der Kartusche (F) abzieht. Die Nutmutter, welche die Kartusche (C) abdeckt, entfernen, wobei man Druck auf die eigens dafür vorgesehene Bezugsrille ausübt. - Seite 10 MANUTENzIONE - MAINTENANCE - ENTRETIEN - wARTUNG - MANTENIMIENTO PULIzIA / SOSTITUzIONE DELL’AERATORE Nel caso l’erogazione non fosse fluida svitare manualmente il porta aeratore, estrarre il filtro senza danneggiare e/o smarrire la guarnizione. Se l’aeratore fosse otturato è sufficiente sciacquare il filtro con acqua corrente, senza utilizzare detergenti.
-
Seite 11: Reinigung / Austausch Des Belüfters
MANUTENzIONE - MAINTENANCE - ENTRETIEN - wARTUNG - MANTENIMIENTO REINIGUNG / AUSTAUSCH DES BELÜFTERS Falls die Wasserversorgung nicht genügend flüssig ist, schrauben Sie das Gehäuse des Belüfters ma- nuell ab und nehmen Sie den Filter heraus, ohne die Dichtung zu verlieren/beschädigen. Falls der Filter verstopft ist, genügt es, ihn mit fließendem Wasser auszuspülen, ohne Waschmittel zu verwenden. - Seite 12 ET 40097 - R0...