
Inhaltszusammenfassung für lidl Silvercrest
- Seite 1 MICROONDE SMW 900 EDS B4 MICROONDE STAINLESS STEEL MICROWAVE Istruzioni per l‘uso Operating instructions EDELSTAHL-MIKROWELLE Bedienungsanleitung IAN 275170...
- Seite 2 Prima di leggere aprire la pagina con le immagini e prendere confi denza con le diverse funzioni dell'apparecchio. Before reading, unfold the page containing the illustrations and familiarise yourself with all functions of the device. Klappen Sie vor dem Lesen die Seite mit den Abbildungen aus und machen Sie sich anschließend mit allen Funktionen des Gerätes vertraut.
-
Seite 4: Inhaltsverzeichnis
Indice Introduzione ..........3 Uso conforme . - Seite 5 Ricette ............34 Polpette .
-
Seite 6: Introduzione
Introduzione Congratulazioni per l'acquisto del Suo nuovo apparecchio. È stato scelto un prodotto di alta qualità. Il manuale di istruzioni è parte integrante del presente prodotto. Esso contiene importanti indicazioni per la sicurezza, l'uso e lo smaltimento. Prima di utilizzare il prodotto, familiarizzare con tutte le indicazioni relative ai comandi e alla sicurezza. -
Seite 7: Descrizione Dell'apparecchio
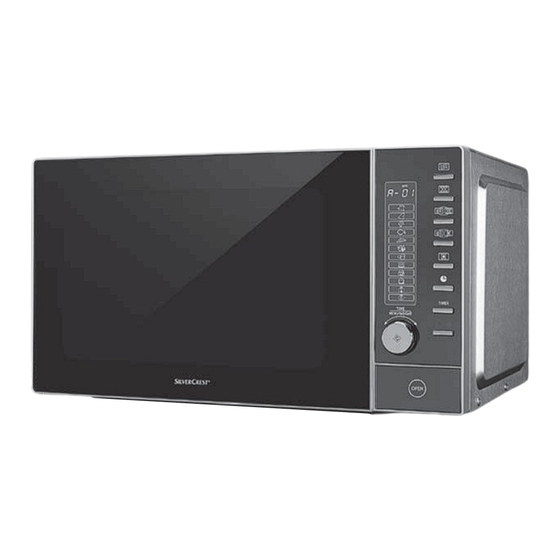
Descrizione dell'apparecchio Figura A: 1 Display 2 Tasto Apertura sportello 3 Piatto girevole 4 Rotelle 5 Aperture di aerazione Figura B: 6 Tasto Microonde 7 Tasto Grill 8 Tasto Combinazione microonde - grill 9 Tasto Combinazione microonde - aria calda 0 Tasto Aria calda q Tasto Orologio w Tasto TIMER (timer da cucina) -
Seite 8: Importanti Indicazioni Relative Alla Sicurezza
Importanti indicazioni relative alla sicurezza Leggere attentamente le avvertenze di sicurezza prima del primo utilizzo e conservarle per il successivo impiego. PERICOLO! RISCHIO DI FOLGORAZIONE! Un'avvertenza contrassegnata da questo livello di pericolo indica una situazione potenzialmente pericolosa. Se non si evita tale situazione pericolosa, essa può dare luogo a decesso o a gravi lesioni. - Seite 9 Non attaccare alcun oggetto fra il frontale dell'apparecchio e ► lo sportello e impedire il depositarsi dello sporco o di resti di detergente sulle superfi ci isolanti. PERICOLO! RISCHIO DI FOLGORAZIONE! Non immergere mai il cavo o la spina in acqua o altri liquidi. ►...
- Seite 10 AVVERTENZA - PERICOLO DI LESIONI! La pulizia e la manutenzione a cura dell'utente non devono ► essere eseguite dai bambini a meno che non abbiano alme- no 8 anni di età e siano sorvegliati. Tenere l'apparecchio e il cavo di allacciamento fuori dalla ►...
- Seite 11 AVVERTENZA - PERICOLO DI LESIONI! I portatori di pace-maker devono informarsi presso il medico ► di fi ducia prima di cominciare a utilizzare un microonde, per conoscere gli eventuali pericoli collegati all'uso dell'appa- recchio. Non lasciare mai il cavo appeso sul tavolo o sul piano di ►...
- Seite 12 AVVERTENZA - PERICOLO DI LESIONI! Attenzione! Superfi cie rovente! AVVERTENZA - PERICOLO D'INCENDIO! Non lasciare il microonde incustodito mentre si riscaldano ► gli alimenti in confezioni di plastica o di carta. Non collocare materiali infi ammabili nelle vicinanze del ► microonde o delle aperture di aerazione.
- Seite 13 AVVERTENZA - PERICOLO D'INCENDIO! Non scongelare oli o grassi surgelati nel microonde. Gli oli ► o i grassi potrebbero incendiarsi. Non utilizzare timer esterni o un sistema di telecomando ► separato per azionare l'apparecchio. Questo microonde destinato al riscaldamento di alimenti e ►...
- Seite 14 ATTENZIONE - DANNI MATERIALI! Non poggiarsi sullo sportello del microonde. ► La pulizia insuffi ciente dell'apparecchio di cottura può pro- ► vocare la distruzione delle superfi ci, infl uenzando la durata di utilizzo e creando circostanze di pericolo. Si possono utilizzare esclusivamente stoviglie idonee all'uti- ►...
-
Seite 15: Messa A Terra/Installazione Conforme
INDICAZIONI PER UN UTILIZZO SICURO Le uova nel guscio e le uova sode non devono essere riscaldate ► nel forno a microonde, poiché possono esplodere anche dopo il termine del riscaldamento nel forno a microonde. Prima della cottura, punzecchiare gli alimenti con la buccia spessa, come ad esempio patate, zucche intere, mele e castagne. -
Seite 16: Prima Di Cominciare
INTERFERENZE CON ALTRI APPARECCHI L'uso del forno a microonde può dare luogo a interferenze ► con apparecchi radiofonici, televisivi e simili. In caso di presenza di tali interferenze, è possibile ridurle o eliminarle, ricorrendo ai seguenti provvedimenti: Pulire lo sportello e le superfi ci isolanti. –... -
Seite 17: Uso Delle Stoviglie Di Cottura Idonee
Uso delle stoviglie di cottura idonee ■ Il materiale ideale per un forno a microonde è permeabile alle microonde, cioè permette il passaggio dell'energia attraverso il contenitore, per riscaldare i cibi. Le microonde non riescono a penetrare i metalli. Per tale motivo, non utilizzare recipienti e stoviglie in metallo. -
Seite 18: Prima Messa In Funzione
Prima messa in funzione AVVERTENZA RELATIVA AL PRIMO RISCALDAMENTO Non azionare mai il forno a microonde vuoto nella ► modalità "Microonde". Far funzionare il forno a microonde esclusivamente ► al primo riscaldamento senza accessori e alimenti nella modalità "Grill" (Gr 3)! (vedasi capitolo "Preparazione dell'apparecchio") Installazione dell'apparecchio AVVERTENZA - PERICOLO D'INCENDIO! -
Seite 19: Preparazione Dell'apparecchio
Preparazione dell'apparecchio ■ Rimuovere il materiale d'imballaggio e la pellicola protettiva applicata sul pannello e sul tasto Apertura sportello 2. ATTENZIONE - DANNI MATERIALI! Non rimuovere la placca di copertura grigio-chiaro in mica, applicata per proteggere i tubi a campi magnetici nel vano di cottura. -
Seite 20: Inserimento Del Piatto Girevole
AVVERTENZA ► Durante la prima messa in funzione può avere luogo una leggera forma- zione di fumi e odori, dovuti ai resti di lavorazione del prodotto. Si tratta di un evento innocuo. Provvedere a una suffi ciente aerazione. Aprire ad esempio una fi... -
Seite 21: Modalità Stand-By
Modalità stand-by Se non si preme nessun tasto per un periodo prolungato, il microonde passa au- tomaticamente alla modalità standby e sul display viene visualizzata l'ora. Pochi secondi dopo il passaggio alla modalità standby viene ridotta anche l'intensità d'illuminazione del display. Impostazione del timer di cottura Il forno a microonde dispone di un timer di cottura utilizzabile indipendentemen- te dal forno a microonde. -
Seite 22: Interruzione Temporanea O Defi Nitiva Di Procedimenti Di Cottura O Scongelamento
Richiesta del livello di potenza durante il funzionamento Durante il procedimento di cottura, premere il tasto Microonde 6 Sul display 1 compare per alcuni secondi il livello di potenza attivato. Interruzione temporanea o defi nitiva di procedimenti di cottura o scongelamento ■... -
Seite 23: Impostazione Del Tempo Di Cottura
Impostazione del tempo di cottura Dopo aver selezionato la potenza, impostare il tempo di cottura desiderato: ruotare la manopola r ■ fi no a quando non è impostato il tempo di cottura desiderato. I livelli per il tempo di impostazione della manopola r sono i seguenti: –... -
Seite 24: Funzione Grill
Funzione grill AVVERTENZA - PERICOLO D'INCENDIO! ► Quando si utilizzano le funzioni grill, non utilizzare coperchi o stoviglie non resistenti al calore, poiché essi potrebbero fondersi o incendiarsi! AVVERTENZA Per grigliare, utilizzare sempre la base grill t. Così si ottiene un risultato di ►... -
Seite 25: Combinazione Procedimento Di Cottura "Grill
Combinazione procedimento di cottura "Grill" Questa funzione combina la funzione Grill con il normale funzionamento a mi- croonde. Durante il procedimento combinato, un determinato periodo di tempo viene utilizzato per la cottura, e il restante per la grigliatura, il tutto automati- camente e in un unico procedimento. -
Seite 26: Funzionamento Ad Aria Calda
3) Con la manopola r impostare il tempo di cottura desiderato. Il tempo di cottura massimo è pari a 95 minuti. 4) Per avviare, premere il tasto Avvio/Avvio rapido r Sul display 1 compaiono i simboli dei relativi procedimenti di cottura utilizzati . -
Seite 27: Combinazione-Procedimento Di Cottura "Aria Calda
Sul display 1 compare il simbolo del funzionamento nella modalità aria calda , che rimane acceso permanentemente. Il tempo impostato scorre a ritroso. Una volta scaduto il tempo impostato, sul display 1 compaiono alternati- vamente "End" e "Hot". Un segnale acustico risuona più volte consecutivamente. Combinazione-procedimento di cottura "Aria calda"... -
Seite 28: Menù Automatico
Menù automatico Per i cibi da preparare nella modalità Menù automatico, non è necessario inserire la durata del procedimento di cottura e il livello di potenza. È suffi ciente inserire il tipo e il peso dell'alimento che si deve cuocere/bollire. AVVERTENZA - PERICOLO D'INCENDIO! ►... - Seite 29 Display Simbolo Alimento Peso A-04 Pesce 200 - 1200 g * P1 150 - 450 g A-05 Pizza P2 150 - 450 g P3 150 - 450 g A-06 Frutta / verdura 100 - 1000 g A-07 Patate 100 - 800 g A-08 Riscaldamento 300 - 700 g...
- Seite 30 AVVERTENZA ► Per ottenere una cottura uniforme, è necessario girare alcuni cibi a 2/3 del tempo di cottura. Trascorso tale tempo, il microonde si ferma automatica- mente, risuonano 4 segnali acustici e sul display 1 compare "Turn". Display Simbolo Alimento Girare dopo...
- Seite 31 Proseguimento Display Simbolo Alimento della cottura con... Procedimento di A-01 Manzo cottura combinato "Grill" - C3 Procedimento di A-02 Maiale cottura combinato "Grill" - C3 Procedimento di A-03 Pollame cottura combinato "Grill" - C3 Procedimento di A-04 Pesce cottura combinato "Grill"...
-
Seite 32: Cottura Della Pizza
PERICOLO DI LESIONI! Il piatto girevole 3 si surriscalda dopo un procedimento di cottura con il ► grill! Utilizzare pertanto sempre presine o guanti resistenti al calore per prelevarlo dal vano di cottura. AVVERTENZA ► Ricordare che le dimensioni, la forma e i tipi di alimenti contribuiscono al risultato di cottura. - Seite 33 3) Con l'ausilio della manopola r selezionare il programma per pizza adeguato: – "P-01" per pizza surgelata, Temperatura circa -18 gradi Peso 150 g – 450 g (sul display 1 compare "P-01"). – "P-02" per pizza conservata in frigorifero, Temperatura circa 5 gradi Peso 150 g –...
-
Seite 34: Scongelamento
Scongelamento Scongelamento in base al peso AVVERTENZA ► Collocare i cibi da scongelare sempre su stoviglie idonee per il microonde, mai direttamente sul piatto girevole 3! Con questa funzione si possono scongelare senza problemi carne, pollame, pesce, frutta/verdura e pizza. Il tempo di scongelamento e il livello di potenza vengono calcolati e impostati automaticamente inserendo il peso. - Seite 35 4) Quando sul display 1 compare l'alimento desiderato, premere il tasto Avvio/Avvio rapido r 5) Impostare il peso ruotando la manopola r Si possono impostare i seguenti pesi: Display Simbolo Alimento Peso d-01 Manzo 100 - 1800 g d-02 Maiale 100 - 1800 g d-03 Pollame...
-
Seite 36: Scongelamento In Base Al Tempo
AVVERTENZA ► Per garantire uno scongelamento ottimale, è necessario girare gli alimenti durante il procedimento di scongelamento. L'apparecchio ricorda che è necessario girare l'alimento tramite un segnale acustico e con la comparsa sul display 1 del messaggio "turn". Aprire lo sportello dell'apparecchio, girare l'alimento e richiudere lo sportello dell'apparecchio. -
Seite 37: Ricette
Ricette Polpette Preparazione 1) Formare una polpetta da 125 g di carne tritata di manzo (diametro ca. 75 mm, altezza ca. 35 mm). 2) Distribuire uniformemente le polpette sul piatto girevole 3. 3) Si ottiene il migliore risultato se si utilizzano alternativamente la funzione aria calda e la funzione microonde. -
Seite 38: Muffi N
Preparazione 1) Tagliare le patate in dischi spessi circa 3 – 4 mm. 2) Collocare circa la metà delle patate nella teglia con una disposizione a tegole. 3) Ricoprire le patate con circa la metà del formaggio. 4) Aggiungere la metà delle spezie e circa 150 g di panna. 5) Collocare il resto delle patate tagliate nella teglia sempre con una disposi- zione a tegole. -
Seite 39: Zuppa Di Zucchine
Preparazione 1) Mescolare bene tutti gli ingredienti. 2) Versare l'impasto per muffi n nelle apposite formine di carta reperibili in commercio (diametro circa 45 mm, altezza ca. 28 mm) 3) Riscaldare il microonde con la funzione Aria calda a 170° C. AVVERTENZA ►... -
Seite 40: Torta Di Cioccolato E Mele
Torta di cioccolato e mele Ingredienti ▯ 125 g di burro ▯ 125 g di zucchero ▯ 1 bustina di zucchero vanigliato ▯ 2 uova ▯ 125 g di farina ▯ 2 cucchiai di cacao in polvere ▯ 1/2 bustina di lievito in polvere ▯... -
Seite 41: Polpettone
Polpettone Ingredienti ▯ 500 g di carne tritata (mista) ▯ 1/2 cipolla ▯ 1 uovo ▯ 1/2 pagnotta ▯ Sale, pepe, paprika in polvere per la salsa: ▯ 75 ml di acqua ▯ 1 cucchiai di senape ▯ 2 cucchiai di ketchup ▯... -
Seite 42: Pulizia E Manutenzione
Pulizia e manutenzione PERICOLO! RISCHIO DI FOLGORAZIONE! ► Prima di pulire il forno a microonde, spegnerlo e disconnetterlo dalla presa di corrente. In caso contrario sussiste il rischio di scossa elettrica! Non immergere assolutamente l'apparecchio in acqua o altri liquidi. Potrebbe derivarne pericolo di morte a causa di scosse elettriche e l'apparecchio potrebbe subire danni. -
Seite 43: Eliminazione Dei Guasti
Eliminazione dei guasti PROBLEMA POSSIBILE CAUSA POSSIBILI SOLUZIONI La spina di rete non è inseri- Controllare la spina. ta nella presa. Il display 1 non mostra La presa di corrente è Provare a utilizzare un'altra guasta. presa di rete. niente. Contattare il centro di Il display 1 è... -
Seite 44: Smaltimento
PROBLEMA POSSIBILE CAUSA POSSIBILI SOLUZIONI Interrompere il programma e staccare la spina dalla presa di corrente. Se possi- Il microonde è passato alla bile, rimuovere il problema, Il display 1 segnala "E03" funzione di protezione dai ad es. metallo nel vano di guasti a causa di un corto- e risuonano dei segnali cottura, che può... -
Seite 45: Importatore
Le riparazioni eseguite dopo la scadenza del periodo di garanzia sono a pagamento. Assistenza Italia Tel.: 02 36003201 E-Mail: kompernass@lidl.it IAN 275170 Assistenza Malta Tel.: 80062230 E-Mail: kompernass@lidl.com.mt IAN 275170... - Seite 46 Contents Introduction ..........45 Intended use .
- Seite 47 Recipes ............76 Rissoles .
-
Seite 48: Introduction
Introduction Congratulations on the purchase of your new device. You have selected a high-quality product. The operating instructions are part of this product. They contain important information on safety, usage and disposal. Before using the product, please familiarise yourself with all operating and safety instructions. -
Seite 49: Description Of The Appliance
Description of the appliance Figure A: 1 Display 2 Door opener button 3 Turntable 4 Rollers 5 Ventilation slits Figure B: 6 Microwave button 7 Grill button 8 Microwave/grill combination button 9 Microwave/convection combination button 0 Convection button q Clock button w TIMER button (kitchen timer) e Stop/child safety lock button r Control dial/start/quick start button... -
Seite 50: Important Safety Instructions
Important safety instructions Read the safety advice and these operating instructions carefully before using the appliance, and keep them for future reference. DANGER! ELECTRIC SHOCK! A warning notice at this hazard level indicates a potentially hazardous situation. If the hazardous situation is not avoided, it could result in death or serious physical injury. -
Seite 51: Warning - Risk Of Injury
Do not jam anything between the front of the appliance and ► the door, and make sure that there is no food or cleaning agent residue left on the seals. DANGER! ELECTRIC SHOCK! Never submerse the appliance, the power cable or the plug ►... - Seite 52 WARNING – RISK OF INJURY! Cleaning and user maintenance must not be carried out by ► children, unless they are aged 8 or over and are supervised. Children younger than 8 years of age must be kept away ► from the appliance and the power cable. Use this appliance only for its intended purpose as described ►...
- Seite 53 WARNING – RISK OF INJURY! People fi tted with a heart pacemaker should consult their ► doctor about the possible risks of using a microwave oven before using it. Do not allow the power cable to hang down from a table or ►...
- Seite 54 WARNING – RISK OF INJURY! Caution! Hot surface! WARNING – RISK OF FIRE! Never leave the microwave oven unattended if you are ► heating foodstuff s packed in plastics or paper. Do not place fl ammable materials close to the microwave ►...
- Seite 55 WARNING – RISK OF FIRE! Do not thaw frozen fat or oil in the microwave oven. The fat ► or oil could ignite. Do not use an external timer switch or a separate remote ► control system to operate the appliance. This microwave is designed for heating foods and drinks.
- Seite 56 CAUTION – PROPERTY DAMAGE! Do not heat liquids and other foods in airtight containers, as ► these may explode and damage the appliance. Do not lean on the microwave oven door. ► Insuffi cient cleanliness of the appliance could lead to the ►...
-
Seite 57: Earthing Information / Correct Installation
NOTES ON SAFE USE If the appliance starts to give off smoke, switch it off immedi- ► ately or remove the plug from the mains, and keep the door closed to smother any fl ames that might otherwise escape. Eggs in their shells and hard-boiled eggs should not be ►... -
Seite 58: Before You Begin
INTERFERENCE WITH OTHER APPLIANCES The operation of the microwave may cause interference on ► your radio, television or similar appliances. If such interference occurs, it can be reduced or corrected by the following remedial measures: Clean the door and the seals of the microwave. –... -
Seite 59: Use Suitable Cookware
Use suitable cookware ■ The ideal material for a microwave oven is microwave-permeable, allowing the energy to penetrate the container to heat the food. Microwaves cannot permeate metal. For this reason, metal containers and cookware should not be used. ■ When using the microwave for heating, do not use products made of recycled paper. -
Seite 60: First Use
First use NOTE ON HEATING UP FOR THE FIRST TIME Never operate the microwave in "Microwave" mode ► when it is empty! When heating up for the fi rst time, operate the ► microwave without food or accessories in the operating mode "Grill"... -
Seite 61: Preparing The Appliance
Preparing the appliance ■ Remove the packaging material and the protective fi lms from the panel and the door opener button 2. CAUTION – PROPERTY DAMAGE! Do not remove the light grey mica cover plate, which is mounted inside the cooking chamber to protect the magnetron. -
Seite 62: Inserting The Turntable
NOTE ► The appliance may generate light smoke and a slight smell during initial use. This is due to the production residues and is not harmful. Provide for suffi cient ventilation. For example, open a window. After 5 minutes, the appliance will switch itself off automatically. Wait until it has cooled down completely. -
Seite 63: Standby Mode
Standby mode The microwave oven automatically switches to standby mode and the time is displayed if no button is pressed for a long time. A few seconds after switching to standby mode, the display lighting is also dimmed. Setting the kitchen timer The microwave oven is provided with a kitchen timer which you can use indepen- dently of the microwave operation. -
Seite 64: Pause/Cancel Cooking Or Defrosting Operations
Query the power level during operation During the cooking process press the microwave button 6 . The current power level appears for a few seconds on the display 1. Pause/cancel cooking or defrosting operations Press the stop button e ■ once to pause a cooking or defrosting pro- cess. -
Seite 65: Aborting/Stopping An Input Process
Programming the cooking time After you have selected the power level, programme in the desired cooking time: Turn the control dial r ■ , until the desired cooking time has been set. The increments for setting the time with the control dial r are as follows: –... -
Seite 66: Grill Function
Grill function WARNING – RISK OF FIRE! ► When using the grill function, do not use any form of lid or cookware that is not heat resistant, as these could melt or set on fi re! NOTE Always use the grill stand t when grilling. This way you will achieve optimal ►... -
Seite 67: Combination Cooking Mode "Grill
Combination cooking mode "Grill" This function combines the grill function and the normal microwave operation. In combination mode, a certain amount of time is automatically set aside for cooking and the remaining time for grilling in a single process. You may notice a quiet clicking noise when the oven is switching between modes. -
Seite 68: Convection Operation
3) Set the required cooking time with the control dial r . The maximum possible cooking time setting is 95 minutes. 4) To start, press the start/quick start button r The symbols of the cooking process being used appear on the screen 1. -
Seite 69: Combination Cooking Mode "Convection
appears permanently on the display 1. The pro- The convection symbol grammed time counts down. When the set time has elapsed, "End" and "Hot" will appear alternately in the display 1. You will hear a series of beeps. Combination cooking mode "Convection" This function combines the convection function with the normal microwave opera- tion. -
Seite 70: Automatic Menu
Automatic menu It is not necessary to program the duration of the cooking process and the power level for foods that are prepared in the automatic menu mode. You only need to enter the type of food you wish to cook and its weight. WARNING –... - Seite 71 Display Symbol Food Weight A-04 Fish 200–1200 g * P1 150–450 g A-05 Pizza P2 150–450 g P3 150–450 g A-06 Fruit/vegetables 100–1000 g A-07 Potatoes 100–800 g A-08 Heating up 300–700 g A-09 Beverages 200–500 ml A-10 Entrees 300 / 500 g Defrosting A-11 by weight...
- Seite 72 NOTE ► To ensure uniform heating or cooking, some foods should be turned after 2/3 of the cooking time. The microwave oven will stop automatically after this time. You will hear four beeps and "Turn" appears on the display 1. Display Symbol Food...
- Seite 73 Finish cooking Display Symbol Food with... Combination cooking A-01 Beef mode "Grill" - C3 Combination cooking A-02 Pork mode "Grill" - C3 Combination cooking A-03 Poultry mode "Grill" - C3 Combination cooking A-04 Fish mode "Grill" - C3 Automatic menu A-05 Pizza "Pizza"...
-
Seite 74: Baking Pizza
RISK OF INJURY! After a cooking cycle, the turntable 3 is very hot! You should therefore ► always use an oven cloth or heat resistant oven gloves when removing it from the cooking area. NOTE ► Please note that the size, shape and the type of foodstuff aff ects the result of the cooking process. - Seite 75 3) Use the control dial r to select the appropriate pizza programme: – "P-01" for deep-frozen pizza, temperature approx. -18°C Weight 150 g–450 g ("P-01" appears on the display 1). – "P-02" for chilled pizza, temperature approx. 5°C, Weight 150 g–450 g ("P-02"...
-
Seite 76: Defrosting
Defrosting Defrosting by weight NOTE ► Always place the food to be defrosted on dishes suitable for use in a micro- wave oven. Never directly onto the turntable 3! You can use this function to defrost meat, poultry, fi sh, fruit/vegetables and pizza. The defrosting time and the power level are calculated and set automatically once you have entered the weight. - Seite 77 4) Once the desired food item appears on the display 1, press the start/quick start button r 5) Now select the weight by turning the control dial r The following weights can be set: Display Symbol Food Weight d-01 Beef 100 –...
-
Seite 78: Defrosting By Time
NOTE ► To ensure optimum defrosting, it is necessary to turn the food during the thawing process. The appliance reminds you of the need to turn by beep- ing and "turn" appears on the display 1. Open the appliance door, turn the food and then reclose the door. -
Seite 79: Recipes
Recipes Rissoles Preparation 1) Shape approx.125 g of minced beef into a patty (roughly 75 mm in diameter and 35 mm thick). 2) Distribute the rissoles evenly on the turntable 3. 3) You will get the best results if you use the convection and microwave functions alternately. -
Seite 80: Muffi Ns
Preparation 1) Cut the potatoes into slices approximately 3–4 mm thick. 2) Lay about half of the potatoes in the casserole dish in the style of roof tiles. 3) Sprinkle the potatoes with about half of the cheese. 4) Then add half of the spices and about 150 g of cream. 5) Lay the rest of the sliced potatoes on top, also in the style of roof tiles. -
Seite 81: Courgette Soup
Preparation 1) Mix all ingredients well. 2) Add the muffi n pastry into standard commercial paper baking cases (diameter 45 mm, height 28 mm) 3) Preheat the oven with the convection function to 170°C. NOTE ► If the number of muffi ns requires multiple baking operations are necessary, preheating is required only for the fi... -
Seite 82: Chocolate Apple Cake
Chocolate apple cake Ingredients ▯ 125 g butter ▯ 125 g sugar ▯ 1 packet of vanilla sugar ▯ 2 eggs ▯ 125 g fl our ▯ 2 tbsp. cocoa powder ▯ 1/2 packet baking powder ▯ 1 apple ▯ a little icing sugar Preparation 1) Mix the sugar, softened butter, vanilla sugar, eggs, fl... -
Seite 83: Meat Loaf
Meat loaf Ingredients ▯ 500 g minced meat (half and half) ▯ 1/2 onion ▯ 1 egg ▯ 1/2 bread roll ▯ Pepper, salt, paprika powder For the sauce: ▯ 75 ml water ▯ 1 tbsp mustard ▯ 2 tbsp. tomato ketchup ▯... -
Seite 84: Cleaning And Care
Cleaning and care DANGER! ELECTRIC SHOCK! ► Before cleaning, switch the microwave oven off and remove the plug from the mains power socket. Otherwise, there is the great risk of receiving an electric shock! Never immerse the device in water or other liquids. This could result in you receiving a fatal electric shock and the appliance could be damaged. -
Seite 85: Troubleshooting
Troubleshooting PROBLEM POSSIBLE CAUSE POSSIBLE SOLUTIONS The plug is not inserted into Check the plug. a mains power socket. There is nothing on the The mains power socket is Try another mains power display 1. defective. socket. The display 1 is defective. Contact Customer Service. -
Seite 86: Disposal
PROBLEM POSSIBLE CAUSE POSSIBLE SOLUTIONS Stop the programme and re- move the power plug. If pos- sible, eliminate the problem, The microwave has switched "E03" appears on the e.g. metals in the cooking into fault protection due to display 1 and you hear area, which can lead to the a short circuit or open-circuit beeps. -
Seite 87: Importer
Repairs carried out after expiry of the warranty period shall be subject to charge. Service Great Britain Tel.: 0871 5000 720 (£ 0.10/Min.) E-Mail: kompernass@lidl.co.uk IAN 275170 Service Malta Tel.: 80062230 E-Mail: kompernass@lidl.com.mt... - Seite 88 Inhaltsverzeichnis Einleitung ........... . 87 Bestimmungsgemäßer Gebrauch .
- Seite 89 Rezepte ........... . 118 Frikadellen .
-
Seite 90: Einleitung
Einleitung Herzlichen Glückwunsch zum Kauf Ihres neuen Gerätes. Sie haben sich damit für ein hochwertiges Produkt entschieden. Die Bedienungs- anleitung ist Bestandteil dieses Produkts. Sie enthält wichtige Hinweise für Sicherheit, Gebrauch und Entsorgung. Machen Sie sich vor der Benutzung des Produkts mit allen Bedien- und Sicherheitshinweisen vertraut. -
Seite 91: Gerätebeschreibung
Gerätebeschreibung Abbildung A: 1 Display 2 Taste Türöff ner 3 Drehteller 4 Rollen 5 Lüftungsschlitze Abbildung B: 6 Taste Mikrowelle 7 Taste Grill 8 Taste Kombination Mikrowelle - Grill 9 Taste Kombination Mikrowelle - Heißluft 0 Taste Heißluft q Taste Uhr w Taste TIMER (Küchentimer) e Taste Stop / Kindersicherung r Drehregler / Taste Start / Schnellstart... -
Seite 92: Wichtige Sicherheitshinweise
Wichtige Sicherheitshinweise Lesen Sie die Sicherheitshinweise und die Bedienungsanleitung vor der ersten Ver- wendung aufmerksam durch und heben Sie diese für den späteren Gebrauch auf. GEFAHR! ELEKTRISCHER SCHLAG! Ein Warnhinweis dieser Gefahrenstufe kennzeichnet eine mögliche gefährliche Situation. Falls die gefährliche Situation nicht vermieden wird, kann dies zum Tod oder schweren Verletzungen führen. -
Seite 93: Warnung - Verletzungsgefahr
Klemmen Sie nichts zwischen Gerätefront und Tür und sorgen ► Sie dafür, dass sich keine Verschmutzungen oder Reinigungs- mittelrückstände auf den Dichtfl ächen ansammeln. GEFAHR! ELEKTRISCHER SCHLAG! Tauchen Sie nie das Netzkabel oder den Netzstecker in ► Wasser oder andere Flüssigkeiten. Halten Sie das Netzkabel von Hitzequellen fern. - Seite 94 WARNUNG - VERLETZUNGSGEFAHR! Reinigung und Benutzer-Wartung dürfen nicht durch Kinder ► durchgeführt werden, es sei denn, sie sind 8 Jahre und älter und werden beaufsichtigt. Kinder jünger als 8 Jahre sind vom Gerät und der Anschluss- ► leitung fernzuhalten. Verwenden Sie dieses Gerät nur zum bestimmungsgemäßen ►...
- Seite 95 WARNUNG - VERLETZUNGSGEFAHR! Personen, die einen Herzschrittmacher tragen, sollten sich ► vor Inbetriebnahme der Mikrowelle bei ihrem Hausarzt über mögliche Risiken informieren. Lassen Sie das Netzkabel nie über den Tisch oder die Ar- ► beitsplatte hängen. Kinder könnten daran ziehen. Öff...
- Seite 96 WARNUNG - VERLETZUNGSGEFAHR! Achtung! Heiße Oberfl äche! WARNUNG - BRANDGEFAHR! Lassen Sie die Mikrowelle nie unbeaufsichtigt, wenn Sie Le- ► bensmittel in Plastikoder Papierverpackungen erhitzen. Stellen Sie keine brennbaren Materialien in der Nähe der ► Mikrowelle oder der Lüftungsöff nungen auf. Entfernen Sie alle metallischen Verschlüsse der Verpackungen ►...
- Seite 97 WARNUNG - BRANDGEFAHR! Tauen Sie kein gefrorenes Fett oder Öl in der Mikrowelle ► auf. Das Fett oder Öl kann sich entzünden. Benutzen Sie keine externe Zeitschaltuhr oder ein separates ► Fernwirksystem, um das Gerät zu betreiben. Diese Mikrowelle ist für die Erwärmung von Speisen und ►...
- Seite 98 ACHTUNG - SACHSCHADEN! Flüssigkeiten und sonstige Nahrungsmittel dürfen nicht in ► luftdicht verschlossenen Behältern erhitzt werden, da diese explodieren und das Gerät beschädigen können. Lehnen Sie sich nicht auf die Mikrowellentür. ► Mangelhafte Sauberkeit des Kochgerätes kann zu einer ► Zerstörung der Oberfl...
- Seite 99 HINWEISE ZUM SICHEREN UMGANG Wenn das Gerät Rauch abgibt, ist das Gerät abzuschalten ► oder der Stecker zu ziehen und die Tür geschlossen zu hal- ten, um eventuell auftretende Flammen zu ersticken. Eier in der Schale und hart gekochte Eier dürfen nicht in ►...
-
Seite 100: Funkstörungen Bei Anderen Geräten
FUNKSTÖRUNGEN BEI ANDEREN GERÄTEN Der Betrieb der Mikrowelle kann Störungen bei Ihrem ► Radio, Fernseher oder ähnlichen Geräten hervorrufen. Falls solche Interferenzen auftreten sollten, lassen sie sich mit Hilfe der folgenden Maßnahmen vermindern oder ausschalten: Tür und Dichtfl äche der Mikrowelle säubern. –... -
Seite 101: Geeignetes Kochgeschirr Verwenden
Geeignetes Kochgeschirr verwenden ■ Das ideale Material für einen Mikrowellenherd ist mikrowellendurchlässig, lässt also die Energie durch den Behälter hindurch, um die Speise zu erwärmen. Mikrowellen sind nicht in der Lage, Metall zu durchdringen. Aus diesem Grund dürfen keine Metallgefäße und kein Metallgeschirr verwendet werden. ■... -
Seite 102: Erste Inbetriebnahme
Erste Inbetriebnahme HINWEIS ZUM ERSTEN AUFHEIZEN Betreiben Sie die Mikrowelle niemals in der Be- ► triebsart „Mikrowelle“ im Leerzustand! Betreiben Sie die Mikrowelle ausschließlich beim ► ersten Aufheizen ohne Zubehör und Lebensmittel in der Betriebsart „Grill“ (Gr 3)! (siehe Kapitel „Gerät vorbereiten”) Gerät aufstellen WARNUNG - BRANDGEFAHR! ►... -
Seite 103: Gerät Vorbereiten
Gerät vorbereiten ■ Entfernen Sie das Verpackungsmaterial und die auf dem Panel und der Taste Türöff ner 2 angebrachte Schutzfolie. ACHTUNG - SACHSCHADEN! Entfernen Sie nicht die hellgraue Glimmer-Abdeckplatte, die zum Schutz der Magnetfeldröhre im Garraum ange- bracht ist. ■ Stecken Sie den Netzstecker in eine Netzsteckdose. -
Seite 104: Drehteller Einsetzen
HINWEIS ► Bei der ersten Inbetriebnahme kann es durch fertigungsbedingte Rück- stände zu leichter Rauch- und Geruchsentwicklung kommen. Dieses ist unschädlich. Sorgen Sie für eine ausreichende Belüftung. Öff nen Sie zum Beispiel ein Fenster. Nach 5 Minuten schaltet sich das Gerät automatisch aus. Warten Sie, bis es vollständig abgekühlt ist. -
Seite 105: Standby-Modus
Standby-Modus Die Mikrowelle schaltet automatisch in den Standby-Modus und die Uhrzeit wird angezeigt, wenn für längere Zeit keine Taste gedrückt wird. Wenige Sekunden nach der Umstellung in den Standby-Modus wird auch die Displaybeleuchtung gedimmt. Küchentimer einstellen Die Mikrowelle verfügt über einen Küchentimer, den Sie unabhängig vom Mikro- wellenbetrieb einsetzen können. -
Seite 106: Gar- Oder Auftauvorgänge Unterbrechen/Abbrechen
Leistungsstufe während des Betriebs abfragen Drücken Sie während des Garvorgangs die Taste Mikrowelle 6 . Im Display 1 erscheint für einige Sekunden die aktivierte Leistungsstufe. Gar- oder Auftauvorgänge unterbrechen/abbrechen Drücken Sie einmal die Taste Stop e ■ , um einen Gar- oder Auftauvor- gang zu unterbrechen. -
Seite 107: Garzeit Einstellen
Garzeit einstellen Nachdem Sie die Leistung ausgewählt haben, stellen Sie die gewünschte Garzeit ein: Drehen Sie den Drehregler r ■ , bis die gewünschte Garzeit eingestellt ist. Die Stufen für die Einstellungszeit des Drehreglers r sind wie folgt: – von 0 Sek. bis 5 Min.: in 10-Sek.-Schritten –... -
Seite 108: Grill-Funktion
Grill-Funktion WARNUNG - BRANDGEFAHR! ► Benutzen Sie bei Verwendung der Grill-Funktionen auf keinen Fall Abdeckun- gen oder nicht hitzebeständiges Geschirr, da diese schmelzen oder in Brand geraten können! HINWEIS Benutzen Sie zum Grillen immer den Grillständer t. So erzielen Sie ein ►... -
Seite 109: Kombinations-Garvorgang „Grill
Kombinations-Garvorgang „Grill“ Diese Funktion vereint die Grill-Funktion mit dem normalen Mikrowellenbetrieb. Während des Kombinationsvorgangs wird eine bestimmte Zeit für Garen und die übrige Zeit für Grillen automatisch und in einem Vorgang ausgeführt. Den Umschaltzeitpunkt des Gerätes können Sie durch ein leises Klicken wahrnehmen. WARNUNG - BRANDGEFAHR! Benutzen Sie niemals den Grillständer t oder andere metallische Gegen- ►... -
Seite 110: Heißluftbetrieb
3) Stellen Sie mit dem Drehregler r die gewünschte Garzeit ein. Die maxi- mal einstellbare Garzeit beträgt 95 Minuten. 4) Drücken Sie zum Starten die Taste Start/Schnellstart r Im Display 1 erscheinen die Symbole der jeweils verwendeten Garvorgänge . Die eingestellte Zeit zählt rückwärts herunter. Wenn die eingestellte Zeit abgelaufen ist, erscheint abwechselnd „End“... -
Seite 111: Kombinations-Garvorgang „Heißluft
Im Display 1 erscheint das Symbol für Heißluftbetrieb dauerhaft. Die eingestellte Zeit zählt rückwärts herunter. Wenn die eingestellte Zeit abgelaufen ist, erscheint abwechselnd „End“ und „Hot“ im Display 1. Ein Signalton ertönt mehrmals hintereinander. Kombinations-Garvorgang „Heißluft“ Diese Funktion vereint die Heißluft-Funktion mit dem normalen Mikrowellenbe- trieb. -
Seite 112: Automatik-Menü
Automatik-Menü Für Speisen, die im Automatik-Menümodus zubereitet werden sollen, ist es nicht notwendig, die Dauer des Garvorgangs und die Leistungsstufe einzugeben. Es reicht vielmehr aus, wenn Sie eingeben, welche Art Lebensmittel gegart/gekocht werden soll, sowie das Gewicht dieses Lebensmittels. WARNUNG - BRANDGEFAHR! ►... - Seite 113 Display Symbol Lebensmittel Gewicht A-04 Fisch 200 - 1200 g * P1 150 - 450 g A-05 Pizza P2 150 - 450 g P3 150 - 450 g A-06 Obst / Gemüse 100 - 1000 g A-07 Kartoff eln 100 - 800 g A-08 Aufwärmen 300 - 700 g...
- Seite 114 HINWEIS ► Um ein gleichmäßiges Kochen oder Garen zu erreichen, sollten einige Speisen nach 2/3 der Garzeit gewendet werden. Die Mikrowelle stoppt nach dieser Zeit automatisch, 4 Signaltöne erklingen und „Turn“ erscheint im Display 1. Display Symbol Lebensmittel Wenden nach... A-01 Rind 2/3 der Zeit...
- Seite 115 Display Symbol Lebensmittel Nachgaren mit... Kombinations- A-01 Rind Garvorgang „Grill” - C3 Kombinations- A-02 Schwein Garvorgang „Grill” - C3 Kombinations- A-03 Gefl ügel Garvorgang „Grill” - C3 Kombinations- A-04 Fisch Garvorgang „Grill” - C3 Automatikmenü A-05 Pizza „Pizza” - P2 Mikrowellenbetrieb A-06 Obst / Gemüse...
-
Seite 116: Pizza Backen
VERLETZUNGSGEFAHR! Der Drehteller 3 ist nach einem Garvorgang mit Grill sehr heiß! Benutzen ► Sie daher unbedingt Topfl appen oder hitzebeständige Handschuhe wenn Sie ihn aus dem Garraum entnehmen. HINWEIS ► Bitte beachten Sie, dass Größe, Form und die Sorten der Lebensmittel das Kochergebnis mitbestimmen. - Seite 117 3) Wählen Sie mit Hilfe des Drehreglers r das passende Pizza-Programm: – „P-01“ für tiefgefrorene Pizza, Temperatur ca. -18 Grad Gewicht 150 g – 450 g („P-01“ erscheint im Display 1). – „P-02 für gekühlte Pizza, Temperatur ca. 5 Grad, Gewicht 150 g –...
-
Seite 118: Auftauen
Auftauen Auftauen nach Gewicht HINWEIS ► Legen Sie die aufzutauenden Lebensmittel immer auf für Mikrowellen geeignetes Geschirr. Niemals direkt auf den Drehteller 3! Mit dieser Funktion können Sie problemlos Fleisch, Gefl ügel, Fisch, Obst/Gemüse und Pizza auftauen. Die Auftauzeit und die Leistungsstufe werden nach Eingabe des Gewichts automatisch errechnet und eingestellt. - Seite 119 4) Wenn das gewünschte Lebensmittel im Display 1 erscheint, drücken Sie die Taste Start/Schnellstart r 5) Stellen Sie durch Drehen des Drehreglers r das Gewicht ein. Es lassen sich folgende Gewichte einstellen: Display Symbol Lebensmittel Gewicht d-01 Rind 100 - 1800 g d-02 Schwein 100 - 1800 g...
-
Seite 120: Auftauen Nach Zeit
HINWEIS ► Um ein optimales Auftauen zu gewährleisten, ist es nötig die Speisen während des Auftauvorganges zu wenden. Das Gerät erinnert Sie an das Wenden, indem Signaltöne erklingen und auf dem Display 1 „turn“ erscheint. Öff nen Sie die Gerätetür, wenden Sie die Speise und schließen Sie die Gerätetür wieder. -
Seite 121: Rezepte
Rezepte Frikadellen Zubereitung 1) Formen Sie je ca. 125 g Rinderhackfl eisch zu einer Frikadelle (Durchmesser ca. 75 mm, Höhe ca. 35 mm). 2) Verteilen Sie die Frikadellen gleichmäßig auf dem Drehteller 3. 3) Das beste Ergebnis erzielen Sie wenn Sie Heißluft und Mikrowellen-Funktion abwechselnd benutzen. -
Seite 122: Muffi Ns
Zubereitung 1) Schneiden Sie die Kartoff eln in ca. 3 – 4 mm dicke Scheiben. 2) Legen Sie ungefähr die Hälfte der Kartoff eln dachziegelartig in die Aufl auff orm. 3) Bestreuen Sie die Kartoff eln mit ca. der Hälfte des Käses. 4) Geben Sie die Hälfte der Gewürze hinzu sowie ca. -
Seite 123: Zucchinisuppe
Zubereitung 1) Mischen Sie alle Zutaten gut durch. 2) Füllen Sie den Muffi nteig in handelsübliche Papier-Backförmchen (Durchmesser ca. 45 mm,Höhe ca. 28 mm) 3) Heizen Sie die Mikrowelle mit der Heißluft-Funktion auf 170°C vor. HINWEIS ► Sollten Sie bedingt durch die Anzahl der Muffi ns mehrere Backvorgänge benötigen, ist das Vorheizen nur einmal erforderlich. -
Seite 124: Schoko-Apfel-Kuchen
Schoko-Apfel-Kuchen Zutaten ▯ 125 g Butter ▯ 125 g Zucker ▯ 1 Päckchen Vanillezucker ▯ 2 Eier ▯ 125 g Mehl ▯ 2 EL Kakaopulver ▯ 1/2 Päckchen Backpulver ▯ 1 Apfel ▯ etwas Puderzucker Zubereitung 1) Vermischen Sie den Zucker, die weiche Butter, den Vanillezucker, die Eier, das Mehl, das Bakkpulver und das Kakaopulver zu einem Teig. -
Seite 125: Hackbraten
Hackbraten Zutaten ▯ 500 g Hackfl eisch (halb/halb) ▯ 1/2 Zwiebel ▯ 1 Ei ▯ 1/2 Brötchen ▯ Salz, Pfeff er, Paprikapulver für die Soße: ▯ 75 ml Wasser ▯ 1 EL Senf ▯ 2 EL Tomatenketchup ▯ 2 EL Bratensaft ▯... -
Seite 126: Reinigung Und Pfl Ege
Reinigung und Pfl ege GEFAHR! ELEKTRISCHER SCHLAG! ► Schalten Sie vor dem Säubern die Mikrowelle ab und ziehen Sie den Netzstecker aus der Netzsteckdose. Ansonsten besteht die Gefahr eines elektrischen Schlages! Auf keinen Fall darf das Gerät in Wasser oder andere Flüssigkeiten getaucht werden. -
Seite 127: Fehlerbehebung
Fehlerbehebung PROBLEM MÖGLICHE URSACHE MÖGLICHE LÖSUNGEN Der Netzstecker steckt nicht Kontrollieren Sie den in der Netzstekkdose. Netzstecker. Das Display 1 zeigt nichts Probieren Sie eine andere Die Netzsteckdose ist defekt. Netzsteckdose. Das Display 1 ist defekt. Kontaktieren Sie den Service. Deaktivieren Sie die Das Gerät reagiert nicht auf Die Kindersicherung ist... -
Seite 128: Entsorgen
PROBLEM MÖGLICHE URSACHE MÖGLICHE LÖSUNGEN Unterbrechen Sie das Pro- gramm und ziehen Sie den Netzstecker. Beheben Sie, Die Mikrowelle ist, aufgrund falls möglich das Problem, eines Kurzschlusses oder z.B. Metall im Garraum, Das Display 1 zeigt „E03“ einer Leerlaufspannung, welches bei Nutzung der an und Signaltöne erklingen. -
Seite 129: Importeur
Auspacken gemeldet werden, spätestens aber zwei Tage nach Kaufdatum. Nach Ablauf der Garantiezeit anfallende Reparaturen sind kostenpfl ichtig. Service Deutschland Tel.: 0800 5435 111 (Kostenfrei aus dem dt. Festnetz/Mobilfunknetz) E-Mail: kompernass@lidl.de IAN 275170 Service Österreich Tel.: 0820 201 222 (0,15 EUR/Min.) E-Mail: kompernass@lidl.at... - Seite 130 KOMPERNASS HANDELS GMBH BURGSTRASSE 21 44867 BOCHUM DEUTSCHLAND / GERMANY www.kompernass.com Versione delle informazioni · Last Information Update Stand der Informationen: 02 / 2016 · Ident.-No.: SMW900EDSB4-012016-1 IAN 275170...