Inhaltsverzeichnis
Werbung
Verfügbare Sprachen
Verfügbare Sprachen
Werbung
Kapitel
Inhaltsverzeichnis

Inhaltszusammenfassung für Klarstein 10032348
- Seite 1 Standventilator Stand Fan 10032348...
-
Seite 3: Inhaltsverzeichnis
Sehr geehrter Kunde, wir gratulieren Ihnen zum Erwerb Ihres Gerätes. Lesen Sie die folgenden Hinweise sorgfältig durch und befolgen Sie diese, um möglichen Schäden vorzubeugen. Für Schäden, die durch Missachtung der Hinweise und unsachgemäßen Gebrauch entstehen, übernehmen wir keine Haftung. INHALT Technische Daten 4 Sicherheitshinweise 5... -
Seite 4: Technische Daten
TECHNISCHE DATEN Artikelnummer 10032348 Stromversorung 220-240 V~ 50/60 Hz Leistung 65 W Stromverbrauch im Standby ≤ 0,5 W ≤ 60 dB Lärmemission Höhe 1,40 m Eigenschaften • Timer 1, 2, 3, 4, 8 Stunden • Leichte Steuerung per Fernbedienung • Stufen: Hoch/Mittel/Niedrig •... -
Seite 5: Sicherheitshinweise
SICHERHEITSHINWEISE Dieses Gerät darf von Kindern ab 8 Jahren und Personen mit eingeschränkten körperlichen, sensorischen und geistigen Fähigkeiten und Kenntnissen verwendet werden, wenn sie in die sichere Verwendung des Gerätes eingewiesen wurden und die damit verbundenen Gefahren verstehen. Kinder dürfen nicht mit dem Gerät spielen. Die Reinigung und Wartung darf von Kindern nicht ohne Aufsicht durchgeführt werden. -
Seite 6: Gerätebeschreibung
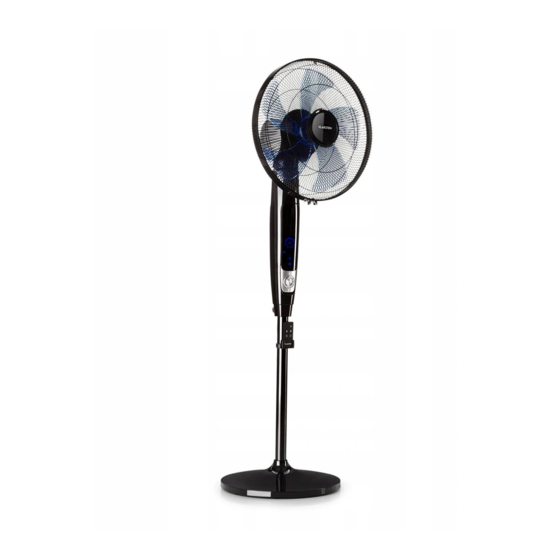
GERÄTEBESCHREIBUNG Blende vorderes Schutzgitter Rotorschraube Ventilatorblätter Schutzgitterring Schraube Halteklammer für Schutzgitterring Mutter für Schutzgitter hinteres Schutzgitter 10 Gehäuse 1 1 Netzkabel 12 Stellschraube 13 Standrohr 14 Fuß 15 Schraube... -
Seite 8: Aufstellung
AUFSTELLUNG Öffnen Sie den Karton. Nehmen Sie das Gerät heraus. Achten Sie darauf, dass alle Teile enthalten sind. Montieren Sie den Ventilator nach den Schritten weiter unten. -
Seite 10: Bedienung
BEDIENUNG Alle Funktionen können mit der Berührung der Tasten auf dem Bedienfeld ausgeführt werden. Wenn Sie den Ventilator zum ersten Mal an die Stromversorgung anschließen, meldet sich das Gerät mit einem zweifachen Piepton. Dann geht der Ventilator in den Bereitschaftsmodus (Standby), in dem nur die Ein/Aus-Taste funktioniert. Ein- und Ausschalten 1. - Seite 11 T=90S T=90S T=90S Schlafmodus Hoch: 30 Min. Naturwind (hoch) - 30 Min. Naturwind (mittel) - Naturwind (niedrig) Mittel: 30 Min. Nturwind (mittel)- Naturwind (niedrig) Die aktuelle Stufe wird im Display nicht angezeigt. Timer Nach dem Einschalten ist keine Zeit voreingestellt und es gibt keine Timer-Anzeige. Die Taste TIMER drücken, um die Laufzeit für den Ventilator einzustellen.
-
Seite 12: Wartung Und Reinigung
WARTUNG UND REINIGUNG Austausch der Battterie der Fernbedienung 1. Öffen Sie das Batteriefach auf der Rückseit der Fernbedienung. Setzen Sie eine Knopfzelle (Typ CR2032) ein. 2. Die Fernbedienung am Empfänger ausrichten. Die Fernbedienung funktioniert nicht, wenn Sie blockiert wird. 3. Tauschen Sie die Batterie aus, wenn das Gerät ausgeschaltet ist. Beachten Sie die Polung. -
Seite 13: Hinweise Zur Entsorgung
HINWEISE ZUR ENTSORGUNG Befindet sich die linke Abbildung (durchgestrichene Mülltonne auf Rädern) auf dem Produkt, gilt die Europäische Richtlinie 2012/19/EU. Diese Produkte dürfen nicht mit dem normalen Hausmüll entsorgt werden. Informieren Sie sich über die örtlichen Regelungen zur getrennten Sammlung elektrischer und elektronischer Gerätschaften. - Seite 15 Dear Customer, Congratulations on purchasing this equipment. Please read this manual carefully and take care of the following hints on installation and use to avoid technical damages. Any failure caused by ignoring the items and cautions mentioned in the operation and installation instructions are not covered by our warranty and any liability.
-
Seite 16: Technical Data
TECHNICAL DATA Item number 10032348 Power supply 220-240 V~ 50/60 Hz Power 65 W Standby power consumption ≤ 0.5 W Noise ≤. 60 dB Height 1.4 m Features • TIMING 1, 2, 4, 8H; • Easy control with remote control;... -
Seite 17: Safety Instructions
SAFETY INSTRUCTIONS It should be under supervision when the appliance is used by children aged from 8 years or above, or the persons with reduced physical, sensory or mental capabilities or lack of experience and knowledge, and make sure their safety and are well acknowledged with the potential danger. -
Seite 18: Parts
• Must ensure that the supply voltage and the voltage specified on the nameplate is consistent. • Please confirm the voltage when move to a new place. • DO NOT COVER • Do not put anything on the unit. PARTS decoration cover front grill blade nut... -
Seite 20: Installation
INSTALLATION Open the package and take out the products , make sure all components are included, IM, remote control. Install the fan according to below instructions... -
Seite 22: Operation
OPERATION All functions can be operated by tickling the buttons on the control panel.. When first plug in, the fan with “Bi Bi” sound alerts, then the fan will under standby status, in which no button works except “ON/OFF”. On/Off 1. - Seite 23 strong T=90S T=90S T=90S Sleeping wind High:30 minutes’ high natural wind—30 minutes medium natural wind-low natural wind(keeping) Medium:30 minutes’ medium natural wind—low natural wind(keeping) The speed led display do not change as the wind speed at natural and sleeping mode. Timer After turned on, there is no time setting by default and no TIMER led display.
-
Seite 24: Maintenance
MAINTENANCE Change of the batties in the remote control 1. Open the battery box on the back of remote control, and install One button battery (CR2032 3V). 2. Align to the remote control receiver. The RC will not work when blocked. Well keep the remote control, do not throw it to the floor. -
Seite 25: Disposal Considerations
DISPOSAL CONSIDERATIONS According to the European waste regulation 2012/19/EU this symbol on the product or on its packaging indicates that this product may not be treated as household waste. Instead it should be taken to the appropriate collection point for the recycling of electrical and electronic equipment.


