
Verwandte Anleitungen für CAME BPT TA/350


Inhaltszusammenfassung für CAME BPT TA/350
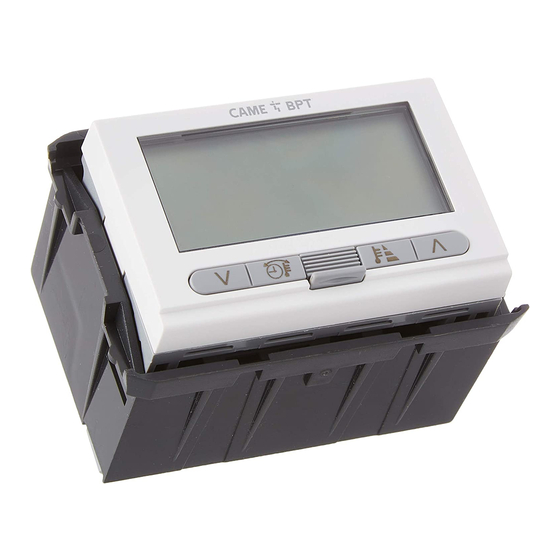
- Seite 1 Termostato digitale FB00942M04 IT Italiano TA/350 EN English FR Français MANUALE DI INSTALLAZIONE ED USO DE Deutsch...
-
Seite 2: Avvertenze Generali
Avvertenze generali • Leggere attentamente le istruzioni prima di iniziare l’installazione ed eseguire gli interventi come specificato dal costruttore. • L’installazione, la programmazione, la messa in servizio e la manutenzione del prodotto devono essere effettuate soltanto da personale tecnico qualificato ed opportunamente addestrato nel rispetto delle normative vigenti ivi comprese le osservanze sulla prevenzione infortuni e lo smaltimento imballaggi. -
Seite 3: Installazione
Installazione Contenuto della confezione Controtelai Telaio Adattatori copriforo Corpo principale Viti per fissaggio NOTA: Sono disponibili come componenti opzionali, cover e adattatori copriforo grigio antracite e grigio alluminio. I controtelai e gli adattatori copriforo opportunamente abbinati, permettono di adattare il dispositivo alle maggior parte delle serie civili in commercio seguendo le indicazioni delle pagine seguenti. - Seite 4 Come abbinare/adattare i controtelai alle serie civili BTICINO - Light, Light Tech, Living International. VIMAR - Plana, Eikon. LEGRAND - Vela Quadra, Vela Tonda, Serie Cross. GEWISS - Playbus, Playbus Young. BTICINO - Matix.
- Seite 5 AVE - Banquise, Sistema 45. VIMAR - Idea, Idea Rondò. ABB - Elos.
- Seite 6 GEWISS - System. BTICINO - Axolute, Luna. BTICINO - Livinglight Qua- dre. VIMAR - Arché BTICINO - Livinglight Tonde. GEWISS - Chorus.
- Seite 7 AVE - Serie 44. BTICINO - Livinglight AIR. VIMAR - Eikon Evo. BTICINO - Axolute Air.
- Seite 8 Installare l’apparecchio in posizione idonea a rilevare correttamente la temperatura dell’ambiente, possibilmente in una parete interna, evitando l’installazione in nicchie, dietro a porte, a tende o vicino a sorgenti di calore. Estrarre la linguetta L e quindi il corpo dell’apparecchio dal telaio fino all’arresto Premere sulle alette laterali in corrisponden- za del simbolo per estrarre completa-...
-
Seite 9: Collegamenti Elettrici
Collegamenti elettrici I collegamenti vanno effettuati in funzione del tipo di apparecchiatura comandata dal cronotermostato. LEGENDA Conduttori di alimentazione da rete NCNA C N = neutro L = fase Contatti del relé C = comune NA = contatto normalmente aperto NC = contatto normalmente chiuso Carichi U1 = bruciatore, pompa di circolazione,... - Seite 10 Installazione Una volta assemblati telaio e controtelaio scelti ed avere eseguito i collegamenti elettrici, assemblare il cronotermostato come mostrato in figura H.
-
Seite 11: Descrizione Dispositivo
Descrizione dispositivo Descrizione delle icone sul display e funzione dei pulsanti frontali ① ② ③ ④ ⑤ ⑥ ⑦ ⑧ ⑨ ⑯ ⑩ ⑪ ⑮ ⑭ ⑬ ⑫ ⑪ ① ⑩ Temperatura rilevata. Stato di carica della batteria. Pulsanti per la variazione dei ②... - Seite 12 Funzione dei pulsanti interni Per accedere ai pulsanti di comando interni estrarre la linguetta ⑬ e quindi il corpo dell’apparecchio dal telaio. ⑰ ⑱ ⑲ ⑳ ㉑ ㉒ ㉓ ㉔ ⑰ Pulsante di reset. ⑱ Impostazione dell’orologio. ⑲ Impostazione parametri di funzionamento. Selezione della modalità...
-
Seite 13: Uso Del Dispositivo
Uso del dispositivo Impostazione dell’orologio TA350 Estrarre il corpo dell’apparecchio. Premere il pulsante per visualizzare l’orologio. Premere il pulsante Le cifre dei minuti lampeggiano. Usare i pulsanti per impostare il valore esatto dei minuti B. TA350 Premere il pulsante Le cifre delle ore lampeggiano. Usare i pulsanti per impostare l’ora esatta D. - Seite 14 TA350 Premere il pulsante per terminare la procedura di impostazione ora e giorno E. I due punti fra ore e minuti lampeggeranno confermando la conclusione dell’operazione. Nota. Dopo 15 secondi di inattività, l’apparecchio esce autonomamente dalla procedura memorizzando gli ultimi dati impostati. Nota.
- Seite 15 Cambiare il profilo Utente TA350 Il dispositivo è in grado di gestire le prefe- renze termiche di due profili Utente. Per ogni profilo utente possono essere creati diversi programmi "Comfort", "Eco", "Notte" per le modalità Riscaldamento e Raffrescamento. Per cambiare l'utente attivo, premere il pulsante Modificare i livelli di temperatura pre-programmati TA350...
-
Seite 16: Impostazione Della Modalità Di Funzionamento
Forzare manualmente la temperatura desiderata Con un qualunque programma di gestione termica attivo (Eco, Comfort, Notte), usare C per modificare la tempe- i pulsanti rature desiderata programmata. La nuova temperatura desiderata viene mostrata al posto della temperatura rilevata. L'eventuale icona del programma attivo e quella dell'utente attivo ( ) spariscono per indicare che è... - Seite 17 Configurazione dei parametri generali del dispositivo Modificare la temperatura antigelo predefinita TA350 Premere il pulsante Sul display compare la temperatura antigelo predefinita (3 °C). Usare i pulsanti per modificare la temperatura programmata (max 16°C). Premere il pulsante per uscire e memo- rizzare il dato impostato.
- Seite 18 Impostare il tipo di algoritmo di gestione termica Il dispositivo permette di scegliere il tipo di algoritmo da applicare per la gestione dell'im- pianto tra: differenziale e proporzionale Integrale. Attivazione e configurazione dell'algoritmo differenziale Questo sistema di regolazione è Set-point consigliato in impianti particolar- + differenziale mente difficili da controllare con...
- Seite 19 Usare i pulsanti per impostare il valore differenziale ad un valore compreso tra 0 °C e 0,9 °C H. Impostando il differenziale a 0 °C, durante il funzionamento viene rispettato un tempo minimo di accensione/spegnimento pari ad 1 minuto indipendentemente dalla tempe- ratura rilevata in ambiente.
- Seite 20 Set-point Tempo Se si è scelto il programma P4 la pressione del pulsante P permette di accedere alla pro- grammazione dei singoli parametri che compongono il programma P4 manuale. Il grafico K può aiutare a decidere il valore dei parametri da inserire. TA350 Il primo parametro riguarda la durata dei cicli di accensione L.
- Seite 21 TA350 Premere il pulsante P O per confermare il tempo minimo di ON impostato e passare alla regolazione della banda proporzionale. Usare i pulsanti per regolare il valore della banda proporzionale in un valore compreso fra 1 e 3 °C. Premere il pulsante P per uscire dalla programmazione.
- Seite 22 Abilitare e configurare la funzione del comando da remoto Collegando un’apposita interfaccia ai morsetti 1-2 (vedi "Collegamenti elettrici" a pagina 9) è possibile cambiare da remoto la modalità di funzionamento del dispositivo; per scegliere la modalità desiderata (raffrescamento o riscaldamento) procedere come segue. TA350 Premere il pulsante Usare i pulsanti...
-
Seite 23: Reset Dispositivo
Utilizzare i pulsanti per scegliere una delle 2 possibili configurazioni del contatto magnetico G. = Contatto abilitato = Contatto non abilitato Dopo alcuni secondi di inattività la scelta fatta viene registrata. In caso di apertura di un contatto abilitato ), l'attivazione viene visualizzata come in figura H. -
Seite 24: Sostituzione Delle Pile
Sostituzione delle pile L’indicazione lampeggiante sul display indica che le pile devono essere sostituite entro 1 mese circa. Quando sul display compare l’indicazione insieme al simbolo l’apparecchio non è più operativo e la zona termica non è più controllata. Una volta rimosse le pile esauste si hanno a disposizione 2 minuti per inserire le nuove pile (3 pile alcaline LR03 tipo mini stilo AAA da 1,5V);... - Seite 25 Digital thermostat FB00942-EN TA/350 INSTALLATION AND USE MANUAL EN English...
-
Seite 26: General Warnings
General warnings • Read the instructions carefully before starting installation and proceed as specified by the manufacturer. • Installation, programming, commissioning and maintenance of the product must only be performed by qualified technicians who have been properly trained in compliance with current standards, including health and safety and packaging disposal regulations. -
Seite 27: Installation
Installation Package contents Subframes Frame Hole cover adapter Main body Fixing screws N.B. Covers and hole cover adapters in anthracite grey and aluminium grey are available as optional components. The subframes and appropriately paired hole cover adapters allow the device to be adapted to most wiring systems available, following the instructions on the following pages. - Seite 28 How to pair/adapt the subframes to the wiring systems BTICINO - Light, Light Tech, Living International. VIMAR - Plana, Eikon. LEGRAND - Vela Quadra, Vela Tonda, Serie Cross. GEWISS - Playbus, Playbus Young. BTICINO - Matix.
- Seite 29 AVE - Banquise, Sistema 45. VIMAR - Idea, Idea Rondò. ABB - Elos.
- Seite 30 GEWISS - System. BTICINO - Axolute, Luna. BTICINO - Livinglight Qua- dre. VIMAR - Arché BTICINO - Livinglight Tonde. GEWISS - Chorus.
- Seite 31 AVE - Serie 44. BTICINO - Livinglight AIR. VIMAR - Eikon Evo. BTICINO - Axolute Air.
- Seite 32 Install the unit in a suitable position to cor- rectly detect the temperature, possibly in an internal wall, avoiding installation in niches, behind doors, curtains or near heat sources. Pull out the tab L and then pull the unit body out from the frame as far as it will go B.
- Seite 33 Wiring The connections are made depending on the type of equipment controlled by the programmable thermostat. Mains power supply wires NCNA C N = neutral L = phase Relay contacts C = common NO = normally open contact NC = normally closed contact Loads U1 = burner, circulation pump, solenoid valve etc.
- Seite 34 Installation Once the chosen frame and subframe have been assembled and wiring has taken place, assemble the programmable thermostat as shown in the figure H.
-
Seite 35: Device Description
Device description Description of the icons on the display and function of the front buttons ① ② ③ ④ ⑤ ⑥ ⑦ ⑧ ⑨ ⑯ ⑩ ⑪ ⑮ ⑭ ⑬ ⑫ ⑪ ① ⑪ Battery charge status. Buttons to vary the values. Operating temperature level selec- ②... - Seite 36 Function of internal buttons To access the internal command buttons, pull out the tab ⑬ and then the unit body from the frame. ⑰ ⑱ ⑲ ⑳ ㉑ ㉒ ㉓ ㉔ ⑰ Reset button. ⑱ Setting the clock. ⑲ Setting the operating parameters. Selecting the operating mode: ⑳...
-
Seite 37: Using The Device
Using the device Setting the clock TA350 Pull out the unit body. Press the button to display the clock. button A. Press the The minute digits flash. Use the buttons to set the exact minute value B. TA350 button C. Press the The hour digits flash. - Seite 38 TA350 Press the button to finish the time and day setting procedure E. The colon between the hours and minutes will flash confirming the operation has been completed. N.B. After 15 seconds of inactivity, the unit automatically exits the procedure, storing the last data set.
- Seite 39 Changing the user profile TA350 The device is able to manage the tempera- ture preferences of two user profiles. For each user profile, several programs can be created - "Comfort", "Eco", "Night" mode for heating and cooling modes. To change the active user, press the but- Changing the pre-programmed temperature levels TA350 Select the user profile and operating mode...
-
Seite 40: Setting The Operating Mode
Manually forcing the desired temperature With any active temperature management program (Eco, Comfort, Night), use the buttons C to change the desired pro- grammed temperatures. The new desired temperature is displayed instead of the detected temperature. Any icon of the active program and the active user ( ) disappear to indicate that the programming has been edited. - Seite 41 Configuring the general device parameters. Editing the default frost protection temperature TA350 button A. Press the The display shows the default frost protec- tion temperature (3 °C). Use the buttons to edit the pro- grammed temperature (max 16 °C). Press the button to exit and save the set data.
- Seite 42 Setting the type of temperature management algorithm The device allows you to choose the type of algorithm to be applied for system management from differential and integral proportional. Activating and configuring a differential algorithm This control system is recom- + differential mended in systems that are par- setpoint ticularly difficult to control with...
- Seite 43 Use the buttons to set the differential value at a value between 0 °C and 0.9 °C H. By setting the differential to 0 °C, during operation, a minimum switching on/off time of 1 minute is respected, regardless of the detected room temperature.
- Seite 44 Setpoint Time If you have chosen the P4 program, pressing button P gives access to the programming of the individual parameters that make up the manual P4 program. The graph K can help you decide the value of the parameters to be entered. TA350 The first parameter concerns the duration of the power-on cycles L.
- Seite 45 TA350 Press button P O to confirm the minimum ON time and switch to adjusting the pro- portional band. Use the buttons to adjust the value of the proportional band to between 1 and 3 °C. Press button P to exit programming. N.B.
- Seite 46 Enabling and configuring the remote control function By connecting a special interface to terminals 1-2 (see "Wiring"), it is possible to remotely change the operating mode of the device. To select the desired mode (cooling or heating), proceed as follows. TA350 Press the button...
-
Seite 47: Resetting The Device
Use the buttons to choose one of the 2 possible magnetic configurations E. = Contact enabled = Contact not enabled After a few seconds of inactivity, the choice made is recorded. If an enabled contact is opened ( the activation is displayed as shown in fig- ure H. -
Seite 48: Replacing The Batteries
Replacing the batteries The flashing indication on the display indicates that the batteries must be replaced within approximately one month. When appears on the display along with the symbol, the unit is no longer operational and the thermal zone is no longer controlled. After removing the old batteries, you will have 2 minutes to insert the new batteries (3 x alkaline LR03 AAA 1.5 V batteries). - Seite 49 Thermostat numérique FB00942-FR TA/350 MANUEL D'INSTALLATION ET D'UTILISATION FR Français...
-
Seite 50: Instructions Générales
Instructions générales • Lire attentivement les instructions avant toute opération d'installation et effectuer les interventions comme indiqué par le fabricant. • L’installation, la programmation, la mise en service et la manutention du produit ne doivent être effectuées que par des techniciens qualifiés et dans le strict respect des normes en vigueur, y compris des règles sur la prévention des accidents et l'élimination des emballages. -
Seite 51: Installation
Installation Contenu de l'emballage Précadres Châssis Adaptateur cache-trou Corps principal Vis de fixation REMARQUE : les cadres et les adaptateurs cache-trou gris anthracite et gris aluminium sont disponibles comme composants en option. Les précadres et les adaptateurs cache-trou opportunément combinés permettent d'adapter le dispositif à... - Seite 52 Comment combiner/adapter les précadres aux séries domestiques BTICINO - Light, Light Tech, Living International. VIMAR - Plana, Eikon. LEGRAND - Vela Quadra, Vela Tonda, Serie Cross. GEWISS - Playbus, Playbus Young. BTICINO - Matix.
- Seite 53 AVE - Banquise, Sistema 45. VIMAR - Idea, Idea Rondò. ABB - Elos.
- Seite 54 GEWISS - System. BTICINO - Axolute, Luna. BTICINO - Livinglight Qua- dre. VIMAR - Arché BTICINO - Livinglight Tonde. GEWISS - Chorus.
- Seite 55 AVE - Serie 44. BTICINO - Livinglight AIR. VIMAR - Eikon Evo. BTICINO - Axolute Air.
- Seite 56 Installer l'appareil dans une position lui permettant de détecter correctement la température ambiante, si possible dans un mur interne, en évitant l'installation dans des ouvertures, derrière des portes, des rideaux ou près de sources de chaleur. Extraire du cadre la languette L puis le corps de l'appareil jusqu'à...
-
Seite 57: Branchements Électriques
Branchements électriques Les connexions doivent être effectuées en fonction du type d'équipement commandé par le thermostat programmable. LÉGENDE Conducteurs d'alimentation réseau NCNA C N = neutre L = phase Contacts du relais C = commun NO = contact normalement ouvert NF = contact normalement fermé... - Seite 58 Installation Après avoir assemblé le cadre et le précadre choisis et effectué les branchements électriques, assembler le thermostat programmable comme indiqué sur la figure H.
- Seite 59 Description dispositif Description des icônes sur l'afficheur et fonction des boutons du bandeau ① ② ③ ④ ⑤ ⑥ ⑦ ⑧ ⑨ ⑯ ⑩ ⑪ ⑮ ⑭ ⑬ ⑫ ⑪ ① ⑩ Température détectée. État de charge de la pile. Boutons pour la modification des ②...
- Seite 60 Fonction des boutons internes Pour accéder aux boutons de commande internes, extraire la languette ⑬ puis le corps de l'appareil du cadre. ⑰ ⑱ ⑲ ⑳ ㉑ ㉒ ㉓ ㉔ ⑰ Bouton RàZ. ⑱ Configuration de l'horloge. ⑲ Configuration des paramètres de fonctionnement. Sélection de la modalité...
-
Seite 61: Utilisation Du Dispositif
Utilisation du dispositif Configuration de l'horloge TA350 Extraire le corps de l'appareil. Appuyer sur le bouton pour visualiser l'horloge. Appuyer sur le bouton Les chiffres des minutes clignotent. Se servir des boutons pour configurer la valeur exacte des minutes B. TA350 Appuyer sur le bouton Les chiffres des heures clignotent. - Seite 62 TA350 Appuyer sur le bouton pour terminer la procédure de configuration de l'heure et du jour E. Les deux points entre les heures et les minutes clignoteront pour confirmer la fin de l'opération. Remarque. Au bout de 15 secondes d'inactivité, l'appareil sort de façon autonome de la procédure en mémorisant les dernières données configurées.
- Seite 63 Changer le profil utilisateur TA350 Le dispositif est en mesure de gérer les préfé- rences thermiques de deux profils utilisateur. Pour chaque profil utilisateur, il est possible de créer différents programmes (« Confort », « Eco », « Nuit ») pour les modalités Chauf- fage et Rafraîchissement.
- Seite 64 Forcer manuellement la température souhaitée Quel que soit le programme de gestion thermique activé (Eco, Confort, Nuit), se C pour modifier la servir des boutons température programmée souhaitée. La nouvelle température souhaitée est visualisée à la place de la température détectée.
- Seite 65 Configuration des paramètres généraux du dispositif Modifier la température antigel prédéfinie TA350 Appuyer sur le bouton L'écran affiche la température antigel prédéfinie (3°C). Se servir des boutons pour modifier la température programmée (max. 16°C). Appuyer sur le bouton pour sortir et mémoriser la donnée configurée.
- Seite 66 Configurer le type d'algorithme de gestion thermique Le dispositif permet de choisir le type d'algorithme à appliquer pour la gestion de l'installation entre : différentiel et proportionnel intégral. Activation et configuration de l'algorithme différentiel Ce système de réglage est conseil- Point de consigne lé...
- Seite 67 Se servir des boutons pour configurer la valeur du différentiel entre 0°C et 0,9°C H. En cas de configuration du différentiel sur 0°C, un délai minimum d'allumage/ extinction d'1 minute sera respecté durant le fonctionnement indépendamment de la température ambiante détectée. Appuyer sur le bouton P pour sortir de la programmation.
- Seite 68 Point de consigne Temps En cas de sélection du programme P4, l'enfoncement du bouton P permet d'accéder à la programmation de chaque paramètre composant le programme P4 manuel. Le graphique K peut faciliter le choix de la valeur des paramètres à saisir. TA350 Le premier paramètre concerne la durée des cycles d'allumage L.
- Seite 69 TA350 Appuyer sur le bouton P O pour confirmer le temps minimum de ON configuré et passer au réglage de la bande proportionnelle. Se servir des boutons pour régler la valeur de la bande proportionnelle à une valeur comprise entre 1 et 3°C. Appuyer sur le bouton P pour sortir de la programmation.
- Seite 70 Activer et configurer la fonction de la commande à distance La connexion d'une interface spécifique aux bornes 1-2 (voir « Branchements électriques ») permet de modifier à distance la modalité de fonctionnement du dispositif ; pour choisir la modalité souhaitée (rafraîchissement ou chauffage), procéder comme suit. TA350 Appuyer sur le bouton Se servir des boutons...
- Seite 71 Se servir des boutons pour choisir une des 2 configurations possibles du contact magnétique G. = Contact activé = Contact désactivé Le choix sera enregistré au bout de quelques secondes d'inactivité. En cas d'ouverture d'un contact activé ), l'activation est visualisée comme sur la figure H.
-
Seite 72: Remplacement Des Piles
Remplacement des piles Le symbole clignotant à l'écran indique que les piles doivent être remplacées d'ici 1 mois environ. Lorsque l'écran affiche l'indication et le symbole , l’appareil ne fonctionne plus et la zone thermique n'est plus contrôlée. Après avoir enlevé les piles usagées, il est nécessaire d'introduire les nouvelles piles (3 piles alcalines LR03 AAA d'1,5 V) dans les 2 minutes qui suivent ;... - Seite 73 Digital-Thermostat FB00942-DE TA/350 MONTAGE- UND BETRIEBSANLEITUNG DE Deutsch...
-
Seite 74: Allgemeine Hinweise
Allgemeine Hinweise • Lesen Sie die Anweisungen vor dem Einbau genau durch und führen Sie die vom Hersteller genannten Arbeiten aus. • Die Installation, Programmierung, Inbetriebnahme und Wartung des Produktes müssen ausschließlich von qualifiziertem und entsprechend geschultem Fachpersonal unter Einhaltung der geltenden Normen, einschließlich der Unfallverhütungs- und Abfallentsor- gungsvorschriften, durchgeführt werden. -
Seite 75: Montage
Montage Inhalt der Verpackung Hilfsrahmen Tragrahmen Abdeckung/Adapter Hauptaggregat Schrauben HINWEIS: Optional sind Blenden und Abdeckungen in den Farben anthrazit und aluminium erhältlich. Durch die Kombination verschiedener Hilfsrahmen und Abdeckungen kann das Gerät, wie auf den nächsten Seiten beschrieben, in die meisten handelsüblichen Unterputzdosen eingesetzt werden. -
Seite 76: Kombination/Anpassung Der Hilfsrahmen An Übliche Rahmen
Kombination/Anpassung der Hilfsrahmen an übliche Rahmen BTICINO - Light, Light Tech, Living International. VIMAR - Plana, Eikon. LEGRAND - Vela Quadra, Vela Tonda, Serie Cross. GEWISS - Playbus, Playbus Young. BTICINO - Matix. - Seite 77 AVE - Banquise, Sistema 45. VIMAR - Idea, Idea Rondò. ABB - Elos.
- Seite 78 GEWISS - System. BTICINO - Axolute, Luna. BTICINO - Livinglight Qua- dre. VIMAR - Arché BTICINO - Livinglight Tonde. GEWISS - Chorus.
- Seite 79 AVE - Serie 44. BTICINO - Livinglight AIR. VIMAR - Eikon Evo. BTICINO - Axolute Air.
- Seite 80 Das Gerät an einer für die Temperatu- rerfassung geeigneten Stelle montieren (möglichst an einer Innenwand, nicht in Nischen, hinter Türen oder Gardinen oder in der Nähe von Wärmequellen anbringen). Die Lasche L und anschließend das Gerät herausziehen, bis es nicht mehr weiter hinausgeht B.
-
Seite 81: Elektrische Anschlüsse
Elektrische Anschlüsse Die Anschlussweise hängt von den vom programmierbaren Thermostat gesteuerten Geräten ab. ZEICHENERKLÄRUNG Netzstromleiter NCNA C N = Neutralleiter L = Leiter Relaiskontakte C = allgemeiner NO = normalerweise offener Kontakt NC = normalerweise geschlossener Kontakt Stromverbraucher U1 = Brenner, Umwälzpumpe, Magnet- ventil, usw. - Seite 82 Montage Zunächst den gewählten Rahmen und den Hilfsrahmen zusammenbauen und die Anschlüsse vornehmen, danach den programmierbaren Thermostat wie dargestellt zusammenbauen, siehe Abb. H.
- Seite 83 Beschreibung Beschreibung der Symbole auf dem Display und der vorderen Taster ① ② ③ ④ ⑤ ⑥ ⑦ ⑧ ⑨ ⑯ ⑩ ⑪ ⑮ ⑭ ⑬ ⑫ ⑪ ① Heizbetrieb eingeschaltet. Ladestand der Batterie. ⑨ Animiertes Symbol = Heizung ② Temperatursteuerung gesperrt.
-
Seite 84: Funktion Der Innentaster
Funktion der Innentaster Um auf die Innentaster zuzugreifen, die Lasche ⑬ und anschließend das Gerät herausziehen. ⑰ ⑱ ⑲ ⑳ ㉑ ㉒ ㉓ ㉔ ⑰ Reset-Taster ⑱ Uhrzeit einstellen. ⑲ Betriebsparameter einstellen. Betriebsart wählen: ⑳ KÜHLEN HEIZEN ㉑ Benutzerprofil wählen. ㉒... -
Seite 85: Verwendung Des Geräts
Verwendung des Geräts Uhrzeit einstellen TA350 Das Gerät herausziehen. Auf den Taster drücken, um die Uhr anzuzeigen. A drücken. Auf den Taster Die Minuten blinken. Mit den Tastern die genaue Minuten- zahl eingeben B. TA350 C drücken. Auf den Taster Die Stunden blinken. -
Seite 86: Ein Heizprogramm Wählen
TA350 Auf den Taster drücken, um die Ein- stellung der Uhrzeit und des Datums zu beenden E. Nach Beendigung der Einstellung blinken die beiden Punkte zwischen der Stunden- und Minutenanzeige. Hinweis. Wenn das Gerät 15 Sek. lang nicht betätigt wird, beendet das Gerät den Vorgang automatisch und speichert die zuletzt eingegebenen Daten. -
Seite 87: Benutzerprofil Ändern
Benutzerprofil ändern TA350 Das Gerät kann die Wunschtemperaturen von zwei Benutzerprofilen steuern. Man kann für jedes Benutzerprofil verschie- dene "Komfort"-, "Öko"- und "Nacht"-Pro- gramme für den Heiz- und Kühlbetrieb erstellen. Um den aktivierten Benutzer zu ändern, den Taster drücken. Die vorprogrammierten Temperaturen ändern TA350 Das Benutzerprofil und die Betriebsart wählen, deren Soll-Temperatur individuell... -
Seite 88: Die Solltemperatur Von Hand Erzwingen
Die Solltemperatur von Hand erzwingen Wenn eines der Temperaturprogramme (Öko, Komfort, Nacht) aktiviert wurde, mit C die programmierte den Tastern Solltemperatur ändern. Die neue Solltemperatur wird anstelle der Ist-Temperatur angezeigt. Die Ikone des aktivierten Programms und die des aktivierten Benutzers ( ) werden nicht mehr angezeigt. -
Seite 89: Die Allgemeinen Geräteparameter Einstellen
Die allgemeinen Geräteparameter einstellen Die festgelegte Frostschutztemperatur ändern TA350 A drücken. Auf den Taster Auf dem Display wird die festgelegte Frost- schutztemperatur (3°C) angezeigt. Mit den Tastern die programmierte Temperatur ändern (max. 16°C). Auf den Taster drücken, um den Vorgang zu beenden und die Eingaben zu speichern. -
Seite 90: Den Temperatur-Regler Festlegen
Den Temperatur-Regler festlegen Man kann zwei Reglertypen wählen: D-Regler und PI-Regler (d.h. Differential- bzw. Pro- portional-Integral-Regler). D-Regler aktivieren und konfigurieren Dieses System eignet sich bei Set-point schwer zu regelnden Anlagen + Differential und extremen Schwankungen der Set-point Außentemperatur. Set-point - Differential Dauer TA350 Das Gerät auf... - Seite 91 Mit den Tastern das Temperaturdiffe- rential zwischen 0 °C und 0,9 °C einstellen Bei auf 0°C gestelltem Diffenrential wird während des Betriebs, unabhängig von der Ist-Temperatur eine Mindestein-/ausschalt- zeit von 1 Minute eingehalten. Mit dem Taster P die Programmierung beenden. PI-Regler aktivieren und konfigurieren TA350 Bei ausgeschaltetem Differentialregler...
- Seite 92 Set-point Dauer Wenn P4 gewählt wurde, öffnet sich durch Druck auf P die Programmierseite, auf der die Parameter des Programms P4 manuell eingestellt werden können. Das Diagramm K ist bei der Wahl der einzugebenden Parameter von Nutzen. TA350 Der erste Parameter betrifft die Dauer der Einschaltyzklen L.
-
Seite 93: Die Taster Sperren/Freigeben
TA350 Durch Druck auf P O die eingestellte Min- dest-ON-Dauer bestätigen und zum Menü- punkt Einstellung Proportionalband wechseln. Mit den Tastern das Proportional- band einstellen, der Wert muss zwischen 1 und 3 °C liegen. Mit dem Taster P die Programmierung beenden. -
Seite 94: Magnetkontakt Aktivieren Und Konfigurieren
Fernsteuerung freischalten und konfigurieren Durch Anschluss einer entsprechenden Schnittstelle an die Klemmen 1-2 (siehe "Elektrische Anschlüsse") kann man die Betriebsart über Fernschaltung wechseln; bei der Wahl der gewünschten Betriebsart (Kühlen oder Heizen), wie folgt vorgehen. TA350 D drücken. Den Taster Mit den Tastern eine der 3 Konfigura- tionen wählen E. -
Seite 95: Werkseinstellung Zurücksetzen
Mit den Tastern eine der beiden Konfigurationsmöglichkeiten für den Ma- gnetkontakt wählen G. = Kontakt aktiviert = Kontakt deaktiviert Wenn das Gerät einige Sekunden lang nicht betätigt wird, wird die Wahl gespeichert. Wenn sich ein aktivierter Kontakt öffnet ), wird die Aktivierung in folgender Weise angezeigt, siehe Abb. -
Seite 96: Batterien Wechseln
Batterien wechseln Wenn das Zeichen auf dem Display blinkt, müssen die Batterien innerhalb von ca. einem Monat gewechselt werden. Wenn auf dem Bildschirm die Angabe neben dem Zeichen erscheint, funktioniert das Gerät nicht mehr und die Temperaturzone wird nicht mehr gesteuert.