Inhaltsverzeichnis
Werbung
Verfügbare Sprachen
Verfügbare Sprachen
Quicklinks
Werbung
Inhaltsverzeichnis

Verwandte Anleitungen für STAMOS soldering 6110 S-LS-11

Inhaltszusammenfassung für STAMOS soldering 6110 S-LS-11
- Seite 1 S-LS-11 LÖTSTATION / HEISSLUFT-ENTLÖTSTATION SOLDERING STATION / SMD REWORK STATION STACJA LUTOWNICZA / STACJA HOT AIR BEDIENUNSANLEITUNG User manual | Manuel d´utilisation | Istruzioni per l‘uso | Manual de instrucciones...
- Seite 2 INHALT | CONTENT | CONTENU | CONTENIDO | TREŚĆ SICHERHEITSHINWEISE Allgemeine Sicherheitshinweise bei der Benutzung von Elektrogeräten: Um das Verletzungsrisiko durch Feuer oder Stromschlag zu minimieren, bitten wir Sie stets einige grundlegende Sicherheitsvorkehrungen zu treffen, wenn Sie dieses Gerät verwenden. Bitte lesen Sie diese Bedienungsanleitung sorgfältig und vergewissern Sie sich, dass keine Fragen offen bleiben.
-
Seite 3: Technisches Datenblatt
TECHNISCHES DATENBLATT WIE FUNKTIONIERT DAS GERÄT – DAS GRUNDPRINZIP Produktübersicht Modell 6110 S-LS-11 Spannung (V) 230 ~ 50Hz Nennstrom (A) Leistung (W) 0 - 40 Arbeitstemperatur (⁰C) -20 - 80 Lagerungstemperatur (⁰C) Luftfeuchtigkeit der Lagerung 35 - 45% Temperaturbereich (⁰C) LÖTSTATION... -
Seite 4: Aufbau Des Gerätes
Entsorgung der Verpackung BEDIENUNG DER LÖTSTATION Die Einrichtung ist auf stabilen Boden zu legen, der Lötkolben ist in der Halte- Es wird darum gebeten, das Verpackungsmaterial (Pappe, Plastikbänder und Styropor) rung zu befestigen. zu behalten, um im Servicefall das Gerät bestmöglich geschützt zurücksenden zu kön- Befestigen Sie die entsprechende spitze am Lötkolben und schließen Sie anschlie- nen! ßend das Gerät ans Netz an. -
Seite 5: Sicherheitshinweise
SICHERHEITSHINWEISE Vor Auswechseln des Heizelementes muss überprüft werden, dass die Heißluft- Die Düsen dürfen nicht unter Kraftanwendung installiert werden. Hierzu keine Entlötstation vollkommen abgekühlt ist. Zangen oder Pinzetten benutzen. Die Schrauben von der Abdeckung des Kolbens entfernen. Die Düsen und die Endstücke erst auswechseln, wenn sie vollkommen erkaltet Den Griff (2) lösen die Umfassung des Lötkolbens abnehmen. -
Seite 6: Standardreinigung
Austausch der Lötspitze und des Heizelementes stellen Sie sicher, dass der Lötkolben völlig erkaltet ist. Austausch der Lötspitze: Entfernen Sie die Mutter, die die Abdeckung der Lötspit- ze sichert und entfernen Sie die Abdeckung. Ersetzen Sie diese durch eine neue, Abdeckung aufsetzen und Mutter festdrehen. -
Seite 7: Principle Of Operation
Some parts of the device can get extremely hot. To avoid any injuries, be careful by every contact with the device. • Clean the device regularly to avoid a durable encrustation of dirt. TECHCNICAL DETAILS Model 6110 S-LS-11 Voltage (V) 230 ~ 50Hz Rated current (A) Power (W) 0 - 40 Work temperature (⁰C) -
Seite 8: Installing The Appliance
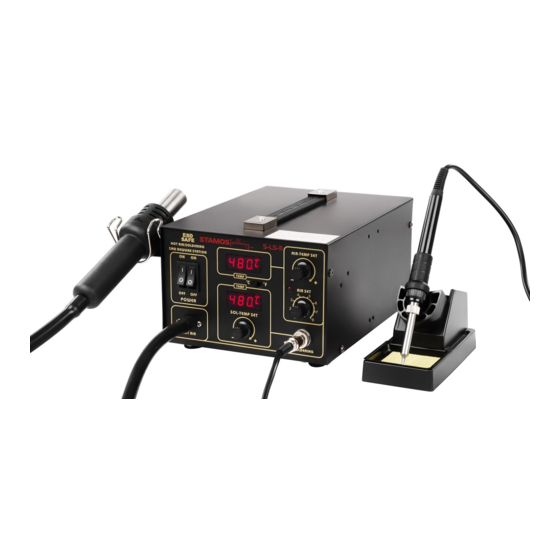
SMD rework gun cable SMD REWORK STATION OPERATION: soldering iron temperature setting knob Device must be placed on stable work table, SMD rework gun must be placed soldering iron connection socket into the holder. air flow volume adjustment knob Fix the appropriate nozzle and connect the device to the power source. SMD rework gun temperature setting knob Turn on the device with the main switch placed at the back of the device, turn on the SMD rework gun with switch (12), gun will start to heat. - Seite 9 suitable to the diameter of the fixed nozzle. In order to avoid any SMD rework gun Before heater replacement make sure that the SMD rework gun is completely damages, too high air flow along with the high temperature mustn’t be used for a cold.
-
Seite 10: Regular Cleaning
Before heater replacement make sure that the soldering iron is completely cold. SOLDERING IRON TIP REPLACEMENT: remove the nut for mounting the solde- ring iron tip housing and take off the housing. Replace the tip with the new one, place the housing and fix all with the plastic nut. HEATER REPLACEMENT: remove the nut for mounting the soldering iron tip housing and take off the housing along with the tip. -
Seite 11: Zalecenia Odnośnie Bezpieczeństwa
ZALECENIA ODNOŚNIE BEZPIECZEŃSTWA KARTA DANYCH TECHNICZNYCH Ogólne zalecenia odnośnie bezpieczeństwa podczas użytkowania urządzeń elektrycz- Model 6110 S-LS-11 nych: Napięcie (V) 230 ~ 50Hz W celu zminimalizowania ryzyka obrażeń na skutek działania ognia lub porażenia Prąd znamionowy (A) prądem prosimy Państwa o stałe przestrzeganie kilku podstawowych zasad bezpie- czeństwa podczas użytkowania urządzenia. -
Seite 12: Przed Pierwszym Użyciem
JAK FUNKCJONUJE URZĄDZENIE – PODSTAWOWA ZASADA Utylizacja opakowania Prosimy o zachowanie elementów opakowania (tektury, plastykowych taśm oraz sty- Budowa urządzenia: ropianu), aby w razie konieczności oddania urządzenia do serwisu można go było jak najlepiej ochronić na czas przesyłki! MONTAŻ URZĄDZENIA Umiejscowienie urządzenia Urządzenie powinno się... -
Seite 13: Uwagi Ogólne
Pokrętłem (2) ustawić żądaną temperaturę, po ustawieniu temperatury wyświe- WYMIANA ELEMENTU GRZEWCZEGO KOLBY HOT AIR tlacz (9) pokaże ją przez chwilę a następnie będzie wskazywał aktualną tempera- turę kolby lutowniczej. Po skończonej pracy, kolbę lutowniczą należy umieścić w uchwycie i wyłączyć grzanie kolby wyłącznikiem (11). - Seite 14 WYMIANA ELEMENTU GRZEWCZEGO ORAZ KOŃCÓWKI KOLBY STANDARDOWE CZYSZCZENIE LUTOWNICZEJ Uwagi ogólne • Nigdy nie należy spryskiwać urządzenia. Do czyszczenia nie należy używać jakich- kolwiek szczotek czy przyborów, które mogłyby uszkodzić powierzchnię urzą- dzenia. • Przed rozpoczęciem czyszczenia urządzenie należy odłączyć od źródła zasilania energią.
- Seite 15 NOTIZEN | NOTES NOTIZEN | NOTES...
- Seite 16 NOTIZEN | NOTES Hiermit bestätigen wir, dass die hier in dieser Anleitung aufgeführten Geräte CE- konform sind. We hereby certify that the appliances listed in this manual are CE compliant. Par la présente, nous confirmons que les appareils présentés dans ce mode d´emploi sont conformes aux normes Ce.
- Seite 17 Umwelt- und Entsorgungshinweise Hersteller an Verbraucher Sehr geehrte Damen und Herren, gebrauchte Elektro- und Elektronikgeräte dürfen gemäß europäischer Vorgaben [1] nicht zum unsortierten Siedlungsabfall gegeben werden, sondern müssen getrennt erfasst werden. Das Symbol der Abfalltonne auf Rädern weist auf die Notwendigkeit der getrennten Sammlung hin.