
Verwandte Anleitungen für ZENEC ZEM-W702UIR


Inhaltszusammenfassung für ZENEC ZEM-W702UIR
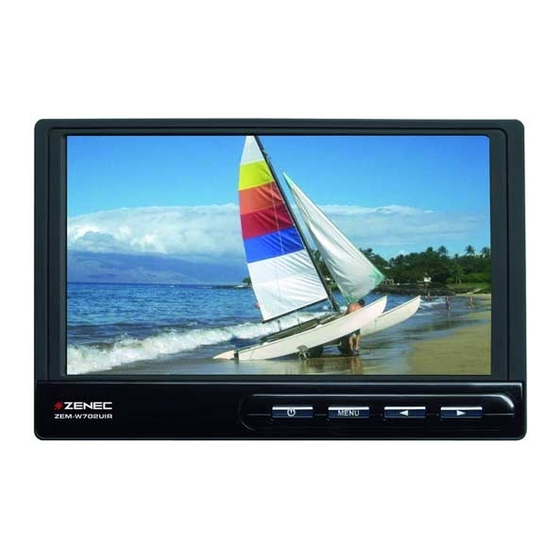
- Seite 1 7" TFT-LCD UNIVERSAL MONITOR WITH INTEGRATED IR-TRANSMITTER ZEM-W702UIR MODEL NO: ZEM-W702UIR INSTRUCTION MANUAL...
- Seite 2 ZEM-W702UIR 7"/16:9 BREITBILD TFT-LCD MONITOR MIT INTEGRIERTEM IR-SENDER Vielen Dank für den Kauf dieses ZENEC Produktes Mit dem Kauf des ZEM-W702UIR haben Sie sich für ein technisch ausgereiftes Produkt entschieden, das Ihnen durch die Verwendung von hochwertigen Materialien und Bauteilen eine lange Lebensdauer garantiert.
-
Seite 3: Inhaltsverzeichnis
Deutsch LIEFERUMFANG ■ Überprüfen Sie vor der Installation den Lieferumfang auf Vollständigkeit. ■ Benutzen Sie nur das im Lieferumfang enthaltene Zubehör. Abbildung Element Menge Monitor ZEM-W702UIR Montagerahmen Anschlusskabel Bedienungsanleitung PM 4×8 Schrauben Kugelgelenk Schwenk-Halterung INHALTSVERZEICHNIS LIEFERUMFANG ......................3 Lieferumfang ........................ 3 VORSICHTSMASSNAHMEN .................. -
Seite 4: Vorsichtsmassnahmen
VORSICHTSMASSNAHMEN Bitte beachten Sie die folgenden Vorsichtsmassnahmen. Bei Nichtbeachtung besteht die Gefahr von Sachschäden, Verletzungen oder Unfälle mit Todesfolge. ■ BETRIEB AM BORDNETZ EINES FAHRZEUGES Dieses Gerät ist nur für den Gebrauch an einem Bordnetz mit +12V (DC) und Minus gegen Masse geeignet und darf auch nur so betrieben werden. -
Seite 5: Reinigung Des Monitors
■ PROBLEME Sollten Sie ein Problem bei der Installation oder während des Betriebs haben, wenden Sie sich bitte an einen ZENEC-Händler. Der Hersteller gewährt auf dieses Produkt eine Garantiezeit von 2 Jahren, geltend ab dem Kaufdatum im Fachhandel. Bewahren Sie deshalb die Garantieunterlagen an einem sicheren Ort auf. -
Seite 6: Fernbedienung
-Taste ■ Wenn Sie die -Taste drücken, können Sie die Bildhelligkeit verringern. ■ Wenn Sie das Menü aufgerufen haben, können Sie durch drücken der -Taste den Wert des ausgewählten Menüpunktes verringern. -Taste ■ Wenn Sie die -Taste drücken, können Sie die Bildhelligkeit erhöhen. ■... -
Seite 7: Batterie Der Fernbedienung
Deutsch BATTERIE DER FERNBEDIENUNG ■ Verwenden Sie nur Lithium-Batterien (CR2025). ■ Berücksichtigen Sie die Batteriepolung und legen Sie die Batterie entsprechend in das Batteriefach. BITTE BEACHTEN ■ Bitte achten Sie darauf dass Batterien für Kinder unzugänglich aufbewahrt werden. Aufgrund ihrer Größe können sie versehentlich verschluckt werden. Wenden Sie sich in so einem Fall sofort an einen Arzt. -
Seite 8: Installation
INSTALLATION SICHERHEITSHINWEISE ■ Lesen Sie sich die Bedienungsanleitung vor der Installation des Gerätes noch einmal genau durch. ■ Dieses Gerät ist für den Betrieb mit +12V (DC) und Minus gegen Masse geeignet und darf auch nur so betrieben werden. ■ Um während der Installation des Gerätes Kurzschlüsse zu vermeiden, sollten Sie das entsprechende +12V Terminal an der Batterie für die Dauer der Montage abhängen. -
Seite 9: Anschlüsse
Deutsch ANSCHLÜSSE ZEM-W702UIR 2. B+ (Gelb) 3. ACC (Rot) 4. Masse (Schwarz) 1. Anschlusskabel 5. A/V-Eingang 1. Anschlusskabel 2. B+ (Gelb) ■ Verbinden Sie den B+-Anschluss des Monitors mit einer permanenten +12V (DC) Spannungsquelle des Fahrzeuges. 3. ACC (Rot) ■ Verbinden Sie den ACC-Anschluss des Monitors mit dem entsprechenden ACC- Anschluss des Fahrzeuges, welcher bei der Schlüsselposition „ACC“... -
Seite 10: Zusätzliche Informationen
Fernbedienung ist Batterie. nicht richtig. leer oder schon sehr 2. Wenden Sie sich an einen schwach. ZENEC-Händler. 2. Die Fernbedienung ist defekt. Das Bild ist sehr dunkel. 1. Das Gerät befindet sich 1. Aufgrund der Charakteristik bzw. wird an einem Ort des Flüssigkristall-... -
Seite 11: Technische Daten
Deutsch TECHNISCHE DATEN Versorgungsspannung: 10.5 – 16V (DC) Betriebsspannung: 12V (DC) Max. Strombedarf: <1A Betriebstemperatur: -20°C bis 70°C Bildschirmgröße: 7“/16:9 Auflösung: 1440 x 234 Pixel bzw. 336960 Bildpunkte IR – Trägerfrequenzen: L-CH 2.3 MHz R-CH 2.8 MHz Abmessungen Monitor (B x H x T): 194.3 x 127 x 27.3 mm Gewicht Monitor: 537 g... -
Seite 12: Technical Features
With the ZEM-W702UIR monitor, you have chosen a technically mature high quality product, which will give you a long life and high reliability, since this product has been assembled using only high quality parts. The ZEM-W702UIR is a 7”/16:9 wide screen TFT-LCD active matrix universal monitor with an integrated IR-transmitter. -
Seite 13: Box Contents
■ Make sure proper use of accessories packed together within the gift box only. ■ Use of any extra accessories might result in damage to the unit. Appearance Parts Neme Quantity LCD Monitor ZEM-W702UIR Mounting Frame 3M Signal Cable User Manual Screw PM 4×8 Headrest Monitor Mount CONTENTS BOX CONTENTS ...................... -
Seite 14: Precautions
PRECAUTIONS ■ The unit is designed for working at a 12V (DC), negative ground battery power supply. ■ Do not disassemble or alter the unit. Violation of this principle may cause damage to the unit and invalidate your warranty. ■ Be careful not to run down the car battery while using the unit with the engine turned off. -
Seite 15: Basic Operations
English BASIC OPERATIONS FRONT PANEL FUNCTIONS ZEM-W702UIR 1. POWER-button ■ Press the POWER-button to turn on/off the monitor. 2. MENU-button ■ Press the MENU-button to enter the system menu. ■ When menu is on, press the MENU-button to choose all sorts of adjustment function. -
Seite 16: Ir-Remote Control
IR-REMOTE CONTROL ➃ ➀ ➁ ➅ ➄ ➂ 1. POWER-button ■ Press the POWER-button to turn on/off the monitor. 2. MENU[]-button ■ When menu is on, press the MENU[]-button to choose the previous menu item. 3. MENU[]-button ■ When menu is on, press the MENU[]-button to choose the next menu item. 4. -
Seite 17: Using The Remote Control
English USING THE REMOTE CONTROL ■ Battery type for replacement: CR2025 ■ Insert a new battery with the (+) side up. NOTE ■ Batteries and small parts can be a choking hazard. Keep the remote control away from young children. ■... -
Seite 18: Installation
INSTALLATION SAFETY PRECAUTIONS ■ Please read this manual carefully before attempting the installation. ■ This unit is exclusively for use in cars with a negative ground +12V power supply. ■ To prevent short circuits, remove the key from the ignition and disconnect the terminal of the battery. -
Seite 19: Connection Layout
English CONNECTION LAYOUT ZEM-W702UIR 2. B+ (yellow) 3. ACC (red) 4. GND (black) 1. Connection Cable 5. AV Input 1. Connection Cable 2. B+ (yellow) ■ Connect to a permanent +12V (DC) power supply in the car. 3. ACC (red) ■... -
Seite 20: Additional Information
ADDITIONAL INFORMATION TROUBLESHOOTING Problems: Possible Cause: Remedy: No picture and 1. Power wire connection 1. Check the power wire sound when the wrong or fuse blown. and replace the fuse. monitor is turned on. 2. System cable is not on 2. -
Seite 21: Technical Specifications
English TECHNICAL SPECIFICATIONS Power Source: 10.5-16V (DC) Operating Voltage: 12V (DC) Operating Current: < 1A (Typical) Operating Temperature: -20°C bis 70°C Native Display Aspect Ratio: 7“/16:9 1440 (H) x 234 (V) = 336‘960 Dots Native Screen Resolution: IR – Carrier Frequencies: L-CH 2.3 MHz R-CH 2.8 MHz Dimensions (L x W x H): 194.3 x 127 x 27.3 mm... -
Seite 22: Jahre Garantie
2 YEARS LIMITED WARRANTY Dear customer Thank you for purchasing this ZENEC product. It is advisable to keep the original packing material for any future transporting of the product. Should your ZENEC product require warranty service, please return it to the retailer from whom it was purchased or the distributor in your country. - Seite 23 WARRANTY / GARANTIE ZENEC MODEL: ZEM-W702UIR Serial number: ..........................Date of purchase: ......................... Your name: ........................... Your address: ..........................City: .............................. State: ........ZIP or postal code ................. Country: ............................Dealer’s address & stamp...