
Verwandte Anleitungen für Eneo PXB-1080Z03 D


Inhaltszusammenfassung für Eneo PXB-1080Z03 D
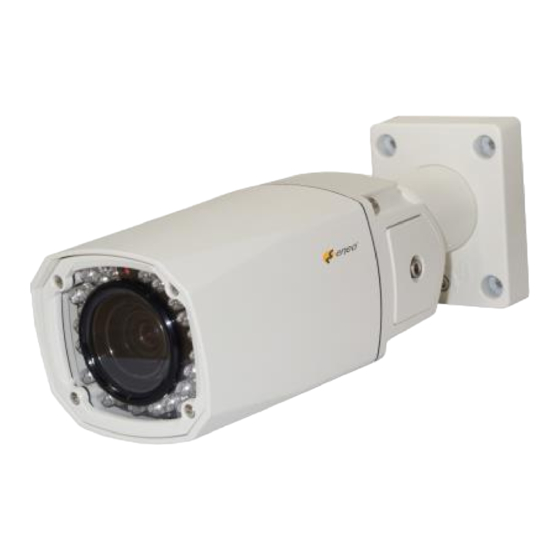
- Seite 1 Quick Installation Guide 1/3” Network Camera, WDR, Day&Night, 1920x1080, PoE, Infrared, 3x AF Zoom, 3-9mm PXB-1080Z03 D...
-
Seite 2: Inhaltsverzeichnis
Installation instructions ....................5 Pan & Tilt adjustments ..............................6 Power supply connections .............................7 Network Connection and IP assignment ........................8 eneo Scan Device Tool ..............................8 Quick Network Setup ..............................9 Operating instructions ....................13 Using OSD controller..............................13 Description of the joystick operation ....................... 13 Description of the ZOOM&FOCUS adjustment .................. -
Seite 3: Notes On Safety
Notes on safety Please also pay attention to the enclosed safety instructions, and carefully read through this instruction guide before initial operation. Important points of warning are marked with a caution symbol. Important points of advice are marked with a notice symbol. Parts supplied •... -
Seite 4: Part Names
Part names Ethernet & Power cable OSD setup control cover Dual window Easy bracket Bracket Front case Rear case Lock/Unlock screw... -
Seite 5: Installation Instructions
Installation instructions CAUTION: The camera’s base should be attached to a structural object, such as concrete, hard wood, wall stud or ceiling rafter that supports the weight of the camera. If necessary use appro- priate mounting material (e.g. anchors) instead of the material enclosed with the camera. -
Seite 6: Pan & Tilt Adjustments
CAUTION: Extreme care should be taken NOT to scratch the window in front of lens. Care should be taken the cable is NOT to be damaged, kinked or exposed in the hazardous area. Do not expose the camera directly to a strong light source such as the sun or spot light. -
Seite 7: Power Supply Connections
2. Tilt limit: Tilt is limited to 0° min ~ 90° max. for wall(ceiling) installation respective- ly with reference to the wall(ceiling) when the inclination of camera module is 0°, that is, the image is aligned horizontally. 90° 3. Inclination limit (Horizontal image alignment): Inclination limited to +/-90° max. ±90°... -
Seite 8: Network Connection And Ip Assignment
Network Connection and IP assignment eneo Scan Device Tool The eneo Scan Device Tool is used to locate all eneo network cameras in a local network. The tool does not need to be installed with a setup program. The program exe-file can be started directly from the CD with a simple double click to use the program. -
Seite 9: Quick Network Setup
IP properties. When you are done click the „Activate“ button to update the camera settings. For further information, please refer to the eneo Scan Device Tool Quick Start Guide. Quick Network Setup The network camera‘s default IP address is: 192.168.1.10. - Seite 10 • If the Information message doesn‘t come out due to the problems like network failure, you can start the manual installation. • Click the Install ActiveX Control, and the pop-up window will be displayed. After the installation is successfully completed, Smart Viewer window will be displayed. Assigning an IP address To assign an IP address to the camera proceeded as follows: Click Network Configuration on the Network Configuration menu.
- Seite 11 • For static IP, select static IP and input values for IP address, NetMask, Gateway, DNS1, DNS2 and click apply for saving settings. After apply, program will ask clos- ing web browser for updates, which will take 20~30 seconds. • For DHCP, DHCP server must exist in the same network environment. Select DHCP Client from Network Configuration, click Apply.
-
Seite 12: Administrator Password
• PPPoE is used to connect IP products to PPPoE modem provided by ISP. Since PPPoE needs verification, ID and password are necessary to access network. Type in ID and password. Administrator password To change the password for the administrator, click Admin Password on System Configu- ration menu. -
Seite 13: Operating Instructions
Operating instructions Using OSD controller Setup menu can be accessed and controlled by OSD control joy stick on the side of cam- era unit. Five commands are available with the joy stick. Standard SD Card Slot IP Reset OSD Control Joy Stick Cover Open Video Sub-out Connector Description of the joystick operation... -
Seite 14: Osd Menu Startup
2. ▼ : Zoom Out 3. ◄ : Focus Near 4. ► : Focus Far OSD menu startup Camera SETUP menu can be accessed in two ways via web viewer. Most frequent controls are available with the parameters directly in the below table. More complicated settings such as PRIVACY, POINTING ZOOM &... -
Seite 15: Further Information
Further information Make sure to always upgrade to the latest firmware version available from the eneo web- site at www.eneo-security.com to receive the latest functionality for your product. The manual, and other software tools are available on the eneo website at www.eneo-se- curity.com or on the included CD. - Seite 16 Bezeichnungen von Gerätekomponenten ...............18 Installationsanweisungen ..................19 Einstellung von Schwenkung und Neigung ......................20 Stromversorgungsanschlüsse ............................ 22 Netzwerkverbindung und IP-Zuweisung ......................23 eneo Scan Device Tool ............................. 23 Schnelle Netzwerkkonfiguration ........................24 Betriebsanleitung .......................27 Bildschirmmenü-Steuerung verwenden ....................... 27 Beschreibung der Joystick-Bedienung ..................... 27 Beschreibung der Zoom- &...
-
Seite 17: Sicherheitshinweise
Sicherheitshinweise Bitte beachten Sie auch die beiliegenden Sicherheitshinweise und lesen Sie diese Anlei- tung vor Inbetriebnahme sorgfältig durch. Wichtige Warnhinweise sind mit einem Achtung-Symbol gekennzeichnet. Wichtige Hinweise sind mit einem Hinweis-Symbol gekennzeichnet. Lieferumfang • Netzwerk Kamera • Betriebsanleitung • Bohrschablone •... -
Seite 18: Bezeichnungen Von Gerätekomponenten
Bezeichnungen von Gerätekomponenten Ethernet- und Stromkabel Abdeckung für Bildschirmmenüsteuerung Doppelglasiges Fenster „Easy Bracket“-Halterung Kamerahalter Vorderes Gehäuse Hinteres Gehäuse Schraube zum Verriegeln/Entriegeln... -
Seite 19: Installationsanweisungen
Installationsanweisungen ACHTUNG: Die Kamerahalterung sollte an einem Bauelement wie etwa Beton, Hartholz, einem Wandständer oder Deckenbal- ken befestigt werden, welches das Gewicht der Kamera trägt. Verwenden Sie, falls erforderlich, geeignetes Befestigungsmateri- al (z.B. Dübel) anstelle des mitgelieferten Materials. 1. Halten Sie die Bohrschablone an die Installationsstelle und bohren Sie die Löcher in Decke oder Wand, falls erforderlich. -
Seite 20: Einstellung Von Schwenkung Und Neigung
Befestigungsschraube 1: 4 x 30mm Montageschraube: 4 x 14mm Inbusschlüssel Kabeldurchgang ACHTUNG: Achten Sie besonders darauf, das Fenster vor dem Objektiv NICHT zu verkratzen. Es muss sorgfältig darauf geachtet werden, das Kabel NICHT zu beschädigen, zu knicken oder Gefahrenbereichen auszusetzen. Setzen Sie die Kamera nie direkt einer starken Lichtquelle wie der Sonne oder einem Scheinwerfer aus. - Seite 21 • Stellen Sie den Betrachtungswinkel der Kamera ein und ziehen Sie die Schraube am Halter fest. Anpassung des Betrachtungswinkels mit einem Halter Schraube zum Verriegeln/Entriegeln Inbusschlüssel 1. Schwenkwinkel: Der Schwenkwinkel ist auf +/- 80° begrenzt. 80° 80° 160° 2. Neigungswinkel: Die Neigung ist bei Wand- (bzw. Decken)-Installation auf min. 0° bis max.
-
Seite 22: Stromversorgungsanschlüsse
3. Drehwinkel (horizontale Bildausrichtung): Der Drehwinkel ist begrenzt auf max. +/-90°. ±90° Stromversorgungsanschlüsse Stellen Sie vor der Installation sicher, dass die Spannungszufuhr unterbrochen ist. Die Kamera kann entweder mit 12VDC oder 24VAC, doppelte Spannungsversorgung und PoE (IEEE Std. 802.3af ) betrieben werden. Primäre und sekundäre Masse sind vollständig voneinander isoliert, um mögliche Probleme durch Erdungsschleifen zu vermeiden. -
Seite 23: Netzwerkverbindung Und Ip-Zuweisung
Die exe-Datei des Programms kann mit einem Doppelklick direkt von der CD gestartet und benutzt werden. Nach dem Drücken des Buttons „eneo Geräte suchen“ erhalten Sie eine Liste der mit dem lokalen Netzwerk verbundenen Kameras. Markieren Sie Ihre Kamera in der Liste und... -
Seite 24: Schnelle Netzwerkkonfiguration
Wählen Sie die „Kamera IP Adresse bearbeiten“ Option um ein Fenster für die Kamera IP- Einstellungen zu erhalten. Wenn Sie fertig sind, klicken Sie den „Aktivieren“ Button um die Kameraeinstellungen zu aktualisieren. Weitere Informationen finden Sie im eneo Scan Device Tool Quick Start Guide. Schnelle Netzwerkkonfiguration Die Standard-IP-Adresse der IP-Kamera ist: 192.168.1.10. - Seite 25 Zuweisen einer IP-Adresse Um der Kamera eine IP-Adresse zuzuweisen, gehen Sie wie folgt vor: Klicken Sie auf "Netzwerk-Konfiguration" im Netzwerkkonfigurationsmenü. • Abhängig von Ihrem Service Typ sind Static IP, DHCP Client oder PPPoE verfügbar. Sie müssen die Netzwerk Kamera entsprechend Ihrer Netzwerkumge- bung einstellen.
-
Seite 26: Administrator Passwort
• Für DHCP muss ein DHCP Server bereits in der gleichen Netzwerkumgebung vor- handen sein. Wählen Sie DHCP Client unter Network Confi guration und klicken Sie auf Apply. • PPPoE wird verwendet, um IP-Produkte mit einem vom ISP zur Verfügung gestell- ten PPPoE-Modem zu verbinden. -
Seite 27: Betriebsanleitung
Betriebsanleitung Bildschirmmenü-Steuerung verwenden Zugriff und Steuerung des Konfigurationsmenüs können über den Joystick zur Bild- schirmmenü-Steuerung an der Kamera und einen Service Monitor erfolgen. Fünf Befehle stehen mit dem Joystick zur Verfügung. Standard SD-Karten-Schlitz IP Reset Joystick zur Bildschirmmenü- Steuerung Abdeckung öffnen Video Sub-out Anschluss Beschreibung der Joystick-Bedienung 1. -
Seite 28: Beschreibung Der Zoom- & Fokus-Einstellung
Beschreibung der Zoom- & Fokus-Einstellung Funktioniert nur, wenn das Bildschirmmenü inaktiv ist und keine IP-Verbindung besteht. 1. ▲ : Heranzoomen 2. ▼ : Herauszoomen 3. ◄ : Fokus nah 4. ► : Fokus fern... -
Seite 29: Bildschirmmenü Starten
Bildschirmmenü starten Auf das Kameraeinstellungsmenü kann über Webbrowser auf zwei Arten zugegriffen werden. Die meisten Einstellungen können unmittelbar im Menü in der Abbildung unten eingestellt werden. Um auf die erweiterten Einstellungen wie PRIVACY, POINTING ZOOM und SMART MOTION zugreifen zu können, rufen Sie das Menü ‘ADVANCED CAMERA MENU’... -
Seite 30: Weitere Informationen
Die aktuellsten Firmware-Versionen finden Sie auf unserer Website unter www.eneo-security.com. Das Benutzerhandbuch und weitere Software-Tools sind auf der eneo Website unter www.eneo-security.com oder auf der mitgelieferten CD verfügbar. Informationen zu kompatiblen Video Management Software-Lösungen finden Sie in der... - Seite 31 Réglages Panoramique/Inclinaisons ........................35 Connexions d'alimentation ............................37 Connexion au réseau et attribution d’une adresse IP ..................38 eneo Scan Device Tool (outil de balayage d´eneo) ..................38 Configuration rapide du réseau ........................... 39 Mode d'emploi ......................42 Utilisation d'une commande OS ..........................42 Description du fonctionnement de la manette de contrôle ...............
-
Seite 32: Consignes De Sécurité
Consignes de sécurité Respectez les consignes de sécurité ci-après et lisez attentivement cette notice avant toute utilisation. Les mises en garde importantes sont précédées d´un symbole d´avertissement. Les points importants sont précédés d´un symbole de notice. Matériel livré • Caméra de réseau •... -
Seite 33: Noms Des Pièces
Noms des pièces Câble Ethernet & câble d'alimentation Couvercle de commande de configuration OSD Double vitre Support Easy bracket Panneau avant Panneau arrière Vis de verrouillage/déverrouillage... -
Seite 34: Instructions D'installation
Instructions d'installation ATTENTION : La base de la caméra doit être fixée à une surface solide, co mme du bois dur, un mur, pilier ou poutre au plafond apte à supporter le poids de la caméra dôme. Si nécessaire, utiliser un matériel de fixation (ancrages) plus adéquat au lieu du matériel fourni avec la caméra. -
Seite 35: Réglages Panoramique/Inclinaisons
Vis de montage 1 : 4 x 30 mm Vis de montage : 4 x 14 mm Clé Torx Sorties de câbles ATTENTION : Il faudra veiller à ne pas érafler la vitre devant l'objectif. Veillez à ne PAS endommager, déformer ou exposer le câble dans une zone dangereuse. - Seite 36 Réglage de l'angle de vision à l'aide d'un support Vis de verrouillage/ déverrouillage Clé Torx 1. Limite de panoramique : Le panoramique est limité à +/- 80°. 80° 80° 160° 2. Limite d'inclinaison : L’inclinaison est limitée à une fourchette de 0° min ~ 90° max.
-
Seite 37: Connexions D'alimentation
±90° Connexions d'alimentation Assurez-vous que l´alimentation secteur est déconnectée avant l'installation. La caméra peut fonctionner en 24 V CA ou en 12 V CC ainsi qu’avec une alimentation bitension et par PoE (IEEE Std. 802.3af ). Les mises à la terre primaire et secondaire sont complètement isolées pour éviter les éventuels problèmes de boucle de masse. -
Seite 38: Connexion Au Réseau Et Attribution D'une Adresse Ip
être démarré directement du CD avec un double clic. Après avoir appuyé sur le bouton « Find eneo devices » (trouver le dispositif eneo), vous pourrez prendre connaissance de la liste des caméras connectées au réseau local. Sélec- tionner votre caméra dans la liste et ouvrir le menu contextuel en cliquant avec le bouton... -
Seite 39: Configuration Rapide Du Réseau
Sélectionner l´option "Editing the camera IP address" (taper l´adresse de la caméra IP) pour ouvrir une fenêtre et rentrer l´adresse IP. Quand vous avez fini, cliquer sur "activate" (activer) pour actualiser les paramètres de la caméra. Pour plus d´informations, merci de vous référer au Scan Device Tool Quick Start Guide (guide d´installation rapide du dispositif de balayage). - Seite 40 Attribution d´une adresse IP Pour attribuer une adresse IP à la caméra, veuillez procéder comme suit : Cliquez sur « Network Configuration » (Configuration réseau) dans le menu « Network Configuration ». • En fonction du type de service, la configuration réseau peut être soit « Static IP » (IP statique), «...
- Seite 41 « DHCP Client » (Client DHCP) dans le menu « Network Configuration » (Configuration réseau). Cliquez ensuite sur « Apply ». • Le PPPoE sert à connecter les produits eneo à un modem PPPoE fourni par le four- nisseur d’accès à Internet. Le PPPoE exigeant une authentification, il est nécessaire de saisir un identifiant (ID) et un mot de passe pour accéder au réseau.
-
Seite 42: Mode D'emploi
Mode d'emploi Utilisation d'une commande OS Le menu de configuration peut être consulté et contrôlé soit en utilisant la manette de contrôle de l'affichage à l'écran situé sur le côté de la caméra. Cinq fonctions de com- mande sont disponibles avec la manette. Logement Carte SD standard IP Reset Manette de commande OSD... -
Seite 43: Démarrage Du Menu Osd
1. ▲ : Agrandissement 2. ▼ : Rétrécissement 3. ◄ : Focus proche 4. ► : Focus éloigné Démarrage du menu OSD Il y a deux façons d´accéder au menu de configuration de la caméra via la visualisation Web. Les configurations les plus fréquentes sont disponibles avec les paramètres direc- tement dans le tableau ci-dessous. -
Seite 44: Complément D'information
Le manuel utilisateur et d’autres outils logiciels sont disponibles sur le site web eneo www.eneo-security.com ou sur le CD joint. Des informations concernant les solutions logicielles de gestion vidéo compatibles sont disponibles dans la catégorie Videomanagement (gestion des vidéos) sur www.eneo-se-... - Seite 48 VIDEOR E. Hartig GmbH Exclusive distribution through specialised trade channels only. VIDEOR E. Hartig GmbH Carl-Zeiss-Straße 8 63322 Rödermark/Germany Tel. +49 (0) 6074 / 888-0 Technical changes reserved Fax +49 (0) 6074 / 888-100 www.videor.com...