SICK MLG-2 Pro Betriebsanleitung
Modulares lichtgitter
Vorschau ausblenden
Andere Handbücher für MLG-2 Pro:
- Betriebsanleitung (136 Seiten) ,
- Betriebsanleitung (152 Seiten)
Werbung
Quicklinks
ENGLISH
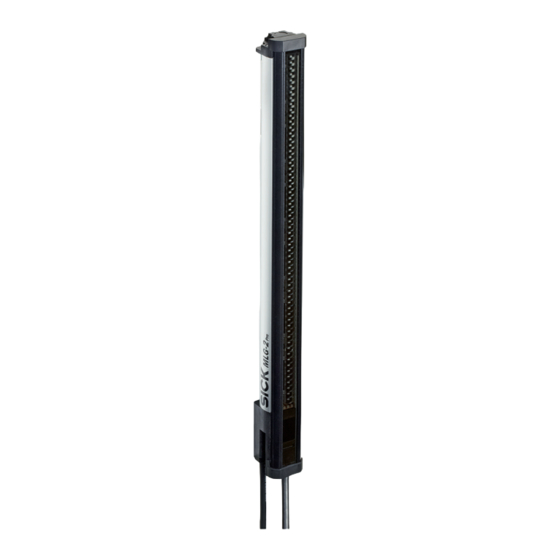
MLG- 2 Prime / Pro
Modular light grid
Operating instructions
Safety notes
> When commissioning, protect the device from moisture and contamin-
-------------------------------------------------------------- 8016959.YCZ4 0714 CV -----------------------------------------------------------
ation.
> These operating instructions contain information required during the
life cycle of the sensor.
> The radiation of the emitted light must not be focused by additional
optical elements.
Correct use
MLG -2 Prime / Pro
The MLG-2 modular light grid is solely intended for the optical and non-contact
detection of objects, animals and persons.
In the event of any other usage or modification to the MLG-2 (e .g. due to
opening the housing during mounting and electrical installation) or in the event
of changes made to the SICK software, any claims against SICK AG under the
warranty will be rendered void.
The MLG-2 is not a safety component according to the EU Machinery Directive.
Read the operating instructions before commissioning (item no. 8017460).
Australia
Österreich
Not included with delivery (download from www.sick.com).
Phone +61 3 9457 0600
Phone +43 (0)22 36 62 28 8-0
Belgium/Luxembourg
Norge
Phone +32 (0)2 466 55 66
Phone +47 67 81 50 00
In accordance with the UL standard, the MLG-2 is only suitable for NFPA 79
Brasil
Polska
applications.
Phone +55 11 3215-4900
Phone +48 22 837 40 50
Canada
România
Mounting, connection, configuration, and commissioning only by competent
Phone +1 905 771 14 44
Phone +40 356 171 120
technicians.
Česká republika
Russia
Phone +420 2 57 91 18 50
Phone +7-495-775-05-30
Function and use
China
Schweiz
Phone +86 4000 121 000
Phone +41 41 619 29 39
Principle of operation
+852-2153 6300
Singapore
Danmark
Phone +65 6744 3732
The MLG-2 is an optical light grid consisting of a sender and a receiv-
Phone +45 45 82 64 00
Slovenija
Deutschland
Phone +386 (0)1-47 69 990
er. The light beams from the sender elements encounter the receiver
Phone +49 211 5301-301
South Africa
elements and form a detection area. If an object is located between
España
Phone +27 11 472 3733
the sender and receiver elements the light beams will be blocked,
Phone +34 93 480 31 00
South Korea
France
Phone +82 2 786 6321/4
depending on the size of the object (Fig. 1 Detection area).
Phone +33 1 64 62 35 00
Suomi
The detection area is determined by the monitoring height and the
Great Britain
Phone +358-9-25 15 800
Phone +44 (0)1727 831121
Sverige
sensing range of the light grid. The monitoring height is determined
India
Phone +46 10 110 10 00
by the necessary beam separation and the number of beams. The
Phone +91–22–4033 8333
Taiwan
sensing range of the light grid is the distance between sender and
Israel
Phone +886-2-2375-6288
Phone +972-4-6801000
Türkiye
receiver.
Italia
Phone +90 (216) 528 50 00
Phone +39 02 27 43 41
United Arab Emirates
Mounting
Japan
Phone +971 (0) 4 8865 878
Phone +81 (0)3 5309 2112
USA/México
The sender and receiver can be secured using a QuickFix bracket
Magyarország
Phone +1(952) 941-6780
Phone +36 1 371 2680
(item no. 2066048) or a FlexFix bracket (item no. 2066614).
Nederland
Mount the sender and receiver at the same height. The end with the
Phone +31 (0)30 229 25 44
cable connection must point in the same direction for both devices.
SICK AG, Erwin-Sick-Strasse 1, D-79183 Waldkirch
When mounting, make sure that sender and receiver are aligned
correctly. The optical lens systems of sender and receiver must be
located opposite one other.
Please find detailed addresses and additional representatives and agencies in
all major industrial nations at www.sick.com
Protect the device from moisture and contamination.
Electrical installation
A label with a connection diagram and details of the inputs and
outputs can be found on the sender and the receiver.
Make the electrical connections using suitable connecting cables,
in line with the connection diagram.
Status indicators
The receiver has three LEDs on its front and a control panel with LEDs
and membrane keys on its rear. The LEDs and the control panel are
NFPA79 applications only.
located on the connection side.
LEDs on the front of the receiver
Adapters providing field
wiring leads are available.
(Tab. 1 LEDs on the front of the receiver)
Control panel
Refer to the product information.
Enclosure Type 1
The MLG-2 Prime and its outputs can be configured for specific
applications using the pushbuttons and LEDs in the control panel.
Depending on the device type, a range of functions can be set in
this manner.
In addition, information can be taught in to the MLG-2 Prime and
MLG-2 Pro using the teach pushbutton on the control panel.
Commissioning
After mounting and electrical installation, the sender and receiver
must be aligned with each other. No objects should be located
between the sender and the receiver. The light path must be clear.
For initial commissioning, the alignment aid is activated in the factory.
Note
When the alignment aid is activated, the outputs are deactivated
Configuration of MLG-2 Prime
(no change in their status). As a result of the teach-in process, the
Basic operation
sensitivity is stored. Following this, the alignment aid is automatically
deactivated and the device switches to operating mode.
Alignment and teach-in of sensitivity for the MLG-2 Prime
The left-hand row of LEDs on the control panel shows the available
outputs, while the right-hand row shows the functions that can be
configured:
The four green LEDs on the right-hand side of the control panel show
Start configuration by pressing the Menu pushbutton.
the quality of alignment.
Use the Menu pushbutton to select an output.
Align the MLG-2 such that as many LEDs illuminate as possible.
Then confirm your selection with the Set pushbutton.
Then fix the position of the sender and receiver.
Next, use the Menu pushbutton to select a function for the output.
Press the teach pushbutton (< 1 s).
Note
The four green LEDs on the right light up briefly one after another
With the height classification and object recognition applications,
(sequential light). The sensitivity is stored.
After a successful teach-in process, all LEDs on the control panel
the reference objects must be located in the detection field at this
go out, as does the yellow LED on the front of the device.
point, so that these can be defined.
The MLG-2 is operational.
Confirm your selection with the Set pushbutton.
If the teach-in process is unsuccessful, all LEDs on the control panel
If you do not press either of the pushbuttons for 15 seconds, the
flash, as does the red LED (10 Hz) on the front of the device.
MLG-2 automatically leaves the menu.
Level 2
Check that the MLG-2 is correctly aligned, that the front screens are
clean and that there are no objects located in the light path.
You can access the second level (L2) of the control panel by pressing
Then carry out the teach-in process once again.
the Menu and Set pushbuttons simultaneously for > 1 second.
Alignment and teach-in of sensitivity for the MLG-2 Pro
Meaning of the displays
(Tab. 2 Meaning of the displays)
The yellow LED on the front of the receiver and the Alignment LED
show the rough alignment.
3 Hz yellow – improve the alignment of the MLG-2.
Configuration of MLG-2 Pro
The MLG-2 Pro is configured using SOPAS ET.
When the yellow LED and the Alignment LED go out, the MLG-2
Ethernet factory settings:
is optimally aligned.
Note
assigning of addresses active via DHCP.
Without DHCP server, static IP address: 192.168.200.100
With the MLG-2 Pro, the configuration software SOPAS ET will
(sub-net mask 255.255.255.0)
support you with alignment and teach-in of the sensitivity.
(Software not included with delivery. Download from website
For information on this process, please read the SOPAS help file
or Chapter "Configuration of MLG-2 Pro" in the user guide
www.sick.com > Service & Support > Software).
(item no. 8017460).
Then fix the position of the sender and receiver.
Press the teach pushbutton (< 1 s).
Maintenance
1 Hz yellow – the yellow LED on the front of the device and the
Alignment LED flash slowly.
SICK light grids are maintenance-free.
We recommend doing the following regularly:
After a successful teach-in process, all LEDs on the control panel go
– Cleaning the front screen of the sender and receiver
out, as does the yellow LED on the front of the device.
(do not use any alcohol for cleaning).
– Repeating the teach-in process after cleaning.
The MLG-2 is operational.
– Checking the screw connections and plug-in connections.
If the teach-in process is unsuccessful, all LEDs on the control
Subject to change without notice. Specified product properties and
panel flash (except for the Ethernet status LEDs), as does the red LED
(10 Hz) on the front of the device.
technical data are not written guarantees.
Check that the MLG-2 is correctly aligned, that the front screens are
SICK support
clean and that there are no objects located in the light path.
If you cannot remedy the fault with the help of the information provided
Then carry out the teach-in process once again.
in the operating instructions (item no. 8017460), please contact your
respective SICK subsidiary.
DEUTSCH
Konfiguartion MLG-2 Prime
Grundsätzliche Bedienung
MLG-2 Prime / Pro
Modulares Lichtgitter
Die linke LED-Reihe des Bedienfelds stellt die verfügbaren Ausgänge
Betriebsanleitung
dar, die rechte LED-Reihe die konfigurierbaren Funktionen:
Starten Sie die Konfiguration durch Drücken der Taste Menü.
Sicherheitshinweise
Wählen Sie mit der Taste Menü einen Ausgang aus.
> Gerät bei Inbetriebnahme vor Feuchte und Verunreinigung schützen.
Bestätigen Sie anschließend mit der Taste Set.
> Diese Betriebsanleitung enthält Informationen, die während des Lebens-
Wählen Sie anschließend mit der Taste Menü eine Funktion für den
zyklus des Sensors notwendig sind.
> Die Strahlung des Sendelichtes darf nicht durch zusätzliche optische
Ausgang.
Bauteile fokussiert werden.
Hinweis
Bei den Applikationen Höhenklassifikation und Objektwiederer-
Bestimmungsgemäße Verwendung
kennung müssen sich nun die Referenzobjekte im Erfassungsfeld
Das modulare Lichgitter MLG-2 ist ausschließlich zum optischen und berüh-
befinden, damit diese definiert werden.
rungslosen Erfassen von Sachen, Tieren und Personen vorgesehen.
Bestätigen Sie die Auswahl mit der Taste Set.
Bei jeder anderen Verwendung sowie bei Änderungen am MLG-2 (z. B. durch
Öffnen des Gehäuses, auch im Rahmen von Montage und Elektroinstallation)
Wenn Sie 15 s keine der beiden Tasten betätigen, dann verlässt das
oder bei Änderungen an der SICK-Software erlischt ein Gewährleistungsan-
MLG-2 automatisch das Menü.
Level 2
spruch gegenüber der SICK AG.
Das MLG-2 ist kein Sicherheitsbauteil gemäß der EU-Maschinenrichtlinie.
Das zweite Level (L2) des Bedienfelds erreichen Sie durch gleichzeiti-
ges Drücken der Taste Menü und Set für > 1sec.
Vor der Inbetriebnahme die Betriebsanleitung lesen (Art.Nr. 8016616).
Nicht im Lieferumgang enthalten (Download über www.sick.com).
Bedeutung der Anzeigen
(Tab. 2 Bedeutung der Anzeigen)
Das MLG-2 ist gemäß UL nur für NFPA 79-Anwendungen geeignet.
Montage, Anschluss, Konfiguration und Inbetriebnahme nur durch Fachpersonal.
Konfiguration MLG-2 Pro
Funktion und Einsatz
Das MLG-2 Pro wird mit Hilfe von SOPAS ET konfiguriert.
Funktionsprinzip
Werkseinstellungen Ethernet:
Adressvergabe über DHCP aktiv.
Das MLG-2 ist ein optisches Lichtgitter, bestehend aus einem Sender
Ohne DHCP-Server statische IP-Adresse: 192.168.200.100
und einem Empfänger. Die Lichtstrahlen der Sendeelemente treffen
(Subnetzmaske 255.255.255.0)
auf die Empfangselemente und bilden ein Erfassungsfeld. Befindet
Bitte lesen Sie hierzu die SOPAS Hilfedatei oder in der Betriebsan-
sich ein Objekt zwischen den Sende- und Empfangselementen,
leitung (Art.Nr. 8016616) das Kapitel „Konfiguration MLG-2 Pro".
werden in Abhängigkeit von der Größe des Objektes Lichtstrahlen
unterbrochen (Abb. 1 Erfassungsfeld).
Wartung
Das Erfassungsfeld wird durch die Überwachungshöhe und die Reich-
SICK-Lichtgitter sind wartungsfrei.
weite des Lichtgitters bestimmt. Die Überwachungshöhe wird durch
Wir empfehlen, in regelmäßigen Abständen:
den notwendigen Strahlabstand und die Strahlanzahl bestimmt.
– Reinigung der Frontscheibe von Sender und Empfänger
Die Reichweite des Lichtgitters ist der Abstand zwischen Sender und
(kein Alkohol zur Reinigung verwenden).
Empfänger.
– Führen Sie nach der Reinigung den Einlernprozess erneut durch.
– Überprüfen Sie Verschraubungen und Steckverbindungen.
Montage
Irrtümer und Änderungen vorbehalten. Angegebene Produkteigenschaften
Sender und Empfänger können mit einer QuickFix-Halterung
und technische Daten stellen keine Garantieerklärung dar.
(Art.-Nr. 2066048) oder einer FlexFix-Halterung (Art.-Nr. 2066614)
befestigt werden.
SICK-Support
Montieren Sie den Sender und den Empfänger auf gleicher Höhe. Das
Wenn Sie einen Fehler nicht mit Hilfe der Informationen der Betriebsanlei-
Ende mit dem Kabelanschluss muss bei beiden Geräten in die gleiche
tung (Art.Nr. 8016616) beheben können, dann setzen Sie sich bitte mit
Richtung zeigen.
Ihrer zuständigen SICK-Niederlassung in Verbindung.
Achten Sie bei der Montage auf die korrekte Ausrichtung von Sender
und Empfänger. Die Optiken von Sender und Empfänger müssen sich
gegenüber liegen.
Gerät vor Feuchtigkeit und Verunreinigung schützen.
Elektroinstallation
Am Sender und Empfänger befindet sich ein Aufkleber mit dem
Anschlussschema und Angaben zu den Eingängen und Ausgängen.
Führen Sie den elektrischen Anschluss mit geeigneten Anschlußka-
beln gemäß dem Anschlussschema durch.
Anzeigeelemente
Der Empfänger verfügt auf der Vorderseite über drei LEDs und auf der
Rückseite über ein Bedienfeld mit LEDs und Folientasten. Die LEDs
und das Bedienfeld befinden sich an der Anschlusseite.
LEDs an der Vorderseite des Empfängers
(Tab. 1 LEDs Vorderseite Empfänger)
Bedienfeld
Über die Tasten und LEDs des Bedienfelds kann das MLG-2 Prime
sowie dessen Ausgänge anwendungsspezifisch konfiguriert werden.
Je nach Gerätetyp sind unterschiedliche Funktionen damit einstellbar.
Außerdem kann das MLG-2 Prime und das MLG-2 Pro mit der
Teach-Taste am Bedienfeld eingelernt werden.
Inbetriebnahme
Nach der Montage und der elektrischen Installation müssen der
Sender und der Empfänger aufeinander ausgerichtet werden. Zwi-
schen Sender und Empfänger darf sich kein Objekt befinden.
Der Lichtweg muss frei sein.
Für die Erstinbetriebnahme ist werkseitig die Ausrichthilfe aktiviert.
Hinweis
Bei aktivierter Ausrichthilfe sind die Ausgänge deaktiviert (keine
Änderung ihres Zustands). Durch den Einlernprozess wird die Empfind-
lichkeit eingelernt und danach automatisch die Ausrichthilfe deaktiviert
und in den Betriebsmodus gewechselt.
Ausrichten und Einlernen der Empfindlichkeit des MLG-2 Prime
Die vier rechten grünen LEDs auf dem Bedienfeld zeigen die
Ausrichtgüte an.
Richten Sie das MLG-2 so aus, dass möglichst viele LEDs leuchten.
Fixieren Sie anschließend die Position des Senders und des Empfängers.
Drücken Sie die Taste Teach (< 1 s).
Die vier rechten grünen LEDs leuchten nacheinander kurz auf
(Lauflicht). Die Empfindlichkeit wird eingelernt.
Nach einem erfolgreichem Einlernprozess erlöschen alle LEDs des
Bedienfelds, sowie die gelbe LED an der Gerätevorderseite.
Das MLG-2 ist betriebsbereit.
Schlägt das Einlernen fehl, blinken alle LEDs des Bedienfelds, sowie
die rote LED (10 Hz) an der Gerätevoderseite.
Prüfen Sie, ob das MLG-2 korrekt ausgerichtet ist, ob die Frontschei-
ben sauber sind und ob sich keine Objekte im Lichtweg befinden.
Führen Sie dann den Einlernprozess erneut durch.
Ausrichten und Einlernen der Empfindlichkeit des MLG-2 Pro
Die gelbe LED an der Vorderseite des Empfängers und die LED
Alignment zeigen die grobe Ausrichtung an.
3 Hz Gelb – richten Sie das MLG-2 besser aus.
Wenn die gelbe LED und die LED Alignment erlöschen, dann ist
das MLG-2 optimal ausgerichtet.
Hinweis
Beim MLG-2 Pro werden Sie von der Konfigurationssoftware SOPAS ET
(Nicht im Lieferumfang enthalten. Download-Website www.sick.com
> Service & Support > Software) beim Ausrichten und Einlernen der
Empfindlichkeit unterstützt.
Fixieren Sie anschließend die Position des Senders und des Empfän-
gers.
Drücken Sie die Taste Teach (< 1 s).
1 Hz Gelb – die gelbe LED an der Gerätevorderseite und die LED
Alignment blinken langsam.
Nach einem erfolgreichem Einlernprozess erlöschen alle LEDs des
Bedienfelds, sowie die gelbe LED an der Gerätevorderseite.
Das MLG-2 ist betriebsbereit.
Schlägt das Einlernen fehl, blinken alle LEDs des Bedienfelds
(außer Ethernet Status LEDs), sowie die rote LED (10 Hz) an der
Gerätevoderseite.
Prüfen Sie, ob das MLG-2 korrekt ausgerichtet ist, ob die Frontschei-
ben sauber sind und ob sich keine Objekte im Lichtweg befinden.
Führen Sie dann den Einlernprozess erneut durch.
A
Detection area / Erfassungsfeld
1
Monitoring height /
Überwachungshöhe
2
Beam separation /
Strahlabstand
3
Sensing range of the light grid /
Reichweite des Lichtgitters
B
General data
Allgemeine Daten
Protection class
Schutzklasse
Enclosure rating
Schutzart
Ambient operating temperature
Betriebsumgebungstemperatur
Electrical data
Elektrische Angaben
Supply voltage V
Versorgungsspannung U
S
V
Switching type
Schaltart
Digital output, output current
Digitalausgang Ausgangsstrom
Digital input
Digitaleingang
Analog output, output current
Analogausgang Ausgangsstrom
Current consumption of sender
Stromaufnahme Sender
typical
typisch
maximum
maximal
with 3 x simultaneous scan
bei 3fach Simultan Scan
Current consumption of receiver
Stromaufnahme Empfänger
typical
typisch
maximum
maximal
in sunlight-resistant mode where a beam of 150 klx is sent to all receiver optics
im sonnenlichtresistenten Modus bei Betrahlung aller Empfangsoptiken mit 150 klx
Switch-on current
Einschaltstrom
1)
Do not use light grid outdoors unless protected (condensation will form)
1)
Lichtgitter nicht ungeschützt im Außenbereich einsetzen (Kondenswasserbildung)
2)
With 24 VDC and 25 °C ambient temperature
2)
Bei 24 VDC und 25 °C Umgebungetemperatur
3)
Class 2
3)
Class 2
Dati generali
Información general
Classe di protezione
Clase de protección
Tipo di protezione
Tipo de protección
Temperatura ambientale di funzionamento
Temperatura ambiente de servicio
Dati elettrici
Datos eléctricos
Tensione di alimentazione U
Tensión de alimentación U
V
V
Tipo di commutazione
Tipo de conmutación
Uscita digitale per la corrente di uscita
Salida digital intensidad de salida
Uscita digitale
Entrada digital
Uscita analogica per la corrente di uscita
Salida analógica intensidad de salida
Assorbimento di corrente emettitore
Consumo de corriente del transmisor
tipico
típico
massimo
máximo
con triplice Simultan Scan
con triple exploración simultánea
Assorbimento di corrente ricevitore
Consumo de corriente del receptor
tipico
típico
massimo
máximo
in modalità resistente ai raggi solari con irraggiamento di tutti i sensori ottici di ricezione con 150 klx en modo resistente a la luz solar con irradiación de todas las ópticas receptoras con 150 klx
Corrente di commutazione
Corriente de cierre
1)
Non utilizzare all'esterno la barriera ottica senza protezione (formazione di condensa)
1)
No utilizar la rejilla fotoeléctrica sin protección en exteriores (formación de agua de condensación)
2)
Con 24 VDC e temperatura ambiente 25 °C
2)
Con 24 V CC y una temperatura ambiente de 25 °C
3)
Class 2
3)
Class 2
Tab. 1:
LEDs on the front of the receiver /
LEDs Vorderseite Empfänger
LED /
Meaning /
LED
Bedeutung
Green /
Grün
Supply voltage on /
Versorgungsspannung an
Supply voltage off, too low or fault (red LED on) /
Versorgungsspannung aus, zu gering oder Fehler (rote LED ein)
1 Hz
IO-Link communication /
Kommunikation IO-Link
Yellow /
Gelb
Light path blocked (at least one beam blocked) /
Lichtweg unterbrochen (mindestens ein Strahl unterbrochen)
No object in the light path /
Lichtweg frei
3 Hz
Contamination warning or alignment aid active /
Verschmutzungswarnung oder Ausrichthilfe aktiv
1 Hz
Teach-in active /
Einlernen aktiv
Red /
Rot
10 Hz
Fault with teach-in (at least one beam blocked), check the
alignment of sender and receiver. /
Fehler beim Einlernen (mindestens ein Strahl unterbrochen),
kontrollieren Sie die Ausrichtung von Sender und Empfänger.
Fault: observe the operating instructions (item no. 8017460). /
Fehler: Beachten Sie die Betriebsanleitung (Art.Nr. 8016616)
Caractéristiques générales
Dados gerais
Classe de protection
Classe de proteção
Indice de protection
Tipo de proteção
Température ambiante de service
Temperatura ambiente de funcionamento
Données électriques
Especificações elétricas
Tension d'alimentation U
Tensão de alimentação U
V
V
Type de commutation
Tipo de ligação
Sortie numérique courant de sortie
Saída digital corrente de saída
Entrée numérique
Entrada digital
Sortie analogique courant de sortie
Saída analógica corrente de saída
Consommation électrique émetteur
Consumo de corrente do emissor
standard
Típico
maximum
Máximo
avec balayage simultané triple
Com escaneamento simultâneo triplo
Consommation électrique récepteur
Consumo de corrente do receptor
standard
Típico
maximum
Máximo
en mode résistant à la lumière solaire avec rayonnement de toutes les optiques de réception
No modo resistente à luz solar com irradiação de todos os elementos ópticos de recepção
avec 150 klx
com 150 klx
Intensité de mise en service
Corrente de ligação
1)
Ne pas mettre en œuvre le rideau de détection non protégé en extérieur
1)
Não utilizar a grade de luz sem proteção em exteriores (formação de condensado)
(formation de condensation d'eau)
2)
Com 24 VDC e temperatura ambiente de 25 °C
2)
Avec 24 V CC et une température ambiante de 25 °C
3)
Class 2
3)
Class 2
一般数据
共通データ
防护等级
保護クラス
外壳防护等级
保護等級
工作环境温度
周辺温度 (作動中)
电气数据
電気データ
供电电压
U
供給電圧
V
V
S
开关输出
スイッチ出力タイプ
数字输出输出电流
デジタル出力 出力電流
数字输入
デジタル出力
模拟输出输出电流
アナログ出力 出力電流
发射器的电流消耗
投光器の消費電流
典型值
標準値
最大值
最大値
3 x
同步扫描
3 x
同時スキャン
接收器的电流消耗
受光器の消費電流
典型值
標準値
最大值
最大値
处于防日光模式,
150 klx
光束可发射至所有接收器的光学元件
150 klx
の光軸がすべての受光光学系に送られる日光耐性モード
接通电流
スイッチオン電流
1)
除非实施保护措施,否则切勿在室外使用光栅(将产生污染物)
1)
ライトグリッドを保護なしで屋外で使用しないこと(結露のおそれ)
2)
24 VDC 电源,25 °C 环境温度
2)
24 VDC
および 25 °C 周辺温度
3)
Class 2
クラス 2
3)
Tab. 2:
Meaning of the display /
Bedeutung der Anzeige
Display /
Meaning /
Anzeige
Bedeutung
Q1 ... Q3
Digital output (Device-specific) /
Digitalausgang (Gerätetypenspezifisch)
QA1 / QA2
Analog output (Device-specific) /
Analogausgang (Gerätetypenspezifisch)
L2
Control panel level 2 active /
Bedienfeld Level 2 aktiv
Level 1 (output-specific settings) /
Level 1 (Ausgangsspezifische Einstellungen)
For digital outputs /
Bei Digitalausgängen
Presence checking /
Anwesenheitskontrolle
Contamination warning /
Verschmutzungswarnung
Height classification (Switch on object > teach-in object) /
Höhenklassifikation (Schalten bei Objekt > Einlernobjekt)
Object recognition (Switch on teach-in object in
monitored area +/- 2 beam tolerance) /
Objektwiedererkennung (Schalten bei Einlernobjekt im
Überwachungsbereich +/- 2 Strahlen Toleranz)
Output inverted / 20 ... 4 mA /
Ausgang invertiert / 20 ... 4 mA
For analog outputs /
Bei Analogausgängen
NBB
Total number of beams blocked /
Summe unterbrochener Strahlen
FBB
First beam blocked /
Erster unterbrochener Strahl
LBB
Last beam blocked /
Letzter unterbrochener Strahl
Level 2 (System-wide settings) /
Level 2 (Systemweite Einstellungen)
Reset to the factory setting /
Auf Werkeinstellung zurücksetzen
Beam blanking with teach-in /
Strahlausblendung bei Teach
Activate / deactivate alignment aid /
Ausrichthilfe aktivieren / deaktivieren
Activate / deactivate cross-beam function /
Kreuzstrahlfunktion aktivieren / deaktivieren
(EN 61 140)
IP 65 and IP 67 (EN 60 529)
1)
/
IP 65 und IP 67 (EN 60 529)
1)
–30 ... +55 °C
2)
24 VDC ±20 %
3)
Push / Pull
100 mA
Activ: 15 V ... V
/ Aktiv: 15 V ... U
S
v
Inactiv: <5 V / Inaktiv: <5 V
4 ... 20 mA
40 mA + (0.05 mA × number of beams / number of beams) /
40 mA + (0,05 mA × Strahlanzahl / Strahlanzahl)
<50 mA + (0.05 mA × number of beams / number of beams) /
<50 mA + (0,05 mA × Strahlanzahl / Strahlanzahl)
<100 mA + (0.05 mA × number of beams / number of beams) /
<100 mA + (0,05 mA × Strahlanzahl / Strahlanzahl)
80 mA + (0.25 mA × number of beams / number of beams) /
80 mA + (0,25 mA × Strahlanzahl / Strahlanzahl)
<100 mA + (0.25 mA × number of beams / number of beams) /
<100 mA + (0,25 mA × Strahlanzahl / Strahlanzahl)
<100 mA + (0.5 mA × number of beams / number of beams) /
<100 mA + (0,5 mA × Strahlanzahl / Strahlanzahl)
5 × current consumption / current consumption /
5 × Stromaufnahme / Stromaufnahme
Werbung

Verwandte Anleitungen für SICK MLG-2 Pro


Inhaltszusammenfassung für SICK MLG-2 Pro
- Seite 1 Änderungen an der SICK-Software erlischt ein Gewährleistungsan- MLG-2 automatisch das Menü. Level 2 of changes made to the SICK software, any claims against SICK AG under the spruch gegenüber der SICK AG. Light path blocked (at least one beam blocked) / Presence checking / warranty will be rendered void.
- Seite 2 器之间不得存在任何物体。光学路径必须清晰可见。 Niveau 2 Montaggio d’uso (art. n. 8017460). 方の装置で同じ方向を指す必要があります。 En el caso de la MLG-2 Pro, el software de configuración SOPAS ET (no Fonctionnement et utilisation Após um processo de teach-in bem-sucedido, todos os LEDs do 初次调试时,请在工厂内完成对准和激活。 取り付け時に、投光器と受光器を正しく光軸調整します。投光器と受 Principe de fonctionnement...