Inhaltsverzeichnis
Werbung
Verfügbare Sprachen
Verfügbare Sprachen
Quicklinks
Werbung
Inhaltsverzeichnis

Inhaltszusammenfassung für JTS MH-920/5
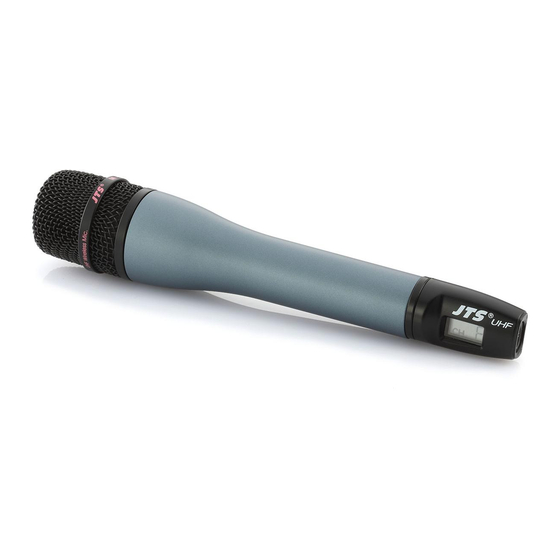
- Seite 1 ® Vertrieb von JTS-Produkten — Distribution of JTS products Bedienungsanleitung Instruction Manual Mode d’emploi Manual de instrucciones MH-920/5 Mikrofon mit UHF-Sender Microphone with UHF Transmitter Microphone avec émetteur UHF Micrófono con emisor UHF...
- Seite 2 La version française se trouve page 10. Antes de cualquier instalación ... deseamos una buena utilización para su nue vo aparato de JTS. Por favor, lea estas in s - trucciones de uso atentamente antes de hacer funcionar el aparato. De esta manera conocerá...
- Seite 3 Ž Œ ...
-
Seite 4: Übersicht Der Bedienelemente
Dieses dynamische Handmikrofon mit Mul tifrequenz- Mignon (R6, AA) Sender bildet mit dem Mul ti frequenz-Dual-Empfänger US-902D / 5 von JTS ein draht lo ses Audio-Über tra - 1.3 Abb. 5: Bedienteil (Kappe abgezogen) gungs system. Der Übertragungs ka nal kann aus 16 Ka nälen im UHF-Fre quenz bereich 518 –... - Seite 5 Anmeldung finden Sie im Internet auf der Seite der 3) Den Übertragungskanal für das Mikrofon einstellen → siehe Kap. 5.1. Den Empfänger einschalten und Bundesnetzagentur (www.bundesnetzagentur.de). auf den gleichen Kanal ein stellen → siehe Bedie- In anderen Ländern muss eine entsprechende Ge - nungsanleitung des Empfängers.
-
Seite 6: Technische Daten
5.2 Einstellen der Empfindlichkeit 5.3.2 Sperrfunktion deaktivieren 1) Der Ein-/Ausschalter (4) muss auf ON stehen. 1) Erst den Kanaleinstellmodus auf ru fen: Die Taste SET (8) 2 s gedrückt halten. 2) Die Taste SET (8) 3 s gedrückt halten, bis 2) Sobald im Display die Anzeige blinkt, die Tas te Display blinkt. -
Seite 7: Operating Elements
1999 / 5 / EC. The declaration of conformity 10 Key for channel selection “up” (in the channel can be found in the Internet via the JTS home page adjusting mode), to increase the sensitivity (in the (www.jts-germany.de). sensitivity adjusting mode), and to activate the lock... -
Seite 8: Power Supply
country. Links to the national authorities can be found 5) The microphone may be locked to prevent acciden- via the following Internet address: tal change of the adjustments or accidental switch - ing off → chapter 5.3. www.cept.org → ECC 6) After all adjustments have been made, replace the →... -
Seite 9: Specifications
3) Adjust the sensitivity in such a way that an optimum 5.3.2 Deactivating the lock function volume level of the microphone is reached. If the 1) The power switch (4) must be set to ON. volume is too high, the microphone will distort, then 2) Keep the key SET (8) pressed for 3 s until adjust a lower value with the key (9). -
Seite 10: Conseils Importants Dʼutilisation
7 Support de batteries pour deux batteries 1,5 V de quences intégré constitue avec le récepteur multifré- type R6. quences double US-902D / 5 de JTS un système de transmission audio sans fil. Le canal de transmission 1.3 Schéma 4 : élément de commande peut être librement sélectionné... - Seite 11 pays correspondant. Vous trouverez les liens permet- 4) Parlez ou chantez dans le micro. En modifiant la sensibilité du micro, vous pouvez corriger le niveau tant dʼaccéder aux agences nationales compétentes à de volume du micro → voir chapitre 5.2. lʼadresse suivante : 5) Le microphone peut être verrouillé...
-
Seite 12: Caractéristiques Techniques
réglage de la sensibilité : lʼaffichage indique briève- 5.3.2 Désactiver la fonction verrouillage ment puis la sensibilité réglée (0 dB, 1) Lʼinterrupteur Marche/Arrêt (4) doit être sur ON. -10 dB, -20 dB ou -30 dB). 2) Maintenez la touche SET (8) enfoncée pendant Conseil : pour quitter le mode réglage sans effec- 3 secondes jusquʼà... -
Seite 14: Elementos Operativos
7 Portador de batería para dos baterías 1,5 V de tipo Combinado con el receptor dual multifrecuencia AA (R6) US-902D / 5 de JTS este micrófono de mano dinámico con emisor multifrecuencia forma un sistema de trans- misión audio inalámbrico. Dentro de la gama de frecu- 1.3 Fig. -
Seite 15: Puesta En Funcionamiento
www.cept.org 5) El micrófono puede ser bloqueado para prevenir → ECC cambios accidentales de los ajustes o que se apa- → Topics gue→ capítulo 5.3. → Short Range Devices (SRD) and other R&T TE 6) Tras haber hecho todos los ajustes, vuelva a colo- sub-classes car la tapa (3). -
Seite 16: Características Técnicas
Nota: Para abandonar el modo de ajuste sin 5.3.2 Desactivar la función de bloqueo hacer ningún ajuste, presione la tecla SET las 1) El interruptor de encendido (4) debe ajustarse en veces necesarias hasta que se indique la pantalla. Luego la unidad vuelve al funcio- 2) Mantenga la tecla SET (8) presionada durante namiento normal. - Seite 17 MONACOR INTERNATIONAL GmbH & Co. KG, Zum Falsch 36, 28307 Bremen, Germany Copyright by MONACOR INTERNATIONAL. All rights reserved. A-1490.99.01.01.2014 ©...


