Inhaltsverzeichnis
Werbung
Verfügbare Sprachen
Verfügbare Sprachen
Quicklinks
Werbung
Inhaltsverzeichnis

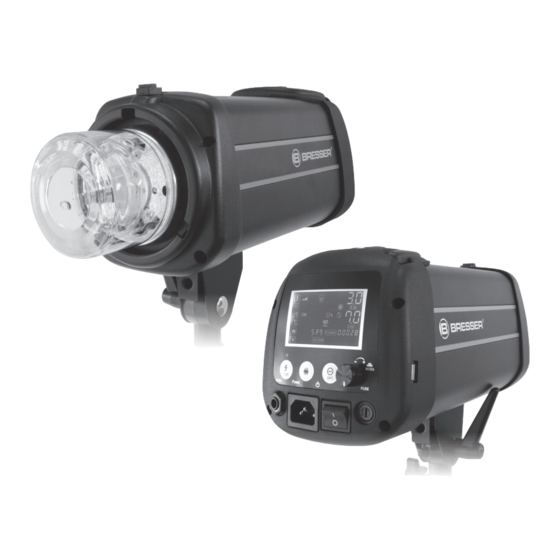
Inhaltszusammenfassung für Bresser FM-300
- Seite 1 STUDIOBLITZGERÄTE FM-Serie STUDIO FLASHES FM Series Art. No. 81-10133 81-10134 81-10135 FM-300 FM-400 FM-500 FM-600 FM-800 BEDIENUNGSANLEITUNG FM-1000 INSTRUCTION MANUAL ANLFMFLASHESDEGB0215BRESSER.indd 1 12.03.15 09:44...
- Seite 2 Fig. 1 Fig. 2 Fig. 3 ANLFMFLASHESDEGB0215BRESSER.indd 2 12.03.15 09:44...
- Seite 3 Fig. 4 Fig. 5 Fig. 6 Fig. 7 Fig. 8 ANLFMFLASHESDEGB0215BRESSER.indd 3 12.03.15 09:44...
- Seite 4 Fig. 9 Fig. 10 Fig. 11 BEDIENUNGSANLEITUNG .............5 INSTRUCTION MANUAL ............. 11 GARANTIE & SERVICE / WARRANTY & SERVICE GARANTIE ET SERVICE / GARANTÍA Y SERVICIO GARANZIA E ASSISTENZA ...........16 ANLFMFLASHESDEGB0215BRESSER.indd 4 12.03.15 09:44...
- Seite 5 SMD-Leuchtdiode (LED) (vorinstalliert), Bedienungsanleitung zen sie Kabel vor scharfen Kanten und Hitze. Überprüfen Sie das Gerät, die Kabel und Anschlüsse vor Inbe- Die hochwertigen BRESSER Studioblitzgeräte wurden für die triebnahme auf Beschädigungen. Studiofotografie entwickelt. Sie überzeugen durch hohe Sta- Beschädigtes Gerät oder ein Gerät mit beschädigten stromfüh- bilität und Zuverlässigkeit und werden so den Bedürfnissen je-...
- Seite 6 Eigenschaften der BRESSER FM-Serie 11 Anzeige für die eingestellte Leistung der Einstelllampe 12 Statusanzeige für den Lüfter 1. Hochgeschwindigkeitsblitzlampen, erhältliche in den Leis- 13 Blitzzeitzähler tungsstärken 400Ws, 500Ws, 600Ws, 800Ws, 1000Ws 14 Verbindungsanzeige für die Fernbedienung 2. Blitzgeschwindigkeiten: 5x/Sek., 10x/Sek. oder 15x/Sek.
-
Seite 7: Bedienung
4. Tragegriff aus- und einklappen (Fig. 8) HINWEIS! 1. Zum Ausklappen des Tragegriffs betätigen Sie den Siche- Der Leistungsbereich liegt zwischen 1.0 und 7.0. Dabei ist 1.0 rungsknopf (Fig. 2, A). Der Tragegriff springt aus der Mulde. der niedrigste Leistungswert und 7.0 der höchste. Es ergeben 2. - Seite 8 2. Drehen Sie den Einstellknopf (Fig. 2, I), um eine Blitzge- 2. Drücken Sie den Einstellknopf (Fig. 2, I) bis im Display schwindigkeit von F1 bis F9 einzustellen. aktuelle Einstellung blinkt. 3. Bestätigen Sie die Einstellung durch Drücken der Funktions- 3.
-
Seite 9: Reinigung Und Wartung
Eine „Konformitätserklärung“ in Übereinstimmung mit den anwendbaren Richtlinien und entsprechenden Nor- HINWEIS! men ist von der Bresser GmbH erstellt worden. Diese kann auf Sorgen Sie unbedingt für eine Spannungsversorgung gemäß Anfrage jederzeit eingesehen werden. den vorgegebenen Bereichen! Optionales Zubehör... -
Seite 10: Technische Daten
Technische Daten Modell FM-300 FM-400 FM-500 FM-600 FM-800 FM-1000 Blitzenergie 300Ws 400Ws 500Ws 600Ws 800Ws 1000Ws Leitzahl GN58 GN62 GN70 GN80 GN87 GN99 Blitzaufladezeit 0,1 - 0,5 Sek 0,1 - 1 Sek 0,1 - 1,5 Sek. Energiebereich stufenlos regelbar von 1/64 bis 1/1 Einstelllampe 10 W OLED;... - Seite 11 (pre-installed), instruction manual a power source (power supply and/or batteries). Children The high quality studio flashes of the BRESSER FM series should only use the device under adult supervision. Only use were designed for studio photography. They impress with high the device as described in the manual;...
- Seite 12 saving and durable due to lower surface temperature NOTE! Use clean cotton gloves or a clean cloth. 6. Large LCD panel with digital program control, power-on 1. Remove and replace UV protection cover (Fig. 5) indicator, guide numbering (GN), overheating and over- 1.
-
Seite 13: Operation
until you have set the desired position. 3.3. Synchronous power setting 3. Tighten the locking screws again. Move the flash back into (Set modeling lamp depending on the flash power) a horizontal position and tighten the locking lever of the tilt 1. - Seite 14 2. Press the setting knob (Fig. 2, I) until the current setting 10.2. Condenser overheating protection under flashes. If the temperature of the condenser is higher than the current 3. Press the function button (Fig. 2, J) until flashes. After that operating temperature, charging of the flash will be stopped.
-
Seite 15: Optional Accessories
Much more accessories such as light modifiers, tripods and environmental authority. bags available in our webshop at www.photostudio.equipment EC Declaration of conformity Cleaning and maintenance Bresser GmbH has issued a "Declaration of Conformity" Before cleaning the device, disconnect it from the power supply accordance with applicable... - Seite 16 Las llamadas des del extranjero están ligadas a costes suplementarios. via the link below (QR code) for available versions. Alternatively you can also send an email to manuals@bresser.de or leave a message on +49 (0) 28 72 – GARANZIA E ASSISTENZA 80 74-220*.


