Inhaltsverzeichnis
Werbung
Verfügbare Sprachen
Verfügbare Sprachen
Bedienungsanleitung
Deutsch Seite: 1-15
User Manual
English Page: 16-30
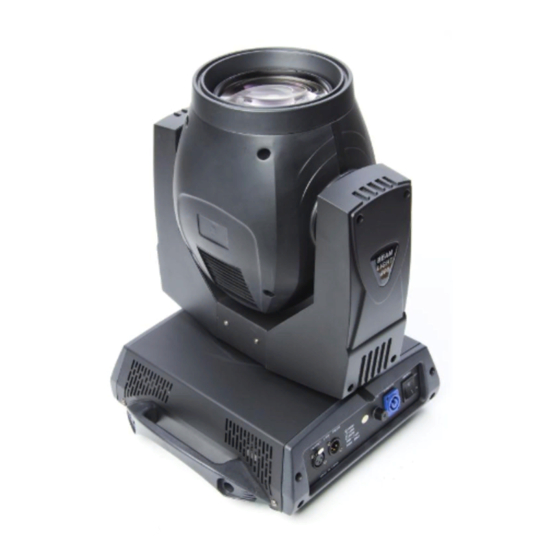
Shaft 5R
Beam Moving Head
Art.: LIG0010525-000 Shaft 5R
Art.: LIG0010000-000 Shaft 5R Touring Pack
Art.: LIG0010510-000 Shaft 5R + Single Case
Sehr geehrter Kunde,
vielen Dank, dass Sie sich für ein Produkt von LightmaXX entschieden haben.
In der folgenden Anleitung erhalten Sie wichtige Informationen über dieses Produkt, sowie deren
Eigenschaften und Funktionen.
Dear Customer,
Thank you for purchasing our product from LightmaXX.
To fully enjoy the benefits of this product,
Please read and understand the important information and instructions
Included in this manual.
Werbung
Kapitel
Inhaltsverzeichnis

Inhaltszusammenfassung für LIGHTMAX Shaft 5R
- Seite 1 Beam Moving Head Art.: LIG0010525-000 Shaft 5R Art.: LIG0010000-000 Shaft 5R Touring Pack Art.: LIG0010510-000 Shaft 5R + Single Case Sehr geehrter Kunde, vielen Dank, dass Sie sich für ein Produkt von LightmaXX entschieden haben. In der folgenden Anleitung erhalten Sie wichtige Informationen über dieses Produkt, sowie deren Eigenschaften und Funktionen.
-
Seite 2: Inhaltsverzeichnis
LightmaXX Shaft 5R Beam Moving Head ______ Inhaltsverzeichnis 1. Produkt-Einleitung Seite 2 2. Sicherheitshinweise Seite 3 3. Zubehör Seite 4 4. Informationen zur Installation Seite 4-5 4.1 Montage und Befestigung Seite 4 4.2 Stromversorgung Seite 5 4.3 Anschlüsse Seite 5 4.4 Informationen zum Leuchtmittel... -
Seite 3: Produkt-Einleitung
Shaft 5R Beam Moving Head. 1. Produkt-Einleitung Vielen Dank, für die Wahl des Shaft 5R Beam Moving Head. Dieses Gerät ist die neueste Entwicklung aus dem Hause LightmaXX und zählt zu den fortschrittlichsten und hellsten Beam Lights in dieser Klasse. -
Seite 4: Sicherheitshinweise
LightmaXX Shaft 5R Beam Moving Head ______ 2. Sicherheitshinweise • Installation Stellen Sie sicher, dass alle Teile für die Befestigung des Geräts in einem guten Zustand sind. Stellen Sie sicher, dass die Transportsicherung für PAN und TILT vor der Inbetriebnahme gelöst ist. -
Seite 5: Zubehör
LightmaXX Shaft 5R Beam Moving Head 3. Zubehör 1x Bedienungsanleitung 2x Camlock Montagebügel 1x Powercon Netzkabel 1x DMX Kabel 1x Leuchtmittel (bereits vorinstalliert) 4. Informationen zur Installation 4.1 Montage und Befestigung Verriegeln Sie den Transportschutz für die X-und Y-Achse (PAN & TILT) in einer Stellung, um die Installation zu erleichtern. -
Seite 6: Stromversorgung
LightmaXX Shaft 5R Beam Moving Head ______ Achtung: 1. Stellen Sie bitte vor der Installation sicher, dass die Halterungen und Montageflächen stabil genug sind, um dem 10-fachen Gewicht des Geräts standhalten zu können. Bitte beachten Sie bei Traversen - Montage die Belastungstabellen des jeweiligen Herstellers. -
Seite 7: Informationen Zum Leuchtmittel
LightmaXX Shaft 5R Beam Moving Head 4.4 Informationen zum Leuchtmittel 1. Passende Leuchtmittel Philips MSD Platinum 5R OSRAM SIRIUS HRI 190W VSE 60 Achtung! Die Installation anderer Arten von Leuchtmitteln kann zu potentiellen Sicherheitsrisiken und Materialschäden führen. Um das Risiko von Schäden am Gerät zu minimieren, wechseln Sie das Leuchtmittel, wenn die angegebene Lebensdauer erreicht ist. -
Seite 8: Betrieb Und Steuerung
LightmaXX Shaft 5R Beam Moving Head ______ Bild 8 (links neben dem Leuchtmittel finden sie die Bild 9 Inbusschraube zur Positionierung des Brenners) Betrieb und Steuerung 5.1 Bedienfeld & Menü Im Einstellungsmenü: Zurück zum vorherigen Menüebene SELECT ohne Veränderung (Beenden der Funktion). -
Seite 9: Menüstruktur
LightmaXX Shaft 5R Beam Moving Head ______ 5.2 Menüstruktur 2 Info 1 Press E into Powerontimes DMX Address Set Poweron time Clear time Info Lampoontimes Options Lamp on time Clear time Setting Lamp strikes Manual control Lamp strike Reset strikes... -
Seite 10: Menüfunktionen
LightmaXX Shaft 5R Beam Moving Head ______ 5manua 6 Test l control DMX values Lamp Reset on or off Functio values Run program Lamp Reset 7 Advanced Lamp Reset Effect Access code _ _ _ _ Reset Pan/Tilt 5.3 Menüfunktionen... - Seite 11 LightmaXX Shaft 5R Beam Moving Head ______ Options Lamp off via ON /OFF LAMP OFF Befehl per DMX ermöglichen Reset via DMX ON /OFF Resetfunktion per DMX ermöglichen Lamp on by ON/OFF LAMP ON Befehl wenn das Power on Gerät eingeschatet wird...
-
Seite 12: Dmx Kanal Tabelle
LightmaXX Shaft 5R Beam Moving Head ______ 6. DMX Kanal Tabelle Attribute color wheel DMX value Effects 128——255 Clockwise rotate color wheel Slow ->Fast Linearity Blue +White Single step Blue Single step CTB8000+Blue Single step CTB8000 Single step CTO190+CTB8000 Single step... -
Seite 13: Dmx Kanal Tabelle Fortsetzung
LightmaXX Shaft 5R Beam Moving Head ______ DMX Value Effect Attribute CH4 Fixed Gobo 250—255 Gobo 16 shake Slow ->Fast Linearity 249—244 Gobo 15 shake Slow ->Fast Linearity 237—243 Gobo 14 shake Slow ->Fast Linearity 231—236 Gobo 13 shake Slow ->Fast Linearity 224—230... -
Seite 14: Dmx Kanal Tabelle Fortsetzung
LightmaXX Shaft 5R Beam Moving Head ______ DMX Value Effect Attribute CH6 Prism Rotation 193—255 Clockwise Rotation, Slow ->Fast Linearity 191—192 Stop Single-step 128—190 Anticlockwise ,Rotation, Fast->Slow Linearity 0—127 0°->540° Linearity CH7 Prism Effect DMX Value Effect Attribute Movement 0—255... -
Seite 15: Wartungshinweise
LightmaXX Shaft 5R Beam Moving Head ______ 7. Wartung Es wird empfohlen eine regelmäßige Wartung am Moving Head durchzuführen. Die Lebensdauer des Geräts hängt zum Großteil von der Arbeitsumgebung und den Betriebsbedingungen ab. Daher ist es sehr wichtig, dass Gerät regelmäßigen Wartungen zu unterziehen. -
Seite 16: Fehlerbehebung
LightmaXX Shaft 5R Beam Moving Head ______ 9. Fehlerbehebung 1. Leuchtmittel zündet nicht (kein Licht) A. Das Leuchtmittel ist nach einem Neustart noch nicht komplett abgekühlt. Warten Sie bitte 5-10 Minuten nach dem abschalten und starten sie das Gerät neu. - Seite 17 LightmaXX Shaft 5R Beam Moving Head ______ INSTRUCTION MANUAL 1. Product Introduction Page 17 2. Safety Information Page 18 3. Accessories Page 19 4. Installation Information Page 19 4.1 Equipment mounting bracket installation Page 19 4.2 Device power Page 20 4.3 Connectivity standard...
-
Seite 18: Product Introduction
LightmaXX Product. To assure a secure Use, please read the following instruction Manual before starting the device. We wish you a lot of fun and successful Events with your brand new LightmaXX Shaft 5R Beam Moving Head. 1. Introduction Thanks for choosing the LightmaXX Shaft 5R. -
Seite 19: Safety Information
2. Safety Information • Installation Make sure all parts for fixing the projector are in a good state of repair. Make sure the point of anchorage is stable before positioning the projector. The safety chain must be properly hooked onto the fitting and secured to the framework, so that, if the primary support system fails, the fitting falls as little as possible. -
Seite 20: Accessories
LightmaXX Shaft 5R Beam Moving Head ______ 3. Accessories 1x Manual 2x Camlock Mounting bracket 1x Signal line 1x Power Supply 1x Lamp (installed) 4. Installation information 4.1 Equipment mounting bracket installation Please lock the X and Y axis transport protection, to alleviate the installation. -
Seite 21: Device Power
LightmaXX Shaft 5R Beam Moving Head ______ 4.2 Device power Power supply Fuse 200-250V 5A ( main fuse) 100-120V 7A (main fuse) The connecting operator must have the relative certificate. Confirm that power voltage accords to the power marked on the lamp. Make sure, it has overload and leakage protection. -
Seite 22: Operation And Control Methods
LightmaXX Shaft 5R Beam Moving Head ______ 2. Installation and replacement bulbs. Caution! Replace the Lamp carefully. To avoid oil contamination, do NOT touch the surface of the bulb. Bulbs must be kept clean, if not, clean it with the attached paper. The bulb leading wire must be inserted firmly . Bad contact of the terminal may cause that bulbs won’t work or even damage .Ensure bulbs are in place and... -
Seite 23: Control Panel Menu Functions
LightmaXX Shaft 5R Beam Moving Head 5.2 The control panel menu functions: 1 Press E into 2 Info Powerontimes DMX Address Set Poweron time Clear time Info Lampoontimes Options Lamp on time Clear time Lamp strikes Setting Lamp strike Reset strikes... -
Seite 24: The Control Panel
LightmaXX Shaft 5R Beam Moving Head 6 Test manual control DMX values Lamp Reset on or off Functio values Run program Lamp Reset 7 Advanced Lamp Reset Effect Access code _ _ _ _ Reset Pan/Tilt 5.3 The control panel... - Seite 25 Tilt Inverse ON/OFF According to the scene choose the vertical scan direction Pan Tilt Swap ON/OFF Choose the lamp horizontal and vertical control exchange or not . ( For hanging lamps ) Lamp on via ON /OFF Choose opening the bulb by control table or not Lamp off via ON /OFF...
-
Seite 26: Function Table Of Dmx Control Channel
LightmaXX Shaft 5R Beam Moving Head ______ 6. Function Table of DMX Control Channel color wheel DMX value Effects Attribute 128——255 Clockwise rotate color wheel Slow ->Fast Linearity Blue +White Single step Blue Single step CTB8000+Blue Single step CTB8000 Single step... - Seite 27 LightmaXX Shaft 5R Beam Moving Head ______ DMX Value Effect Attribute CH4 Fixed Gobo 250—255 Gobo 16 shake Slow ->Fast Linearity 249—244 Gobo 15 shake Slow ->Fast Linearity 237—243 Gobo 14 shake Slow ->Fast Linearity 231—236 Gobo 13 shake Slow ->Fast Linearity 224—230...
- Seite 28 CH 14 macro function DMX value Effect Attribute 0-255 Unused Attribute CH15 Reset DMX value Effect Attribute 128—255 The complete machine reset single step delay 5seconds 77—127 XY axles reset single step delay 5seconds Effective parts reset (color 、Gobo 、Lens, etc. ) 26—76 single step delay 5seconds 0—25...
-
Seite 29: Routine Maintenance
LightmaXX Shaft 5R Beam Moving Head ______ 7. Routine maintenance Routine maintenance to the moving head light is strongly recommended .The equipments life span depends on the working environment to a great degree .Therefore it’s very important to keep routine maintenance. -
Seite 30: Technical Parameters
LightmaXX Shaft 5R Beam Moving Head ______ 8. Technical parameters • Bulbs:Philips MSD Platinum 5R, Osram SIRIUS HRI 190W VSE 60 • Illuminance: 58700 Lux @ 20m • Channel:17 international standard DMX signal channels • Horizontal scan:540° (16bit precise scan) automatically correct •... -
Seite 31: Common Malfunctions
LightmaXX Shaft 5R Beam Moving Head ______ 9. Common Malfunctions 1. Bulb cannot light up A. Bulb con not cool down completely because of improper operation .First cool the fan inside the light body do for about 10 minutes, then switch off the power, 5 minutes later, after all inner parts return to normal, restart the power at last .