Inhaltsverzeichnis
Werbung
Verfügbare Sprachen
Verfügbare Sprachen
Werbung
Kapitel
Inhaltsverzeichnis

Verwandte Anleitungen für DNT IP-dio


Inhaltszusammenfassung für DNT IP-dio
- Seite 1 Bedienungsanleitung user manual Mode d’emploi...
-
Seite 2: Inhaltsverzeichnis
Inhalt Sicherheitshinweise ..............3 Gerätebeschreibung Systemvoraussetzungen ............4 Geräteansicht ...............5 Bedienung ................6 Begriffserklärung ..............7 Netzwerk einrichten / Radiostatio suchen ......8 Uhrzeit/Alarm einstellen .............10 Standortwahl ..............12 Windows Shares..............12 UPNP Server / Mediaplayer 11 ..........13 Wiedergabe ................16 Konfi guration ..............16 Technische Daten ...............17 Umweltgerechte Entsorgung ..........18 Fragen und Antworten ............18 Serviceabwicklung ..............18 Konformitätserklärung ............19... -
Seite 3: Sicherheitshinweise
Sicherheitshinweise Bitte lesen Sie diese Hinweise vor dem ersten Gebrauch sorgfältig durch. Allgemeine Hinweise Stellen Sie das Gerät niemals auf einen instabilen Untergrund. Durch ein Herabfallen könnten Personen verletzt werden. Das Gerät gehört nicht in Kinderhände. Es ist kein Spielzeug. Beachten Sie auch die Sicherheitshinweise und die Bedienungsanleitungen der übrigen Geräte, an die das Gerät angeschlossen wird. -
Seite 4: Reinigung Und Pflege
Sicherheitshinweise / Systemvoraussetzungen Verpackungsmaterial Lassen Sie das Verpackungsmaterial nicht achtlos liegen. Plastik-folien/-tüten, etc. können für Kinder zu einem gefährlichen Spielzeug werden. Reinigung und Pfl ege Bewahren Sie das Gerät immer an einem sauberen, trockenen Platz auf. Verwenden Sie zur Reinigung der Außenfl ächen ein trockenes, weiches Tuch. Systemvoraussetzungen (Begriffserklärung Seite 7) Was wird benötigt, um mit dem Radio arbeiten zu können? -
Seite 5: Gerätebeschreibung
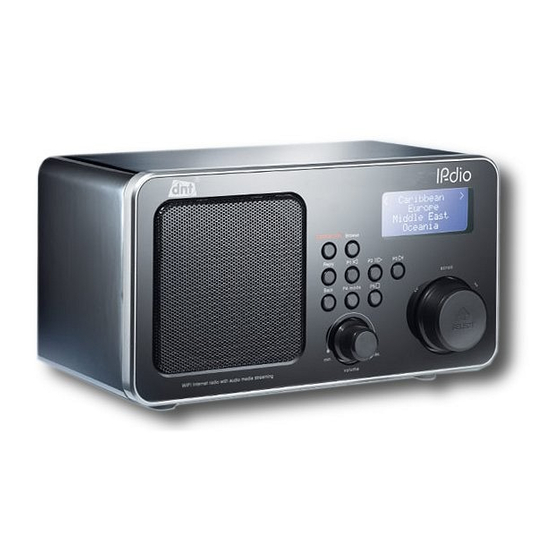
Gerätebeschreibung Geräteansicht Kopfhöreranschluss 230 V Anschluss-Kabel Antenne Display Select i i I Bedientasten und Knöpfe (s. nächste Seite) Lautsprecher - 5 -... -
Seite 6: Bedienung
Bedienung Knöpfe u. Internet Radio Mode Mediaplayer Mode Tasten Drücken zum Ein- und Ausschalten des Radios Im Menü eine Stufe zurückgehen Keine Funktion gespeicherte Titel anzeigen Keine Funktion Keine Funktion Drücken und halten um eine Station zu speichern Kurz Drücken, um eine gespeicherte Station zu wählen voriger Titel Drücken und halten um eine Station zu speichern Start / Pause... -
Seite 7: Begriffserklärung
Begriffserklärung Wireless AP: Unter Wireless AP versteht man einen Wireless LAN Access Point. Dieser ist in der Regel im Router eingebaut. DHCP: Das Dynamic Host Confi guration Protocol (DHCP) ermöglicht mit Hilfe eines entsprechenden Servers oder Routers die dynamische Zuweisung einer IP-Adresse in einem Netzwerk. -
Seite 8: Netzwerk Einrichten / Station Wählen
Netzwerk einrichten / Station wählen Erstinbetriebnahme Es empfi ehlt sich die erste Inbetriebnahme in der unmittelbaren Nähe des Routers durch- zuführen. Verbinden Sie das Radio mit der Steckdose. Reciva Radio Das Display zeigt für 6 Sekunden das Startdisplay. ARM Powered Danach erfolgt eine automatische Umschaltung auf Netzwerk Suche. -
Seite 9: Manuelle Einstellung Der Ip-Adresse
Netzwerk einrichten / Station wählen Wählen Sie nun das gewünschte Programm aus und bestätigen mit dem Select-Knopf. Die Verbindung wird aufgebaut, falls zur Zeit ein Radioprogramm übertra- gen wird. Es erfolgt die Meldung „Puffern“, danach wird die Übertragungs- qualität im Display angezeigt. Der Verbindungsaufbau und die Qualität sind fast ausschließlich von der Bandbreite des Radiosenders und der Bandbreite des eigenen DSL-Anschlusses abhängig. -
Seite 10: Uhrzeit/Alarm Einstellen
Zeit / Alarm Einstellen der Uhrzeit Drücken Sie den Select-Knopf. Solten Sie an irgendeinem Punkt einen Stations Fehler machen, drücken Sie die Back-Taste um zum vorigen Bild zurück < Konfi guration > zu kehren. Medienwiedergabe Wählen Sie Konfi guration Drücken Sie den Select-Knopf Registrieren <... - Seite 11 Zeit / Alarm Drehen Sie den Select-Knopf bis <Alarm einstellen> im Display erscheint. Zeit einstellen Drücken Sie den Select-Knopf. < Alarm einstellen > Drehen Sie den Select-Knopf zwischen JA und NEIN und drücken den Select-Knopf. Haben Sie NEIN gewählt, ist der Alarm ausgeschaltet. Im Display erscheint für 3 Sekunden Alarm ist aus.
-
Seite 12: Standortwahl
Standortwahl / Windows Shares Die Standortwahl Nachdem Sie das Radio am Netzwerk angemeldet haben, können Sie einen Platz suchen, an dem Sie es betreiben möchten. Dabei ist zu beachten, dass die theoretische Reichweite von 100m nur im Freien und unter besten Bedingungen gilt. In der Praxis, bei Ihnen zuhause, schränken Wände und Betondecken die Reichweite sehr stark ein. -
Seite 13: Den Media Player Als Upnp-Server Einrichten
UPNP-Server einrichten Wählen Sie den gewünschten Ordner aus, bestätigen Sie mit dem Select-Knopf. Das Display zeigt Lade..Wenn Sie eine große Dateiliste haben, kann der Such- vorgang einige Zeit dauern. Nachdem das Radio den Scan-Vorgang beendet hat, kann die Dateiliste sortiert werden: Nach Album, Nach Interpret und Wie- dergabe-Liste, falls vorhanden. -
Seite 14: Wiedergabe
Wiedergabe Klicken Sie auf Einstellungen, um die Medienauswahl anzupas- sen. Geben Sie einen eindeutigen Freigabenamen ein. Beachten Sie die Sicherheitshinweise zur Freigabe von Medien, Dateien und Ordnern. Wiedergabe von auf einem UPNP Server gespeicherten Musikdateien Drücken Sie die Back-Taste bis Medienwiedergabe angezeigt wird. Wählen Sie den Eintrag Medienwiedergabe und drücken Sie den Select- Knopf. -
Seite 15: Titel Für Eine Spätere Wiedergabe Zur Queue Hinzufügen
Wiedergabe Wie im Mediplayer erhalten Sie eine Liste der Kategorien. Wählen Sie die Kategorie aus und drücken den Select-Knopf. Die Sortierung der Titel erfolgt durch die Kategorienauswahl. Wählen Sie Zur Queue hinzufuegen und drücken den Select-Knopf. Das Radio bestätigt mit der Meldung Hinzufuegen von Titel zur Queue. Ist die Liste der Titel zu groß... -
Seite 16: Konfi Guration
Konfi guration Im Display erscheint Aus der Queue entfernt. Möchten Sie alle Titel löschen, drücken Sie die Back-Taste, bis im Display Queue leeren erscheint. Drücken Sie den Select-Knopf. Wiederholte Wiedergabe oder Wiedergabe in zufälliger Reihenfolge Wählen Sie einen Titel aus, wie soeben beschrieben. Drücken Sie die Back-Taste bis der Menüeintrag Wiedergabe erscheint. -
Seite 17: Technische Daten
Konfi guration < Werkseinstellungen > Gelegentlich kann es notwendig sein, das Radio auf Werkseinstellung zurück zu setzen, weil man z.B. eine Netzwerkeinstellung gemacht hat, aber nicht mehr genau weiß, welche Werte eingestellt wurden. In diesem Fall werden alle Einstellungen gelöscht. <... -
Seite 18: Umweltgerechte Entsorgung
Serviceabwicklung Sollten Sie Grund zur Beanstandung haben oder Ihr Gerät weist einen Defekt auf, wenden Sie sich an Ihren Händler oder setzen Sie sich bitte mit der Serviceabteilung der Firma dnt GmbH in Verbindung, um eine Serviceabwicklung zu vereinbaren. Servicezeit: Montag bis Donnerstag von 8.00-17.00 Uhr Freitag von 8.00-16.00 Uhr... -
Seite 19: Konformitätserklärung
Konformitätserklärung EC-Declaration of Conformity marking We, Manufacturer/Importer Dnt Drahtlose Nachrichtentechnik Entwicklungs- und Vertriebs GmbH Voltastr, 4 D-63128 Dietzenbach, Germany Declare that the product IPdio is in conformity with Council Directive 1999/5/EC (R&TTE Directive) EN 300 328 v1.6.1 Council Directive 89/336/EEC (EMV Directive) as amended by directive 93/68/EEC EN 301 489-17 v.1.2.1, EN 61000-3-2:2000-A2, EN 61000-3-3:1995+A1... - Seite 20 Contents Security instructions ............21 Product information Systemrequirements ............22 Name of each part .….………..........23 Controls ................24 Operation Steps for connecting your radio to your wireless network 25 Choosing a radio station to listen to ......... 26 Changing the volume ............27 .........
-
Seite 21: Security Instructions
Security instructions Please read this information carefully before you use the two way radio. General instructions Don’t place the unit on unstable location, if it falls down, people may be injured. Betrieb The unit is not a toy, please beware of small children. If you connect the unit to other electronic devices, please study also the security instruction of this device. -
Seite 22: Systemrequirements
System requirements System requirements What you need before you can use your Internet radio Before you can use your Internet radio, you need the following: A broadband Internet connection und Flaterate. A wireless access point (Wi-Fi) connected to your broadband Internet, preferably via a router. If your wireless network is confi... -
Seite 23: View Of The Appliance
View of the Appliance View of the Appliance Headset connector AC 230V 50Hz Antenna Display Select i i I Speaker Operating Buttons (s. next page) - 23 -... -
Seite 24: Operating
Operating Control Internet Radio Mode Mediaplayer Mode Press to turn on/off the Internet Radio Go back to previous menu page No function at present Display Queue information No function at present No function at present Press and hold to save Preset station P1 Previous Track Press to load Preset station P1 Press and hold to save Preset station P2... -
Seite 25: Steps For Connecting Your Radio To Your Wireless Network
Operating Steps for connecting your radio to your wireless network Power up the radio First, connect to the AC Power. In use, the radio can be switched on or off Reciva Radio with the standby button. ARM Powered The display on the front of the radio will light up and say: Initialising After a few seconds, this will change to show: Network... -
Seite 26: Choosing A Radio Station To Listen To
Operating Then: Network OK Enter WEP key If the screen displays either: Enter WPA key Then the network is using one of the encryption systems: Wired Equivalent Privacy (WEP) or Wi-Fi Pro- tected Access (WPA). You therefore need to enter the correct WEP or WPA code into the radio to get it to communicate with your network. -
Seite 27: Changing The Volume
Operating <Location> Turn the knob until the display shows the region you want (or select ‘All’ to display all countries), Press the SELECT button. Turn the knob until the display shows the country you want. Press the SELECT button. Turn the knob until the display shows the station you want. Press the SELECT button and wait until the radio connects to that station. -
Seite 28: Setting The Clock
Operating Stations which enable you to choose what you listen to Some radio stations can provide a number of options associated with their station; for example, some stations enable you to listen to programmes that have already been broadcast. When you select a radio station that has this facility, the station does not start playing immediately, but instead the dis- play shows: <... -
Seite 29: Setting Alarm
Operating Press the SELECT button. Set Time 14:03 Turn the knob until the hour setting is correct, then press the SELECT Set Time button. 15:03 Turn the knob until the minute setting is correct, then press the SELECT Operating button. Time Set: The display says Time Set with the new time shown beneath for 3 seconds, then returns to the radio stationdisplay. -
Seite 30: Alarm Set
Operating The display says Alarm Set with the time of the alarm shown beneath for 3 Alarm Set: seconds and then returns to the radio station display. 07:45 When in Standby, the Alarm time is shown next to the clock time with brack- ets. -
Seite 31: Listening To A Complete Shared Album
Operating The fi rst time the fi le scan is done a fi le called ‘.reciva_media_cache’ is written to the folder where the audio fi les are stored. This is in order to speed up subsequent fi le scans. Listening to a single shared track Turn the knob until ‘By Artist’... -
Seite 32: Removing Tracks From The Queue
Operating If you want to jump to a particular place in the queue then press the SELECT button when the required track is displayed. Removing tracks from the queue Press the BROWSE button. The currently playing track name will be displayed. Turn the knob to select the track you want to remove from the queue. -
Seite 33: Media Player As Upnp Server
Operating Use Mediaplayer as UPNP Server he Media Sharing feature in Windows Media Player 11 lets you manage all of your connected devices from one place, setting permissions and approving new devices on your network. Open Media Player 11 In Windows Media Player 11, click the small arrow below the Library tab, and then click Media Sharing. -
Seite 34: Playback With Media Player
Operating SELECT. Then turn the knob until ‘View Confi g’ is selected, press SELECT again and turn the knob until ‘MAC Address’ is selected to view your radio’s MAC address. The radio will now list the media categories available from the UPnP server, e.g. ‘Music’, ‘Playlists’ etc. Turn the knob to select which category you wish to browse, press SELECT and turn the knob to highlight a sub category and press SELECT again. -
Seite 35: Playing Tracks In Random Order
Operating If ‘Yes’ was selected then ‘Removed From Queue’ will be displayed. To remove all tracks from the queue, keep pressing BACK until the ‘Media Player’ menu item is selected, press SELECT and then turn the knob to select ‘Clear Queue’ and press SELECT again. Playing tracks in random order Select the individual tracks as described previously. - Seite 36 Operating Use this option to download new fi rmware for the radio from the Reciva portal on the Internet. If there is new fi rmware available, then the radio will prompt you if you want to download it or not. Note, at this stage, you can press the radio’s BACK button to cancel the radio beginning a fi...
-
Seite 37: Troubleshooting
This product is intended to be used in all European member countries, however there are restrictions when used with France. See your countries relevant radio authorities website for details. Hereby, dnt GMBH, Dietzenbach, Germany, declares that this IPdio is in compliance with the essential requirements and other relevant provisions of Directive 1999/5/EC“... -
Seite 38: Disposal Of Electrical And Electronic Equipment
Service information In case of complaints your device shows a defect, please consult your dealer or contact the service depart- ment of dnt to agree a servicing. Service time: Monday until Thursday from 8.00-17.00h Friday from 8.00-16.00h Hotline/service: +49 6074 3714 31 E-mail: support@dnt.de... - Seite 39 - 39 -...
- Seite 40 Précautions de sécurité ............41 Description de l’appareil Exigences du système ............42 Vue d’ensemble de l’appareil ..........43 Maniemen ................44 Explications des termes .............45 Installer le réseau / Chercher la station radio .....46 Régler l’heure/le réveil ............48 Emplacement ..............50 Windows Shares..............50 Serveur UPNP / Lecteur Media 11 ........51 Lecture ................52 Confi...
-
Seite 41: Précautions De Sécurité
Précautions de sécurité Avant de procéder à une première mise en service, veuillez lire les prescriptions suivantes. Prescriptions générales Ne jamais poser l’appareil sur un support instable. La chute de l’appareil pourrait blesser des personnes. Ne pas laisser l’appareil à la portée des enfants en bas âge. L’appareil n’est pas un jouet. Veuillez également respecter les prescriptions de sécurité... -
Seite 42: Matériel D'emballage
Précautions de sécurité La plupart des appareils électroniques tels que lampes, ordinateurs, téléphones etc. génèrent un champ électromagnétique. Ne placez aucun article électronique à côté de l’émetteur-récepteur afi n d’éviter des perturbations et interférences indésirables. Matériel d’emballage Ne laissez pas traîner le matériel d’emballage sans surveillance. Sacs et feuilles de plastique peuvent être un jouet dangereux pour les enfants. -
Seite 43: Garantiebestimmungen
Vue d’ensemble de l’appareil Câble de raccordement 230 V Port pour casque Antenne Ecran Select i i I Haut-parleur Touches de maniement et boutons (voir page suivante) - 43 -... -
Seite 44: Maniemen
Maniement Boutons et Mode radio Internet Mode Lecteur média touches Appuyer pour allumer et éteindre la radio Reculer d’une étape dans le menu Sans fonction Affi cher les titres enregistrés Sans fonction Sans fonction Appuyer et maintenir appuyé pour enregistrer une station. Appuyer brièvement pour sélectionner une station enregistrée Titre précédent Appuyer et maintenir appuyé... -
Seite 45: Explications Des Termes
Il s’agit d’une fi le d’attente dans laquelle se trouvent les données à traiter. Pour l’appareil IP-dio, c’est une mémoire tampon dans laquelle les données de la récep- tion radio sont enregistrées de manière intermédiaire afi n de minimiser les interrut- pions dues au transfert. -
Seite 46: Première Mise En Service
Sélectionnez ensuite Recherche Réseau. Dès que la recherche est terminée, tous les réseaux WLAN se trouvant à la <Recherche Réseau> portée de l’IP-dio sont affi chés. Noms de réseau Si le message Aucun réseau trouvé est affi ché, vérifi ez le réglage Affi... - Seite 47 Installer le réseau /Sélectionner la station Sélectionnez maintenant le programme souhaité et confi rmez à l’aide du bouton Select. La connexion sera établie à condition qu’un programme radio soit actuelle- ment diffusé. Le message „Chargement“ apparaît, puis la qualité de trans- mission est affi...
-
Seite 48: Régler L'heure/Le Réveil
Heure/Réveil Réglage de l’heure Appuyez sur le bouton Select. Si vous commettez une erreur à une étape Stations quelconque, appuyez sur la touche Back pour retourner à l’affi chage <Confi guration> précédent. Lecteur média Sélectionnez la confi guration Appuyez sur le bouton Select. Enregistrer <L’heure>... - Seite 49 Heure/Réveil Tournez le bouton Select jusqu’à ce que <Régler réveil> s’affi che à Régler l’heure l’écran. Appuyez sur le bouton Select. <Régler réveil> Régler réveil OUI NON Tournez le bouton Select entre OUI et NON et appuyez sur le bouton. Si vous avez sélectionné...
-
Seite 50: Emplacement
L’emplacement/Windows Shares L’emplacement Après avoir inscrit la radio dans le réseau, vous pouvez chercher un endroit approprié pour la mise en serv- ice. Pour ce faire, veuillez observer que la portée théorique est de 100 m en plein air et dans des conditions idéales. -
Seite 51: Serveur Upnp / Lecteur Media 11
Lecture Lors du premier téléchargement du titre, le titre doit être sauvegardé : Ajouter à la fi le Veuillez observer les précautions de sécurité pour le partage des médias, fi chiers et dossiers. Installer le lecteur média en tant que serveur UPNP Seulement valable pour le Lecteur Windows Media 11. -
Seite 52: Lecture
Lecture Sélectionnez le serveur UPNP et appuyez sur le bouton Select. Windows Shares < Serveur UPNP > Lecture Effacer la fi le Après 3 secondes environ, les serveurs UPNP s’affi chent. BASIS: AUTORISATION D’abord, le nom de l’ordinateur (TEST: est affi ché, suivi par le nom de <Test : XP_MUSIC>... - Seite 53 Lecture Ajouter un album à la fi le pour une lecture ultérieure Appuyez sur la touche Back jusqu’à ce que la sélection des catégories soit affi chée. Sélectionnez l’album souhaité et appuyez ensuite sur le bouton Select. Tournez le bouton Select jusqu’à ce que Ajouter à la fi le apparaisse à l’écran. Appuyez de nouveau le bouton Select.
-
Seite 54: Confi Guration
Confi guration Confi guration Commande Vous pouvez sélectionner une entrée de menu en tournant le bouton Select vers la gauche ou vers la droite. Vous pouvez confi rmer la sélection en appuyant sur le bouton Select. La touche Back (Retour) vous permet à... -
Seite 55: Caractéristiques Techniques
Confi guration < Rétro-éclairage> Cette option permet de régler le rétro-éclairage de l’écran. Le menu affi che 3 réglages : Mode actif, Mode inactif et Mode Standby. Réglage Mode inactif : Aucune touche n’est appuyée pendant 30 secondes. Réglage Mode actif : Des réglages sont effectués sur l’appareil. Réglage Mode Standby: Rétro-éclairage lorsque l’appareil est éteint. -
Seite 56: Questions Et Réponses
Questions et réponses Questions et réponses En cas de problèmes de fonctionnement de votre radio, il peut être utile de consulter le serveur Reciva sous http://radio.reciva.com/. Nous espérons que les conseils suivants vous aideront à résoudre vos problèmes. Vérifi éz qu’un ordinateur Wi-Fi se trouvant sur le même réseau peut se connecter à l’Internet. Vérifi... -
Seite 57: Elimination Écologique
Pour toute réclamation ou si votre appareil devait présenter un défaut, nous vous prions de vous adresser à votre détaillant ou au service clientèle de la société dnt afi n de convenir des mesures à prendre. Horaires de service : Lundi à jeudi de 8h00 à 17h00 Vendredi de 8h00 à... - Seite 58 - 58 -...
- Seite 59 Garantiebedingungen 1. Es gelten grundsätzlich die gesetzlichen Garantiebestimungen. Die Garantiezeit beginnt mit der Übergabe des Gerätes. Im Garan- tiefall ist das Gerät mit dem Kaufbeleg (Kassenzettel, Rechnung o.ä.), dem korrekt ausgefüllten Gerätepass und einer genauen Fehlerbeschreibung einzureichen. Ohne diese Belege sind wir nicht zur Garantieleistung verpfl ichtet. 2.
- Seite 60 Drahtlose Nachrichtentechnik Entwicklungs- und Vertriebs GmbH Voltastraße 4 D-63128 Dietzenbach Tel. +49 (0)6074 3714-0 +49 (0)6074 3714-37 Service-Hotline +49 (0)6074 3714-31 Internet http://www.dnt.de Email dnt@dnt.de Serien Nr. Serial no. N° de série Serie n. Kaufdatum: Date of purchase: Date d’achat: Data d‘acquisto:...