Inhaltsverzeichnis
Werbung
Verfügbare Sprachen
Verfügbare Sprachen
Bedienungsanleitung
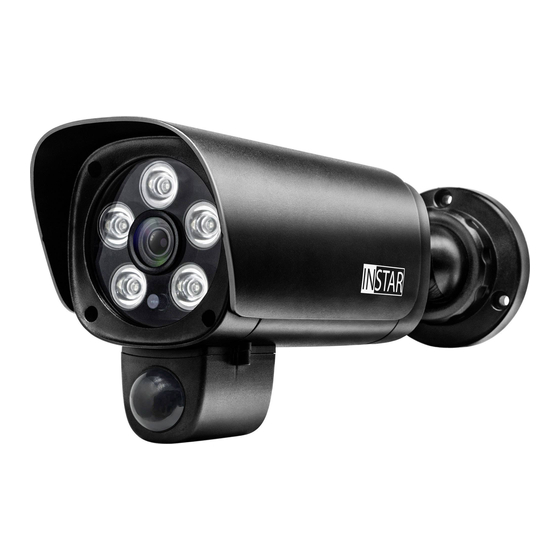
IN-9008 Full HD
Außenkamera
www.instar.de
- Panasonic Wide Dynamic Range (WDR) Full-HD-Bildsensor
- Benutzerfreundliche und moderne HTML5-Weboberfläche (WebUI)
- Unterstützt alle modernen Webbrowser (IE 11, Edge, Firefox, Chrome, Safari, etc.)
- Unterstützt MicroSD (max 128GB) für Alarm-, Dauer- und manuelle Aufnahmen
- Alarmbenachrichtigung per Email, Push (Textmitteilung) oder an einen Alarmserver
- Speicherung von Bildern, Videos oder Fotoserien per FTP(S)
- TLS- / SSL-Verschlüsselung für sichere HTTPS- und FTPS-Verbindungen
- Sichere Archivierung der Alarmvideos in der INSTAR Cloud (optional)
Werbung
Kapitel
Inhaltsverzeichnis

Verwandte Anleitungen für Instar IN-9008


Inhaltszusammenfassung für Instar IN-9008
- Seite 1 - Unterstützt MicroSD (max 128GB) für Alarm-, Dauer- und manuelle Aufnahmen - Alarmbenachrichtigung per Email, Push (Textmitteilung) oder an einen Alarmserver - Speicherung von Bildern, Videos oder Fotoserien per FTP(S) - TLS- / SSL-Verschlüsselung für sichere HTTPS- und FTPS-Verbindungen - Sichere Archivierung der Alarmvideos in der INSTAR Cloud (optional)
-
Seite 2: Inhaltsverzeichnis
6. Smartphone Apps 10-DE 7. Fernzugriff 11-DE 8. Zurücksetzen der Kamera 12-DE 9. Objektivjustage 13-DE 10. Online-Material 14-DE 11. INSTAR Cloud 15-DE 12. Technische Daten 16-DE 13. Garantie & Entsorgung 17-DE 14. Rechtliche Informationen 18-DE 1-DE Gehen Sie auf http://install.instar.de... -
Seite 3: Vorstellung Der Kamera
Bitte beachten Sie, dass diese Anleitung sowohl die WLAN- als auch die PoE-Version der IN-9008 beschreibt. Daher kann es sein, dass einige Punkte nur die WLAN-Variante und andere Punkte nur die PoE-Variante beschreiben. So bezieht sich z.B. die WPS-Funktion für die WLAN-Verbindung einzig auf die WLAN-Variante. -
Seite 4: Sicherheitsvorschriften
Benutzen Sie die Kamera bitte nicht für einen anderen als den vorgesehenen Zweck. • Installieren Sie das Gerät bitte nicht in der Nähe von leicht entzündlichen Ge- genständen. • Der Hersteller INSTAR haftet für keinerlei Schäden, die durch Zubehör oder Firmware von Drittanbietern entstehen. 3-DE Gehen Sie auf http://install.instar.de... -
Seite 5: Produktmerkmale
Kostenfreier Point-2-Point-Zugriff mit InstarVision, unterstüzt IPv6 DDNS Kostenfreie DDNS-Adresse für die Verbindung über das Internet Cloud Opt. Speicherung / Verwaltung der Alarmvideos in der INSTAR Cloud FTP-Upload Übertragung von Alarmbildern / Videos per FTP(S) Wi-Fi Protected Setup (WPS) zur einfachen WLAN-Einrichtung WLAN / WiFi 2,4Ghz WLAN, IEEE 802.11b/g/n und WPA/WPA2-Verschlüsselung... -
Seite 6: Aufbau Der Kamera
4. Aufbau der Kamera 4.1. Verpackungsinhalt Kamera Halterung Dichtungsringe 16GB MicroSD Schrauben / Dübel Netzteil Netzwerkkabel Antenne Inbusschlüssel Folgende Teile sind im Lieferumfang enthalten 4.2. Kameraaufbau 1-Kabel 2-Kabel 3-Kabel 9 10 5-DE Gehen Sie auf http://install.instar.de... -
Seite 7: Status-Leds
Rote LED Durchgehend an Mit WLAN verbunden Blinkt langsam Verbindet per WPS Kamera ist eingeschaltet Blinkt schnell Firmware-Upgrade im Gange LED ausgeschaltet oder keine LED ausgeschaltet oder keine Verbindung mit dem Strom Verbindung mit dem Strom 6-DE Gehen Sie auf http://install.instar.de... - Seite 8 Anbindung per LAN u. Netzteil (Netzteil- & Netzwerkkabel) Anbindung per LAN & Netzteil (Netzwerkkabel & Netzteil) WLAN und Lautsprecher (Netzteil- & Lautsprecherkabel) Bei Anbindung per LAN inkl. Netzteil und Lautsprecher (Für Netzwerk-, Netzteil- und Lautsprecherkabel) 7-DE Gehen Sie auf http://install.instar.de...
-
Seite 9: Halterung
4.5. Halterung Lösen Sie die Schrauben gegen den Uhrzeigersinn, um die Halterung so in die gewünschte Position auszurichten. Anschließend ziehen Sie die Schrauben wie- der fest. 72° 360° 360° 360° 72° 72° 8-DE Gehen Sie auf http://install.instar.de... -
Seite 10: Installation
Bitte öffnen Sie den Webbrowser und gehen Sie auf: http://install.instar.de um den Kamera-Installations-Assistenten zu öffnen Schritt 2 Wählen Sie Ihre Sprache und das Kameramodell IN-9008 Schritt 3 Entscheiden Sie, auf welche Art Sie sich für die Ersteinrichtung verbinden möchten: a) Verbindung per LAN-Kabel (empfohlen) b) Verbindung direkt per WLAN mit WPS (nicht für PoE-Version) -
Seite 11: Smartphone Apps
6. Smartphone Apps INSTAR bietet kostenfreie Apps für Android, iOS (iPhone / iPad), Windows Phone, Blackberry, AmazonKindle, Windows 8.1 / 10 (Metro) und Windows Phone. Um die App zu installieren, suchen Sie bitte nach “InstarVision“ in Ihrem App Store. InstarVision Der Unterschied zwischen der App und der Weboberfläche (WebUI) -
Seite 12: Fernzugriff
über eine externe Internetverbindung testen. Beachten Sie bitte, dass eine Portweiterleitung nur bei einem IPv4-Internetan- schluss funktioniert. Für detallierte Informationen zur Portweiterleitung bei Ihrem Router und dem DDNS-Service im Allgemeinen schauen Sie bitte auf: http://remote.instar.de 11-DE Gehen Sie auf http://install.instar.de... -
Seite 13: Zurücksetzen Der Kamera
Netzwerk. Für mehr Informationen, wie man die Kamera neu installiert, schauen Sie bitte hier: http://install.instar.de. Nachdem die Kamera wieder verbunden ist, verwenden Sie das INSTAR Camera Tool, um die IP-Adresse der Kamera zu finden und öffnen Sie die WebUI zur neuen Einrichtung. -
Seite 14: Objektivjustage
9. Objektivjustage Das Objektiv der IN-9008 Full HD hat eine Tiefenschärfe (auch Schärfentiefe gen- annt), die werksseitig auf ca. 10-15m eingestellt wurde. Sofern der Bereich, den Sie überwachen möchten, unscharf ist, müssten Sie das Objektiv justieren. Schieben Sie die obere Abdeck- ung nach vorne von der Kamera herunter und lösen Sie die vier... -
Seite 15: Online-Material
4. Wie kann man sich die Aufnahmen auf der Speicherkarte herunterladen und vieles mehr... 10.2. Firmware-Update INSTAR Kameras erhalten kostenfreie Firmware-Updates. Öffnen Sie die WebUI und gehen Sie auf System -> Firmware-Update, um zu prüfen, ob eine neue Firmware für Ihre Kamera verfügbar ist. Sie können diese dann herunterladen und über die WebUI installieren. -
Seite 16: Instar Cloud
14 Tage unter Die INSTAR Cloud kostet nur etwa 1/3 von dem, was andere Anbieter verlangen. Wenn man mit einer Speichereinheit von 10GB für eine Kamera plant (es lassen sich ca. 2500 Alarm Events auf 10GB speichern), sparen Sie im Vergleich sogar bis zu ~70% an Kosten. -
Seite 17: Technische Daten
Stromverbrauch max. 8,5W (im Normalbetrieb 3W) Betriebstemperatur - 5°C bis 55°C (-25°C mit optionaler Heizung) Anforderungen Webbrowser Webbrowser mit HTML5-Unterstützung CPU / Grafikkarte Dual Core (min. 2Ghz) / 256MB+ Grafikkarte Bandbreite min. 512kbs pro Kamera 16-DE Gehen Sie auf http://install.instar.de... -
Seite 18: Garantie Entsorgung
Sie bitte support@instar.de, um eine RMA-Num- mer zu beantragen. Mit dieser RMA können Sie dann das Gerät zur Reparatur einsenden. Das INSTAR SERVICE CENTER finden Sie aktuell an folgendem Standort: Firma: INSTAR Deutschland GmbH Hotline: +49 (6438) 9198992 Raiffeisenstraße 12... -
Seite 19: Rechtliche Informationen
(2) dieses Gerät muss alle empfangenen Störung- en akzeptieren, einschließlich Störungen, die einen uner- wünschten Betrieb verursachen können. Das FCC Compliance Statement finden Sie auf folgender Internetseite: http://www.instar.de/legal/fcc © INSTAR ist eine geschützte Marke der INSTAR Deutschland GmbH. 18-DE Gehen Sie auf http://install.instar.de... - Seite 20 INSTAR Deutschland GmbH Ihr Spezialist für Netzwerk- und Sicherheitstechnik...
- Seite 21 - Alarm notifications by email, push or to an alarm server - Supports FTP(S) upload of alarm images, videos and photo series - Supports TLS / SSL encryption for secure HTTPS and FTPS communication - Supports secure video upload to the INSTAR Cloud (optional)
- Seite 22 6. Smartphone Apps 10-EN 7. Remote Access 11-EN 8. Camera Reset 12-EN 9. Lens Adjustment 13-EN 10. Online Material 14-EN 11. INSTAR Cloud 15-EN 12. Technical Data 16-EN 13. Warranty & Disposal 17-EN 14. Legal Information 18-EN 1-EN Go to http://install.instar.com...
-
Seite 23: Camera Introduction
Wide Dynamic Range (WDR) function- ality, the IN-9008 is able to achieve the best image quality in daylight as well as clear image in night vision mode with the help of its high-power LEDs. Hence, the IN-9008 is able to deliver accurate motion detection and alarm notification. -
Seite 24: Safety Warnings
Don’t use the camera for any other purpose than it is made for. • Never install the device near explosive or flammable substances. • INSTAR does not give any warranty, if you use any third party firmware. 3-EN Go to http://install.instar.com... -
Seite 25: Product Features
DDNS Free DDNS address to connect to your camera via the internet Cloud Optional upload & management of alarm videos in the INSTAR Cloud FTP Upload Upload alarm images / videos to an FTP server (FTP or secure FTPS) Use WiFi Protected Setup (WPS) to easily establish a WiFi connection WiFi 2.4Ghz WiFi with IEEE 802.11b/g/n and WPA/WPA2 encryption... -
Seite 26: Camera Structure
4. Camera Structure 4.1. Delivery Content Allen Key Camera Bracket Sealing Rings 16GB MicroSD Screws & Dowels Power Adaptor LAN Cable Antenna Delivery contents in the camera package 4.2. Camera Structure 1-cable 2-cables 3-cables 9 10 5-EN Go to http://install.instar.com... - Seite 27 12 - Antenna RP-SMA WiFi antenna connector (not for PoE version) Connector 13 - Antenna 3 dB Antenna (option: add INSTAR extension antenna cable) 14 - Weatherproof For sealing cables with IP65 protection. Different scenarios Connector available for 1-cable, 2-cables, 3-cables...
- Seite 28 Cable & Power Adaptor) For LAN and Power (Ethernet Cable & Power Adaptor) For WiFi Connection & Audio Output (Power adaptor & audio cable) For LAN connection including power supply and audio-output (Ethernet cable, power adaptor & audio cable) 7-EN Go to http://install.instar.com...
- Seite 29 4.5. Bracket Loosen the screws counter-clock wise in order to align the bracket to the desired position. Once the camera is positioned, please tighten the screws again. 72° 360° 360° 360° 72° 72° 8-EN Go to http://install.instar.com...
-
Seite 30: Installation
Camera Installation Guide. to open the Step 2 Choose your language and camera model IN-9008. Step 3 Select the type of network connection: a) Connection via LAN cable (recommended) b) Connection directly with WiFi via WPS (not for PoE version) Step 4 Follow each step of the installation process according to your choice. -
Seite 31: Smartphone Apps
You can open the WebUI using a modern HTML5 based web browser on your computer. You only need to use the INSTAR Camera Tool to search for your cam- era’s IP address and then open it inside your default web browser. -
Seite 32: Remote Access
LTE / data connection. Please consider that port forwarding only works if your router has a public IPv4 address. For detailed description to port forwarding on your router model and DDNS service in general, please refer to: http://remote.instar.com 11-EN Go to http://install.instar.com... -
Seite 33: Camera Reset
WPS to reconnect the camera to your network. For more informa- tion on how to install your camera again, please visit: http://install.instar.com. Once you connect the camera to the network, use the INSTAR Camera Tool to find out the camera’s IP address and open the camera’s WebUI to start configu- rating your camera again. -
Seite 34: Lens Adjustment
9. Lens Adjustment The IN-9008 Full HD standard lens has a depth of field (also focus range) that is adjusted to a distance of approx. 10 - 15m. In case your area of interest is out of focus, you will have to adjust the lens accordingly. -
Seite 35: Online Material
10.2. Firmware Update INSTAR cameras will be provided with free firmware updates. Open the WebUI and navigate to System -> Firmware Update to check if there is a new update available for your camera model. You can then download and install the latest firmware directly through the WebUI. -
Seite 36: Instar Cloud
11. INSTAR Cloud https://cloud.instar.de What’s INSTAR Cloud? The INSTAR Cloud is a purely optional and paid service to backup your record- ings. Try the INSTAR Cloud free of charge for 14 days at https://cloud.instar.de. The INSTAR Cloud costs only about 1/3 of what other cloud platforms demand. -
Seite 37: Technical Data
Max. 8.5W (in normal operation 3W) Operating Temperature - 5°C to 55°C (-25°C with optional heater) Requirements Web Browser Web browser supporting HTML5 CPU / Graphic Card Dual Core (min. 2Ghz) / 256MB+ Graphic Card Bandwidth Min. 512kbs per camera 16-EN Go to http://install.instar.com... -
Seite 38: Warranty Disposal
13. Warranty & Disposal 13.1. Warranty INSTAR offers a 2-year warranty on its products. During this period you can send in your camera for free repair (the shipping cost to our service center will have to be paid by the customer). This excludes cameras installed with custom-made or third party firmware and WebUIs which have not been approved by INSTAR. -
Seite 39: Legal Information
The complete FCC Compliance Statement can be found on the following website: http://www.instar.com/legal/fcc © INSTAR is a registered trademark of the INSTAR Deutschland GmbH. 18-EN Go to http://install.instar.com... - Seite 40 INSTAR Deutschland GmbH Your Specialist for Network and Security Equipments 19-EN Go to http://install.instar.com...