SCHUBERTH SRC-System Gebrauchsanleitung
Vorschau ausblenden
Andere Handbücher für SRC-System:
- Bedienungsanleitung (72 Seiten) ,
- Schnellstartanleitung (2 Seiten)

Verwandte Anleitungen für SCHUBERTH SRC-System


Inhaltszusammenfassung für SCHUBERTH SRC-System
- Seite 1 G E B R A U C H S A N L E I T U N G P O W E R E D B Y MAN00097 QG SRC-S2_C3 J 009.indd 1 7/18/12 5:37 PM...
-
Seite 2: Inhaltsverzeichnis
12..HINWEISE..........................22 6.1.AUSBAU.DES.VORHANDENEN.AKUSTIKKRAGENS..........9 6.2.. A NSCHLUSS.DES.ANTENNEN.KABELS..............9 6.3.EINBAU.DES.SRC‑SYSTEM™-HEADSETS............. 10 WICHTIG:.Dies.ist.Version.2.0.der.Gebrauchsanleitung..Unter.www.schuberth.com/fileadmin/ 6.4.POSITIONIEREN.DER.LAUTSPRECHER..............11 downloads/SRC/SRC-System_Manual-1.pdf.finden.Sie.stets.die.jeweils.aktuelle.Version. 6.5.POSITIONIEREN.DES.MIKROFONS............... 11 (Updates).in.verschiedenen.Sprachen,.inkl..Erklärungen.der.neusten.Funktionen.und.Features.Ihres. 6.6.AUSBAU.DES.SRC‑SYSTEM™.HEADSETS.AUS.DEM.HELM....... 12 SRC-System™.Headsets. Bitte.prüfen.Sie.jetzt.und.auch.in.Zukunft,.ob.Sie.die.aktuellste.Version.haben.und.laden.Sie.stets. 6.7.AUFSETZEN.UND.ABNEHMEN.DES.HELMS............12 die.neueste.Version.in.Ihrer.bevorzugten.Sprache.herunter. 6.8.REINIGEN.DES.SRC‑SYSTEM™.HEADSETS............12 MAN00097 QG SRC-S2_C3 J 009.indd 2 7/18/12 5:37 PM... -
Seite 3: Einleitung
WEITERE SPEZIALFUNKTIONEN : 1. EINLEITUNG ➤.. A GC.Technologie.(Automatic.Gain.Control).ausgerüstet,.einer.automatischen. Lautstärkenanpassung.an.Umweltlärm.und.Fahrtgeschwindigkeit..Die. Lautstärke.kann.allerdings.auch.jederzeit.manuell.eingestellt.werden..Der. Herzlichen.Glückwunsch.und.vielen.Dank,.dass.Sie.sich.für.das.Schuberth.Rider. AGC-Empfindlichkeitsgrad.kann.ebenfalls.individuell.geregelt.werden. Communication-System™ (SRC-System™).Bluetooth®.Headset.für.Schuberth. Motorradhelme.entschieden.haben. ➤.. V OX.Technologie.für.sichere.und.freihändige.Bedienung.von. Schlüsselfunktionen.(Sprachwahl,.Anrufe.empfangen,.Anrufe.abweisen)..Der. Diese.Gebrauchsanleitung.soll.Ihnen.bei.der.Nutzung.des.Headsets.behilflich.sein.. VOX.-Empfindlichkeitsgrad.kann.auch.individuell.eingestellt.werden. Vor.Inbetriebnahme.machen.Sie.sich.bitte.mit.den.Bluetooth®.Funktionen.ihres. Mobiltelefons.und/oder.ihres.Navigationsgerätes.vertraut. ➤ PLC.Technologie.(Packet.Loss.Concealment).für.digitale.Überbrückung.von. Audio-Datenverlust.in.Echtzeit..PLC.optimiert.die.Klangqualität.in.besonders. Die.Box.des.SRC-System™.enthält.eine.Headseteinheit.. lauten.Umgebungen.. IHR SRC‑SYSTEM™ KANN WIE FOLGT VERWENDET WERDEN : ➤.. S oftware.Aktualisierungen.über.jeden.PC.mit.Windows®.XP™,.Vista™. bzw..Windows®.7.Betriebssystem,.um.stets.die.neusten.Features.und. 1..Als.Bluetooth®.Headset.für.Mobiltelefon-Kommunikation.(unterstützt. -
Seite 4: Lieferumfang
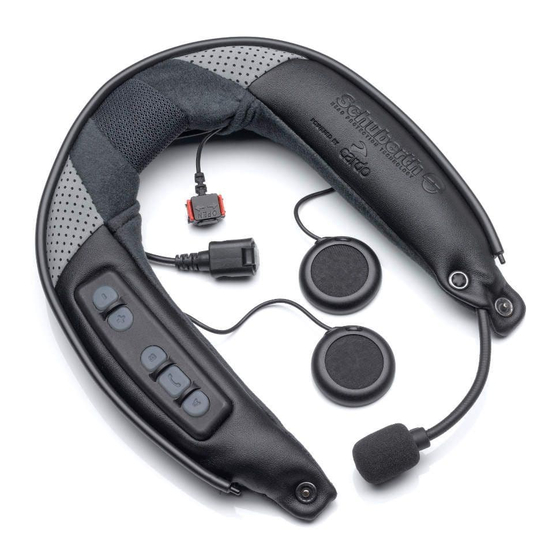
2. LIEFERUMFANG SRC‑SYSTEM™ FÜR S2 HELME SRC‑SYSTEM™ FÜR C3 PRO HELME (Das Gerät ist in verschiedenen Größen erhältlich) (Das Gerät ist in verschiedenen Größen erhältlich) Mikrofon Schwanenhals Kanal A Taste •Verbinde mit Biker A • MP3-Taste Zwei Lautsprecher Handy Taste Kabelge- Kanal A Taste bundenes •... -
Seite 5: Aufladen.des.src-System™.Headsets
3. AUFLADEN DES SRC‑SYSTEM 4. BASISEINSTELLUNGEN UND ™ HEADSETS KONFIGURATIONEN Bitte beachten Sie: Ihr Headset muss vor der ersten Inbetriebnahme 4.1 HAUPTFUNKTIONEN mindestens 4 Stunden lang aufgeladen werden. Gewünschtes Nötige Ergebnis 1.. Heben.Sie.die.Kappe.an.. Schritte 2.. Das.USB.Kabel.in.die.Ladebuchse. Gerät EIN/AUS Betätigen.und.halten.Sie.die.Handy-Taste.mindestens.3.Sekunden. lang.gedrückt einstecken.. •.. A N:.3.x.blaues.Blinken.+.aufsteigender.Ton 3.. USB-Steckerende.(anderes.Ende.des.USB-Kabels). •.. -
Seite 6: Software.aktualisierung
4.3 SOFTWARE AKTUALISIERUNG •.Über.das.Sprachmenü.für.die.Anpassung.der.Einstellungen.und.der.Tasten.an. Ihrer.SRC-System™-Headseteinheit.(s..unten).. Um.Ihr.SRC-System™.optimal.zu.nutzen,.vergewissern.Sie.sich.bitte,.dass.die. neueste.Software.installiert.ist..Zum.Herunterladen.des.neuesten.Software- 4.5 SPRACHMENÜ Updates.und.zur.individuellen.Einstellungen.über. Eingabe.über.das.Sprachmenü.für.die.Anpassung.der.Einstellungen.an.Ihrem. den.Rechner,.registrieren.Sie.sich.bitte.online.unter:. SRC-System™: www.schuberth.com/register/de... Das.Sprachmenü.für.die.Anpassung.der.Einstellungen.ist.auf.eine.der.verfügbaren. Halten.Sie.dazu.Ihre.Produktseriennummer.bereit..(Seriennummer auf der Sprachen.konfigurierbar. Rückseite des SRC-System™ und auf der Box). Nach.Herunterladen.des.SRCS-Upgrades-Programms.verbinden.Sie.Ihr. Hierzu.die.Tasten.KANAL.„A“.und.KANAL.„B“.im.Bereitschaftsmodus.gleichzeitig. SRC-System™.über.das.als.Zubehör.mitgelieferte.USB-Kabel.mit.Ihrem.Computer. betätigen,.und.drei.Sekunden.gedrückt.halten..Bestätigen.Sie.Ihre.Wahl.mit.der.Kanal. „A“.Taste.in.dem.Moment.der.Ansage. Sobald.Ihr.Gerät.mit.dem.Computer.verbunden.ist,.können.Sie.dessen. Einstellungen.komfortabel.entsprechend.der.auf.dem.Bildschirm.angezeigten. 4.6 AUDIOQUELLEN UND PRIORITÄTEN Anweisungen.anpassen. Die.verschiedenen.Audioquellen,.die.mit.dem.SRC-System™.verbunden.sind,.werden. Zukünftige.Software-Updates.und.Programmkorrekturen.halten.die.Software. priorisiert,.d.h..eine.höher.priorisierte.Quelle.wird.immer.eine.niedrig.priorisierte. Ihrer.SRC-System™-Einheit.auf.dem.neuesten.Stand.und.erweitern.Ihr.Gerät.um. -
Seite 7: S2.Montageanleitung
Entfernen.Sie.den.vorhandenen.Akustikkragen.durch.behutsames.Herausziehen.von. Entfernen.Sie.die.Schutzabdeckung. vorn.beginnend.vom.Helm. vom.Antennenanschluss.des.Helms. 4.. Verbinden.Sie.beide.Antennenanschlüsse.miteinander.und.verriegeln.Sie.diese.mit. Hilfe.der.Verschlüsse.. 5.2 ANSCHLUSS DES ANTENNEN KABELS Das.SRC-System™.verfügt.über.ein.Antennenkabel,.welches.an.die.integrierte.Antenne. des.Helms.angeschlossen.werden.muss,.um.einen.Radioempfang.zu.ermöglichen. HINWEIS: Stellen Sie sicher, dass die Schutzkappe des USB-Anschlusses korrekt befestigt ist und verstauen Sie diesen anschließend in der dafür vorgesehenen Tasche im Nackenbereich des SRC System™. -
Seite 8: Positionieren.des.mikrofons
1.. Stellen.Sie.sicher,.dass.sich.die.Lautsprecher.und.das.Mikrofon.im.Innern.des. um die Lautsprecher Ihren persönlichen Wünschen entsprechend näher am Ohr zu Helms.befinden. positionieren und somit eine optimale Lautstärke zu gewährleisten. 2.. Positionieren.Sie.das.SRC-System™.mittig.im.hinteren.Bereich.des.Helms.und. Platzieren Sie die Unterlagen direkt auf den Klettpolstern und anschließend die drücken.Sie.dieses.schrittweise.in.den.Spalt.an.der.Helmunterkante. Lautsprecher direkt auf den Unterlagen. -
Seite 9: Aufsetzen.und.abnehmen.des.helms
3... Z iehen.Sie.die.Pins.am.vorderen.Bereich.des. Akustikkragens.aus.den.Öffnungen.heraus. HINWEIS: Ihr SRC-System™ wurde für höchsten Komfort entwickelt. Da dieses umfangreiche 6.2 ANSCHLUSS DES ANTENNEN KABELS Bauteile enthält, kann es vorkommen, dass Sie das Aufsetzen bzw. Abnehmen des Ihr.SRC-System™.verfügt.über.ein. Helms mit eingebauten SRC-System™ anders als gewohnt wahrnehmen. -
Seite 10: Einbau.des.src-System™-Headsets
.1... Z iehen.Sie.den.Antennenanschluss.(welcher.durch.einen.roten.Anhänger. 5... V erstauen.Sie.die.verbundenen.Anschlüsse.in. gekennzeichnet.ist).aus.dem.hinteren.Bereich.des.Helms.heraus. der.dafür.vorgesehenen.Tasche.im.Nackenbe- reich. 6.3 EINBAU DES SRC‑SYSTEM™‑HEADSETS 1... S tellen.Sie.sicher,.dass.sich.die.Lautsprecher.und.das.Mikrofon.im.Innern.des. Helms.befinden. 2... S tecken.Sie.den.am.SRC-System™.vorhandenen.Stift.in.die.dafür.vorgesehene. Antennenanschluss Antennenanhänger runde.Öffnung.unter.der.Helmunterkante.des.Helms.und.schließen.Sie.den. wird sichtbar herausziehen Druckknopf. 2... B ewegen.Sie.die.beiden.Verschlüsse.für.die. Schutzkappe.des.Antennenanschlusses.am.Headset. nach.unten.und.entfernen.Sie.anschließend.die. Schutzkappe. 3... E ntfernen.Sie.die.Schutzabdeckung.vom. Antennenanschluss.des.Helms. 3... W iederholen.Sie.den.vorigen.Schritt.für.die.gegenüberliegende.Seite. -
Seite 11: Positionieren.der.lautsprecher
3... K nöpfen.Sie.die.Wangenpolster.mit.Hilfe.der.Pins.an.die.rot.markierten.Steckvor- Druckknopf Schwanenhals-Mikrofon richtungen.an.. HINWEIS: Die zusätzlichen Lautsprecherunterlagen können verwendet werden, um die Lautsprecher Ihren persönlichen Wünschen entsprechend näher am Ohr zu positionieren und somit eine optimale Lautstärke zu gewährleisten. Platzieren Sie die Unterlagen direkt auf den Klettpolstern und anschließend die Druckknopf Lautsprecher direkt auf den Unterlagen. -
Seite 12: Ausbau.des.src-System™.Headsets.aus.dem.helm
Kinnriemen.erneut.auseinander.und.ziehen.Sie. dann.den.Helm.nach.oben.ab. HINWEIS: Ihr SRC-System™ wurde für höchsten Komfort entwickelt. Da dieses umfangreiche Bauteile enthält, kann es vorkommen, dass Sie das Aufsetzen bzw. Abnehmen des Helms mit eingebautem SRC-System™ anders als gewohnt wahrnehmen. Durch das regelmäßige Auf- und Absetzen des Helms, wird der Akustikkragen des SRC-System™... -
Seite 13: K Oppeln.und.nutzen.von.geräten:.mobiltelefon,.Gps.navi.oder.mp3
Dank.MDC.Technologie.können.der.SRC-System™.folgende.parallele. HINWEIS: Falls Sie neben dem Mobiltelefon auch ein Navigationsgerät nutzen, Verbindungen.aufgebaut.werden: müssen Sie Ihr Mobiltelefon statt mit dem SRC-System™ direkt mit dem Navigationsgerät koppeln. In solchem Falle überspringen Sie den folgenden ➤.Interkom.mit.bis.zu.zwei.anderen.SRC-System™.Geräten. Abschnitt und fahren direkt mit Abschnitt 7.2. fort. -
Seite 14: Mobiltelefonanrufe Aufnehmen Und Empfangen
Ihr.SRC-System™.Headset.Navigationsanweisungen.und.Audio. Verbindung mit einigen Mobiltelefontypen ist es evtl. erforderlich, dass Sie - auch empfangen. nachdem das Koppeln durchgeführt wurde - die Handy-Taste des SRC-System™ betätigen müssen, um die Verbindung zwischen Mobiltelefon und Headset Zur.Verbindungsherstellung.zwischen.einem.Bluetooth®.fähigen.Navigationsgerät. herzustellen. Ihr SRC-System™ wird sich automatisch mit jenem Mobiltelefon und.Ihrem.SRC-System™.müssen.diese.zuerst.gekoppelt.werden. -
Seite 15: A.drahtlose.option.-.A2Dp
Nutzung.eines.Bluetooth®.Gerätes.mit.AVRCP.ermöglicht.Ihnen.den.Betrieb.der. (vier.Nullen).ein. wichtigsten.A2DP.Funktionen.direkt.vom.Headset. 6.. Wenn.das.Koppeln.abgeschlossen.ist,.wird.Ihr.MP3-Player.ihnen.dieses.ggf.. HINWEIS: Das SRC-System™ Headset kann über das beigefügte Kabel auch Audiosignale bestätigen.und.die.LED.des.Headsets.wird.gleichmäßig.blau.blinken. von MP3-Playern und Audioquellen ohne Bluetooth® Profil empfangen (s. Absatz 7.3b) HINWEIS: Wenn das Koppeln der Geräte nicht innerhalb von zwei Minuten Auch.bei.Musikempfang.über.Ihre.A2DP.Quelle.bleiben.Sie.für.eingehende. -
Seite 16: Zwischen A2Dp Audio Quellen Umschalten
ZWISCHEN A2DP AUDIO QUELLEN UMSCHALTEN 8. INTEGRIERTES UKW RADIO Wenn.ein.Musik-Player.gekoppelt.ist,.wird.ihr.SRC-System™.es.als.Standard.A2DP. Audio-Quelle.nutzen.. Ihr.SRC-System™.ist.mit.einem.UKW.Stereo.Radiomodul.ausgerüstet..Dank.der.RDS. 1..Musikwiedergabe.vom.aktuellen.Gerät.beenden. Funktion.und.auch.um.Ihnen.das.Justieren.von.Radiofrequenzen.bei.schneller.Fahrt.zu. 2..Wiedergabe.am.anderen.Gerät.starten. ersparen,.wählt.Ihr.Headset.stets.automatisch.das.stärkste.Signal,.das.für.den.UKW- Sender.Ihrer.Wahl.verfügbar.ist. 7.3b AUDIOQUELLE ÜBER AUX ANSCHLIESSEN Ein-/Ausschalten Betätigen.Sie.die.Kanal.“B”.Taste.für.3.Sekunden. Nutzen Sie die AUX Buchse, um eine Kabelverbindung herzustellen Zum nächsten Während.des.Radioempfangs.betätigen.Sie.kurz.die.Kanal. programmierten “B”.Taste,.um.zwischen.den.sechs.vorprogrammierten. Ihr.SRC-System™.Headset.verfügt.über.eine.AUX-Buchse.zum.Anschluss.von. Sender wechseln Sendern.zu.navigieren.. Geräten,.die.nicht.über.Bluetooth®.verfügen..Diese.Geräte.werden.über.das. -
Seite 17: Interkom
9. INTERKOM . •.. L autstärke.Auf.sucht.nach.oben.(höhere.Frequenzen).Radiosender.ab . •.Lautstärke.Ab.sucht.nach.unten.(niedrigere.Frequenzen).Radiosender.ab 9.1 EINLEITUNG 2... T ippen.Sie.innerhalb.von.20.Sekunden.auf.die.Kanal.„B”-Taste,.um.den. Ihr.SRC-System™.ermöglicht.Voll-Duplex.Interkombetrieb.mit.anderen. SRC-System™.Nutzern.in.einer.Reichweite.von.bis.zu.700.Meter.(gelände-.und. gefundenen.UKW-Sender.auf.dem.aktuellen.Senderplatz.zu.speichern. verkehrsbedingt) SCAN UND SPEICHERN: UKW‑RADIOSENDER ABSUCHEN Um.eine.oder.zwei.Interkom.Verbindungen.herzustellen,.sollten.Sie.zuerst.Ihr. 1... D ie.Lautstärke.Auf.Taste.6.Sekunden.lang.gedrückt.halten..Das.SRC-System™. SRC-System™.mit.den.anderen.Headsets.koppeln. sucht.nach.oben.(höhere.Frequenzen).Radiosender..Wenn.ein.Sender.gefunden. Das.Koppeln.(“Pairing”).muss.prinzipiell.nur.ein.Mal.durchgeführt.werden..Nach. wurde,.wird.er.ein.paar.Sekunden.lang.angespielt. Abschluss.des.Prozesses.bleiben.die.Headsets.gekoppelt.und.erkennen.einander. 2... S can.bei.diesem.Sender.abbrechen:.Lautstärke.Auf.Taste.antippen. automatisch,.sobald.sie.in.Reichweite.sind. Ihr.Headset.verfügt.über.zwei.Interkom-Kanäle.für.Headset-zu-Headset- 3... T ippen.Sie.innerhalb.von.20.Sekunden.auf.die.Kanal.„B”-Taste,.um.den. Verbindungen..Daher.kann.Ihr.SRC-System™.simultan.mit.bis.zu.zwei.anderen. gefundenen.UKW-Sender.auf.dem.aktuellen.Senderplatz.zu.speichern. -
Seite 18: Verwendung Der Interkom-Funktion Mit Anderen Src-System™ -Headsets
Kanal «B» Kanal «A» Taste Taste Headsets.schnell.blinkt..Dadurch.wird.angezeigt,.dass.der.Interkom- Kopplungsmodus.aktiv.ist..(s..obige.Tabelle) 5..Wiederholen.Sie.Schritt.3-4.für.das.zweite.SRC-System™-Headset. 6..Innerhalb.weniger.Sekunden.leuchten.beide.Headsets.zwei.Sekunden. konstant..Dadurch.wird.angezeigt,.dass.beide.Headsets.jetzt.miteinander. verbunden.und.einsatzbereit.sind. HINWEIS: Falls der Kopplungsprozess nicht innerhalb von 2 Minuten abgeschlossen ist, schaltet das Headset automatisch wieder in den Bereitschaftsmodus. 9.4 VERWENDUNG DER INTERKOM‑FUNKTION MIT ANDEREN SRC‑SYSTEM™ ‑HEADSETS 9.4b. -
Seite 19: Aufnahme.von.interkom-Anrufen
Zum.Koppeln.von.drei.SRC-System™-Headsets.wiederholen.Sie.mit.einem.dritten. HINWEIS: Der werkseitige Prioritätsmodus des Headsets verhindert Unterbrechungen SRC-System™-Headset.den.in.Abschnitt.9.4a.dargestellten.Ablauf.(allerdings. von bereits begonnenen Mobiltelefongesprächen oder Navigationsanweisungen durch über.einen.anderen.Kanal). eingehende Interkom-Anrufe. Bei laufenden Gesprächen oder Navigationsanweisungen hört der Interkom-Anrufer ein Besetzt-Zeichen und Sie einen doppelten Piepton (siehe 1..Koppeln.Sie.Ihr.SRC-System™.mit.dem.zweiten.SRC-System™,.wie.in. Abschnitt 4.6 für Details zu den Prioritätseinstellungen von gekoppelten Geräten). -
Seite 20: Wichtige.anmerkungen
3..Nun.blinken.die.roten.und.blauen.LEDs.fünf.Mal.und.das.Headset.schaltet.sich. 10. CLICK-TO-LINK® (CTL) aus..Damit.ist.der.erfolgreiche.Abschluss.des.Rücksetzens.bestätigt. Click-to-Link®.ist.eine.Schnellfunktion,.mit.der.Sie.ohne.jegliche.Vorbereitungen. 9.9 WICHTIGE ANMERKUNGEN Interkomkontakt.aufnehmen.können..Click-to-Link®.ermöglicht.spontanes. Initiieren.von.Interkom-Gesprächen.mit.anderen.SRC-System™-Nutzern.in. 1. BESETZT‑STATUS unmittelbarer.Umgebung.ohne.vorheriges.Durchlaufen.des.Kopplungsvorgangs.. Wenn.Sie.über.das.Headset.ein.Interkom-Gespräch.mit.einem.Teilnehmer. Sie.erhalten.sozusagen.einen.eigenen.Kanal.von.Motorrad.zu.Motorrad,.über.den. beginnen.möchten,.der.bereits.ein.Telefonat.oder.Interkom-Gespräch.führt.oder. Sie.unterwegs.an.der.Ampel.oder.während.der.Fahrt.mit.anderen.SRC-System™. Navigationsanweisungen.hört,.werden.Sie.als.Besetztzeichen.einen.doppelten. Nutzern.spontan.kommunizieren.können..Die.Funktion.Click-to-Link®.kann. Piepston.hören. jederzeit.ausgeschaltet.werden,.um.die.Möglichkeit.schneller.Verbindungen.mit. anderen.SRC-System™-Nutzern.zu.unterbinden. 2. AUTOMATISCHE INTERKOM‑WIEDERVERBINDUNG Falls.das.SRC-System™.und.ein.anderes.gekoppeltes.Headset.außer.Reichweite. NUTZUNG DER CLICK-TO-LINK®‑FUNKTION geraten.und.voneinander.getrennt.werden,.wird.sich.das.SRC-System™. CTL-Funktion aktivieren/deaktivieren:.Die.Funktion.kann.über.das.Menü. automatisch.wieder.mit.dem.anderen.Headset.verbinden.(vorausgesetzt,.Sie. für.die.Anpassung.der.Einstellungen.ein-.bzw..ausgeschaltet.werden.(siehe. sind.wieder.innerhalb.der.Reichweite). Abschnitt.4.3)..Die.Funktion.ist.werkseitig.deaktiviert. Im.Bereitschaftsmodus.(Standby).können.Sie.das.Interkom-Gespräch.erneut. AUDIOQUELLEN UND PRIORITÄTEN manuell.aufnehmen..Betätigen.Sie.lediglich.die.KANAL.“A”.oder.KANAL.“B”-Taste,. -
Seite 21: Allgemeine Funktionen
11. KUNDENSERVICE Niedrige.Priorität *GPS Navigation Anweisungen von Smartphone Apps werden wie A2DP Audio priorisiert Weitere.Informationen.erhalten.Sie.auf.unserer.Website. www.schuberth.com IC (Interkom) Rufton:.Wenn.Sie.ein.Click-to-Link®-Gespräch.führen,.und.Fahrer. „A“.bzw..Fahrer.„B“.versucht,.mit.Ihnen.ein.IC-Gespräch.zu.führen,.hören.Sie.einen. Für.technische.Unterstützung.wenden.Sie.sich.bitte.an.Ihren. Signalton,.während.der.andere.Teilnehmer.ein.Besetzt-Signal.hört. SCHUBERTH.Fachhähandler,.oder.kontaktieren.Sie.uns.unter. Kundenservice@schuberth.com Wenn.Ihre.Click-to-Link®-Verbindung.aus.irgendeinem.Grund.unterbrochen. wird.und.andere.SRC-System™-Benutzer.in.der.Nähe.sind,.können.neue. Unsere.Rufnummer.0391 8106-555 SRC-System™-Verbindungen.zu.anderen.Teilnehmern.als.demjenigen.hergestellt. International:.+49 391-8106-555 werden,.zu.dem.die.ursprüngliche.Verbindung.bestanden.hat.. Für.die.neuesten.Informationen.über.Softwareaktualisierungen,. besuchen.Sie.bitte.unsere.Internetseite.unter. ALLGEMEINE FUNKTIONEN www.schuberth.com/de/motorcycle/service/src-systemtm.html.und. Gewünschtes Aktion registrieren.Sie.Ihr.Gerät.online.. Resultat WICHTIG CTL.. -
Seite 22: Konformitätserklärung
1).Dieses.Gerät.darf.keine.schädlichen.Interferenzen.verursachen.und Straßenrand.anhalten..Alle.Veröffentlichungen,.Anzeigen,.Bekanntmachungen.oder.ähnliche. 2).. d ieses.Gerät.muss.jede.empfangene.Interferenz.entgegennehmen,.einschließlich.solcher. Mitteilungen,.die.sich.darauf.beziehen,.dass.das.Gerät.während.der.Fahrt.verwendet.werden. Interferenzen,.die.einen.unerwünschten.Betrieb.verursachen.könnten. kann,.betreffen.lediglich.dessen.technische.Möglichkeiten.und.sind.nicht.als.entsprechende. FCC-Erklärung zur HF-Strahlenbelastung: Aufforderung.zu.verstehen. Dieses.Gerät.erfüllt.die.Bedingungen.der.FCC.RF.Radiation.Exposure.Limits.auch.unter.unkon- Sie.haben.zu.klären.und.zu.beachten,.ob.die.Benutzung.des.Geräts.-.abhängig.vom.lokalen.Ein- trollierbaren.Umweltbedingungen..Endnutzer.müssen.die.spezifischen.Betriebsanweisungen. satzgebiet.-.einen.Verstoß.gegen.Gesetze.oder.Vorschriften.darstellen.könnte..Jegliche.Benut- befolgen,.um.die.Bedingungen.entsprechend.einzuhalten..Dieser.Sender.darf.nicht.in.der.Nähe. zung.des.Geräts.erfolgt.insoweit.ausschließlich.auf.eigenes.Risiko.und.in.einer.Verantwortung. von.oder.zusammen.mit.anderen.Antennen.oder.Sendern.angebracht.werden. Zu.den.Grundanforderungen.der.sicheren.Nutzung.gehört.unter.anderem,.dass.Sie.körperlich. CE-Mitteilung dazu.in.der.Lage.sind,.das.Gerät.zu.benutzen.und.das.Sie.nicht.unter.einer.Krankheit.leiden. Das.SRC-System™.Headset.(das.“Produkt”.oder.das.„Gerät“).entspricht.den.folgenden.wesentli- bzw..Einschränkungen.unterliegen,.die.Ihre.Fähigkeit.zur.sicheren.Nutzung.des.Gerätes.und. chen.Anforderungen.der.EG-Richtlinie.1999/5/EC.(hier.“R&TTE-Richtlinie”.genannt):.Artikel.3.1a,. der.Teilnahme.am.Verkehr.beeinträchtigen.könnten..Des.Weiteren.müssen.Sie.für.das.Fahrzeug. 3.1.b.und.3.2..Das.Produkt.wurde.in.Übereinstimmung.mit.dem.Anhang.II.zur.oben.genannten. über.eine.gültige.Fahrerlaubnis.verfügen..Unter.keinen.Umständen.dürfen.vor.oder.während.der. Richtlinie.hergestellt. Nutzung.des.Gerätes.Alkohol.oder.bewusstseinsverändernde.Drogen,.die.Ihre.Aufmerksamkeit. beeinträchtigen.könnten,.konsumiert.werden. Konformitätserklärung FCC-Erklärung Das.SRC-System™.Headset.ist.im.Einklang.mit.und.entspricht.den.Richtlinien.der.Bluetooth®. Spezifikation.2.1.und.hat.alle.Tests.zur.Interfunktionsfähigkeit,.die.in.der.Bluetooth®.Spezifika- 15.21 tion.festgelegt.sind,.bestanden..Die.Interfunktionsfähigkeit.zwischen.dem.Gerät.und.anderen. Sie.werden.hiermit.darauf.hingewiesen,.dass.alle.seitens.des.Herstellers.nicht.ausdrücklich. Bluetooth®-fähigen.Produkten.ist.jedoch.nicht.gewährleistet. genehmigten.Änderungen.oder.Modifizierungen.an.diesem.Gerät.die.Berechtigung.des.Nutzers. - Seite 23 Geländefahrzeug,.Quad.oder.jeglichem.anderen.Fahrzeug,.ob.auf.der.Strasse,.im.Wasser.oder. 3..Sie.bestätigen,.dass.Sie.körperlich.dazu.in.der.Lage.sind,.das.Gerät.zu.benutzen.und.das.Sie. in.der.Luft.(nachstehend.“Fahrzeug”.genannt).ist.Ihre.vollständige.und.ungeteilte.Aufmerk- nicht.unter.einer.Krankheit.leiden.bzw..Einschränkungen.unterliegen,.die.Ihre.Fähigkeit.zur. samkeit.erforderlich..Die.Schuberth.GmbH.und.Cardo.Systems,.Inc.,.deren.Management,.Direk- sicheren.Nutzung.des.Gerätes.beeinträchtigen.könnten..Sie.bestätigen,.dass.Sie.mindestens. toren,.Tochtergesellschaften,.Muttergesellschaft,.Vertreter,.Bevollmächtigte,.Auftragnehmer,. achtzehn.(18).Jahre.alt.sind.und.dass.Sie.hinsichtlich.der.Risiken,.die.mit.der.Nutzung.des. Sponsoren,.Mitarbeiter,.Lieferanten.und.Wiederverkäufer.(nachstehend.“Firma”.genannt),. Gerätes.verbunden.sind,.informiert.wurden..Sie.stimmen.weiterhin.zu,.dass.Sie.vor.oder.wäh- weisen.Sie.ausdrücklich.darauf.hin,.dass.Sie.alle.erforderlichen.Vorsichtsmassnahmen.treffen. rend.der.Nutzung.des.Gerätes.weder.Alkohol.noch.irgendwelche.bewusstseinsverändernden. müssen.und.sich.während.der.Benutzung.des.Gerätes.einschließlich.aller.Modelle.des.Gerätes,. Drogen.zu.sich.nehmen.werden.die.Ihre.Aufmerksamkeit.beeinträchtigen.könnten. ungeachtet.deren.Handels-.oder.Markennamen,.zu.jeder.Zeit.des.Verkehrs,.den.Witterungsbe- 4..Sie.bestätigen.unsere.Warnungen.verstanden.zu.haben,.dass:.(a).bei.der.Nutzung.des.Geräts. dingungen.und.dem.Zustand.der.Strasse.bewusst.sein.müssen..Bevor.Sie.einen.Anruf.tätigen. im.Straßenverkehr.Risiken.und.Gefahren.bestehen,.einschließlich.aber.nicht.nur.in.Bezug.auf. oder.annehmen,.sollten.Sie.Ihr.Fahrzeug.am.Straßenrand.anhalten..Alle.Veröffentlichungen,. Verletzungen.oder.Krankheiten,.Zerrungen,.Brüche,.Teil-.und/oder.Totallähmung,.Tod,.oder. Anzeigen,.Bekanntmachungen.oder.ähnliche.Mitteilungen,.die.sich.darauf.beziehen,.dass. andere.Leiden,.die.zu.ernsthaften.Behinderungen.führen.könnten;.(b).diese.Risiken.und. das.Gerät.während.der.Fahrt.verwendet.werden.kann,.betreffen.lediglich.dessen.technische. Gefahren.durch.die.Fahrlässigkeit.des.Herstellers.oder.dessen.Vertreter.oder.Dritten.verursacht. Möglichkeiten.und.sind.nicht.als.Aufforderung.gedacht,.das.Gerät.im.direkten.Straßenverkehr. sein.könnten,.die.an.der.Konstruktion.oder.Herstellung.dieses.Geräts.beteiligt.waren;.(c).diese. zu.benutzen..Mit.dem.Kauf.des.Gerätes.und.dem.Verzicht.auf.Rückerstattung.des.Kaufpreises. Risiken.durch.vorhersehbare.oder.unvorhersehbare.Ursachen.hervorgerufen.werden.könnten.. (siehe.unten),.stellen.Sie.die.Firma.unwiderruflich.von.allen.Haftungsansprüchen,.Verlusten,. Sie.übernehmen.hiermit.alle.Risiken.und.Gefahren.sowie.alle.Verantwortung.für.alle.Verluste. Forderungen.und.anderen.Ansprüchen.jeglicher.Art.(einschließlich.der.Anwaltskosten).im. und/oder.Schäden,.unabhängig.davon.ob.sie.ausschließlich.oder.teilweise.durch.die.Fahrlässig- Zusammenhang.mit.der.Verwendung.des.Geräts.frei.und.verpflichten.sich.die.Firma.nicht.für. keit.oder.das.Verhalten.anderer,.einschließlich.seitens.der.Firma.verursacht.wurden. irgendwelche.Körperverletzungen,.Schäden.oder.Tod,.sowie.für.Warenverluste.und.–Schäden. 5..Sie.bestätigen,.dass.Sie.diese.Haftungsfreistellung.gelesen.haben,.ihre.Bedingungen.vollstän- an.Fahrzeugen,.einschließlich.Ihres.eigenen.Fahrzeugs,.oder.jeglichen.anderen.Schäden.an. dig.verstehen.und.dass.Sie.mit.dem.Verzicht.auf.Rückgabe.des.Gerätes.gegen.Rückerstattung. Sie.oder.an.Dritten,.ungeachtet.der.Umstände.oder.Bedingungen.zu.belangen.und.die.Firma. des.Kaufpreises.auch.auf.jegliche.Forderungen.verzichten.
-
Seite 24: Rückerstattung Des Kaufpreises
Rückerstattung des Kaufpreises FALLS.SIE.MIT.DIESEN.BEDINGUNGEN.NICHT.UNEINGESCHRÄNKT.EINVERSTANDEN.SIND,.BITTEN. WIR.SIE,.DASS.GERÄT.AN.die.Firma.MIT.VOLLER.KAUFPREISRÜCKERSTATTUNG.ZURÜCKZUGEBEN,. VORAUSGESETZT,.DASS.SIE.DIESES.INNERHALB.VON.7.ARBEITSTAGEN.NACH.ERWERB.DES.GERÄTES. TUN.(Kaufbeleg.erforderlich).UND.DAS.GERÄT.SOWIE.ALLE.ZUBEHÖRTEILE.UNVERSEHRT.SIND..BE- ZIEHEN.SIE.SICH.BEI.DER.RÜCKGABE.AUF.DIESE.BESTIMMUNGEN..BEI.NICHT-RÜCKGABE.INNERHALB. DES.VORGENANNTEN.ZEITRAUMS.BEFINDEN.SIE.SICH.AUSDRÜCKLICH.IN.UNEINGESCHRÄNKTER. ZUSTIMMUNG.MIT.ALLEN.OBEN.ANGEFÜHRTEN.BEDINGUNGEN.UND.VERZICHTEN.AUF.ALLE.ZU- KÜNFTIGEN.ANSPRÜCHE.UND.FORDERUNGEN.GEGENÜBER.SCHUBERTH. www.schuberth.com MAN00097 QG SRC-S2_C3 J 009.indd 24 7/18/12 5:38 PM... - Seite 25 U S E R M A N U A L P O W E R E D B Y MAN00097 QG SRC-S2_C3 J 009.indd 25 7/18/12 5:38 PM...
- Seite 26 10..CLICK-TO-LINK® (CTL)......................43 5.8.CLEANING.THE.SRC‑SYSTEM™.ACOUSTIC.COLLAR.......... 33 11..SUPPORT..........................44 6..C3.PRO.INSTALLATION......................33 12..NOTICES..........................45 6.1.REMOVING.THE.EXISTING.ACOUSTIC.COLLAR ..........33 6.2.CONNECTING.THE.ANTENNA.CABLE..............33 IMPORTANT:.This.is.version.1.0.of.the.User.Manual..Please.note,.that.our.manual.is.updated. 6.3.ATTACHING.THE.SRC‑SYSTEM™................34 periodically.on.our.website.in.order.to.include.the.very.latest.features.as.well.the.new. SRC-System www.schuberth.com/ options.and.functions.of.your.new. ..Please.visit. 6.4.POSITIONING.THE.SPEAKERS................35 fileadmin/downloads/SRC/SRC-System_Manual-1.pdf .to.check.now.if.the. 6.5.POSITIONING.THE.MICROPHONE................. 35 manual.you.are.holding.is.the.most.updated.version.and.download.the.website.manual. version.in.your.preferred.language.
-
Seite 27: Introduction
2.. Wireless.music-streaming.(supporting.the.Bluetooth® Stereo A2DP.and.AVRCP ➤Spoken.status.announcements,.so.that.you.always.know.to.whom.or.what. profiles.and.compatible.with.a.variety.of.MP3.Players,.adapters.and.other. device.you.are.connected.to.at.any.given.time. audio.devices) We.wish.you.a.great.riding.experience.and.remain.available.for.any.inquiries.you. 3.. 2-way.or.3-Way.Bike-to-Bike.Intercom.for.conference.calls.with.other. may.have..Just.write.us.at.service@schuberth.com. SRC-System™.headsets.(up.to.700.m/.2,300.ft).in.Full.Duplex**.mode 4.. Driver-to-Passenger.Intercom 5.. Click-to-Link®.for.spontaneous.intercom.communication.with.any.nearby. SRC-System™, scala rider G4 or G9 Nicole Prell 6.. GPS.Navigation.instructions.and.Streaming.Audio.from.compatible.Bluetooth®. Head of Sales and Marketing devices SCHUBERTH GmbH 7.. Built-in.FM.Radio.with.6.station.presets.and.automatic.tuning. Visit.www.schuberth.com/src2-tutorial/en.to.experience.an.interactive. 8.. As.a.stereo.headset.for.listening.to.cable-connected.audio.devices,.(such.as. demonstration.of.the.SRC-System™.functions.. non-Bluetooth®.MP3.Players.and.iPods®) _______________________ *. -
Seite 28: Contents.of.the.retail.box
2. CONTENTS OF THE RETAIL BOX SRC‑SYSTEM™ FOR S2 HELMETS SRC‑SYSTEM™ FOR C3 PRO HELMETS (offered in different sizes) (offered in different sizes) Microphone Channel A Button Flexible Boom • Connect to Rider A • MP3 2 Speakers Mobile Button Corded Microphone Channel A Button Channel B Button •... -
Seite 29: Charging.the.headset
3. CHARGING THE HEADSET 4. BASIC SETUP AND CONFIGURATION Make sure that your headset is fully charged for at least four hours 4.1 BASIC FUNCTIONS before initial use. DESIRED RESULT REQUIRED ACTION 1..Open.the.cover.protecting.the.Charging.Jack. Turn On / Off Press.and.hold.the.Mobile.Button.for.at.least.3.seconds 2..Insert.the.USB.cable.into.the.Charging.Jack. On:.Three.blue.flashes.and.Ascending.tone 3... I nsert.the.other.end.of.the.USB.cable.into. Off:.Three.red.flashes.and.Descending.tone the.wall.charger.or.a.computer’s.USB.port. Adjust the volume of the Tap.either.the.Volume.Up.or.Volume.Down.Button.. -
Seite 30: Software.upgrades.and.settings
If.your.SRC-System™.fails.to.respond.despite.repeated.attempts,.you.can. reset.your.headset.by.charging.it..After.approximately.10.seconds,.remove. •. Set custom AGC and VOX sensitivity levels.suited.to.your.specific.riding. the.headset.from.the.charger.and.turn.it.on.again..It.should.now.respond.as. style.and.conditions. expected. SRC‑SYSTEM SETTINGS CAN BE CUSTOMIZED IN TWO WAYS: 20. •.. V ia.the.free.SRC-System™.Upgrades.software.available.for.download.from. www.schuberth.com/register/en..Requires.PC.and.cable-connected.device. (cable.included)..See.section.4.3.. •.. V ia.the.Voice.Menu.and.the.buttons.on.your.SRC-System™.unit.–.see.below. MAN00097 QG SRC-S2_C3 J 009.indd 30 7/18/12 5:38 PM... -
Seite 31: S2.Installation
First,.remove.the.existing.Acoustic.Collar.from.your.helmet.as.follows: protector.from.the.antenna. Pull.out.and.remove.the.Acoustic.Collar.from.the.front.at.its.bent.center. connector. 4.. Align.the.two.connector.heads.and.snap.the.two.fasteners.back.into.place.to. lock.the.connector.in.a.closed.position.. 5.2 CONNECTING THE ANTENNA CABLE Your.SRC-System™.has.an.antenna.cable.which.must.be.connected.to.the.built- in.antenna.cable.connector.in.the.Schuberth.helmet. NOTE: Make sure to close the cover of the USB connector, and then tuck it away into the USB connector pocket. 1.. Pull.out.the.antenna.connector.(marked.with.a.red.tag).which.is.tucked.inside. the.back.rim.of.the.helmet. 5.. The.antenna.connector.can.now.be. -
Seite 32: Attaching.the.src-System
Locate.the.spot.on.the.internal.padding.of.the.helmet,.opposite.your.mouth,. where.the.microphone.will.be.placed. 1.. Peel.the.cover.from.the.adhesive.Velcro.pad.and.place.it.on.the.chosen. location.opposite.your.mouth. 2.. Attach.the.microphone.to.the.Velcro,.as.shown.in.illustration. 5.4 POSITIONING THE SPEAKERS For.best.audio.results,.make.sure.that.both.of.your.speakers.are.placed.as.closely. as.possible.just.opposite.your.ears.. The following applies to both sides of the SRC-System™: 1.. Open.the.rear.red.button.located.under.the.interior.lining.that.covers.the.cheek. pads.(the.button.is.held.by.a.black.ring)..Lift.the.lining.slightly. 3.. If.there.is.any.excess.microphone.cable,.tuck.it.under.the.cheek.pads. 2.. Attach.the.corresponding.oval.Velcro.pads.to.the.speaker-shaped.indentations. on.the.EPS.(expanded.polystyrene).and.position.the.speakers.on.the.Velcro.pads. 5.6 REMOVING THE SRC‑SYSTEM™ FROM YOUR HELMET 1.. Detach.both.speakers.and.the.microphone.from.the.Velcro.on.the.helmet.. IMPORTANT: Make sure not to pull on the Antenna connector. -
Seite 33: Wearing.and.removing.the.helmet
2... P ull.out.the.Acoustic.Collar.from.the.rear.at. pushing.the.entire.helmet.upwards. its.bended.center. NOTE: Your SRC-System™ Acoustic Collar is designed for maximum comfort. 3... R elease.the.collar’s.pins.from.their. However, since it contains an entire electronic kit within, it will have a slight a bulge. corresponding.indentations.inside.the. Therefore, putting your SRC equipped helmet on or taking it off may feel different helmet’s.rim. -
Seite 34: Attaching.the.src-System
.1... P ull.out.the.antenna.connector.(marked.with.a.red.tag).which.is.tucked.inside. 5... T he.antenna.connector.can.now.be.safely. the.back.rim.of.the.helmet. stowed.away.inside.the.antenna.connector. pocket.on.the.center.of.the.SRC-System™. 6.3 ATTACHING THE SRC‑SYSTEM ™ 1... M ake.sure.to.place.the.speaker.cords.inside.the.helmet,.and.then.secure.the. SRC-System™.into.place. 2... S lide.and.insert.the.pin.located.at.the.edge.of.the.control.panel.into.its. Antenna tag visible Antenna connector corresponding.indentation.on.the.helmet.and.close.the.snap.button. pulled out 2... O n.the.SRC.collar.open.the.two.fasteners.on.the. antenna.connector.and.remove.the.protective. plastic.cover. 3... O n.the.helmet.remove.the.rubber.protector. from.the.antenna.connector. 3... I nsert.the.other.pin.on.the.opposite.side.of.the.Acoustic.Collar.into.place.and. -
Seite 35: Positioning.the.speakers
6.5 POSITIONING THE MICROPHONE Snap Button To.assure.smooth.closing.(flip-down).of.the.helmet’s.chin.section,.first.remove.its. triangular.Anti-Noise.Pad.and.proceed.as.follows: 1..Bend.the.flexible.microphone.boom.as.shown.in.the.image. 6.4 POSITIONING THE SPEAKERS 2..Press.the.microphone.towards.the.center.of.your.mouth. For.best.audio.results,.make.sure.that.both.of.your.speakers.are.placed.as.closely. as.possible.just.opposite.your.ears.. The following applies to both sides of the SRC-System™: 1... O pen.the.rear.red.button.located.under.the.interior.lining.that.covers.the.cheek. pads.(the.button.is.held.by.a.black.ring)..Lift.the.lining.slightly. 2... A ttach.the.corresponding.oval.Velcro.pads.to.the.speaker-shaped.indentations.on. the.EPS.(expanded.polystyrene).and.position.the.speakers.on.the.Velcro.pads. .3... F lip-down.and.close.the.chin.section.of.your.helmet..You.may.need.to.use.both. hands.to.close.the.chin.section.properly. 4... W hile.the.chin.section.is.closed.and.the.visor.is.open,.insert.your.hand.into.the. opening.of.the.visor.and.push.the.microphone.away,.towards.the.center.of.the. -
Seite 36: Wearing.and.removing.the.helmet
NOTE: If you plan to use your mobile phone while using a Bluetooth® GPS device, then you should pair your mobile phone to the GPS and not to the SRC-System™ headset. * see restrictions under 9.4 b MAN00097 QG SRC-S2_C3 J 009.indd 36... -
Seite 37: Mobile.phone
NOTE: If you plan to use a GPS device in parallel with your mobile phone, then you to Standby mode should pair your mobile phone to the GPS device and not to the SRC-System™. In such case, skip this section and proceed directly with section 7.2. -
Seite 38: Gps.device
1. If the pairing process is not completed within two minutes the headset will return 2.. With.the.SRC-System™.headset.turned.ON,.press.and.hold.the.Mobile.Button. to Standby mode for.at.least.six.seconds.until.the.Red.and.Blue.Lights.begin.alternating.rapidly: 2. The priority schedule of your SRC-System™ has been set in a way to avoid 3.. Search.for.Bluetooth®.headsets.on.your.MP3.Player.by.following.the.device’s. incoming intercom calls to interrupt GPS instructions in progress. In such case the instructions. -
Seite 39: Built-In.fm.radio
NOTE: If the Pairing process is not completed within two minutes the headset will return to Standby mode. 8. BUILT‑IN FM RADIO OPERATING YOUR A2DP SOURCE FROM YOUR HEADSET Play Press.the.MP3.Button.for.3.seconds The.SRC-System™.is.equipped.with.an.FM.stereo.radio.receiver.and.RDS.(Radio. Data.System).technology. Pause / Stop* Press.the.MP3.Button.for.3.seconds Forward Press.the.Volume.Up.Button.for.3.seconds Radio On / Off Press.and.hold.the.CHANNEL.“B”.button.for.3.seconds... -
Seite 40: Automatic Radio Tuning
. •.. P ressing.Volume Up.searches.upwards.(higher.frequency).for.a.station . •.. P ressing.Volume Down.searches.downwards.(lower.frequency).for.a. Turning.off.your.SRC-System™.will.clear.the.Automatic.Radio.Tuning.stations.and. station restore.the.FM.Presets. 2... T ap.the.Channel.“B”.button.within.20.seconds.of.finding.the.FM.station. to.save.it.as.the.current.Preset. Scan and Save: Scan.through.FM.stations 1... P ress.and.hold.the.Volume Up.button.for.6.seconds..The.SRC-System™. will.search.upwards.(higher.frequency).for.a.station..When.a.station.is. found,.it.can.be.heard.for.a.few.seconds. 2... T o.stop.the.scan.on.this.station:.Tap.the.Volume Up.Button. 3... T ap.the.Channel.“B”.button.within.20.seconds.of.finding.the.FM.station. to.save.it.as.the.current.Preset. 4... T o.continue.scan:.Wait.for.the.next.station.to.be.found. MAN00097 QG SRC-S2_C3 J 009.indd 40... -
Seite 41: Using.the.intercom
NOTE: Selecting a CHANNEL that is already in use will override the paired headset on 9.3 BEFORE STARTING THE INTERCOM that CHANNEL with the newly paired headset. Your.SRC-System™.headset.has.two.buttons.designated.for.quick.connection.to. two.other.headsets..These.other.headsets.are.referred.to.as.CHANNEL “A”.and. 4.. . O n.the SRC-System™.headset,.press.and.hold.the.assigned.CHANNEL.BUTTON. CHANNEL “B”. (“A”.or.“B”).for.at.least.six.seconds.until.the.headset’s.BLUE.or.RED.Light.be- Channel “B“ Channel “A“... -
Seite 42: Making.intercom.calls
9.4b. THREE‑WAY INTERCOM 9.5 MAKING INTERCOM CALLS The.SRC-System™.offers.three-way.intercom.conference.connectivity.as.follows: There.are.two.ways.to.start.an.Intercom.call.with.headsets.that.are.paired.to.your. SRC-System™.(make.sure.you.are.in.Standby.mode): Use Channel “A” Use Channel “B” VOICE CONNECT (VOX): CHANNEL BUTTON CONNECT: Preferred for relatively brief conversations as it takes the channel into standby mode after 30 seconds of silence... -
Seite 43: Reset.pairing.(Restoring.default.configuration)
2.. Press.and.hold.the.Volume Up.Button.for.three.seconds. Click-to-Link®.is.the.spontaneous.“social”.nature.of.your.SRC-System™..This.unique. 3.. The.Red.and.Blue.Lights.will.flash.five.times.simultaneously.and.then.the. feature.will.enable.you.to.instantly.initiate.one-to-one.intercom.calls.with.other. headset.will.turn.off,.confirming.that.Reset.was.successfully.completed. SRC-System™.users.in.the.near.vicinity.without.going.through.a.pairing.process.in. advance..Think.of.it.as.a.private.bike-to-bike.channel.that.you.can.set.up.on-the-fly. 9.9 NOTEWORTHY ISSUES with.other.SRC-System™.users.that.you.spot.at.a.traffic.light.or.on.the.road.. 1. Busy Status (When using a SRC-System™ headset) The.Click-to-Link®.feature.can.of.course.be.disabled.at.any.time,.blocking.any. When.attempting.an.Intercom.call.with.a.headset.that.is.already.on.a.Phone/. attempt.by.other.users.to.establish.a.spontaneous.link. GPS/.Intercom.call,.you.will.hear.two.beeps.indicating.the.other.headset.is.busy. ENABLE/DISABLE CLICK-TO-LINK® 2. Automatic Reconnection of the Intercom The.feature.can.be.turned.on.or.off.via.the.Settings Customization Menu.(see. If.the.SRC-System™.and.another.paired.headset.go.out.of.range.and.disconnect. Section.4.4)..By.default,.this.feature.is.DISABLED. -
Seite 44: General Functions
Phone:. +49-391-8106-555 IC (Intercom) Request Tone:.If.you.are.on.a.Click-to-Link®.call.and.Rider.A.or. For.the.latest.information.on.Software.upgrades.please.visit.our.website.at. Rider.B.try.to.connect.to.you.for.an.IC.Call,.you.will.hear.an.IC.Request.Tone.while. www.schuberth.com/en/motorcycle/service/src-systemtm.html. the.other.party.will.hear.a.rejection.beep. and.register.on-line.. If.other.Click-to-Link®-enabled.units.are.nearby,.new.Click-to-Link®.connections. IMPORTANT: may.randomly.connect.to.any.of.them. OPENING ACOUSTIC COLLAR ZIPPER VOIDS WARRANTY! GENERAL FUNCTIONS The.electronic.components.inside.the.Acoustic.Collar.of.the.SRC-System™.are. closed.by.a.sealed.zipper..Please.do.not.tamper.with.or.open.the.zipper.as.this. USING Click-to-Link® will.void.your.warranty. If you want to… Perform this action: Make Start.a.CTL.call.request Double.tap.the.Channel“A”.Button CTL calls (search.lasts.up.to.10.seconds) 21. -
Seite 45: Waiver And General Release
European CE Notice the.device.is.exclusively.at.the.user’s.own.risk.and.responsibility. The.SRC-System™.headset.(the.“Product”).is.in.conformity.with.the.following.essential.require- The.basic.requirements.for.safe.use.include.that.you.must.be.physically.capable.of.using.the. ments.of.Council.Directive.1999/5/EC.(referred.to.as.R&TTE.Directive):.Articles.3.1a,.3.1.b.and.3.2.. device.and.not.suffer.from.any.illness.or.restrictions.that.might.impair.your.capability.to.use.the. The.Product.is.manufactured.in.accordance.with.Annex.II.of.the.above.directive. device.safely.and.ride.on.the.road..Furthermore,.you.must.hold.a.valid.driving.licence.for.the. Declaration of Conformity (DOC) vehicle..Under.no.circumstances.may.you.consume.alcohol.or.mind.altering.drugs,.which.might. The.SRC-System™.headset.is.compliant.with.and.adopts.the.Bluetooth® Specification.2.1.and.has. impair.your.alertness,.before.or.during.use.of.the.device. successfully.passed.all.interoperability.tests.that.are.specified.in.the.Bluetooth®.specification..How- Federal Communications Commission (FCC) ever,.interoperability.between.the.device.and.other.Bluetooth®-enabled.products.is.not.guaranteed. 15.21 You.are.cautioned.that.changes.or.modifications.not.expressly.approved.by.the.part.responsible. WAIVER AND GENERAL RELEASE for.compliance.could.void.the.user’s.authority.to.operate.the.equipment. (not for countries of the European Union) 15.105(b) BY.USING.THE.SRC‑SYSTEM™.YOU.WILL.WAIVE.SUBSTANTIAL.LEGAL.RIGHTS.INCLUDING.THE. -
Seite 46: Return For Full Refund
DAMAGES. respect.to.any.person.or.property.however.caused,.WHETHER.ARISING.FROM.THE.NEGLIGENCE. YOU.ACKNOWLEDGE.AND.AGREE.THAT.THE.LIMITATIONS.SET.FORTH.ABOVE.ARE.FUNDAMENTAL. OR.OTHERWISE,.and.which.may.hereafter.accrue.to.you.on.some.future.date.as.a.result.of.said. ELEMENTS.OF.THIS.AGREEMENT.AND.THE.DEVICE.WOULD.NOT.BE.PROVIDED.TO.YOU.ABSENT.SUCH. use,.to.the.fullest.extent.permitted.by.law. LIMITATIONS..SOME.STATE.STATUTES.MIGHT.APPLY.REGARDING.LIMITATION.OF.LIABILITY. 2..You.fully.understand.and.assume.the.risks.in.using.the.Device,.including.risk.of.negligent.acts. RETURN FOR FULL REFUND or.omissions.by.others. IF.YOU.ARE.UNWILLING.TO.ACCEPT.AND.AGREE.TO.THE.ABOVE.CONDITIONS,.YOU.MAY.RETURN.THIS. 3..You.confirm.that.you.are.physically.capable.to.use.the.Device.and.that.you.have.no.medical. DEVICE.TO.THE.RESELLER.OR.TO.THE.COMPANY.FOR.A.FULL.REFUND,.PROVIDED.THAT.YOU.DO.SO. conditions.or.needs.that.may.infringe.upon.your.abilities.to.do.so.in.a.safe.manner..You. NO.LATER.THAN.7.BUSINESS.DAYS.FOLLOWING.THE.PURCHASE.OF.THE.DEVICE.(proof.of.purchase. confirm.that.you.are.at.least.eighteen.(18).years.of.age.and.that.you.have.been.advised.of.the. required).AND.SUBJECT.TO.THE.WRAPPING.BEING.INTACT..WHEN.DOING.SO,.PLEASE.REFER.TO.THIS. risks.associated.with.the.use.of.the.Device..You.further.confirm.that.you.will.not.consume.any. SECTION..BY.NOT.RETURNING.THE.DEVICE.FOR.REFUND.WITHIN.THE.PERIOD.PROVIDED,.YOU.ARE. alcohol.that.may.affect.your.alertness.or.any.mind-altering.substance,.and.will.not.carry,.use. EXPLICITLY.IN.AGREEMENT.WITH.THE.ABOVE,.AND.RENOUNCE.ALL.RIGHTS.TO.FUTURE.CLAIMS.AND. or.consume.these.substances.before.or.during.the.use.of.the.Device. DEMANDS.AGAINST.THE.COMPANY.AS.DEFINED.ABOVE. 4..You.fully.acknowledge.our.warnings.and.understand.that:. (a).risks.and.dangers.exist.in.using.the.Device.while.in.traffic,.including.but.not.limited.to. www.schuberth.com injury.or.illness,.strains,.fractures,.partial.and/or.total.paralysis,.death.or.other.ailments. that.could.cause.serious.disability;. MAN00097 QG SRC-S2_C3 J 009.indd 46 7/18/12 5:38 PM... - Seite 47 G U I D E D ’ U T I L I S A T I O N P O W E R E D B Y MAN00097 QG SRC-S2_C3 J 009.indd 47 7/18/12 5:38 PM...
- Seite 48 6..C3.PRO-INSTALLATION....................... 55 6.1.RETIRER.LE.COL.ACOUSTIQUE.EXISTANT............55 6.2.CONNECTER.LE.CÂBLE.D’ANTENNE..............55 SRC‑SYSTEM™ 6.3.FIXER.LE..................56 IMPORTANT: Il.s’agit.de.la.version.2.0.du.Guide.d’Utilisateur..Veuillez.noter.que.notre.guide.est.mis.à. 6.4.POSITIONNER.LES.ÉCOUTEURS................57 jour.régulièrement.sur.notre.site.afin.d’y.inclure.les.toutes.dernières.fonctionnalités.et.les.nouvelles. 6.5.POSITIONNEMENT.DU.MICROPHONE..............57 options.et.fonctions.de.votre.nouveau.kit.mains.libres.SRC-System™..Veuillez.vous.rendre.à.l’adresse. 6.5.RETIRER.LE.SRC‑SYSTEM™.DE.VOTRE.CASQUE..........57 www.schuberth.com/fileadmin/downloads/SRC/SRC-System_Manual-1.pdf.pour.vérifier. dès.maintenant.si.le.guide.que.vous.avez.est.la.version.la.plus.actuelle.et.téléchargez.le.guide.du.site. 6.7.METTRE.ET.RETIRER.LE.CASQUE................. 58 dans.votre.langue.préférée. SRC‑SYSTEM™ 6.8.NETTOYER.LE.SRC ..............58 MAN00097 QG SRC-S2_C3 J 009.indd 48 7/18/12 5:38 PM...
-
Seite 49: Introduction
➤Le.SRC-System™.vous.donne.des.indications.vocales.de.statut..Ainsi,.vous. 3..Intercom.bidirectionnel.ou.tridirectionnel.de.moto.à.moto.pour.des.appels. savez.à.tout.moment.à.qui.ou.à.quel.dispositif.vous.êtes.connecté.. en.mode.conférence.avec.un.maximum.de.deux.autres.kits.mains.libres. Nous.vous.souhaitons.d’excellents.moments.avec.votre.SRC-System™.et. SRC-System™.(jusqu’à.700.m.de.portée.entre.deux.SRC-System™.et.en.Full. sommes.à.votre.disposition.pour.toute.question..Vous.pouvez.nous.écrire.à. Duplex**). Kundenservice@schuberth.com. 4..Intercom.entre.le.pilote.et.son.passager 5.Click-to-Link®.pour.les.communications.intercom.spontanées.avec.n’importe. quelle.unité.SRC-System™, scala rider G4.ou.G9.à.proximité 6..Réception.des.instructions.de.navigation.GPS.et.pour.lecture.audio.en.transit.à. Nicole Prell partir.de.dispositifs.Bluetooth®.compatibles Chef des ventes et du marketing 7... R adio.FM.intégrée.avec.6.stations.préréglées.et.réglage.automatique. SCHUBERTH GmbH 8..Écoute.audio.á.partir.d’un.dispositif.connecté.par.câble.(tel.que.lecteur.MP3,. Visitez.le.site.www.schuberth.com/src2-tutorial/fr.pour.découvrir.une. iPod®.non.Bluetooth®) démonstration.interactive.des.fonctionnalités.du.SRC-System™. ____________________ *..C ertaines.fonctionnalités.avancées.ne.seront.peut-être.pas.disponibles.avec.les.téléphones. -
Seite 50: Contenu.du.coffret
2. CONTENU DU COFFRET SRC‑SYSTEM™ POUR CASQUES S2 SRC‑SYSTEM™ POUR CASQUES C3 PRO (offered in different sizes) (Le produit est proposé sous différentes tailles) Microphone Bras flexible Bouton Canal A • Connexion au Motard A • Bouton MP3 Cheville Deux écouteurs Bouton Téléphone mobile Microphone Bouton Canal A... -
Seite 51: Chargement Du Src-System
3. CHARGEMENT DU SRC‑SYSTEM 4. I NSTALLATION ET CONFIGURATION DE BASE Veillez à charger votre SRC-System™ pendant au moins 4 heures avant la première utilisation. 4.1 FONCTIONNALITÉS GÉNÉRALES 1..Ouvrez.la.languette.de.couverture.protégeant.la.prise.de.charge.. RÉSULTAT ESCOMPTE : ACTION REQUISE.: 2... I nsérez.le.câble.USB.dans.la.prise.de.charge.. Marche / Arrêt Appuyez.sur.le.bouton.Mobile.pendant.au.moins.3.secondes.. 3... I nsérez.l’autre.extrémité.du.câble.USB. :.3.clignotements.BLEUS.+.tonalité.croissante •.Marche. -
Seite 52: Réglages.et.mises.a.jour.du.logiciel
3. Source audio A2DP (Stéréo Bluetooth) 4. Radio FM (intégrée) 4.4 PERSONNALISATION DES PARAMÈTRES 5. AUX (pour les connexions câblées comme par exemple les Le SRC-System™.propose.divers.réglages.personnalisables.qui.vous.permettent. MP3) de.personnaliser.l’appareil.en.fonction.de.vos.préférences..Parmi.ces.paramètres,. Faible.priorité vous.pouvez.: *Les instructions des applications des Smartphone (GPS) sont en priorité 3 •.Activer / Désactiver les annonces parlées.qui.fournissent.l’état.de.votre. -
Seite 53: S2-Installation
Sur.le.col.du.SRC-System™,.ouvrez.les.deux. 5. S2‑INSTALLATION attaches.sur.le.connecteur.d’antenne.et.reti- rez.le.couvercle.de.protection.en.plastique. (Voir la section 6 pour les instructions d’installation C3 PRO) Sur.le.casque,.retirez.la.protection.en. 5.1 RETIRER LE COL ACOUSTIQUE EXISTANT caoutchouc.de.la.prise.d’antenne. Tout.d’abord,.retirez.le.Col.Acoustique.existant.de.votre.casque.comme.suit.: 4.. Alignez.les.deux.têtes.du.connecteur.et. Tirez.et.retirez.le.Col.Acoustique.de.la.partie.frontale.au.niveau.du.centre.recourbé. remettez.les.deux.attaches.en.place.pour. verrouiller.le.connecteur.en.position.fermée.. 5.2 CONNECTER LE CÂBLE D’ANTENNE Votre.SRC-System™.dispose.d’un.câble.d’antenne.qui.doit.être.raccordé.au.câble. d’antenne.intégré.dans.le.casque.Schuberth. REMARQUE : Refermez le couvercle du connecteur USB, puis rangez-le dans la poche prévue à... -
Seite 54: Fixer.le.src-System
5.5 POSITIONNEMENT DU MICROPHONE Localiser.l’endroit.exact,.au.niveau.du.rembourrage.intérieur.du.casque,.en.face.de. votre.bouche,.où.le.microphone.sera.placé. 1.. Otez.la.pellicule.protectrice.du.Velcro.et.placez.celui-ci.à.l’endroit.choisi.. 2.. Attachez.le.microphone.au.Velcro,.comme.indiqué.ci-joint. Attachez.le.microphone.au.Velcro,.comme.indiqué.ci-joint. 5.4 POSITIONNER LES ÉCOUTEURS Pour.de.meilleurs.résultats.audio,.assurez-vous.que.vos.deux.écouteurs.sont. placés.aussi.près.que.possible.et.juste.en.face.de.vos.oreilles. Ce qui suit s’applique aux deux côtés du SRC-System™: 1.. Ouvrez.le.bouton.rouge.situé.à.l’arrière,.sous.le.revêtement.intérieur.qui. S’il.y’a.un.excès.de.câble.du.microphone,.glissez-le.sous.les.coussinets.proches. couvre.les.joues.(le.bouton.est.maintenu.par.un.anneau.noir)..Soulevez. des.joues. légèrement.le.revêtement. 5.6 RETIRER LE SRC‑SYSTEM™ DE VOTRE CASQUE 2.. Fixez.les.bandes.Velcro.ovales.correspondantes.au.renfoncement.des.écouteurs.sur. 1.. Détachez.les.deux.écouteurs.et.le.microphone.du.velcro.sur.le.casque. -
Seite 55: Mettre.et.retirer.le.casque
5.7 METTRE ET RETIRER LE CASQUE 6. C3 PRO‑INSTALLATION Les.composantes.électroniques.du.SRC-System™.sont.intégrées.de.façon.sûre. à.l’intérieur.du.protège-nuque..Pour.éviter.un.certain.inconfort.lorsque.vous. (Voir la section 5 pour les instructions d’installation S2) mettez.ou.retirer.votre.casque,.nous.vous.recommandons.de.procéder.comme. 6.1 RETIRER LE COL ACOUSTIQUE EXISTANT suit.:. Tout.d’abord,.retirez.le.Col.Acoustique.existant. 1..Elargir.l’ouverture.du.casque.en.tenant.fermement.les.sangles.et.en.les.tirant. de.votre.casque.comme.suit.: fort.de.chaque.côté.. 2..Tout.en.tirant.les.sangles.de.chaque.côté,.faites. 1..Détachez.les.deux.boutons-pression. glisser.le.casque.sur.votre.tête,.en.commençant. 2... S oulevez.et.poussez.l’arc.du.protège-nuque. par.le.cou.puis.vers.l’avant. à.partir.de.son.centre. 3..Pour.enlever.le.casque,.procédez.de.la.même. façon.en.commençant.par.tirer.les.sangles.de. - Seite 56 6.3 FIXER LE SRC‑SYSTEM 2... S ur.le.col.du.SRC-System™,.ouvrez.les.deux. ™ attaches.sur.le.connecteur.d’antenne.et.retirez.le. 1... V eillez.à.placer.les.cordons.des.écouteurs.à.l’intérieur.du.casque,.puis.mettez.le. couvercle.de.protection.en.plastique. SRC-System™.en.place. 2... F aites.glisser.la.cheville.située.à.l’extrémité.du.panneau.de.contrôle.pour. 3... S ur.le.casque,.retirez.la.protection.en. l’insérer.dans.son.orifice.sur.le.casque.et.fermez.le.bouton-pression. caoutchouc.de.la.prise.d’antenne. 4... A lignez.les.deux.têtes.du.connecteur.et.remettez. les.deux.attaches.en.place.pour.verrouiller.le. connecteur.en.position.fermée.. 3... I nsérez.l’autre.cheville.de.l’autre.côté.du.protège-nuque.et.fermez.le.second. antenna-plug (helmet) unsealed (with bouton-pression. arrows) 4... P oussez.et.insérez.le.protège-nuque.en.partant.du.centre.jusqu’à.l’arrière.du. casque..Faites.de.même.pour.les.autres.parties.pour.assurer.la.bonne.mise.en.
-
Seite 57: Positionner.les.écouteurs
6.4 POSITIONNER LES ÉCOUTEURS 6.5 POSITIONNEMENT DU MICROPHONE Pour.assurer.la.fermeture.correcte.de.la.mentonnière,.veuillez.tout.d’abord. Pour.de.meilleurs.résultats.audio,.assurez-vous.que.vos.deux.écouteurs.sont. supprimer.son.anti-bruit.triangulaire.et.procédez.comme.suit.: placés.aussi.près.que.possible.et.juste.en.face.de.vos.oreilles. 1..Tournez.le.microphone.flexible,.comme.indiqué.dans.l’image. Ce qui suit s’applique aux deux côtés du SRC-System™: 2..Rapprochez.le.microphone.du.centre.de.votre.bouche. 1... O uvrez.le.bouton.rouge.situé.à.l’arrière,.sous.le.revêtement.intérieur.qui.couvre. les.joues.(le.bouton.est.maintenu.par.un.anneau.noir)..Soulevez.légèrement.le. revêtement. 2... F ixez.les.bandes.Velcro.ovales.correspondantes.au.renfoncement.des.écouteurs.sur. l’EPS.(surplus.de.polystyrène).et.positionnez.les.écouteurs.sur.les.bandes.velcro. .3... A baissez.et.fermez.la.mentonnière.de.votre.casque..Il.se.peut.que.vous.deviez. utiliser.vos.deux.mains.pour.la.fermer.correctement. 4... A lors.que.la.mentonnière.est.fermée.et.que.la.visière.est.ouverte,.insérez.votre. main.dans.l’ouverture.de.la.visière.et.poussez.le.microphone.vers.le.centre.de.la. -
Seite 58: Mettre.et.retirer.le.casque
REMARQUE: Si vous prévoyez d’utiliser votre téléphone mobile en même temps qu’ un appareil GPS Bluetooth®, vous devez connecter votre téléphone mobile au GPS et non le kit mains libres SRC-System™. 15. * voir restrictions section 9.4b MAN00097 QG SRC-S2_C3 J 009.indd 58... -
Seite 59: Téléphone.mobile
à l’appareil GPS appuyer sur le bouton Mobile pour connecter le kit au téléphone. Le SRC-System™ se et non au SRC-System™. Dans ce cas, ignorez cette section et passez directement à... -
Seite 60: Gps
L’appel.une.fois.terminé,.vous.pouvez.lancer.et.accepter.des.appels.en.mode.Intercom. le SRC-System™ reviendra en mode Veille. 7.2 GPS 2. L’ordre de priorité du SRC-System™ est ainsi fait pour que les appels en mode intercom n’interrompent pas les instructions GPS en cours. L’appelant entendra Pour.utiliser.un.GPS.Bluetooth®.avec.le.SRC-System™,.il.faut. une tonalité « occupé » et vous entendrez deux bips (voir section 4.6 pour de plus tout.d’abord.effectuer.une.connexion..Ainsi,.votre.GPS.pourra. - Seite 61 REMARQUE: Si le processus de connexion n’est pas terminé dans les deux minutes qui Vous.pouvez.régler.le.Volume.à.partir.du.MP3.ou.du.SRC-System™. suivent, le SRC-System™ reviendra en mode Veille. Toute.autre.connexion.audio.mettra.automatiquement.le.MP3.en.sourdine..Le. signal.audio.ne.reprendra.que.quand.le.kit.mains.libres.sera.à.nouveau.en.mode. UTILISATION DE VOTRE SOURCE A2DP À PARTIR DE VOTRE SRC-SYSTEM™ Veille.. Lecture Appuyez.et.maintenez.le.bouton.MP3.pendant.3.secondes REMARQUE: Lorsque vous écoutez votre lecteur MP3, le dispositif VOX est indisponible.
-
Seite 62: Radio.fm.intégrée
Allumer / Eteindre le RDS (appuyer simultanément pendant 3 secondes, 8. RADIO FM INTÉGRÉE pendant que la radio est en marche) Le.SRC-System™.est.équipé.d’un.récepteur.radio.FM.haute.qualité.et.d’une. Bouton Bouton Canal «A» Canal «B» technologie.RDS.(Radio.Data.System). Allumer la radio En.mode.Veille,.appuyez.sur.le.bouton.CANAL.“B”. pendant.3.secondes Eteindre la radio La.radio.étant.allumée,.appuyez.sur.le.bouton.CANAL.“B”. pendant.3.secondes Passer à la prochaine La.radio.étant.allumée,.appuyez.sur.le.bouton.CANAL. -
Seite 63: Introduction
RÉGLAGE AUTOMATIQUE DE LA RADIO Votre.SRC-System™.vous.permet.de.vous.connecter.à.d’autre.motards.utilisant.le. Cette.fonction.permet.de.trouver.de.nouvelles.stations.rapidement.et.facilement. kit.mains.libres.SRC.à.une.portée.allant.jusqu’à.700.mètres.(selon.le.terrain)..Pour. en.créant.automatiquement.une.liste.provisoire.de.6.stations.de.radio. établir.une.ou.deux.connexions.intercom.Bluetooth®,.il.faut.tout.d’abord.procéder. temporaires. à.la.connexion.du.SRC-System™.avec.les.autres.kits.mains.libres. 1..Allumez.la.radio. La.connexion.ne.se.fait.qu’une.fois.et.quand.elle.est.terminée,.les.kits.se. reconnaîtront.automatiquement.lorsqu’ils.seront.à.portée.l’un.de.l’autre. 2... A ppuyez.sur.le.bouton.Volume.–..et.maintenez-le.enfoncé.pendant.6.secondes. Votre.SRC-System™.possède.deux.canaux.intercom.pour.communiquer.avec. 3... V otre.SRC-System™.commencera.à.scanner.vers.le.haut.(fréquence.plus.haute). d’autres.kits.mains.libres..Il.peut.donc.communiquer.avec.au.maximum.deux. par.rapport.à.la.station.actuelle.et.à.enregistrer.les.6.prochaines.stations.FM. autres.kits.mains.libres.SRC. qu’il.découvrira.comme.stations.temporaires.dites.«.on-the-go.». 9.2 COMPATIBILITÉ INTERCOM 4... S i.vous.le.désirez,.répétez.depuis.l’étape.2.pour.enregistrer.les.6.prochaines. stations.comme.stations.«.on-the-go.».Eteindre.votre.SRC-System™.effacera. Vous.pouvez.utiliser.votre.SRC-System™.pour.effectuer.des.communications. les.stations.trouvées.par.réglage.automatique.de.la.radio.et.restaurera.les. Intercom.avec.n’importe.quel.autre.kit.mains.libres.SRC-System™.et.avec.les.kits. stations.FM.préréglées. mains.libres.Cardo scala rider..Pour.de.plus.amples.informations,.veuillez.visiter. - Seite 64 9.4 UTILISATION DU SRC‑SYSTEM™ EN MODE INTERCOM AVEC DEUX 9.4b INTERCOM TRIDIRECTIONNEL AUTRES KITS SRC‑SYSTEM™ Le.SRC-System™.offre.une.connectivité.tridirectionnelle.en.mode.intercom. comme.suit.:. CANAL INTERCOM BOUTON PAIRAGE/ INDICATEURS DE MODE DE CONNEXION PAIRAGE Utiliser le Canal “A” Utiliser le Canal “B” CANAL.«A» BOUTON.CANAL.«A». Le.voyant.ROUGE.clignote.rapidement CANAL.«B» BOUTON.CANAL.“B”.
-
Seite 65: Lancer.des.appels.en.mode.intercom
9.5 LANCER DES APPELS EN MODE INTERCOM avec.VOX,.changez.le.réglage.sur.“Haute”.via.le.logiciel.(voir.section.4.3).ou. directement.sur.votre.SRC-System™.via.le.menu.vocal.(voir.section.4.4). Maintenant.que.vous.avez.terminé.le.processus.de.connexion,.vous.pouvez.commencer. à.utiliser.l’intercom..Si.vous.ne.l’avez.pas.encore.fait,.consultez.le.tableau.ci-dessus.et. Activer/Désactiver : La.fonction.VOX.pour.les.appels.intercom.peut.être. procédez-y.avant.de.poursuivre. complètement.désactivée..En.mode.Veille,.appuyez.sur.les.Boutons.Volume.fort. Vous.pouvez.lancer.un.appel.intercom.avec.des.kits.connectés.à.votre.SRC-System™.de. et.Volume.faible.simultanément.pendant.3.secondes.jusqu’au.bip..Le.statut.par. deux.façons.(assurez-vous.d’être.en.mode.Veille).: défaut.est.Connexion.vocale.. CONNEXION VOCALE : CONNEXION AVEC LE BOUTON DU CANAL Pour des conversations relativement brèves. Le canal REMARQUE : La fonctionnalité Activer/Désactiver la connexion Vocale ne concerne passe en mode Veille après 30 secondes de silence... -
Seite 66: Dépannage.de.l'intercom
3. LIMITES DU MODE CONFÉRENCE 10. CLICK-TO-LINK® (CTL) En.mode.conférence.intercom.avec.3.interlocuteurs.(dont.vous-même),.les. interlocuteurs.qui.ont.deux.connexions.actives.simultanées.ne.pourront.pas. Click-to-Link®.est.le.caractère.spontané.«social».de.votre.SRC-System™..Cette. recevoir.des.appels.téléphoniques.ou.des.messages.GPS.tant.que.dure.l’appel. caractéristique.unique.vous.permettra.de.passer.instantanément.des.appels. conférence.(voir.détails.dans.les.section.9.4b) intercom.avec.d’autres.utilisateurs.SRC-System™.dans.les.environs.sans.passer. 9.10 DÉPANNAGE DE L’INTERCOM par.un.processus.de.pairage.préalable..Voyez-le.comme.un.canal.privé.de.motard- à-motard.que.vous.pouvez.configurer.sur.la.route.avec.d’autres.utilisateurs. Tout.d’abord,.assurez-vous.que.votre.microphone.est.bien.en.face.de.votre.bouche. SRC-System™.une.fois.que.vous.êtes.arrêté.à.un.feu.ou.le.long.de.la.route.. Le.SRC-System™.est.conçu.pour.être.utilisé.dans.des.milieux.bruyants..Il.faut.donc. La.fonction.Click-to-Link®.peut.être.désactivée.à.tout.moment,.bloquant.toute. le.tester.à.l’extérieur,.par.exemple,.près.d’une.moto.au.régime.ralenti.et.non.à. tentative.par.les.autres.utilisateurs.SRC-System™.d’établir.un.lien.spontané. l’intérieur..Vérifiez.aussi.que.la.connexion.a.été.réalisée.correctement..Pour.cela,. reportez-vous.aux.instructions.des.sections.correspondantes. Activer / Désactiver Click-to-Link® :.Cette.fonction.peut.être.activée.ou. désactivée.via.le.menu.vocal.(voir.la.section.4.4)..Par.défaut,.cette.fonction.est. désactivée. SOURCES AUDIO ET PRIORITÉS Les.différentes.sources.audio.connectées.au.SRC-System™.sont.hiérarchisées. -
Seite 67: Fonctions Générales
Tonalité de Demande IC (Intercom) : Si.vous.êtes.en.plein.appel.Click-to-Link®. 11. ASSISTANCE et.le.Motard.A.ou.le.Motard.B.essaie.de.vous.contacter.via.un.appel.IC,.vous. entendrez.une.Tonalité.de.Demande.IC.tandis.que.l’autre.entendra.un.bip.de. Pour.de.plus.amples.informations,.visitez.notre.site.Web.: rejet. www.schuberth.com Si.votre.connexion.Click-to-Link®.a.été.interrompue.pour.une.raison.quelconque.et. Pour.une.assistance.technique,.contactez-nous.à.l’adresse.suivante.:. que.d’autres.utilisateurs.SRC-System™.sont.à.proximité,.de.nouvelles.connexions. service@schuberth.com Click-to-Link®.peuvent.être.établies.avec.d’autres.utilisateurs.que.celui.de.votre. Téléphone.:.+49-391-8106-555 première.connexion. Pour.obtenir.les.dernières.informations.sur.les.mises.à.jour.du.logiciel,.visitez.notre. FONCTIONS GÉNÉRALES site.Web.à.l’adresse:.. www.schuberth.com/fr/motorcycle/service/src-systemtm.html.et. Si vous voulez… Procédez ainsi : inscrivez-vous.en.ligne.. Passer.des. Lancer.une.demande.d’appel.CTL Double.Pression.rapide.sur.. appels.CTL le.bouton.«.A.» (la.recherche.dure.jusqu’à.10. IMPORTANT: secondes) OUVRIR LA FERMETURE DU MICRO‑CASQUE ANNULE LA GARANTIE... -
Seite 68: Avis
•.Réorientez.ou.déplacez.l’antenne.réceptrice. 12. AVIS •.Augmentez.la.distance.qui.sépare.l’équipement.et.le.récepteur. •.Branchez.l’équipement.à.une.prise.d’un.circuit.différent.de.celui.auquel.est.branché.le.récepteur. Remarques importantes : •.Consultez.le.revendeur.ou.un.technicien.radio/télévision.expérimenté.pour.obtenir.de.l’aide. Conduire.une.moto,.un.scooter,.un.cyclomoteur,.un.VTT,.un.quad.ou.tout.autre.véhicule.requiert. Son fonctionnement est soumis aux deux conditions suivantes : toute.votre.attention..Vous.devez.prendre.toutes.les.mesures.nécessaires.pour.analyser. 1).cet.appareil.ne.peut.pas.causer.d’interférence.et. convenablement.le.trafic.et.les.conditions.météorologiques,.ainsi.que.l’état.de.la.route.en. 2).cet.appareil.doit.accepter.toutes.les.interférences,.y.compris.celles.susceptibles.de.perturber. tout.temps,.y.compris.lorsque.vous.utilisez.l’appareil..Avant.de.passer.ou.d’accepter.un.appel,. son.fonctionnement. vous.devez.vous.ranger.sur.le.côté.de.la.route..Toutes.les.publications,.annonces.ou.autres. communications.similaires,.impliquant.que.vous.pouvez.utiliser.l’appareil.en.mouvement,.se. Enoncé FCC sur l’exposition aux radiations RF : réfèrent.uniquement.aux.capacités.techniques.de.l’appareil.et.ne.doivent.pas.être.comprises. Cet.équipement.est.conforme.aux.limites.FCC.d’exposition.aux.radiations,.énoncées.ci-après,.pour. comme.un.encouragement.à.s’adonner.à.une.telle.activité. un.environnement.incontrôlé..Les.utilisateurs.suivront.les.instructions.d’exploitation.spécifiques. Vous.devez.déterminer.si.l’utilisation.de.l’appareil.pourrait.représenter.une.violation.des.lois.ou. pour.répondre.aux.exigences.de.conformité.sur.l’exposition.aux.RF..Cet.émetteur.ne.cohabitera. des.règlements.en.vigueur.dans.le.lieu.d’utilisation.et.respecter.les.lois.pertinentes..À.cet.égard,. - Seite 69 Si vous n’acceptez pas tous les termes de cet accord, utilisation,.dans.la.mesure.permise.par.la.loi. retournez immédiatement le produit qui vous sera intégralement remboursé. En 2..Vous.avez.entièrement.compris.et.assumez.les.risques.liés.à.l’usage.de.ce.dispositif,.y.compris. utilisant cet écouteur SRC-System, vous acceptez d’être lié à cet accord et renoncez à ceux.associés.à.des.actes.de.négligence.ou.omissions.effectuées.par.des.tiers. tout droit d’intenter des poursuites. 3..Vous.confirmez.être.à.même.physiquement.d’utiliser.le.dispositif.et.vous.n’avez.aucune.
- Seite 70 En ne retournant pas le dispositif dans la période susmentionnée, vous confirmez votre de.toute.sorte.. accord avec ce qui précède et renoncez à tout droit de réclamation ou demande future contre l’entreprise, comme défini ci-dessus. www.schuberth.com MAN00097 QG SRC-S2_C3 J 009.indd 70 7/18/12 5:38 PM...
- Seite 71 G U I D A P E R L ’ U T E N T E P O W E R E D B Y MAN00097 QG SRC-S2_C3 J 009.indd 71 7/18/12 5:38 PM...
- Seite 72 12..AVVISI........................... 91 6.1.RIMOZIONE.DEL.COLLARE.ACUSTICO.ESISTENTE..........79 6.2.COLLEGAMENTO.DEL.CAVO.DELL’ANTENNA............79 6.3.ATTACCARE.L’SRC‑SYSTEM™ ................80 IMPORTANTE:.Questa.è.la.versione.2.0.del.Manuale.per.l’Utente..Notare.che.il.nostro.manuale. 6.4.POSIZIONAMENTO.DEGLI.ALTOPARLANT............81 viene.aggiornato.periodicamente.nel.sito.web.in.modo.che.comprenda.le.ultimissime. caratteristiche.oltre.alle.nuove.opzioni.e.funzioni.del.nuovo.auricolare.SRC-System™..Vedere. 6.5.POSIZIONAMENTO.DEL.MICROFONO..............81 www.schuberth.com/fileadmin/downloads/SRC/SRC-System_Manual-1.pdf.per. 6.6.RIMOZIONE.DI.SRC‑SYSTEM™.DAL.CASCO............81 controllare.adesso.se.la.versione.del.manuale.a.propria.disposizione.è.la.più.aggiornata.e. 6.7.COME.INDOSSARE.E.TOGLIERE.IL.CASCO............82 scaricare.la.versione.web.del.manuale.nella.lingua.preferita. MAN00097 QG SRC-S2_C3 J 009.indd 72...
-
Seite 73: Introduzione
➤ SRC-System™.fornisce.informazioni.vocali.relative.allo.stato.di.utilizzo,.in. modo.che.sia.possibile.in.qualsiasi.momento.sapere.con.chi.e.con.quale. 3... C ome.interfono.a.2.vie.o.3.vie.fra.motociclette.per.audioconferenze.con.altri. dispositivo.si.è.collegati. auricolari.SRC-System™.(fino.a.700.m).in.modalità.Full.Duplex**. Vi.auguriamo.una.piacevole.guida.e.rimaniamo.a.disposizione.per.ogni.domanda:. 4..Come.interfono.fra.Guidatore.e.Passeggero;. potete.contattarci.scrivendo.a.Service@schuberth.com 5... F unzionalità.Click-to-Link®.per.comunicazione.interfono.spontanea.con. qualsiasi.unità.SRC-System™, scala rider G4 o G9.vicina;. 6... C ome.auricolare.Bluetooth®.per.ricevere.istruzioni.di.navigazione.GPS.e.Audio. Streaming.da.dispositivi.Bluetooth®.compatibili;. Nicole Prell 7... R adio.FM.incorporata.con.6.stazioni.predefinite.e.sintonizzazione.automatica;. Responsabile Vendite e Marketing 8... C ome.auricolare.stereo.per.ascoltare.apparecchi.audio.collegati.via.cavo.(come. SCHUBERTH GmbH lettori.MP3.non-Bluetooth®,.iPods®);. Andare.su.www.schuberth.com/src2-tutorial/it.per.provare.una.dimostrazoine. -
Seite 74: Contenuto.della.confezione
2. CONTENUTO DELLA CONFEZIONE SRC‑SYSTEM™ PER CASCHI S2 SRC‑SYSTEM™ PER CASCHI C3 PRO (Il prodotto viene offerto in dimensioni diverse) (Il prodotto viene offerto in dimensioni diverse) Braccetto Pulsante A Microfono Flessibile • Per collegamento con il Motociclista A • MP3 Puntina Puntina Pulsante per altoparlanti Microfono... -
Seite 75: Ricarica.dell'auricolare
3. RICARICA DELL’AURICOLARE 4. IMPOSTAZIONE E CONFIGURAZIONE BASILARI .Accertarsi.che.l’auricolare.sia.completamente,.carico.lasciandolo.in.carica.per. 4.1 FUNZIONI GENERALI almeno.quattro.ore.prima.dell’uso.iniziale. 1..Aprire.il.coperchio.di.che.protegge.la.presa.per.la.ricarica. RISULTATO AZIONE DESIDERATO: NECESSARIA: 2... I nserire.il.cavo.USB.nella.Presa.per.la. ricarica... Accendere / Spegnere Premere.il.Pulsante.del.Cellulare.per.almeno.3.secondi 3... I nserire.l’altra.estremità.del.cavo.USB.nel. •.. A ccendere:.3.brevi.lampeggi.blu.+.tono.crescente caricabatterie.a.muro.o.nella.porta.USB.di.un. •.Spegnere:.3.brevi.lampeggi.rossi.+.tono.decrescente. computer. Volume Premere.il.Pulsante.per.Alzare.o.Abbassare.il.Volume. 4... D urante.la.ricarica.la.luce.rossa.si.accende.. (impostare.e.memorizzare.il.Volume.per.fonte) Quando.la.carica.è.completa.la.luce.rossa.si.spegne.. Muto Premere.contemporaneamente.i.Pulsanti.per.Alzare.e.per. Il.caricabatteria.a.muro.e.il.cavo.per.adattatore.USB.servono.per: Abbassare.il.Volume.quando.il.suono.è.presente 1..ricaricare.l’auricolare.da.qualsiasi.presa.CA.a.muro.o.da.qualsiasi.porta.USB.del. -
Seite 76: Src-System™..Vedere.più.sotto
LE IMPOSTAZIONI DEL SRC‑SYSTEM™ POSSONO ESSERE PERSONALIZZATE 4.3 IMPOSTAZIONI E UPGRADE DI SOFTWARE IN DUE MODI: Per.ottenere.il.massimo.dal.SRC-System™,.accertarsi.che.esegua.il.software. •.. P er.mezzo.del.software.gratuito.che.può.essere.scaricato.da:. più.aggiornato..Per.scaricare.gli.ultimi.aggiornamenti.del.software.e. www.schuberth.com/register/it.(richiede.un.PC.e.un.dispositivo.collegato. approfittare.della.personalizzazione.delle.. via.cavo.(cavo.incluso)..Vedere.paragrafo.4.3. impostazioni.per.mezzo.del.computer,.registrarsi. online.su:.www.schuberth.com/register/it.tenendo.a.portata.di.mano.il. •.. P er.mezzo.del.Menu.Vocale.di.Personalizzazione.e.dei.pulsanti.sull’unità. numero.di.serie.del.prodotto. SRC-System™..Vedere.più.sotto. Dopo.avere.scaricato.il.programma,.usare.il.cavo.USB.incluso.nella. 4.5 MENU VOCALE confezione.di.rivendita.per.collegare.il.SRC-System™.al.computer. Come.entrare.nel.Menu Vocale:. Quando.il.SRC-System™.è.collegato.al.computer,.sarà.possibile. 1... P remere.e.tenere.premuti.contemporaneamente.il.Pulsante.di.CANALE.“A”.e. -
Seite 77: Installazione.su.caschi.s2
.. S ul.casco.rimuovere.il.protettore.di.gomma.dal. Innanzitutto,.rimuovere.il.collare.acustico.esistente.dal.casco.procedendo.come.segue: connettore.dell’antenna. Tirare.e.rimuovere.il.collare.acustico.dalla.sua.parte.centrale.ricurva.nella.parte. anteriore. 4.. Allineare.le.due.testine.del.connettore.e.richiudere.con.uno.scatto.i.due. fermagli.nella.loro.posizione.per.bloccare.il.connettore.in.posizione.chiusa.. 5.2 COLLEGAMENTO DEL CAVO DELL’ANTENNA Il.sistema.SRC-System™.ha.un.cavo.per.l’antenna.che.deve.essere.collegato.al. connettore.per.il.cavo.dell’antenna.integrato.nel.casco.Schuberth. NOTA: Accertarsi di chiudere il coperchio del connettore USB, e poi metterlo nella tasca per connettore USB. 1.. Estrarre.il.connettore.dell’antenna.(segnato.con.un’etichetta.rossa).che.si. trova.dentro.al.bordo.posteriore.del.casco. 5.. Adesso.è.possibile.infilare.il.connettore. dell’antenna.in.modo.sicuro.nella.tasca. -
Seite 78: Attaccare.l'src-System
5.5 POSIZIONAMENTO DEL MICROFONO Individua.il.posto.esatto.del.rivestimento.interno.del.casco,.di.fronte.alla.bocca,. nel.quale.verrà.ubicato.il.microfono.e.procedere.come.segue: 1.. Togliere.il.coperchio.del.cuscinetto.adesivo.di.Velcro.e.metterlo.nella.posizione. scelta.di.fronte.alla.bocca. 2.. Fissare.il.microfono.al.Velcro,.come.indicato.nella.immagine. 5.4 POSIZIONAMENTO DEGLI ALTOPARLANTI Per.ottenere.i.risultati.audio.migliori,.accertarsi.che.entrambi.gli.altoparlanti. siano.collocati.più.vicini.possibile,.di.fronte.alle.orecchie. Quanto segue è valido per entrambi i lati del SRC-System™: 1.. Aprire.il.pulsante.rosso.posteriore.ubicato.sotto.il.rivestimento.interno.che. copre.i.guanciali.(il.pulsante.è.tenuto.da.un.anello.nero)..Sollevare.leggermen- te.il.rivestimento. 2.. Attaccare.i.cuscinetti.di.Velcro.ovali.corrispondenti.agli.incavi.a.forma.di.auricola- 3.. Se.il.cavo.del.microfono.è.troppo.lungo,.mettere.la.parte.in.eccesso.sotto.i. re.sull’EPS.(polistirene.espanso).e.sistemare.gli.auricolari.sui.cuscinetti.di.Velcro. guanciali. 5.6 RIMOZIONE DI SRC‑SYSTEM DAL CASCO 1.. -
Seite 79: Come.indossare.e.togliere.il.casco
NOTA: Il cuscino posteriore SRC-System™ è progettato per il Massimo comfort. Tuttavia, poichè contiene in esso un intero kit elettronico, può essere un po’ gonfio. Di 6.2 COLLEGAMENTO DEL CAVO conseguenza,la sensazione indossando il casco attrezzato con SRC o togliendolo può... -
Seite 80: Attaccare.l'src-System
.1... E strarre.il.connettore.dell’antenna.(segnato.con.un’etichetta.rossa).che.si.trova. 5... A desso.è.possibile.infilare.il.connettore. dentro.al.bordo.posteriore.del.casco. dell’antenna.in.modo.sicuro.nella.tasca. per.connettore.dell’antenna.al.centro. dell’SRC-System™. 6.3 ATTACCARE L’SRC‑SYSTEM™ 1... A ccertarsi.di.sistemare.i.cavi.dell’auricolare.nel.casco,.e.poi.fissare.al.suo.posto. l’SRC-System™. 2... F are.scorrere.e.inserire.la.puntina.che.si.trova.all’estremità.del.pannello.di. Etichetta dell’antenna controllo.nella.sua.intaccatura.corrispondente.sul.casco.e.chiudere.il.bottone. Connettore dell’antenna visibile automatico. estratto Puntina 2... S ul.collare.SRC.aprire.i.due.fermagli.che. si.trovano.sul.connettore.dell’antenna.e. rimuovere.il.coperchio.protettivo.di.plastica. 3... S ul.casco.rimuovere.il.protettore.di.gomma.dal. connettore.dell’antenna. 4... A llineare.le.due.testine.del.connettore.e. -
Seite 81: Posizionamento.degli.altoparlant
Bottone automatico Per.assicurare.una.chiusura.scorrevole.(flip-down).della.parte.del.mento.del. casco,.rimuovere.prima.il.suo.Cuscinetto.Anti-Rumore.triangolare.e.procedere. come.segue: 6.4 POSIZIONAMENTO DEGLI ALTOPARLANT Per.ottenere.i.risultati.audio.migliori,.accertarsi.che.entrambi.gli.altoparlanti. 1..Piegare.il.braccio.flessibile.del.microfono.come.indicato.nell’immagine. siano.collocati.più.vicini.possibile,.di.fronte.alle.orecchie. 2..Premere.il.microfono.verso.il.centro.della.bocca. Quanto segue è valido per entrambi i lati del SRC-System™: 1... A prire.il.pulsante.rosso.posteriore.ubicato.sotto.il.rivestimento.interno.che. copre.i.guanciali.(il.pulsante.è.tenuto.da.un.anello.nero)..Sollevare.leggermen- te.il.rivestimento. 2... A ttaccare.i.cuscinetti.di.Velcro.ovali.corrispondenti.agli.incavi.a.forma.di.auricola- re.sull’EPS.(polistirene.espanso).e.sistemare.gli.auricolari.sui.cuscinetti.di.Velcro. .3... A bbassare.e.chiudere.il.laccio.per.il.mento.del.casco..Può.essere.necessario. usare.entrambe.le.mani.per.chiudere.bene.il.laccio.del.mento. 4... C on.la.parte.del.mento.chiusa.e.la.visiera.aperta,.inserire.la.mano.nell’apertura. della.visiera.e.spingere.via.il.microfono,.verso.il.centro.della.parte.del.mento. -
Seite 82: Come.indossare.e.togliere.il.casco
3... P er.togliere.il.casco,.procedere.in.modo.simile. prima.separando.le.cinghie.e.poi.spingendo. tutto.il.casco.verso.l’alto. NOTA: Il cuscino posteriore SRC-System™ è progettato per il Massimo comfort. Tuttavia, poichè contiene in esso un intero kit elettronico, può essere un po’ gonfio. Di Connettività Lettore MP3 con telefono cellulare o A2DP conseguenza,la sensazione indossando il casco attrezzato con SRC o togliendolo può... -
Seite 83: Telefono.cellulare
NOTA: Se si intende usare un dispositivo GPS parallelamente al telefono cellulare, è Con alcuni telefoni cellulari, può essere necessario premere il Pulsante Cellulare necessario abbinare il telefono cellulare al dispositivo GPS e non allo SRC-System™. per collegare l’auricolare al telefono dopo aver completato l’abbinamento. -
Seite 84: Dispositivo.gps
Quando.la.telefonata.finisce,.è.invece.possibile.effettuare.e.accettare.chiamate. l’auricolare tornerà in modalità di Standby. in.interfono. 2. Il programma per le priorità dello SRC-System™ è stato impostato in modo da evitare che chiamate in interfono in arrivo interrompano istruzioni GPS in corso. 7.2 DISPOSITIVO GPS In questo caso, chi ha chiamato via interfono sentirà un segnale di occupato e Per.utilizzare.un.dispositivo.GPS.abilitato.Bluetooth®.con. - Seite 85 Nota: Se la fonte A2DP è integrata nel telefono cellulare, è necessario abbinarla USO DELLA PORTA DI ENTRATA AUSILIARE PER CONNETTIVITÀ VIA CAVO all’auricolare come descritto più sopra nel paragrafo 7.1. L’auricolare consente.di.collegare.fonti.audio.non-Bluetooth®,.come.lettori.MP3,. all’auricolare.usando.il.cavo.incluso.. 1..Accendere.il.lettore.MP3.e.accertarsi.che.la.sua.funzione.Bluetooth®.sia.attiva. 1..Accertarsi.che.l’auricolare.sia.in.modalità.di.Standby,.con.la.luce.blu.che. 2..Con.l’auricolare.SRC-System™.ACCESO,.premere.e.tenere.premuto.il.Pulsante. lampeggia.lentamente. Cellulare.per.almeno.sei.secondi.finchè.le.luci.Rossa.e.Blu.cominciano.ad. 2..Collegare.il.cavo.dell’MP3.alla.presa.dell’auricolare.per.il.lettore.MP3./fonte. alternarsi.rapidamente. audio.e.inserire.l’altra.estremità.del.cavo.nel. 3..Cercare.gli.auricolari.Bluetooth®.sul.lettore.MP3.seguendo.le.istruzioni.del.dispositivo.
-
Seite 86: Radio.fm.integrata
•.. P remendo.il.pulsante.per.Abbassare.il.Volume.la.ricerca.sarà.in.direzione. forte.disponibile.per.la.stazione.FM.che.si.desidera.ascoltare,.indipendentemente. della.frequenza.più.bassa.(verso.il.basso) dal.luogo.nel.quale.si.sta.viaggiando.. 2... P remere.il.pulsante.Canale.“B”.entro.20.secondi.da.quando.è.stata.trovata.la. Questo.consente.di.lasciare.sempre.le.mani.sul.manubrio.senza.bisogno.di.regolare.la. stazione.FM.per.salvarla.come.stazione.preimpostata. frequenza.della.stazione.radio.mentre.si.è.in.movimento. Scandire e salvare:.Scansione.di.stazioni.FM 1... P remere.il.pulsante.per.Alzare.il.Volume.per.6.secondi..Il.SRC-System™. cercherà.una.stazione.verso.l’alto.(frequenza.più.alta)..Quando.trova.una. stazione,.è.possibile.sentirla.per.alcuni.secondi. 2... P er.interrompere.la.scansione.su.questa.stazione:.premere.il.pulsante.per. Alzare.il.Volume.. 3... P remere.il.pulsante.Canale.“B”.entro.20.secondi.da.quando.è.stata.trovata.la. stazione.FM.per.salvarla.come.stazione.preimpostata. 4..P er.continuare.la.scansione:.Attendere.che.trovi.la.stazione.successiva. MAN00097 QG SRC-S2_C3 J 009.indd 86 7/18/12 5:38 PM... -
Seite 87: Uso.dell'interfono
CANALE “B”.. Pulsante Pulsante 2... P remere.il.pulsante.per.Abbassare.il.Volume.per.6.secondi. CANALE “A“ CANALE “B“ 3... I l.SRC-System™.cercherà.verso.l’alto.(frequenza.più.alta).dalla.stazione. attuale.e.memorizzerà.le.6.stazioni.FM.successive.che.trova.come.stazioni.“in. movimento”. 4... S e.si.desidera,.ripetere.dal.passo.2.per.memorizzare.le.6.stazioni.FM.successive. come.stazioni.“in.movimento”. NOTA: Queste 6 stazioni temporanee “in movimento” non possono essere salvate e non sostituiscono le Stazioni Radio preimpostate che possono essere state salvate. -
Seite 88: Src-System
Motociclista “1” si ricollegherà automaticamente al suo telefono cellulare sostituito con l’ultimo auricolare abbinato. o GPS. Il Motociclista “2” e “3” rimangono collegati ai loro telefoni cellulari o ai dispositivi GPS durante la chiamata con interfono o tre vie. 4..Sull’auricolare.SRC-System™,.poi.premere.e.tenere.premuto.il.PULSANTE. DEL.CANALE.scelto.(“A”.o.“B”).per.almeno.sei.secondi.finchè.la.luce.BLU.o. L’abbinamento.di.tre.auricolari.SRC-System™..è.eseguito.semplicemente.ripetendo. ROSSA.dell’auricolare.inizia.a.lampeggiare.rapidamente,.cosa.che.indica.che. -
Seite 89: Ricezione.di.chiamate.con.interfono
9.10 RISOLUZIONE DI PROBLEMI CON L’INTERFONO 9.8 CANCELLARE L’ABBINAMENTO (RIPRISTINO DELLA CONFIGURAZIONE Prima.di.tutto,.assicurarsi.che.il.microfono.si.trovi.nella.sua.posizione.corretta.al. ORIGINALE PREDEFINITA) centro.della.bocca. Questo.paragrafo.è.rilevante.solo.dopo.aver.completato.un.processo.di. Lo.SRC-System™.è.progettato.per.essere.usato.in.ambienti.rumorosi..Di. abbinamento conseguenza,.la.funzionalità.di.Interfono.deve.essere.controllata.solo.in.un. Si.può.cancellare.l’abbinamento.dei.dispositivi.in.qualsiasi.momento.come.segue: ambiente.rumoroso,.come.ad.esempio.vicino.a.una.moto.accesa.e.non.all’interno. 1... C on.l’auricolare.SRC-System™.ACCESO,.premere.e.tenere.premuto.il.Pulsante. di.una.casa..Accertarsi.anche.che.gli.auricolari.siano.stati.abbinati.uno.con.l’altro. Cellulare.per.almeno.sei.secondi.finchè.le.Luci.Rossa.e.Blu.cominciano.a. in.modo.corretto.seguendo.le.istruzioni.riportate.nei.paragrafi.di.Impostazione. alternarsi.rapidamente. rilevanti. 2..Premere.e.tenere.premuto.il.pulsante.per.Alzare.il.Volume.per.tre.secondi. MAN00097 QG SRC-S2_C3 J 009.indd 89 7/18/12 5:38 PM... -
Seite 90: Click-To-Link® (Ctl)
10. CLICK-TO-LINK® (CTL) Priorità.maggiore 1. Audio dal telefono cellulare o istruzioni GPS* 2. Interfono/ Click-to-Link® 3. Audio A2DP (Bluetooth stereo) Click-to-Link®.costituisce.la.natura.“sociale”.spontanea.dello.SRC-System™.. 4. Radio FM (integrata) Questa.caratteristica.unica.consentirà.di.cominciare.immediatamente.chiamate. 5. Presa per MP3 (per collegamento via cavo come in.interfono.a.due.con.altri.utenti.SRC-System™.che.si.trovano.nelle.vicinanze. nel caso dei lettori MP3). -
Seite 91: Assistenza
È.necessario.controllare.se.l’uso.del.dispositivo.può.costituire.una.violazione.di.una.legge.o. IMPORTANTE: disposizione.applicabile.nel.luogo.in.cui.viene.usato.il.dispositivo.stesso.e.attenersi.alle.leggi. NEL CASO LA CERNIERA DEL CUSCINO POSTERIORE rilevanti..A.questo.proposito,.qualsiasi.uso.del.dispositivo.è.a.rischio.esclusivo.dell’utente.e.sotto. la.sua.responsabilità. VENGA APERTA, LA GARANZIA SARÀ NULLA! Un.uso.sicuro.richiede.di.attenersi.a.alcuni.requisiti.basilari,.fra.i.quali.il.fatto.che.devi.essere. Le.componenti.elettroniche.all’interno.del.Cuscino.Posteriore.dello. fisicamente.in.grado.di.usare.il.dispositivo.e.non.soffrire.di.nessuna.malattia.o.restrizione.che. SRC-System™.sono.chiuse.da.una.cerniera.sigillata..Non.manomettere.o.aprire. possano.compromettere.la.tua.capacità.di.usare.il.dispositivo.in.modo.sicuro.e.viaggiare.sulla. la.cerniera.poichè.questo.annulla.la.garanzia. strada..Inoltre,.devi.essere.in.possesso.di.una.patente.di.guida.valida.per.il.veicolo..Non.puoi.mai. e.in.nessun.caso.consumare.alcool.o.sostanze.psicoattive,.che.possono.compromettere.la.tua. prontezza.di.riflessi,.prima.o.durante.l’uso.del.dispositivo. Dichiarazione della Commissione Federale per le Comunicazioni (FCC) 15.21 Siete.avvertiti.che.cambiamenti.o.modifiche.non.approvate.espressamente.dalla.parte.responsa- bile.per.la.conformità.può.annullare.il.permesso.dell’utente.a.azionare.l’attrezzatura. 15.105(b) Questa.attrezzatura.è.stata.controllata.e.trovata.conforme.alle.limitazioni.per.un.apparecchio. - Seite 92 Dichiarazione FCC di Esposizione a Radiazione RF circostanze,.compreso.cattivo.funzionamento.dell’Apparecchio,.e.tutti.i.rischi.connessi.con.il.suo. azionamento.sono.solo.ed.esclusivamente.a.carico.dell’utente.di.questo.Apparecchio,.indipen- Questa.attrezzatura.è.conforme.ai.limiti.per.l’esposizione.a.radiazione.della.FCC.indicati.per.un. dentemente.dal.fatto.che.l’.Apparecchio.sia.usato.dall’acquirente.originario.o.da.terzi. ambiente.non.controllato..Gli.utenti.finali.devono.seguire.le.istruzioni.operative.specifiche.per.la. soddisfazione.della.conformità.all’esposizione.RF..Questa.trasmittente.non.deve.essere.ubicata. L’azienda.vi.avverte.in.questa.sede.che.l’uso.dell’Apparecchio.può.essere.in.contravvenzione.a. insieme.o.azionata.congiuntamente.a.nessun’altra.antenna.o.trasmittente.. leggi.o.regolamenti.locali,.federali,.statali.o.nazionali,.e.che.ogni.uso.dell’Apparecchio.è.intera- mente.a.vostro.esclusivo.rischio.e.responsabilità. Avviso CE Europeo 1..Voi,.i.vostri.eredi,.rappresentanti.legali,.successori.o.cessionari,.in.questa.sede,.volontariamen- L’auricolare.SRC-System™.(il.“Prodotto”).è.conforme.con.i.seguenti.requisiti.essenziali.della. te.e.per.sempre.liberano,.esentano,.indenizzano,.e.ritengono.l’azienda.esente.da.ogni.causa,. Direttiva.Comunitaria.1999/5/EC.(cui.ci.si.riferisce.come.la.Direttiva.R&TTE):.Articoli.3.1a,.3.1.b.e. rivendicazione,.debito,.richiesta,.azione.e.responsabilità.che.possa.insorgere,.direttamente.o. 3.2..Il.Prodotto.è.costruito.in.conformità.all’Allegato.II.della.direttiva.summenzionata. indirettamente,.dall’uso.dell’Apparecchio,.per.ogni.disagio,.dolore,.sofferenza,.scomodità,.per- Dichiarazione di Conformità (DOC) dita,.ferita,.morte,.danni.a.o.in.riferimento.a.qualsiasi.persona.o.proprietà.comunque.causata,. L’auricolare.SRC-System™.è.conforme.con.e.adotta.le.Specificazioni.2.0.di.Bluetooth®.e.ha.supera- SIA.CHE.DERIVI.DA.NEGLIGENZA.CHE.DA.ALTRO,.e.che.possono.derivarvi.in.futuro.come.risultato. to.con.successo.tutti.i.test.di.interoperabilità.specificati.nella.specificazione.Bluetooth®..Tuttavia,. di.tale.uso,.fino.all’estremo.limite.permesso.dalla.legge.. l’interoperabilità.fra.l’apparecchio.e.altri.prodotti.abilitati.Bluetooth®.non.è.garantita. 2..Capite.completamente.e.vi.assumete.i.rischi.dell’uso.dell’Apparecchio,.compreso.il.rischio.di. Deroga e Rinuncia Generale a Diritti (non per Paesi dell’Unione Europea) atti.di.negligenza.o.di.omissione.da.parte.di.terzi.
-
Seite 93: Limitazione Di Responsabilità
ELEMENTI.FONDAMENTALI.DI.QUESTO.ACCORDO.E.L’APPARECCHIO.NON.VI.SAREBBE.FORNITO.PRIVO. opzione.di.rimborso.più.sotto). DI.TALI.LIMITAZIONI..GLI.STATUTI.DI.ALCUNI.STATI.POSSONO.ESSERE.APPLICABILI.PER.QUANTO. RIGUARDA.LA.LIMITAZIONE.DI.RESPONSABILITÀ. Rinuncia a Garanzia RESTITUZIONE PER RIMBORSO COMPLETO L’AZIENDA.RINNEGA.OGNI.GARANZIA.ESPLICITA.E.IMPLICITA.RIGUARDO.ALL’APPARECCHIO.ANNESSO,. COMPRESO.E.SENZA.LIMITAZIONE.QUALSIASI.GARANZIA.IMPLICITA.DI.VENDIBILITÀ,.IDONEITÀ.A. SE.NON.DESIDERATE.ACCETTARE.E.ACCONSENTIRE.ALLE.CONDIZIONI.DI.CUI.SOPRA,.POTETE.RESTITU- UNO.SCOPO.PARTICOLARE,.E.NON-INFRAZIONE..L’APPARECCHIO.E.I.SUOI.ACCESSORI.SONO.FORNITI. IRE.QUESTO.APPARECCHIO.ALL’AZIENDA.PER.UN.RIMBORSO.COMPLETO,.A.PATTO.CHE.LO.FACCIATE. “COME.SONO”.E.“COME.DISPONIBILI”.SENZA.GARANZIA.DI.NESSUN.TIPO.AL.DI.LÀ.DI.QUELLE.ASSUNTE. ENTRO.7.GIORNI.LAVORATIVI.DALL’ACQUISTO.DELL’APPARECCHIO.(è.necessaria.la.prova.di.acquisto). NEL.MANUALE.INCLUSO. E.CHE.LA.CONFEZIONE.SIA.INTATTA..QUANDO.AGITE.IN.QUESTO.SENSO,.FATE.RIFERIMENTO.A.QUE- STO.PARAGRAFO..NON.RESTITUENDO.L’APPARECCHIO.PER.RIMBORSO.ENTRO.IL.PERIODO.INDICATO,. Limitazione di Responsabilità ACCETTATE.IMPLICITAMENTE.QUANTO.SOPRA,.E.RINUNCIATE.A.TUTTI.I.DIRITTI.A.PRETESE.E..RIVEN- L’AZIENDA.NON.SARÀ.RESPONSABILE.IN.NESSUN.CASO.PER.NESSUN.DANNO.SPECIALE,.INDIRETTO,. DICAZIONI.FUTURE.CONTRO.L’AZIENDA.COME.SOPRA.DEFINITO. PUNITIVO,.INCIDENTALE,.ESEMPLARE.O.CONSEGUENTE,.O.NESSUN.DANNO.CHE.RISULTI.DALL’USO. DELL’APPARECCHIO,.SIA.SE.SI.BASA.SU.VIOLAZIONE.DEL.CONTRATTO,.ATTO.ILLECITO.(COMPRESA. www.schuberth.com NEGLIGENZA),.RESPONSABILITÀ.PER.IL.PRODOTTO.O.ALTRO,.ANCHE.SE.AVVERTITO.DELLA.POSSIBI- MAN00097 QG SRC-S2_C3 J 009.indd 93 7/18/12 5:38 PM... - Seite 94 MAN00097 QG SRC-S2_C3 J 009.indd 94 7/18/12 5:38 PM...
- Seite 95 H A N D L E I D I N G POW ERED BY MAN00097 QG SRC-S2_C3 J 009.indd 95 7/18/12 5:38 PM...
- Seite 96 9.1.INTRODUCTIE......................111 4.4.HET.AAN.UW.WENSEN.AANPASSEN.VAN.DE.INSTELLINGEN......100 9.2.INTERCOM.COMPATIBILITEIT................111 4.5.KEUZEMENU......................100 9.3.VOOR.U.DE.INTERCOM.BEGINT.TE.GEBRUIKEN..........111 4.6.AUDIOBRONNEN.EN.PRIORITEITEN..............100 9.4.HET.GEBRUIK.VAN.DE.SRC‑SYSTEM-HEADSET.VOOR.INTERCOM. MET.ANDERE.SRC-SYSTEM-HEADSETS............111 4.7.HET.OPNIEUW.OPSTARTEN.VAN.UW.HEADSET..........100 9.5.HET.AANGAAN.VAN.INTERCOMGESPREKKEN ..........113 5..INSTALLATIE.VOOR.DE.S2.HELM..................101 9.6.HET.ONTVANGEN.VAN.INTERCOMGESPREKKEN ..........113 5.1.VERWIJDEREN.VAN.DE.AKOESTISCHE.KRAAG ..........101 9.7.HET.SPRAAKGESTUURD.CONTACTMAKEN.(VOX)..........113 5.2.AANSLUITEN.VAN.DE.KABEL.VOOR.DE.ANTENNE ..........101 9.8.HET.ONGEDAANMAKEN.VAN.DE.AFSTEMMING.(HET.TERUGBRENGEN.
-
Seite 97: Introductie
Service@schuberth.com. en.andere.audioapparatuur) 3..als.een.bike-to-bike-intercom.voor.gesprekken.en.drieweggesprekken. (conference.calls).met.tot.twee.andere.SRC-System™-headset.(met.een. maximaal.bereik.van.700.m.tussen.elke.twee.SRC-System™-headsets.en.in.full. duplex**) Nicole Prell 4..als.een.intercom.tussen.bestuurder.en.passagier.(werkt.ook.nog.met.eerdere. Head of Sales en Marketing SRC-System™-headset-versies) SCHUBERTH GmbH 5..Click-to-Link®:.spontaan.intercomcontact.met.elk.SRC-System™, scala rider G4 Bezoek.www.schuberth.com/src2-tutorial/en.voor.een.interactieve. of G9 -apparaat.in.de.buurt demonstratie.van.de.SRC-System-headset-functies. 6..als.een.Bluetooth®-headset.voor.ontvangst.van.aanwijzingen.van.een.gps. navigatiesysteem.en.streaming-audio.van.Bluetooth®-apparaten _________________________ 7... i ngebouwde.FM-radio.met.6.voorkeurstations.en.automatische.ingestelling *...Als.u.een.mobiele.telefoon.gebruikt.die.niet.werkt.met.het.Bluetooth®-Handsfree-profiel.kan. dat.het.gebruik.van.zekere.geavanceerde.functies.verhinderen 8..als.een.stereoheadset.voor.het.luisteren.naar.inplugbare.audioapparatuur,. **.In.“full.duplex”.betekent.dat.u.tegelijkertijd.kunt.spreken.en.de.ander.kunt.horen,.net.als.bij. (zoals.mp3-spelers.en.iPods®.die.niet.voldoen.aan.de.Bluetooth®-normen) gesprekken.via.de.mobiele.of.vaste.telefoon.en.in.tegenstelling.tot.walkie-talkie-gesprekken. -
Seite 98: Inhoud.van.de.verpakking
2. INHOUD VAN DE VERPAKKING SRC‑SYSTEM™ VOOR DE S2 HELM SRC‑SYSTEM™ VOOR DE C3 PRO HELM (dit product wordt in verschillende maten geleverd) (dit product wordt in verschillende maten geleverd knop voor kanaal A • verbindt met motorrijder A flexibele • verbindt met de mp3-speler Microfoon microfoonstaaf knop voor de... -
Seite 99: Het.opladen.van.de.headset
3. HET OPLADEN VAN DE HEADSET 4. BASISMOGELIJKHEDEN EN -INSTELLINGEN Zorgt u er voor dat uw headset volledig is opgeladen, wat ten minste vier uur zal duren, voor dat u hem voor het eerst gebruikt. 4.1 ALGEMENE FUNCTIES 1... O pen.het.lipje.dat.de.ingang.voor.het.opladen.afschermt.. GEWENSTE RESULTAAT: BENODIGDE ACTIE: 2... P lug.de.USB-kabel. de.ingang.voor.het.opladen.. -
Seite 100: De.mogelijkheid.om.de.software.up-To-Date.te.brengen
In.de.toekomst.kunt.u.Software-.en. Toegang.tot.het.Keuzemenu:. programmaverbeteringen.installeren.zodat.de. •.. D ruk.gedurende.3.seconden.gelijktijdig.op.de.knoppen.van.“kanaal.A”.en. software.van.up-to-date.blijft. “kanaal.B”.terwijl.de.headset.aan.staat.maar.inactief.is.(op.stand-by).. Zo.zullen.toekomstige.Software-verbeteringen.onder.andere.bestaan.uit.verdere. •.. N adat.u.het.apparaat.aanzet.volgt.u.de.Engelse.instructies.die.u.hoort.of.kiest.u. statusmeldingen.en.andere.waardevolle.functies..Schrijft.u.zich.a.u.b..in.op.onze. uw.voorkeurstaal. website.at.www.schuberth.com/register/nl.en.heb.daarbij.het.serienummer. 4.6 AUDIOBRONNEN EN PRIORITEITEN van.uw.SRC-System™-headset.bij.de.hand,.opdat.u.de.allerlaatste.versies.niet. zult.missen..Voor.het.downloaden.van.verbeteringen.gebruikt.u.de.USB-kabel.die. De.verschillende.audiobronnen.die.verbonden.zijn.met.uw.SRC-System™- in.u.aantrof.bij.uw.SRC-System™-headset.. headset.hebben.een.prioriteit.zoals.hieronder.afgebeeld,.d.w.z..dat.de.bron.met. de.hogere.prioriteit.altijd.degene.met.de.lagere.zal.verdringen.of.onderbreken.. Let.wel,.tot.nadere.aankondiging.zijn.deze.verbeteringen.alleen.beschikbaar. voor.computers.die.draaien.op.Windows®.XP™,.Vista™.of.Windows.7. Zo.zal.bijvoorbeeld.het.overgaan.van.de.mobiele.telefoon.een.aan.de.gang.zijnd. besturingssysteem. intercomgesprek.onderbreken,.terwijl.een.oproep.tot.een.intercomgesprek.het. geluid.van.de.ingebouwde.FM-radio.zal.onderbreken,.enz. 4.4 HET AAN UW WENSEN AANPASSEN VAN DE INSTELLINGEN hogere.prioriteit... -
Seite 101: Installatie.voor.de.s2.Helm
Verwijder.eerst.als.volgt.de.akoestische.kraag.die.aan.uw.helm.zit: van.de.antenne-contrastekker.van. Trek.de.akoestische.kraag.van.voren.bij.de.knik.in.het.midden.los.en.er.uit. de.helm. 4.. Sluit.nu.de.stekker.en.de.contrastekker.op.elkaar.aan.en.klik.de.twee. klemmetjes.weer.op.hun.plaats.om.de.verbinding.te.vergrendelen... 5.2 AANSLUITEN VAN DE KABEL VOOR DE ANTENNE Uw.SRC-System™.heeft.een.antennekabel.die.u.moet.verbinden.met.de. ingebouwde.stekker.voor.de.antennekabel.in.de.Schuberth-helm. Let op: Zorg ervoor dat u de USB-stekker afsluit en dan wegbergt in de uitsparing voor de USB-stekker. 1.. Trek.de.antennestekker.(hij.heeft.een.rood.label).tevoorschijn..U.vind.deze. weggestopt.in.de.achterrand.van.de.helm. 5.. De.verbinding.kan.nu.veilig.in.de. -
Seite 102: Aansluiten.van.het.src-System
1.. Verwijder.nu.het.dunne.plastic.van.de.klittenbandpleister.en.plaats.de.klit- tenbandpleister.op.de.gekozen.locatie.tegenover.uw.mond. tenbandpleister.op.de.gekozen.locatie.tegenover.uw.mond. 5.4 HET PLAATSEN VAN DE SPEAKERS Om.het.beste.geluid.te.krijgen.moet.u.er.voor.zorgen.dat.beide.speakers.zo.dicht. mogelijk.tegenover.uw.oren.geplaatst.worden.. het volgende slaat op beide kanten van de SRC-System™: 1.. Open.de.achterste.rode.knoop.onder.de.binnenbekleding.die.de.wangstukken. Plak.de.microfoon.op.het.klittenband,.zoals.te.zien.is.op.de.illustratie. bedekt.(de.knoop.wordt.op.zijn.plaats.gehouden.door.een.zwarte.ring)..Til.de. bekleding.een.beetje.op. 3.. Houd.u.microfoonkabel.over,.stop.die.dan.onder.de.wangstukken. 2.. Bevestig.de.bijbehorende.ovale.klittenbandkussentjes.aan.de.speakervormige. 5.6 HET VERWIJDEREN VAN DE SRC-SYSTEM-HEADSET VAN UW HELM uitsparing.in.het.EPS.(geëxpandeerde.polystyreen,.piepschuim).en.plaats.de. -
Seite 103: Het.op-En.afdoen.van.de.helm
3... H aal.de.pinnetjes.van.de.akoestische. LET OP: Uw SRC-System™-akoestische kraag is ontworpen voor maximaal comfort. kraag.uit.hun.respectievelijkegaatjes.in.de. Maar, omdat het een uitgebreid elektronisch apparaat bevat, zal het onvermijdelijk helmrand. enigszins bol staan. Dientengevolge kan het op- of afdoen van uw helm met een SRCS- uitrusting anders voelen dan wat u gewend bent met een doorsnee akoestische kraag. -
Seite 104: Aansluiten.van.het.src-System
.1... T rek.de.antennestekker.(hij.heeft.een.rood.label).tevoorschijn..U.vind.deze. 5... D e.verbinding.kan.nu.veilig.in.de.uitsparing. weggestopt.in.de.achterrand.van.de.helm. voor.de.antennestekker.in.het.midden.van.het. SRC-System™.worden.opgeborgen. 6.3 AANSLUITEN VAN HET SRC‑SYSTEM™ 1... L et.er.op.dat.u.de.speakerkabels.in.de.helm.stopt,.en.leg.dan.het.SRC-System™. op.zijn.plaats.vast. 2... S chuif.het.pinnetje.dat.op.de.rand.van.het.bedieningspaneel.zit.naar.het. de antennestekker het antennelabel is hier tevoorschijn getrokken overeenkomstige.gaatje.in.de.helm,.tot.hij.er.in.zit,.en.sluit.de.drukknop. is zichtbaar 2... O pen.op.de.SRC-kraag.de.twee.klemmetjes. pinnetje aan.de.antennestekker.en.verwijder.de.plastic. afscherming. 3... V erwijd.de.rubberen.afscherming.van.de. -
Seite 105: Het.plaatsen.van.de.speakers
6.5 HET PLAATSEN VAN DE MICROFOON Om.te.zorgen.dat.het.kinstuk.van.de.helm.makkelijk.sluit.(naar.beneden.klapt).en. plaats.het.driehoekige.stukje.stof.in.het.kindeel.zoveel.mogelijk.naatr.voren: 6.4 HET PLAATSEN VAN DE SPEAKERS 1..Buigt.u.de.het.buigzame.microfoon-statief.tot.het.zit.zoals.in.de.afbeelding. Om.het.beste.geluid.te.krijgen.moet.u.er.voor.zorgen.dat.beide.speakers.zo.dicht. mogelijk.tegenover.uw.oren.geplaatst.worden.. 2..Duwt.u.de.microfoon.naar.het.midden.van.uw.mond. het volgende slaat op beide kanten van de SRC-System™: 1... O pen.de.achterste.rode.knoop.onder.de.binnenbekleding.die.de.wangstukken. bedekt.(de.knoop.wordt.op.zijn.plaats.gehouden.door.een.zwarte.ring)..Til.de. bekleding.een.beetje.op. 2... B evestig.de.bijbehorende.ovale.klittenbandkussentjes.aan.de.speakervormige. uitsparing.in.het.EPS.(geëxpandeerde.polystyreen,.piepschuim).en.plaats.de. speakers.op.de.klittenbandkussentjes. .3... K lapt.u.het.kinstuk.van.uw.helm.naar.beneden.en.sluit.het..Het.zou.kunnen.dat. -
Seite 106: Het.op-En.afdoen.van.de.helm
FM-radio LET OP: Uw SRC-System™-akoestische kraag is ontworpen voor maximaal comfort. Maar, omdat het een uitgebreid elektronisch apparaat bevat, zal het onvermijdelijk enigszins bol staan. Dientengevolge kan het op- of afdoen van uw helm met een SRCS- uitrusting anders voelen dan wat u gewend bent met een doorsnee akoestische kraag. -
Seite 107: De.mobiele.telefoon
SRC-System™-headset. In zo’n geval slaat u dit gedeelte over en gaat u verder onder 7.2. 2. Wanneer de afstemming (het koppelingsproces) niet binnen twee minuten wordt afgerond, zal de headset terugkeren naar stand-by, de sluimerstand. -
Seite 108: Het.gps.navigatiesysteem
Als.u.een.Bluetooth®-apparaat.dat.werkt.met.het.AVRCP-profiel.gebruikt,.kunt.u. 2..Terwijl.de SRC-System™-headset.AAN.staat.drukt.u.op.de.knop.voor.luider.en. uw.A2DP-bron.rechtsreeks.vanaf.uw.headset.bedienen. die.houdt.u.ten.minste.6.seconden.ingedrukt.tot.er.gelijktijdig.rode.en.blauwe. lichtflitsjes.uit.de.controlelampjes.komen. LET OP: De SRC-System™-headset kan ook audiosignalen ontvangen van mp3- spelers en andere audiobronnen die niet volgens de Bluetooth®-normen werken via 3... Z oek.naar.Bluetooth-apparaten.met.uw.gps.en.volg.de.instructies.die.deze.geeft.. de bijgesloten kabel zoals beschreven is in sectie 7.3b. Raadpleeg.indien.nodig.de.handleiding.van.uw.gps..Raadpleeg.de.handleiding. - Seite 109 7.1. 1..Stop.eerst.het.apparaat.waar.u.naar.luistert. 1..Zet.uw.mp3-speler./.Bluetooth®-adapter.aan.en.waar.van.toepassing.zorg. 2..Pas.daarna.start.u.het.andere.apparaat. ervoor.dat.zijn.Bluetooth®-functie.geactiveerd.is. 2..Als.de.SRC-System™-headset.AAN.staat.drukt.u.ten.minste.zes.seconden.op. 7.3b MP3‑SPELERS VIA DE KABEL de.knop.voor.mobiel.bellen.tot.er.snel-afwisselend.een.rood.en.een.blauw. Het gebruik van de extra ingang voor het inpluggen van apparaten controlelampje.gaan.branden. Uw.SRC-System™ headset.heeft.een.extra.ingang.waarmee.u.audiobronnen,. 3..Zoek.naar.Bluetooth®-headsets.op.uw.mp3-speler.door.het.volgen.van.de. zoals.mp3-spelers.die.niet.volgens.het.Bluetooth®.protocol.werken.toch.kunt. instructies.van.het.apparaat inpluggen.in.de.headset,.door.gebruik.te.maken.van.de.bijgeleverde.kabel. 4..Na.een.paar.seconden.zal.de.mp3-speler.“SRCS” (inclusief software-versie). 1..Om.te.beginnen.moet.de.headset.in.de.sluimerstand.(stand-by).staan,.wat.u. laten.zien.als.een.gevonden.apparaat..Daar.volgt.u.dan.de.instructies.van.uw. kunt.zien.aan.de.infrequente.blauwe.flitsjes. mp3-speler.om.de.afstemming.te.accepteren.
-
Seite 110: De.ingebouwde.fm-Radio
2... T ik.binnen.de.20.seconden.na.het.vinden.van.een.FM-station.kort.op.de.knop. RDS AAN/UIT (staat van houd.de.knoppen.voor.luider.en.zachter.tegelijkertijd.3. voor.“kanaal.B”.om.het.vast.te.leggen.als.de.huidige.voorkeur. zichzelf op UIT) seconden.ingedrukt.terwijl.de.radio.aanstaat Scannen en vastleggen: scannen.langs.de.FM-stations 1... D ruk.6.seconden.op.de.knop.voor.harder..De.SRC-System™ gaat.dan.in.de.hogere. Dankzij.de.RDS.zal.uw.headset.automatisch.het.sterkst.beschikbare.signaal. frequenties.zoeken.naar.een.station..Wanneer.hij.bij.een.station.komt,.laat.hij. opzoeken.van.de.FM-zender.waar.u.naar.wilt.luisteren,.ongeacht.waar.u.rijdt..Dit. het.een.paar.seconden.horen. stelt.u.in.staat.om.uw.handen.voordurend.aan.het.stuur.te.houden.want.u.hoeft. 2... O m.het.scannen.op.dit.station.te.stoppen,.tikt.u.kort.weer.op.de.knop.voor.harder. onder.het.rijden.niet.de.frequentie.van.de.radiozender.aan.te.passen. 3... T ik.binnen.de.20.seconden.na.het.vinden.van.dit.FM-station.kort.op.de.knop. voor.“kanaal.B”.om.het.vast.te.leggen.als.de.huidige.voorkeur. 4... O m.door.te.gaan.met.scannen:.wacht.tot.u.het.volgende.station.hoort. -
Seite 111: Het.gebruik.van.de.intercom
AUTOMATISCH INSTELLEN VAN DE RADIO 9.2 INTERCOM COMPATIBILITEIT Deze.mogelijkheid.maakt.het.vinden.van.nieuwe.stations.sneller.en.makkelijker. U.kunt.met.uw.SRC-System™-headset.intercomverbindingen.leggen.met.alle. door.automatisch.een.lijst.van.6.tijdelijke.radiostations.te.creëren. andere.SRC-System™-headsets.en.met.de.Cardo scala rider-headsets..Voor. nadere.details.kunt.u.terecht.op.www.cardosystems.com/SRC. 1..Zet.de.radio.aan. 9.3 VOOR U DE INTERCOM BEGINT TE GEBRUIKEN 2..Druk.6.seconden.op.de.knop.voor.zachter. Uw.SRC-System™-headset.heeft.twee.knoppen.die.dienen.tot.snel.contactmaken. 3... D e.SRC-System™.gaat.dan.in.de.hogere.frequenties.zoeken.vanaf.het.huidige. met.twee.andere.headsets..Deze.andere.headsets.noemen.we.hier.“KANAAL A”. station.en.slaat.de.volgende.6.stations.op. en.KANAAL B.”. 4... D esgewenst.kunt.u.dit.herhalen.vanaf.stap.2..om.de.volgende.6.FM-stations. de knop voor "kanaal A"... -
Seite 112: Driewegintercom
TWEEWEGINTERCOM.uit.te.voeren.met.een.derde.afgestemde.SRC-System™- 5..Herhaal.stappen.3.en.4.voor.de.tweede.SRC-System™-headset. headset.(op.het.andere.KANAAL). 6..Binnen.een.paar.seconden,.zullen.beide.headsets.twee.seconden.lang.een. Voor.het.afstemmen.van.uw.SRC-System™.met.nog.twee.andere. ononderbroken.licht.laten.zien,.wat.aangeeft.dat.de.twee.headsets.nu.op. SRC-System™-headsets: elkaar.afgestemd.zijn,.verbonden.en.klaar.voor.gebruik. 1... K oppel.het.SRC-System™.van.motorrijder.1.met.dat.van.motorrijder.2. LET OP: Wanneer de afstemming (het koppelingsproces) niet binnen twee minuten via.“kanaal.A”.zoals.beschreven.in.sectie.9.4a.. wordt afgerond, zal de headset terugkeren naar standby, de sluimerstand. 2... K oppel.nu.het.SRC-System™.van.motorrijder.1.met.dat.van.motorrijder.3. via.“kanaal.B”.zoals.beschreven.in.sectie.9.4a. 9.4b. DRIEWEGINTERCOM De.SRC-System™-headset.biedt.als.volgt.de.mogelijkheid.tot. -
Seite 113: Het.aangaan.van.intercomgesprekken
VOX-gevoeligheid..Als.u.problemen.ondervindt.met.het.beginnen.van.een.gesprek.via. Er zijn twee manieren om een intercomgesprek te beginnen met headsets VOX,.dan.kunt.u.de.instelling.veranderen.naar.“hoog”.via.de.software.(zie.de.sectie.4.3). die afgestemd zijn op uw SRC-System™-headset (vergewis u ervan dat uw of.rechtstreeks.op.uw.SRC-System™.via.het.spraakmenu.(zie.de.sectie.4.4). SRC-System™-headset in de sluimerstand [stand-by] staat): VOX AAN-/UITZETTEN: En.u.kunt.ook.de.VOX-werking.voor.bellen.met.de. -
Seite 114: Het.oplossen.van.problemen.met.de.intercom
2. HET AUTOMATISCH HERSTEL VAN DE INTERCOMVERBINDING 10. CLICK-TO-LINK® (CTL) Indien.de.SRC-System™-headset.en.een.tweede,.erop.afgestemde.headset. hun.bereik.te.buiten.gaan.en.de.verbinding.tussen.hen.verloren.gaat,.zal.de. Click-to-Link®.(tikcontact).is.de.spontane,.“gezellige”.kant.van.uw.SRC-System™.. Dezer.unieke.mogelijkheid.stelt.u.in.staat.om.onmiddellijk.één.op.één. SRC-System™-headset.onmiddellijk.proberen.de.verbinding.met.de.andere. intercomgesprekken.aan.te.gaan.met.andere.SRC-System™-gebruikers.die.zich. headset.herstellen..U.kunt.met.de.hand.de.intercomverbinding.herstellen.terwijl. in.de.buurt.bevinden.zonder.dat.het.nodig.is.om.vooraf.het.koppelingsproces.te. de.headset.in.de.sluimerstand.(stand-by).staat.door.de.knop.voor.“KANAAL.A”. of.“KANAAL.B”.in.te.drukken.om.u.te.verbinden.met.de.respectievelijke.verloren. doorlopen..U.kunt.het.beschouwen.als.een.privé.gesprekskanaal.van.motorrijder. tot.motorrijder.dat.u.zonder.te.stoppen.kunt.openen.met.andere.SRC-System™- gegane.verbinding. gebruikers.die.u.in.de.buurt.opmerkt,.bij.een.verkeerslicht.of.langs.de.weg..De. 3. GRENZEN AAN EEN GROEPSGESPREK (CONFERENCE CALLS) mogelijkheid.van.Click-to-Link®.kan.natuurlijk.te.allen.tijde.uitgezet.worden,. Als.u.een.groepsgesprek.begint.met.drie.deelnemers.(uzelf.meegerekend),.zullen. waardoor.u.ook.pogingen.van.andere.SRC-System™-gebruikers.om.spontaan. de.deelnemers.die.tegelijkertijd.twee.actieve.verbindingen.onderhouden.niet. contact.met.u.op.te.nemen.blokkeert. instaat.zijn.om.mobiele-telefoongesprekken.of.gps-boodschappen.te.ontvangen. HET GEBRUIK VAN CLICK-TO-LINK®... -
Seite 115: Vragen/Hulp
*gps-aanwijzingen van de smartphone gps apps krijgen dezelfde lagere.prioriteit prioriteit als A2DP-audio Voor.meer.informatie,.kijk.op.onze.website:.. Een.toon.voor.een.verzoek.tot.intercomcontact:.als.bestuurder.A.of.bestuurder. www.schuberth.com B.contact.met.u.zoekt.voor.een.intercomgesprek.terwijl.u.bezig.bent.met.een. Voor.technische.ondersteuning.kunt.u.schrijven.naar:. Click-to-Link®-gesprek,.hoort.u.een.toon.voor.een.verzoek.tot.intercomcontact. Service@schuberth.com terwijl.de.partij.die.contact.zoekt.een.toon.ter.afwijzing.hoort. telnr..:.+49-391-8106-555 Als.om.welke.reden.ook.het.gebeurt.dat.uw.Click-to-Link®-verbinding.wegvalt. en.er.zijn.nog.andere.SRC-System™-gebruikers.in.de.buurt,.dan.kan.het.gebeuren. Be.zoekt.u.a.u.b..onze.website.www.schuberth.com/en/motorcycle/service/ dat.een.hernieuwde.Click-to-Link®-poging.u.verbindt.met.andere.gebruikers.dan. src-systemtm.html en.schrijft.u.zich.online.in.voor.de.nieuwste.informatie.over. degene.met.wie.u.eerst.contact.had. Software-verbeteringen. ALGEMENE FUNCTIES BELANGRIJK Als u van plan bent om .… Doe dan het volgende: DOOR HET OPENEN VAN DE RITSSLUITING VAN DE AKOESTISCH KRAAG, VERVALT DE GARANTIE! een.CTL. -
Seite 116: Bepalingen
Eindgebruikers.moeten.de.specifieke.instructies.volgen.tot.naleving.van.de.voorschriften.voor. sief.voor.risico.en.verantwoording.van.de.eigenaar. de.sterkte.van.de.radiofrequentieafgifte..De.zender.mag.niet.bij.een.andere.antenne.of.zender. worden.geplaatst.of.er.mee.samenwerken. De.basisvoorwaarden.voor.veilig.gebruik.zijn.o.a..dat.u.lichamelijk.in.staat.moet.zijn.het.product.te. gebruiken.en.dat.u.niet.lijdt.aan.een.ziekte.of.last.hebt.van.een.beperking.die.uw.mogelijkheid.tot. De Europese CE regulering veilig.gebruik.van.het.product.en.deelname.aan.het.verkeer.zou.kunnen.verhinderen..Verder.moet. De.SRC-System™-headset.(het.“product”).voldoet.aan.de.volgende.essentiële.eisen.van.Europese. u.in.het.bezit.zijn.van.een.geldig.rijbewijs.voor.het.voertuig..In.geen.geval.mag.u.voor.of.tijdens.het. richtlijn.1999/5/EC.(genaamde.de.R&TTE-regulering),.artikelen.3.1a,.3.1b.en.3.2..Het.product.is. gebruik.van.het.product.alcohol.of.medicatie.gebruiken.die.de.rijvaardigheid.beïnvloeden. gefabriceerd.volgens.aanhangsel.2.bij.bovenstaande.richtlijn. Reguleringen van de federale communicatiecommissie (in de VS) Verklaring van het voldoen aan de standaard (DOC - Declaration of Conformity) 15.21 De.SRC-System™-headset.voldoet.aan.en.gebruikt.de.Bluetooth®.class.1.2-specifictatie.en. heeft.met.succes.alle.testen.doorstaan.van.wederzijdse.operabiliteit.die.vermeld.staan.in. - Seite 117 Schuberth.GmbH.en.Cardo.Systems,.Inc.,.met.inbegrip.van.de.bestuursleden,.directeuren,. 3..U.bevestigt.dat.u.lichamelijk.in.staat.bent.om.dit.apparaat.te.gebruiken.en.dat.u.geen.medische. partners,.het.moederbedrijf,.vertegenwoordigers,.agenten,..onderaannemers,.sponsors,.werk- afwijkingen.of.gebreken.heeft.welke.u.zouden.kunnen.hinderen.in.het.veilig.gebruik..U.beves- nemers,.leveranciers.en.wederverkopers.(verder.aangeduid.als.“het.bedrijf”).raadt.u.ten.sterkste. tigt.dat.u.ten.minste.18.jaar.oud.bent.en.dat.u.op.de.hoogte.bent.gesteld.van.de.risico’s.verbon- aan.om.alle.benodigde.voorzorgsmaatregelen.te.nemen.en.alert.te.blijven.op.de.verkeers-,. den.aan.het.gebruik.van.dit.apparaat..Verder.bevestigt.u.dat.u.geen.alcohol.tot.u.zult.nemen. weers-.en.wegomstandigheden die.uw.alertheid.zou.kunnen.geinvloeden.of.welke.middelen.die.de.rijvaardigheid.beïnvloeden. ook,.en.dat.u.deze.producten.niet.bij.u.zult.hebben..gebruiken.of.nuttigen.voor.of.gedurende. indien.u.ervoor.kiest.om.gebruik.te.maken.van.de.SRC-System™-headset,.inclusief.alle.afgeleide. het.gebruik.van.het.apparaat. modellen,.ongeacht.hun.commerciële.benaming.of.merk.(verder.aangeduid.als.“het.apparaat”). en.om.uw.vervoermiddel.te.stoppen.voordat.u.gaat.opbellen.of.een.gesprek.gaat.aannemen.. 4..U.erkent.onze.waarschuwingen.volledig.en.begrijpt.dat:.(a).er.risico’s.en.gevaren.bestaan. Alle.publicaties,.advertenties,.bekendmakingen.of.dergelijke.berichten.die.het.gebruik.van.het. bij.gebruik.van.het.apparaat.in.het.verkeer,.inclusief,.maar.niet.beperkt.tot,.letsel.of.ziekte,. apparaat.tijdens.het.zich.verplaatsen.te.berde.brengen,.zijn.alleen.bedoeld.om.de.technische. overbelasting,.fracturen,.gedeeltelijke.en/of.gehele.verlammingen,.dood,.of.andere.niet- mogelijkheden.te.bespreken.en.moeten.niet.verkeerd.uitgelegd.worden.alsof.zij.de.gebruikers. genoemde.kwalen.die.kunnen.resulteren.in.ernstige.invaliditeit;.(b).deze.risico’s.en.gevaren. aanmoedigen.om.het.apparaat.te.gebruiken.tijdens.deelname.aan.het.verkeer. zouden.veroorzaak.kunnen.worden.door.achteloosheid.van.de.fabrikant,.zijn.vertegenwoordi- gers.of.een.derde.partij.betrokken.bij.het.ontwerpen.of.de.productie.van.het.apparaat;.(c).deze. Door.dit.apparaat.aan.te.schaffen.en.het.niet.te.retourneren.onder.volledige.restitutie.(zie.hier- risico’s.en.gevaren.zouden.voort.kunnen.komen.uit.te.verwachten.of.onverwachtse.oorzaken.. onder).verleent.u.het.bedrijf.kwijtschelding.en.schadeloosstelling.van.elke.verantwoordelijkheid,. Hierbij.neemt.u.alle.risico’s,.gevaren.en.verantwoordelijkheid.op.u.om.het.even.welke.schade. verlies,.eisen.en.alle.kosten.(inclusief.advocatenkosten).en.beschouwt.u.het.bedrijf.onschuldig. en/of.beschadiging,.zowel.die.geheel.als.die.gedeeltelijk.veroorzaakt.door.nalatigheid.of.ander. aan.welke.lichamelijke.verwonding,.letsel.of.overlijden.dan.ook,.evenals.aan.schade.of.bescha- gedrag.van.anderen,.inclusief.het.bedrijf. diging.van.goederen,.van.elk.vervoermiddel,.inclusief.uw.eigen,.of.van.enige.eigendom.of.activa. van.uzelf.of.een.derde.partij,.elk.mogelijk.voortkomend.uit.het.gebruik.van.het.apparaat.onder. 5..U.bevestigt.dat.u.dit.document.van.afstand.van.verantwoordelijkheid.heeft.gelezen.en. welke.omstandigheden.of.condities.dan.ook.en.ongeacht.de.juridische.aansprakelijkheid. dat.u.het.in.al.zijn.onderdelen.volledig.begrijpt.en.dat.u.wezenlijke.rechten.heeft.opge- geven.door.het.apparaat.niet.te.retourneren.voor.volledige.restitutie.(zie.onderstaande. Het.bedrijf.zal.niet.verantwoordelijk.worden.gehouden.voor.welke.materiële.schade.ook,.onge- terugbetalingsmogelijkheid).
- Seite 118 DEZE.BEPERKINGEN..IN.SOMMIGE.STATEN.KUNNEN.WETTEN.GELDEN.DIE.EEN.BEPERKING.VAN.DE. VAN.HET.APPARAAT.(een.aankoopbewijs.is.vereist).EN.DAT.DE.VERPAKKING.INTACT.IS..MOCHT.U.DIT. AANSPRAKELIJKHEID.REGULEREN. GAAN.DOEN,.RAADPLEEGT.U.DAN.WAT.HIER.GESCHREVEN.STAAT..ALS.U.HET.APPARAAT.NIET.TE- RUGBRENGT.OM.UW.GELD.TERUG.TE.KRIJGEN.BINNEN.DE.AANGEGEVEN.PERIODE,.GAAT.U.DAARMEE. RETOURNEREN VOOR VOLLEDIGE TERUGBETALING AKKOORD.MET.HET.BOVENSTAANDE.EN.DOET.U.AFSTAND.VAN.ALLE.RECHTEN.TOT.TOEKOMSTIGE. INDIEN.U.BOVENSTAANDE.BEPALINGEN.NIET.WILT.ACCEPTEREN.OF.ERMEE.AKKOORD.WILT.GAAN,. CLAIMS.EN.EISEN.TEGEN.HET.BEDRIJF.ZOALS.HIERBOVEN.GEDEFINIEERD. KUNT.U.HET.APPARAAT.RETOURNEREN.AAN.HET.BEDRIJF.VOOR.EEN.VOLLEDIGE.TERUGGAVE.VAN. HET.AANKOOPBEDRAG,.OP.VOORWAARDE.DAT.U.DIT.DOET.BINNEN.7.WERKDAGEN.NA.AANSCHAF. www.schuberth.com MAN00097 QG SRC-S2_C3 J 009.indd 118 7/18/12 5:38 PM...
- Seite 119 G U I A U S A R I O POWERED BY MAN00097 QG SRC-S2_C3 J 009.indd 119 7/18/12 5:38 PM...
- Seite 120 12..AVISOS..........................140 6..INSTALACIÓN.EN.UN.CASCO.C3.PRO................. 127 6.1.RETIRANDO.EL.COLLAR.ACÚSTICO.EXISTENTE..........127 6.2.CONECTANDO.EL.CABLE.DE.LA.ANTENA............127 6.3.FIJANDO.EL.SRC‑SYSTEM™................. 128 IMPORTANTE: Esta.es.la.versión.2.0.del.Manual.de.Usuario..Por.favor.tenga.en.cuenta,.que.nuestro. 6.4.POSICIONANDO.LOS.PARLANTES................. 129 manual.se.actualiza.periódicamente.en.el.sitio.web.con.el.fin.de.incluir.las.últimas.características,. así.como.también.las.nuevas.opciones.y.funciones.de.su.nuevo.SRC-System™..Por.favor.ingrese. 6.5.POSICIONANDO.EL.MICRÓFONO................. 129 a.www.schuberth.com/fileadmin/downloads/SRC/SRC-System_Manual-1.pdf.para. 6.6.RETIRANDO.EL.SRC‑SYSTEM™.DE.SU.CASCO........... 130 comprobar.si.el.manual.que.usted.tiene.ahora.es.la.versión.más.actualizada,.y.descargue.desde.el. 6.7.COLOCANDO.Y.RETIRANDO.EL.CASCO..............130 sitio.web.la.versión.del.manual.en.su.idioma.preferido. 6.8.LIMPIANDO.EL.ACOLCHADO.PARA.LA.NUCA ............ 130 MAN00097 QG SRC-S2_C3 J 009.indd 120...
-
Seite 121: Introducción
A2DP.y AVRCP,.compatible.con.una.variedad.de. disponibles.para.cualquier.pregunta.o.inquietud.que.pueda.tener..Solo.escríbanos. Reproductores.de.MP3,.adaptadores.y.otros.dispositivos.de.audio) a.Service@schuberth.com 3..Intercomunicador.Moto.a.Moto.de.2-.Vías.o.3-Vías.para.llamadas.en.conferencia. con.hasta.otros.kits.SRC-System™.(a.una.distancia.de.hasta.700.m./.2,300.pies. en.modo.Full.Duplex**). 4..Intercomunicador.Conductor-Pasajero Nicole Prell 5... C lick-to-Link®.para.comunicaciones.espontáneas.del.intercomunicador.con. cualquier.unidad.cercana.de.SRC-System™, G4 o G9 Jefe de Ventas y Marketing SCHUBERTH GmbH 6... p ara.recibir.instrucciones.de.Navegación.GPS.y.Audio.Simultáneo.desde. dispositivos.Bluetooth®.compatibles Visite.a.www.schuberth.com/src2-tutorial/es.para.que.experimente.una. 7..radio.FM.Integrada.con.6.estaciones.programadas.y.sintonización.automática. demostración.interactiva.de.las.funciones.del.SRC-System™.. 8... p ara.escuchar.dispositivos.de.audio.con.cable.conectado,.(tales.como. Reproductores.de.MP3.que.no.tienen.Bluetooth®.e.iPods®) CARACTERÍSTICAS ADICIONALES ES PECIALES: ➤La.tecnología.AGC.(Control.Automático.de.Volumen),.que.le.permite.a.su. -
Seite 122: Contenido.del.estuche.de.venta
2. C ONTENIDO DEL ESTUCHE DE VENTA SRC‑SYSTEM™ PARA CASCOS S2 SRC‑SYSTEM™ PARA CASCOS C3 PRO (El producto se ofrece en diferentes tamaños) (El producto se ofrece en diferentes tamaños) Micrófono Soporte Flexible Botón del CANAL A • Se Conecta al Motociclista A Patita de •... -
Seite 123: Cargando.el.kit.manos.libres
3. C ARGANDO EL KIT MANOS LIBRES 4. I NSTALACIÓN Y CONFIGURACIÓN BÁSICA ASEGÚRESE DE QUE EL KIT MANOS LIBRES ESTÉ TOTALMENTE CARGADO 4.1 FUNCIONES GENERALES DURANTE POR LO MENOS CUATRO HORAS ANTES DEL USO INICIAL. RESULTADO DESEADO ACCIÓN REQUERIDA 1... L evante.la.cubierta,.que.protege.la.entrada.para.conexión.de.carga.. Encender / Apagar Presione.y.sostenga.el.Botón.del.Móvil.durante.por.lo. -
Seite 124: Actualizaciones.del.software.y.configuraciones
4.3 ACTUALIZACIONES DEL SOFTWARE Y CONFIGURACIONES •.A.través.de.la.Configuración.Personalizable.del.Menú.de.Voz.y.los.botones.de.su. unidad.de.SRC-System™..Vea.más.abajo. Para.sacarle.el.máximo.provecho.a.su.SRC-System™,.asegúrese.de.que.se.está. Usted.puede.configurar.el.menú.de.voz.eligiendo.primero.el.idioma.de.la.lista.de. ejecutando.el.software.más.reciente..Para.descargar. los.lenguajes.ofrecidos.. las.últimas.actualizaciones.del.software.y.aprovechar.la. configuración.personalizable.a.través.del.computador,. 4.5 MENÚ DE VOZ regístrese.en.línea.en:.www.schuberth.com/register/es.y.tenga.listo.su.número.de. Ingresando.al.Menú de Voz:. serie.del.producto.. •.. P resione.y.sostenga.el.Botón.del.CANAL.«A».y.el.Botón.del.CANAL.«B». Después.de.descargar.el.programa.de.actualizaciones,.utilice.el.cable.USB.incluido. simultáneamente.durante.3.segundos.mientras.el.kit.manos.libres.está.en.modo. en.el.estuche.de.venta.para.conectar.el.SRC-System™.a.su.computador. de.espera.. Una.vez.conectado.a.su.computador,.usted.podrá.fácilmente.personalizar.la. •.. U na.vez.que.entre.al.sistema,.siga.las.instrucciones.de.voz.en.Inglés.o.seleccione. configuración.de.su.SRC-System™.siguiendo.las.instrucciones.en.la.pantalla.. su.idioma.preferido. Las.futuras.actualizaciones.del.software.y.los.parches.de.los.programas,.le. aseguraran.que.el.software.de.su.SRC-System™.se.mantendrá.al.día.e.incluso. 4.6 FUENTES DE AUDIO Y PRIORIDADES contendrá.características.adicionales,.anuncios.de.estado.y.otras.funciones.valiosas. -
Seite 125: Instalación.en.un.casco.s2
(Vea la sección 6 para cascos C3 PRO) 5.1 RETIRANDO EL COLLAR ACÚSTICO EXISTENTE Primero,.retire.el.Collar.Acústico.existente.de.su.casco,.de.la.siguiente.manera: En.el.casco,.retire.el.protector.de. goma.del.conector.de.la.antena. Saque.y.retire.el.Collar.Acústico.desde.la.parte.delantera.del.centro.del.arco. 4.. Alinie.las.dos.cabezas.del.conector.y.ajuste.los.dos.broches.de.nuevo.en.su. lugar,.para.asegurar.el.conector.en.una.posición.cerrada.. 5.2 CONECTANDO EL CABLE DE LA ANTENA Su.SRC-System™.tiene.una.cable.de.la.antena,.que.debe.ser.conectado.al. conector.del.cable.de.la.antena.integrada,.en.el.casco.Schuberth. Asegúrese.de.cerrar.la.cubierta.del. NOTA: conector.del.USB,.y.luego.guárdela. dentro.del.bolsillo.del.conector.USB 1.. Extraiga.el.conector.de.la.antena.(marcado.con.una.etiqueta.roja),.que.está. guardado.dentro.del.borde.de.la.parte.posterior.del.casco. 5.. El.conector.de.la.antena.ahora.puede. guardarse.en.forma.segura,.dentro.del. -
Seite 126: Fijando.el.src-System
3.. Cierre.el.botón.rojo,.asegurándose.de.que.esté.todavía.dentro.su.aro.negro.que. lo.sujeta.. 1.. Asegúrese.de.colocar.los.cables.de.los.altavoces.y.el.micrófono.dentro.del. casco,.y.luego.asegure.el.SRC-System™.en.su.lugar. NOTA: Las almohadillas opcionales para los parlantes, se proporcionan para 2.. Empuje.e.inserte.el.SRC-System™.empezando.desde.la.parte.posterior.de.la.zona. aumentar el volumen de los parlantes, si es necesario, poniendo los parlantes más del.casco..Haga.lo.mismo.con.los.costados.del.SRC-System™.y.luego.la.parte. cerca a sus oídos. delantera.de.la.zona.del.casco,.para.asegurar.el.SRC-System™.en.su.lugar. Para utilizarlas, simplemente coloque las almohadillas de los parlantes entre las almohadillas de Velcro, dentro de la hendidura del casco y el parlante. -
Seite 127: Colocando.y.retirando.el.casco
3... L ibere.las.patitas.de.contacto.del.acolchado. para.la.nuca,.de.su.margen.correspondiente. NOTA: Su acolchado para la nuca SRC-System™ está diseñado para el máximo dentro.del.borde.del.casco. confort. Sin embargo, puesto que contiene dentro de él un kit de electrónica completo, podría abultar un poco. Por lo tanto, al ponerse su casco equipado SRC o al quitárselo, puede sentirlo diferente a lo que usted está... -
Seite 128: Fijando.el.src-System
.1... E xtraiga.el.conector.de.la.antena.(marcado.con.una.etiqueta.roja),.que.está. 5... E l.conector.de.la.antena.ahora.puede. guardado.dentro.del.borde.de.la.parte.posterior.del.casco. guardarse.en.forma.segura,.dentro.del. bolsillo.del.conector.de.la.antena,.en.el. centro.del.SRC-System™. 6.3 FIJANDO EL SRC‑SYSTEM™ 1... A segúrese.de.colocar.los.cables.de.los.altavoces.dentro.del.casco,.y.luego. asegure.el.SRC-System™.en.su.lugar. Etiqueta de la antena Conector de la visible antena extraído 2... D eslice.e.inserte.la.patita.de.contacto.localizada.en.el.borde.del.panel.de.control. dentro.de.su.margen.correspondiente.en.el.casco.y.cierre.el.botón.de.presión. 2... En.el.collar.SRC,.abra.los.dos.broches.del. conector.de.la.antena.y.retire.la.cubierta.plástica. Patita de contacto protectora. 3... E n.el.casco,.retire.el.protector.de.goma.del. -
Seite 129: Posicionando.los.parlantes
Velcro, dentro de la hendidura del casco y el parlante. 6.4 POSICIONANDO LOS PARLANTES 6.5 POSICIONANDO EL MICRÓFONO Para.obtener.los.mejores.resultados.de.audio,.asegúrese.de.que.ambos.parlantes. Para.asegurar.un.buen.cierre.de.la.sección.de.la.barbilla.del.casco.(girar.hacia. están.colocados.lo.más.cerca.posible,.justo.en.frente.de.sus.oídos.. abajo),.por.favor.retire.primero.la.almohadilla.triangular.anti-ruido.y.proceda.de. Lo siguiente se aplica a ambos lados del acolchado para la nuca del la.siguiente.manera: SRC-System™: 1..Doble.el.soporte.flexible.del.micrófono.como.se.muestra.en.la.imagen. 1... A bra.el.botón.rojo.de.la.parte.de.atrás,.localizado.debajo.del.revestimiento. 2..Presione.el.micrófono.hacia.el.centro.de.su.boca. interior,.que.cubre.la.almohadilla.de.la.mejilla.(el.botón.está.sujeto.por.un.aro. negro). 2... F ije.las.almohadillas.de.Velcro.ovaladas,.correspondientes.a.las.hendiduras. conformadas.de.los.altavoces,.en.el.EPS.(poli.estireno.expandido),.y.coloque.los. altavoces.sobre.las.almohadillas.de.Velcro. -
Seite 130: Retirando.el.src-System™.De.su.casco
NOTA: Su acolchado para la nuca SRC-System™ está diseñado para el máximo confort. Sin embargo, puesto que contiene dentro de él un kit de electrónica completo, podría abultar un poco. Por lo tanto, al ponerse su casco equipado SRC o al quitárselo, puede sentirlo diferente a lo que usted está... -
Seite 131: Conectando.dispositivos.de.teléfonos.móviles,.Gps.o.mp3.(A2Dp)
NOTA: Si planea utilizar su teléfono móvil mientras usa un dispositivo de Bluetooth® 5..Cuando.se.le.solicite.ingrese.0000.(cuatro.ceros).como.su.contraseña.«PIN».o. GPS, entonces usted debe aparear su teléfono móvil al GPS y no al SRC-System™. clave. 6..Su.teléfono.confirmará.que.el.emparejamiento.tuvo.éxito.y.el.kit.manos.libres. * vea las restricciones en la sección 9.4 b comenzará.a.parpadear.lentamente.en.Azul.. -
Seite 132: Dispositivo.gps
7.2 DISPOSITIVO GPS conectar el kit manos libres al teléfono, después de completar el emparejamiento. El Para.usar.un.dispositivo.GPS.compatible.con.Bluetooth®.y.el. SRC-System™ se conectará automáticamente al último teléfono conectado al kit manos SRC-System™,.los.dos.deben.primero.estar.emparejados..Esto.le. libres. permitirá.al.GPS.transmitir.instrucciones.de.navegación.y.audio.a.los.parlantes.de.su. 2. Si el proceso de emparejamiento no se completa en dos minutos, el kit manos libres kit.SRC-System™. -
Seite 133: Música.de.mp3
NOTA: El SRC-System™ puede también recibir audio a través del cable incluido NOTA: Si el proceso de emparejamiento no se completa en dos minutos, el kit manos desde los Reproductores de MP3 y fuentes de audio que no tienen Bluetooth® como se libres retomará... -
Seite 134: Radio.fm.integrada
ALTERNANDO ENTRE FUENTES DE AUDIO A2DP 8. RADIO FM INTEGRADA Si.un.Reproductor.de.Música.es.emparejado,.el.SRC-System™.lo.utilizará.como.la. fuente.de.audio.A2DP.por.defecto.. El.SRC-System™.está.equipado.con.un.receptor.de.radio.FM.Estéreo.de.alta. 1..Detenga.la.reproducción.de.la.música.del.dispositivo.actual. calidad.y.con.la.tecnología.RDS.(Sistema.Radial.de.Datos). 2... C omience.la.reproducción.de.la.música.desde.el.otro.dispositivo. Radio Encendida (on) Mientras.está.en.modo.de.Espera,.presione.y. sostenga.el.Botón.CANAL.“B”.por.3.segundos 7.3b REPRODUCTORES DE MP3 CON CABLE CONECTADO Utilizando.la.línea.de.puerto.auxiliar.para.la.conexión.por.cable Radio Apagada (off) Mientras.escucha.la.Radio,.presione.y.sostenga.el. Botón.CANAL.“B”.durante.3.segundos Su.SRC-System™.tiene.una.entrada.de.conexión.auxiliar.que.le.permite. conectarse.con.fuentes.de.audio.que.no.cuentan.con.Bluetooth®,.tales.como. Cambiar a la siguiente Mientras.escucha.la.Radio,.pulse.el.Botón.CANAL. -
Seite 135: Sintonización Automática De La Radio
Estaciones de Radio Guardadas que usted pueda haber establecido mediante el procedimiento de “Guardar una estación seleccionada”. Apagar y Buscar y Guardar:.(Buscar.la.siguiente.estación.FM) Encender el SRC-System™ borrará sus estaciones de la Sintonización Automática de 1... P resione.y.sostenga.el.botón.de.Sube Volumen.o.Baja Volumen.durante.3.segundos.. la Radio, y restaurará las estaciones de radio originales guardadas. -
Seite 136: Utilizando.el.intercomunicador
Antes.de.que.pueda.comenzar.a.utilizar.el.intercomunicador.para.una. 9. U TILIZANDO EL INTERCOMUNICADOR comunicación.Moto-Moto.con.uno.u.otros.dos.kits.manos.libres,.todas.las. unidades.deben.ser.primero.emparejadas. 9.1 INTRODUCCIÓN 9.4 UTILIZANDO EL SRC‑SYSTEM™ PARA EMPLEAR EL Su.SRC-System™.le.permite.conectarse.con.otros.motociclistas.utilizando.el.kit. INTERCOMUNICADOR CON OTROS KITS SRC‑SYSTEM™ manos.libres.SRC.a.una.distancia.de.hasta.700.metros/.2,300.pies.(dependiendo. al.terreno)..Para.establecer.una.o.dos.conexiones.con.el.Intercomunicador. CANAL DEL EMPAREJADO/ EMPAREJADO/ INDICADOR DE Bluetooth®,.usted.debe.primero.emparejar.su.kit.manos.libres.SRC-System™.con. INTERCOMUNICADOR BOTÓN DE CONEXIÓN ESTADO DE LAS LUCES LED los.otros.kits. -
Seite 137: Iniciando.llamadas.con.el.intercomunicador
NOTA: Si el proceso de emparejamiento no se completa en dos minutos, el kit manos como.se.describe.en.la.sección.9.4a. libres retomará al modo de Espera. 9.5 INICIANDO LLAMADAS CON EL INTERCOMUNICADOR 9.4b. INTERCOMUNICADOR DE TRES‑VÍAS El.SRC-System™.ofrece.conectividad.de.conferencia.con.un.intercomunicador.de. Existen.dos.maneras.para.iniciar.una.llamada.con.el.Intercomunicador.y.los.kits.manos.libres. que.están.emparejados.a.su.SRC-System™.(asegúrese.que.está.en.el.modo.de.Espera): tres-vías.de.la.siguiente.manera: CONEXIÓN DE VOZ: BOTÓN DEL CANAL DE Botón Canal “A”... -
Seite 138: Característica.de.conexión.de.voz.(Vox)
ORIGINAL POR DEFECTO) mantengan.simultáneamente.dos.conexiones.activas,.no.podrán.recibir.llamadas. Esta sección es sólo relevante una vez que haya terminado el proceso de por.teléfono.móvil.o.mensajes.del.GPS.mientras.que.la.llamada.en.conferencia. emparejamiento. esté.en.progreso.(vea.los.detalles.en.las.seccione.9.4b) Usted.puede.eliminar.todos.sus.dispositivos.emparejados.las.en.cualquier. 9.10 SOLUCIONANDO PROBLEMAS EN EL INTERCOMUNICADOR momento.y.de.la.siguiente.manera: Primero,.asegúrese.de.que.su.micrófono.está.localizado.propiamente.al.frente.de. 1..Con.el.SRC-System™.encendido.«ON»,.presione.y.sostenga.el.Botón.del Móvil. su.boca. durante.por.lo.menos.seis.segundos.hasta.que.las.Luces.Roja.y.Azul.comiencen. a.alternar.rápidamente. El.SRC-System™.está.diseñado.para.su.uso.en.entornos.de.mucho.ruido..Por. lo.tanto,.usted.debe.probar.la.funcionalidad.del.Intercomunicador.sólo.en. 2..Presione.y.sostenga.el.Botón.Sube Volumen.por.tres.segundos. ambientes.de.mucho.ruido,.como.junto.a.una.moto.en.marcha.y.no.en.entornos. 3..Las.Luces.Roja.y.Azul.parpardearán.cinco.veces.y.luego.el.kit.manos.libres.se. cerrados..Por.favor.verifique.también.que.los.kit.manos.libres.estén.emparejados. -
Seite 139: Click-To-Link® (Ctl)
10. CLICK-TO-LINK® (CTL) Alta.prioridad 1. Audio del Teléfono móvil o instrucciones del GPS* 2. Intercomunicador/Click-to-Link® 3. Fuente de audio A2DP (Estéreo Bluetooth) Click-to-Link®.es.la.naturaleza.“social”.espontánea.de.su.SRC-System™.. 4. Radio FM (Integrada) 5. AUX ( para conexión con cable, por ejemplo Esta.característica.única.le.permitirá.iniciar.de.inmediato.llamadas.del. Reproductores de Música) intercomunicador.una.u.una,.con.otros.usuarios.SRC-System™,.en.la.vecindad. -
Seite 140: Soporte.técnico
Todas.las.publicaciones,.publicidades,.anuncios.u.otras.comunicaciones.similares,.que.implican. que.puede.utilizar.el.dispositivo.en.movimiento,.solamente.se.refieren.a.sus.capacidades. IMPORTANTE: técnicas,.y.no.deben.interpretarse.como.un.estímulo.para.participar.en.dicha.actividad. ¡LA APERTURA DE LA CREMALLERA DEL ACOLCHADO PARA LA Debe.establecer,.si.el.uso.del.dispositivo.podría.representar.una.violación.a.alguna.ley,.o. NUCA, ANULARÁ LA GARANTÍA! reglamento.aplicable,.en.el.lugar.de.su.uso.y.cumplir.con.las.reglas.pertinentes..En.este. sentido,.cualquier.uso.del.dispositivo,.es.exclusivamente.bajo.el.propio.riesgo.del.usuario.y. Los.componentes.electrónicos.dentro.del.Acolchado.para.la.nuca.del. responsabilidad. SRC-System™.están.cerrados.mediante.una.cremallera.sellada..Por.favor.no. Los.requisitos.básicos.para.un.uso.seguro,.incluyen.que.usted.debe.ser.físicamente.capaz.de. manipule.ni.abra.la.cremallera.ya.que.esto.anulará.la.garantía. utilizar.el.dispositivo.y.no.sufrir.de.ninguna.enfermedad.o.limitación,.que.puedan.afectar.su. capacidad.de.utilizar.el.dispositivo.de.manera.segura.y.conducir.en.la.carretera..Por.otra.parte,. debe.tener.una.licencia.de.conducción.válida.para.el.vehículo..Bajo.ninguna.circunstancia,. puede.consumir.alcohol.o.drogas.que.alteran.la.mente,.lo.que.podría.afectar.su.estado.de. alerta,.antes.o.durante.el.uso.del.dispositivo.. Declaración de la Comisión Federal de Comunicaciones (FCC) 15.21 Los.cambios.o.modificaciones.a.esta.unidad.que.no.hayan.sido.expresamente.aprobados.por.la. - Seite 141 Inc.,.incluidos.sus.funcionarios,.directores,.afiliadas,.compañía.madre,.representantes,.agentes,. contratistas,.patrocinadores,.empleados,.proveedores.y.revendedores.(la.compañía).le.reco- •.Reoriente.o.reubique.la.antena.receptora miendan.tomar.todas.las.precauciones.necesarias.y.mantenerse.alerta.al.tráfico,.condiciones.de. •.Aumente.la.separación.entre.equipo.y.receptor la.ruta.y.del.clima,.si.decide.usar.el.kit.manos.libres.SRC-System™,.incluidos.todos.los.modelos. •.Conecte.el.equipo.a.una.salida.en.un.circuito.distinto.al.que.tiene.conectado.al.receptor derivados,.independientemente.de.su.nombre.o.marca.(el.“dispositivo”).y.detenga.su.vehículo.en. la.ruta.antes.de.iniciar.o.recibir.llamadas..Todas.las.publicaciones,.publicidad,.anuncios.o.notas. •.Consulte.al.distribuidor.o.a.un.técnico.de.radio.y.TV.experimentado.para.recibir.ayuda. similares.referidas.al.uso.del.dispositivo.mientras.se.conduce.el.vehículo.sólo.pretenden.indicar. Su.operación.está.sujeta.a.las.dos.condiciones.siguientes: las.funcionalidades.técnicas.y.no.se.interpretarán.como.el.aliento.a.los.usuarios.para.que.operen. 1).este.dispositivo.no.causará.interferencia.y. el.equipo.en.medio.del.tráfico. 2).. e ste.dispositivo.debe.aceptar.cualquier.interferencia,.incluida.la.interferencia.que.puede. Al.comprar.este.equipo.y.no.devolverlo.para.obtener.el.reembolso.(ver.abajo).está.liberando.a.la. causar.la.operación.indeseada.del.dispositivo. compañía,.compensando.por.obligaciones,.pérdidas,.reclamos.y.gastos.(incluidos.los.honorarios. de.abogados).por.lesiones.corporales,.daño.o.muerte.y.pérdidas.o.daños.materiales.a.vehículos,. Declaración de la exposición a radiación RF FCC incluido.el.suyo,.o.a.activos.o.propiedades.que.le.pertenezcan.o.a.terceros,.que.podrían.deberse.al. Este.equipo.cumple.con.los.límites.de.exposición.a.la.radiación.FCC.establecidos.para.un.ambiente. uso.del.equipo.en.cualquier.circunstancia.o.condición.e.independientemente.de.la.jurisdicción.. no.controlado..Los.usuarios.finales.deben.seguir.las.instrucciones.operativas.específicas.para. La.compañía.no.asumirá.ninguna.responsabilidad.por.daños.físicos,.independientemente.de.las. cumplir.con.los.límites.de.exposición.RF..Este.transmisor.no.puede.ser.colocado.ni.operar.conjun- razones,.condiciones.o.circunstancias,.incluida.la.falla.en.la.operación.del.dispositivo.y.los.riesgos.
-
Seite 142: Limitación De Responsabilidad
5..Confirma.que.leyó.esta.declaración.y.entiende.sus.términos.y.que.renunció.a.sus.derechos.al.no. retornar.el.equipo.para.obtener.reembolso.(consulte.la.opción.de.reembolso) RENUNCIA DE RESPONSABILIDAD LA.COMPAÑÍA.RENUNCIA.A.TODAS.LAS.GARANTÍAS.EXPRESAS.E.IMPLÍCITAS.CON.RESPECTO.AL. EQUIPO,.INCLUIDAS.SIN.LIMITACIONES,.GARANTÍAS.IMPLÍCITAS.DE.COMERCIABILIDAD,.ADAPTACIÓN. PARA.UN.FINE.ESPECÍFICO.Y.LA.NO.VIOLACIÓN.DE.LA.LEY. EL.EQUIPO.Y.SUS.ACCESORIOS.SE.PROPORCIONAN.“COMO.ESTÁ”.SIN.GARANTÍAS.FUERA.DE.LAS. ASUMIDAS.EN.EL.MANUAL.ADJUNTO. Limitación de responsabilidad EN.NINGÚN.CASO.LA.COMPAÑÍA.SERÁ.CONSIDERADO.RESPONSABLE.POR.DAÑOS.ESPECIALES,. INDIRECTOS,.PUNITIVOS,.INCIDENTALES,.EJEMPLARES.O.CONSECUENCIALES.O.DAÑOS.DE.CUALQUIER. TIPO.DEBIDOS.AL.USO.DEL.EQUIPO,.YA.SEA.QUE.SE.BASEN.EN.VIOLACIÓN.DE.CONTRATO,.AGRAVIO. (INCLUIDA.NEGLIGENCIA),.RESPONSABILIDAD.DEL.PRODUCTO,.ETC..INCLUSO.SI.SE.LE.INFORMÓ.DE. LA.POSIBILIDAD..RECONOCE.Y.ACEPTA.QUE.LAS.LIMITACIONES.ESTABLECIDAS.SON.ELEMENTOS.FUN- DAMENTALES.DEL.ACUERDO.Y.EL.EQUIPO.NO.LE.SERÁ.PROPORCIONADO,.SIN.LAS.LIMITACIONES..LOS. ESTATUTOS.DE.ESTADO.PUEDEN.SER.VÁLIDOS.CON.RESPECTO.A.LA.LIMITACIÓN.DE.RESPONSABILIDAD. DEVOLUCIÓN POR REEMBOLSO COMPLETO SI.NO.DESEA.ACEPTAR.LAS.CONDICIONES.ANTERIORES.PUEDE.DEVOLVER.ESTE.EQUIPO.A.LA.COMPA- ÑÍA.PARA.OBTENER.UN.REEMBOLSO.COMPLETO,.SIEMPRE.QUE.NO.LO.HAGA.MÁS.TARDE.DE.7.DÍAS. HÁBILES.TRAS.LA.COMPRA.DEL.EQUIPO.(se.requiere.prueba.de.compra).Y.SUJETO.A.QUE.EL.EMPA- QUE.ESTÉ.INTACTO..AL.HACERLO.MENCIONE.ESTA.SECCIÓN. DE.LO.CONTRARIO.ESTÁ.EXPLÍCITAMENTE.ACEPTANDO.LO.ANTERIOR.Y.RENUNCIA.A.TODO.DERECHO. A.FUTUROS.RECLAMOS.Y.DEMANDAS.CONTRA.LA.COMPAÑÍA.COMO.SE.INDICA.ARRIBA. www.schuberth.com MAN00097 QG SRC-S2_C3 J 009.indd 142 7/18/12 5:38 PM... - Seite 143 MAN00097 QG SRC-S2_C3 J 009.indd 143 7/18/12 5:38 PM...
- Seite 144 ©.2012.SCHUBERTH.GmbH The.Bluetooth®.word.mark.and.logos.are.owned.by.the.Bluetooth®.SIG,.Inc..and.any.use.of.such.marks.is.under.license. Other.trademarks.and.trade.names.are.those.of.their.respective.owners. MAN00097 QG SRC-S2_C3 J 009.indd 144 7/18/12 5:38 PM...