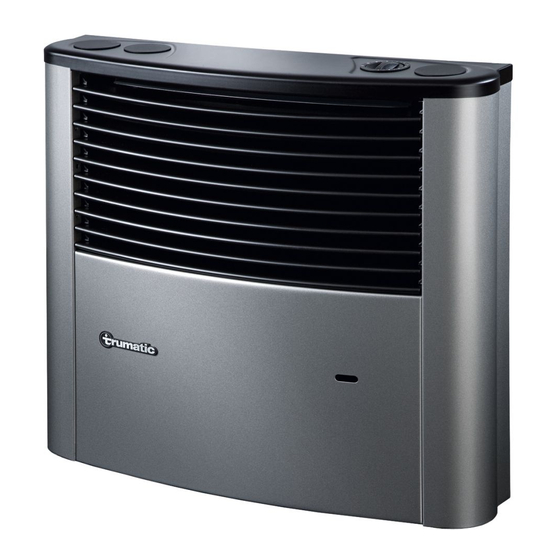
Truma Trumatic S 3002 P Gebrauchsanweisung
Vorschau ausblenden
Andere Handbücher für Trumatic S 3002 P:
- Gebrauchsanweisung (41 Seiten) ,
- Einbauanweisung (38 Seiten) ,
- Gebrauchsanweisung (12 Seiten)
Inhaltszusammenfassung für Truma Trumatic S 3002 P
-
Seite 1: Inhaltsverzeichnis
Zündautomat Nachrüstsatz Gebrauchsanweisung Seite 2 Einbauanweisung Seite 3 Im Fahrzeug mitzuführen! Operating instructions Page 7 Installation instructions Page 8 To be kept in the vehicle! Mode d‘emploi Page 11 Instructions de montage Page 12 À garder dans le véhicule ! - Seite 2 Trumatic S 3002 P (SLP 3002) Trumatic S 3002 P ab Baujahr 10/81 bis 05/96 ab Baujahr 05/96 from date of manufacture 10/81 until 05/96 after date of manufacture 05/96 á partir de l’année de fabrication 10/81 jusqu’à 05/96 á partir de l’année de fabrication 05/96...
-
Seite 3: Gebrauchsanweisung
Gebrauchsanweisung 4. Sind keine Zündfunken hörbar bzw. an der Zünd-Fernan- zeige sichtbar oder nur in Zeitabständen von mehr als einer Vor Inbetriebnahme unbedingt die der Heizung beige- Sekunde, muss die Batterie erneuert werden. fügte Gebrauchsanweisung und die darin enthaltenen wichtigen Bedienungshinweise beachten! Der Fahr- Batteriewechsel am Zündautomat zeughalter ist dafür verantwortlich, dass die Bedienung des Gerätes ordnungsgemäß... -
Seite 4: Einbauanweisung
Ab Bj. 02/92: Am Zündsicherungsventil (5) die 3 Rasthal- Einbauanweisung ter mit einem Schraubendreher zurückbiegen und Deckel abnehmen. 1. Heizungsverkleidung abnehmen: Bis Bj. 05/96: unten fassen, nach vorne ziehen und dann hochheben. Ab Bj. 05/96: oben nach vorne ziehen, Haltefedern seitlich hochdrücken und Verkleidung nach vorne klappen. - Seite 5 8. Bodenschraube (9) – bei Geräten bis Bj. 04/93 Befestigungs- 13. Zwei selbstklebende Kabelbefestiger wie abgebildet im schraube für das Wärme fühler-Abschirmblech (10) – an der unteren inneren Bereich der Heizungsverkleidung einkleben vorderen Ecke lösen. Kabelöse (11) für die Masseverbindung und Kabel befestigen.
- Seite 6 19. Heizungsverkleidung aufsetzen (dabei darauf achten, dass die Kabel nicht eingeklemmt werden): S 3002 bis Bj. 05/96: Verkleidung oben in den Einbaukasten einhängen, Bedienungsgriff in die Griffbuchse einführen und Verkleidung unten einrasten lassen. S 3002 ab Bj. 05/96: Die Verkleidung auf die unteren Hal- telaschen (l) stellen.
-
Seite 7: Operating Instructions
ZAS – Auto ignitor retrofit kit Operating instructions 4. If sparking is inaudible inaudible or nor visible at the remote ignition indicator, or takes place at intervals of more than a Always observe the operating instructions and “Impor- second, the battery needs replacing. tant operating notes”... -
Seite 8: Installation Instructions
From year of manufacture 02/92: Use a screwdriver to Installation instructions bend back the three retaining clips at the ignition safety val- ve (5) and remove the cover. 1. Remove heating case: Up to year of manufacture 05/96: Take hold at the bottom, draw forwards, and then lift upwards. - Seite 9 8. Release the base screw (9) on the front corner (for devices 13. Use adhesive to attach two self-adhering cable securing up to year of manufacture 04/93, the securing screw for the elements as illustrated in the lower inside area of the heating heat sensor screening pla te (10).
- Seite 10 18. Fit the Mignon battery provided into the automatic igni- tor (12). Ensure the polarity is correct. 19. Place the heating cladding in place (take care to ensure that the cable does not get caught): S 3002 up to year of manufacture 05/96: Suspend the cladding in the top of the installation box.
-
Seite 11: Mode D'emploi
ZAS – Allumeur automatique lot de rattrapage Mode d’emploi 4. Si des étincelles d’allumage ne sont pas audibles ou pas visibles sur l’affichage à distance de l’allumage, ou seule- Avant la mise en service, observer impérativement le ment à des intervalles de plus d’une seconde, la pile doit être mode d'emploi et les in-structions d'emploi importan- remplacée. -
Seite 12: Instructions De Montage
Jusqu’à l’année de construc tion 02/92 : retirer les 2 vis et Instructions de montage la pince de fixation sur la soupape de sûreté d’allumage (5) et enlever le couvercle. 1. Retirer l’habillage du chauffage : A partir de l’année de construction 02/92 : recourber les 3 fixations à... - Seite 13 6. Insérer le microcontacteur (7) avec câble de raccorde- 10. Raccorder les câbles d’allumage (1) et le câble de raccor- ment (8) dans la soupape de sûreté d’allumage (5) de telle dement (8) au niveau de l’automate d’allumage (12). sorte que le ressort du contact poin te en direction de la bague tournante (goupilles de fixation intégrées dans le boîtier).
- Seite 14 15. Fixer le câble d'adaptateur depuis l'arrière au système S 3002 à partir de l'année de construction 05/96 : mettre automatique d'allumage (il n'est pas nécessaire de respecter l'habillage sur les éclisses de retenue inférieures (I). Introduire une certaine polarité). la barre de manœuvre depuis le bas dans la douille de poignée et faire s'encliqueter l'habillage en haut.
- Seite 16 Truma Gerätetechnik GmbH & Co. KG Service Wernher-von-Braun-Straße 12 85640 Putzbrunn Telefon +49 (0)89 4617-2142 service@truma.com Deutschland Telefax +49 (0)89 4617-2159 www.truma.com...


