Inhaltsverzeichnis

Inhaltszusammenfassung für RAM 500
- Seite 1 Professional Power Amplifiers 1500-2000-3000-4000-3004-4004 S Series OPERATION MANUAL NOTICE D’EMPLOI BEDIENUNGSANLEITUNG P-7654-564 © 2006 by C.E. Studio-2 s.l. - Spain (EEC) http://www.ramaudio.com QXPDQXDoc 4/06 e-mail: support@ramaudio.com...
-
Seite 2: Safety Precautions
SAFETY PRECAUTIONS SICHERHEITSHINWEISE AVERTISSEMENTS WARNING: ACHTUNG!: RÈGLES DE SÉCURITÉ: The exclamation point inside an Das Ausrufezeichen innerhalb eines Le trinagle ponctué du point d’exclama- equilateral triangle indicates the existen- Dreiecks weist darauf hin, dass der tion central indique l’existence de com- ce of internal components whose substi- Austausch interner Bauteile die posants internes affectant la sécurité... -
Seite 3: Inhaltsverzeichnis
Pol.Ind. La Lloma C/Sierra Perenxisa nº28 46960 Aldaya - Valencia - SPAIN Phone: +34 96 127 30 54 Fax: +34 96 127 30 56 http://www.ramaudio.com e-mail: support@ramaudio.com P-7654-564 QXPDQXDoc 4/06 RAM Audio , SSP , ICL ™ ™ ™ ® QuantaPulse ™... -
Seite 4: General Information
Générales 1.1 Introduction 1.1 Einleitung 1.1 Introduction The S Series Power Amps is RAM Die Endstufe S ist RAM Audios Antwort Les amplis de puissance de la Série S Audio's response to our discerning auf die Nachfrage unserer Kunden nach sont en essence la réponse de RAM... -
Seite 5: Controls: Where And What
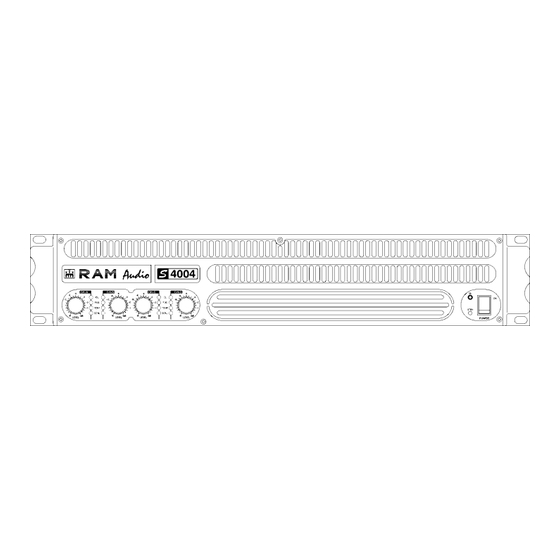
Controls: Lokalisierung der Commandes et Where and What? Funktionen Fonctions 2.1 Front Panel 2.1 Frontplatte 2.1 Panneau Avant See Figure Siehe Fig. Voir Fig. Signal attenuation level control Lautstärkeregler: diese ermögli- Atténuateurs de signal d’entrée knobs: Permit independent control chen die Signalstärke am Ausgang crantés: réglage du niveau d’entrée of each channel’s attenuation (21 in 21 Stufen zu regeln. -
Seite 6: Rear Panel
Controls: Lokalisierung der Commandes et Where and What? Funktionen Fonctions 2.2 Rear Panel 2.2 Rückplatte 2.2 Panneau Arrière See Figure Siehe Fig. Voir Fig. ® ® ® Signal Input: Female Neutrik Eingangssignal: Neutrik -XLR Connecteurs Neutrik XLR (feme- Connectors for the amplifier’s signal Buchsen für den Signaleingang der lle) d’entrée des signaux de modu- input. -
Seite 7: Installation And Operation
Installation and Anschluss und Installation et Operation Inbetriebnahme mise en service 3.1 Connections 3.1 Anschlüsse 3.1 Branchement The Power switch must always be on Bevor Sie diese Einheit an eine Veillez à ce que l’interrupteur de mise the “Off” position before plugging the SHUKO-Steckdose anschließen, schal- en service soit en position “Off”... -
Seite 8: Dual Channel Mode
Installation and Anschluss und Installation et Operation Inbetriebnahme mise en service The amplifier can operate on three diffe- Es gibt drei Funktionsmöglichkeiten die- L’amplificateur peut fonctionner en rent configurations: DUAL, LINK or ser Endstufe: Dual, Link und Bridge. Die mode stéréo, parallèle ou ponté BRIDGE. - Seite 9 Dual Channel 2 Channel models Link Inputs 2 Channel models Bridge Mode 2 Channel models...
-
Seite 10: Bridge Mode
Dual Channel 4 Channel models Link Inputs 4 Channel models Bridge Mode 4 Channel models Bridge + Dual Mode 3 Channels Mode... -
Seite 11: Configuration
Installation and Anschluss und Installation et Operation Inbetriebnahme mise en service 3.2 Configuration 3.2 Konfiguration 3.2 Configuration The amplifier has an ensemble of mini- Das Mini-dip-Ensemble auf der L'amplificateur a un ensemble de mini- dips on the back panel, which allow for Rückplatte der Endstufe ermöglicht fol- dips sur la face arrière qui permettent la the following configurations: the high-... -
Seite 12: Troubleshooting
Installation and Anschluss und Installation et Operation Inbetriebnahme mise en route 3.3 Troubleshooting 3.3 Problemlösung 3.3 Dysfonctionnements éventuels In the event of incorrect connection or Sollte sich eine Fehlfunktion ergeben, En cas d’utilisation incorrecte ou de misfunctioning, the amp will activate wird diese durch die LED-Anzeigen auf dysfonctionnement, une ou plusieurs one or more of its LED to warn about... -
Seite 13: Protection Systems
ICL2 ™ - Intelligent Clip Limiter nen. The RAM Audio ICL2 is an anticlip system to avoid speaker failure and provide more ™ - Limiteur Intelligent d'écrêtage acceptable sound quality even when clip- ™... -
Seite 14: Technical Specifications
4x 700 W 4x 980 W @ 4Ω 2x 575 W 2x 790 W 2x 1100 W 2x 1380 W 4x 500 W 4x 670 W @ 8Ω 2x 325 W 2x 460 W 2x630 W 2x 810 W 4x 300 W 4x 430 W Bridge @ 4Ω... - Seite 15 Manufactured in the EEC by C.E. Studio-2 s.l. Pol. Ind. La Lloma - C/Sierra Perenxisa nº28 46960 Aldaya - Valencia - SPAIN Phone: +34 96 127 30 54 Fax: +34 96 127 30 56 http://www.ramaudio.com e-mail: support@ramaudio.com...


