
Inhaltszusammenfassung für motogadget motoscope speedster
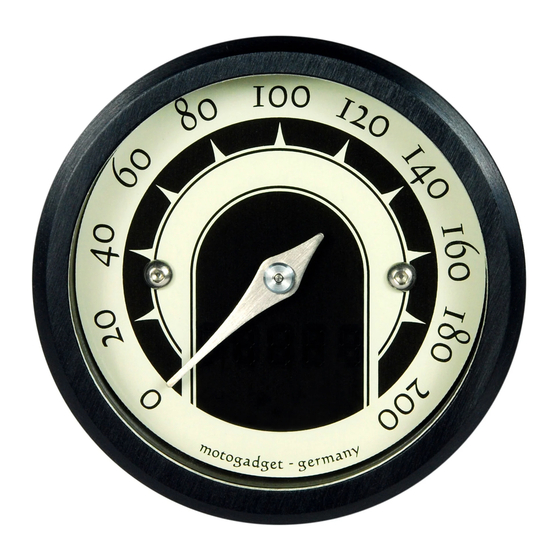
- Seite 1 Gebrauchsanweisung für das digitale Rundinstrument motoscope tiny / speedster / vintage ab Seriennummer 00000003 KBA 91260 ______________________________________________________________ Version 2.2...
- Seite 2 3. Hof, Aufgang D Köpenicker Str. 145 10997Berlin Tel. 030-27 59 19 20 Fax 030-27 59 19 22 www.motogadget.de info@motogadget.de © Copyright und alle Rechte bei motogadget, Berlin 2008-2013 motoscope und motogadget sind eingetragene Warenzeichen der motogadget GmbH, Berlin, Deutschland...
-
Seite 3: Überprüfung Der Lieferung
1 Überprüfung der Lieferung Jedes Produkt von motogadget wird in einwandfreiem und funktionsgeprüftem Zustand ausgeliefert. Bitte überprüfen Sie die erhaltenen Waren sofort auf eventuelle Transportschäden. Sollten Schäden oder Mängel vorhanden sein, setzen Sie sich bitte sofort mit uns in Verbindung. - Seite 4 Montagematerial wie Kabelbinder, Steckverbinder, Schrumpfschlauch, Lötkolben, Lötzinn Für den elektrischen Anschluss empfehlen wir, den Fahrzeugschaltplan zu Hilfe zu nehmen. Wenn Sie keinen Universalhalter von motogadget verwenden, benötigen Sie ein entsprechend stabiles Halteblech für das Gerät. Für die Positionierung des Tachosensors muss, je nach gewähltem Montageort, ebenfalls eine passende Befestigung gefertigt werden.
-
Seite 5: Allgemeine Sicherheitshinweise Zum Anbau Und Anschluss
Suchen Sie sich "geschaltetes Plus" für den Anschluss des braunen Kabels des Motoscope Tiny. Legen Sie sich weiterhin eine Leitung direkt vom Pluspol der Batterie zum Anschlussort des motoscope Tiny. Beachten Sie, dass diese beiden Anschlüsse je einer 5 A Sicherung abgesichert werden. - Seite 6 Hallgeber (zwei Anschlüsse) sind nicht mit dem motoscope mini kompatibel. Das Signalkabel des Sensors wird mit dem weißem Anschlusskabel des motoscope verbunden. Kann kein Tachosignal erkannt werden muss der motogadget Tachosensor (im Lieferumfang) verwendet werden. 8.3.2 Verwendung des motogadget Tachosensors Der mitgelieferte Tachometersensor ist ein Reedschalter.
-
Seite 7: Die Bedienung Und Das Anzeigen Der Funktionen
Spitze des Reedsensors darf nicht bündig in der Halterung sitzen, sondern muss ca. 5mm aus der Halterung herausstehen. Die Halterung darf nicht aus magnetisierbarem Material (Eisen, Stahl etc.) bestehen, sondern muss aus Aluminium, Edelstahl oder Kunststoff gefertigt werden. Der Abstand zwischen Magnet und Sensor darf maximal 2mm betragen und sich auch unter Last im Fahrbetrieb nicht ändern. - Seite 8 11.2 Der Gesamtkilometerzähler (in km oder ml) Der Gesamtkilometerzähler „Odo“ stellt die zurückgelegten Kilometer oder Meilen seit Inbetriebnahme des Instruments dar. Dieser Wert kann im Setup durch den Unterpunkt „SET ODO“ auf 0 gesetzt oder auch voreingestellt werden, wenn der alte Tachostand übernommen werden soll.
-
Seite 9: Sicherheitshinweise Für Den Betrieb Im Verkehr
12.4 Menü 4 – Einstellen des Radumfangs (SET CIRC) Diese Funktion dient zur Eingabe des Radumfangs in Millimetern. Messen Sie den Reifenumfang des Rades an dem der Tachosensor montiert ist mit einer Schnur. Addieren Sie eine Tachovoreilung von 5%, in dem Sie den gemessenen Wert mit 1.05 multiplizieren. Ein kurzer Tasterdruck (eine Kontrolllampe leuchtet) zählt die gewählte Stelle hoch. - Seite 10 Versand zu uns erfolgt auf eigenes Risiko, Sie sind für die ausreichende Versicherung der Sendung verantwortlich, achten Sie auf eine ausreichende Verpackung • legen Sie die Rechnung und das ausgefüllte Reparaturformular bei: http://motogadget.com/de/repairinquiry • bei nicht EU-Staaten muss in der Zollerklärung „Reparaturgerät“ und als Wert 1 Euro stehen Sicherung 1A...
- Seite 11 15.2 Zusammenführung von zwei Blinkerkontrolllampen motoscope tiny gelbes Kabel Pluspol von Pluspol von Blinkerkontrolllampe links Blinkerkontrolllampe rechts Dioden 1A Polung beachten 15.3 Übersicht Menüaufbau Normal Betrieb Setup Menü hour Minute hochzählen Set hour Stunde hochzählen Set Odo Stelle hochzählen löschen trip Stelle hochzählen...
- Seite 12 80/90 - 21 54 H TL 2045 190/50 ZR 17 (73W)TL 1878 90/90 - 21 54 S 2099 200/50 ZR 17 (75W) TL 1919 Das motogadget - Team wünscht Ihnen eine angenehme, sichere Fahrt und viel Spaß mit Ihrem neuen motoscope tiny.
- Seite 13 Operating and installation guide for the digital instrument motoscope tiny / speedster / vintage starting at serial number 00000003 KBA 91260 ______________________________________________________________ Version 2.1...
- Seite 14 Thank you very much for purchasing a high quality product by motogadget. Please read the following information and recommendations thoroughly and follow these instructions during installation and use of the instrument. No liability is assumed by motogadget for damage or defects resulting from negligence or failure to follow the operating and installation guide.
-
Seite 15: Exclusion Of Liability
1 Review of delivery All products from motogadget are thoroughly checked to ensure they are completely fault free when dispatched. Please check the received goods immediately for possible transport damage. If you find any damage or other deficiencies, please contact us immediately. -
Seite 16: Quick Start
If your vehicle is not equipped with a three wire speedometer sensor, the use of the delivered motogadget speedometer sensor is necessary. In case you do not use the motogadget mounting accessories, you have to make your own mounting bracket. If the motogadget speedometer sensor will be applied, you have to make your own sensor mounting bracket, or order the motogadget part (part number 3004099). -
Seite 17: General Safety Instructions
Remove the ground cable from battery terminal. Route all cables from instrument, voltage supply, the speed sensor, menue push button and indicator lights to their chosen location. Then connect the cables according to the circuit diagram provided in the appendix. Re-connect the vehicle battery and turn the voltage supply “on”... - Seite 18 Connect Speedometer sensors signal cable with motoscope tiny’s orange connection cable. If you don’t get a speed signal (no needle movement while wheel rotation), your OEM sensor is not compatible with the device. In this case you have to use the motogadget speedometer sensor. 8.5.2 Use of the motogadget speedometer sensor The motogadget speedometer sensor is a reed sensor.
- Seite 19 The speedometer sensor has to be mounted to the vehicle by using a self made holding bracket. The sensor tip has to be fastened parallel to the magnet's surface. The gap between the magnet and the sensor must not exceed 4 mm and the sensor must not touch the magnet or any other rotating parts.
- Seite 20 In this menu you can set the amount of speedometer senor impulses per wheel revolution. There is no need for adjustments if using the motogadget speedometer senor with one magnet. If you use more than one magnet the amount of magnets has to be adjusted. If using an OEM speedometer sensor, set the amount auf output pulses per wheel revolution.
-
Seite 21: Safety Instructions
operation (two indicator lights are illuminated) change between the digits. If the push button is hold for some seconds, the display will be switch back to the setup main menu. If the function TEACH is used there no need to adjust something in this menu. 12.5 Menue 5 –... - Seite 22 - print and fill the repair return form (refer link below) and attach it http://motogadget.com/media/downloads/support/form_return_repair.pdf - Not prepaid shipments will be rejected. - The Shipment to motogadget is carried out by your own risk - you are responsible for a sufficient insurance. - Make sure the package is adequate.
- Seite 23 15.2 Joining of two turn signal indicator lights motoscope tiny yellow cable plus from plus from indicator control left indicator control right diode 1A observe polarity 15.3 General overview of operation Normal Operation Setup Menue minute count up Set hour hour hour count up...
- Seite 24 15.4 Table of tire circumferences Zoll Reifendimension Abrollumfang für Zoll Reifendimension Abrollumfang für Inch Tyre Size ABE / Gutachten Inch Tyre Size ABE / Gutachten 100/90 16 1770 90/90 - 18 51 H TL 1869 110/90 16 1824 100/90 - 18 56 H 1924 120/80 16 1806...