
Verwandte Anleitungen für AEG 124


Inhaltszusammenfassung für AEG 124
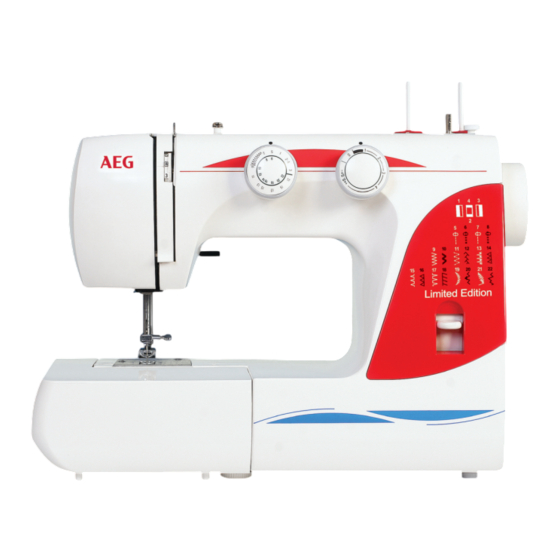
- Seite 1 BEDIENUNGSANLEITUNG USER MANUAL NOTICE D'UTILISATION MANUALE DI ISTRUZIONI Limited Edition NAHMASCHINE SEWING MACHINE MACHINE Ä COUDRE MACCHINA PER CUCIRE...
- Seite 2 Sicherheitshinweise Nähmaschine Model AEG124 Warnhinweise 1. Halten Sie Ihre Finger weg von allen sich bewegenden Teilen. Besondere Vorsicht ist rund urn die Nadel der Nähmaschine geboten. Beim Gebrauch eines Elektrogeräts sollten stets grundlegende Sicherheitsmaßnahmen beachtet werden. Dazu gehören: Lesen Sie sämtliche Hinweise vor Gebrauch Ihrer Haushaltsnähmaschine...
- Seite 3 Inhaltsverzeichnis Hauptteile Bezeichnungder Bauteile Gamrollenhalter Hauptteile der Maschine Fadenführung zum Spulen Spulerstop Nähvorbereitung Fadenführung Spulerstitt Fußanlasser Nählicht Stichlängenwahlknopf Anschiebetisch (Zubehörbox) Fadengeber Nähfu ßbefestigung Rückwärtstaste Nadelwechsel Kopf d eckel Aufspulen des Unterfadens Einsetzen der Spule Stichplatte Einfädeln des Oberfadens Heraufholen des Unterfadens Regulieren der Oberfadenspannung Stichwahlknopf Stichprogramm...
- Seite 4 Nähvorbereitung Der Anschiebetisch (Zubehörbox) ANSCHLUSS DES FUßANLASSERS Für normale Näharbeiten sollte der Anschiebetisch verwendet werden. Dadurch Wird die Arbeitsfläche vergrößert und somit das Nähen erleichtert. Verbinden Sie den Fußanlasser Kabel wie abgebildet. Bevor Sie die Maschine anschließen, beachten Sie ENTFERNEN DES ANSCHIEBETISCHES bitte, dass die Netzspannung mit der...
- Seite 5 Aufspulen des Unterfadens Auswechseln Nadel Handrad in Ihre Richtung drehen, bis die Nadel in Führen Oberfaden in der höchster Stellung ist. Nun den Nähfußlifter nach Abbildung gezeigt über Kreuz um die unten stellen. Fadenführung furs Aufspulen. Einsetzen neuen Nadel: Führen Fadenende 5 cm flache...
- Seite 6 Heraufholen Unterfadens Einsetzen der Spule Fadenende des Oberfadens mit der linken Hand wie in Abb. halten. Faden in den Schlitz der Spulenkapsel gleiten lassen. Faden nach links ziehen, unter die Spannungsfeder hindurch bis zur Öffnungziehen. Drehen Sie nun das Handrad langsam in ihre Richtung, bis der Faden- geber sich wieder in der höchsten Stellung befindet.
- Seite 7 Einstellung der Stretchstiche Stichprogramm Einstellmakierung IJm die Stretchstiche einzustellen, Musterwahlknopf (Programm-Selector) Einstellmarke (Stiche im inneren Kreis) drehen Sie den Stichlängeneinstellknopf Dieser Knopf Wird entsprechend dem in den Bereich —SS+. gewünschten Muster gedreht, entweder nach links Oder nach rechts. Bitte beachten Sie, dass beim Drehen des Musterknopfes, die Nadel immer in Stichlangeneinstellung höchster...
- Seite 8 Offener Overlockstich Geradstich Fadenspannung Stichlånge SS 2 auf Zick.Zack.Fuß Stellen Sie die Maschine Stichwahlknopf Maschinen Einstellung Fadenspannung Stich lange in Abb. 1.5 auf4 (o. Overlockfuß Stich Sonderzubehör) Zick-Zack-FuB Legen Sie Zwei Stoffe mit den rechten Seiten aufeinander. (Abb.) Mit diesem Stich können Sie nun nähen...
- Seite 9 Reißverschluß einnähen Knopf annähen Maschinen Einstellung Stellen Sie die Maschine Maschinen Einstellung Stichwahlknopl Fadenspannung Stichlange Stellen Sie die Maschine wie in Abb. ein. stich(A) Stich(C) wie in Abb. ein. Stichwahlknopf Zipp•Fuß Verwenden Sie zum Zick-Zack-Fuß Knopfannähen Stopfplatte. Stellen Sie die Maschine wie in Abb. ein. Befestigen Sie die Nähfußsohle so an dem Füßchenhalter, dass Sie rechts von der Nadel liegt.
- Seite 10 Muschelsaum Knopfloch nähen Maschinen Einstellung Stichwahlknopf Fadenspannung Stichlänge 1-3 Stellen Sie die Maschine Maschinen Einstellung Stichwahlknopf 5auf wie in Abb. ein. Stich Stich (G) Zick-Zack-Fuß Stichlänge Fadenspannung Nähen Sie als Test ein Knopfloch von 3 auf 5 einem Stück Reststoff. Stellen Maschine Dies hilft, Fehler...
- Seite 11 Reinigen und Warten der Maschine Einfädeln der Zwillingsnadel Bei allen Wartungsarbeiten wie z. B. Nadel wechseln, einem Stück Reststoff. Reinigenund Olen muss die Stromzufuhr unterbrochen werden. Entfernen der Spulenkapsel Nadel in höchste Position bringen. Öffnen Sie die Klappe der Spulenkapsel und nehmen Sie diese nun heraus.
- Seite 12 Funktionsstörungen Tipps für das Nähen mit dicken Stoffen. Z.B. Jeansstoff Manchmal ist es schwierig, bei sehr dickem Material die unterschiedlichen Höhen überwinden. Fuß steht hoch Nadel näht Stelle und unter dem Stoff entstehen große Schlaufen. Der Transporteur funktioniert Störung Ursache Beseitigung Seite nur reibungslos,...
- Seite 14 English IMPORTANT PLEASE READ CAREFULLY ONLY The wires in this mains lead are coloured in accordance with the following code: BROWN-LIVE (OR ACTIVE) BLUE-NEUTRAL As the colours of the mains lead of this appliance may not correspond with the coloured markings identifying the terminals in your plug PROCEED AS FOLLOWS: The earth plug pin is unnecessary.
- Seite 15 English WARNING Keep fingers away from all moving parts. Special care is required around the sewing machine needle Always use proper needle plate. The wrong plate can cause the needle to break. Do not use bent needles. Do not pull or push fabric while stitching. It may deflect the needle causing it to break. Switch the sewing machine off ("O") when making any adjustments in the needle area, such as threading needle, changing nee dle, threading bobbin, or changing presser foot, etc.
- Seite 16 TABLE CONTENTS SECTION ESSENTIAL PARTS SECTION BASIC SEWING Straight Stitch Sewing Names of Parts ....To Change the Sewing Directions Zigzag Stitching. SECTION GETTING READY Connecting the Machine to the Power Supply SECTION UTILITY STITCHING Foot Control Extension Table (Accessory storage Box)..
- Seite 17 PARTS DIAGRAM Names Parts Spool Bobbin Winder Bobbin Winder Thread guide Stopper Bobbin Winder Thread Guide Spindle Stitch Length Control Take up lever Reverse Stitch Lever Face Plate Needle Plate Stitch Selector Top Cover Top Thread Tension Contro Wheel ance ever Hook Cover...
- Seite 18 GETTING READY Connecting the Machine to the Power Supply Before connecting the machine to the power supply, make sure that the voltage and frequency of your electricity matched that of the machine Fit the nonreversible plug into the cord socket plug the machine into the...
- Seite 19 Extension Table (Accessory Storage Box) Extension Table The extension table provides added sewing surface and can be easily removed for free arm sewing. For free arm sewing Pull extension table away from the machine, as illustrated For attaching the table Push the extension table toward the machine...
- Seite 20 Undo the needle clamp screw just enough to release the needle Changing Needles Switch off the machine and disconnect the machine from the power point Loosen the needle clamp screw by turning it counter-clockwise Remove the needle from the clamp. Insert the new needle into the needle clamp with the flat side away from you.
- Seite 21 Removing or Inserting the Bobbin Case Switch off the machine while doing this Setting spool pin Recess hook race Horn Pullout the spoolPin.Insertthe shorterSideof spool Raise the need e by turning the balance Open the hook cover. When inserting the bobbin case, place Pin into the machine whee I towar d you.
- Seite 22 Threading Bobbin Case Place bobbin into bobbin case Pull thread into bobbin Draw thread under tension Make sure thread unwinds case slot. spring and into the delivery eye. direction arrow * Leave about 10 cm (4 inches) of free thread Threading the Machine Always thread your machine with the power off Ralse take-up lever to its highest...
- Seite 23 Drawing up Bobbin Thread 3 Pull 15 cm of both Raise presser foot and hold the needle thread Turn balance wheel slowly towards threads back lightly with your left hand with your right hand until the needle goes under the presser foot down continue...
- Seite 24 Stitch Selector Dial The stitch selector only determines the stitch you select, but also Setting mark regulates the stitch width for regular zigzag and rick rack stretch stitches Stitch Selector NOTE: To avoid needle or fabric damage, be sure your needle is up and out Of the fabric when adjusting...
- Seite 25 Adjusting Stretch Stitch Balance select Stretch Stitches, this control • Stitch Length position Settingmark n stretch stitch sewing,Stitch Length Control should be in the Center position between-and+(SSposition) for most materials. Depending upon the type of fabric used. you may need to adjust this control match forward...
- Seite 26 BASIC SEWING Straight Stitch Sewing Make sure the take-up lever is at the highest position before starting Machine Setting Stitch Stitch selector Top thread tension Stitch length control 2 to control 15-4 Raise the presser foot and position For fastening the ends of seams, press The threads are cut to the proper length...
- Seite 27 UTILITY STITCHING Overcasting Overedge Stitch Machine Setting Machine Setting Stitch Stitch selector Stitch Stitch selector Top thread tension Top thread tension contro 1 to 4 control 1 to Stitch length Stitch length control control 1 to This type of stitch is used on the seam Overedge stitches are most effective to prevent fabrics from fraying at raw edges.
- Seite 28 Zipper Application Rolled Machine Setting Machine Setting Stitch Stitch selector Stitch Stitch selector Top thread tension Stitch length Top thread tension Stitch length control 3 to control control 2 to control Pin or baste zipper tape to fabric and place it under foot.
- Seite 29 Sewing Buttons Machine Setting Stitch Stitch selector Zig zag foot Stitch length contro Top thread tension number (not contro 1 to Darning plate necessary to adjust) Use the darning plate for button sewing. (See page 10 ) A pin can be placed on top of the button to form a shank. strengthen the shank, threads...
- Seite 30 Buttonhole Stitching MachineSetting Stitch selector Stitch Stitch length control Upper thread tension dial 1 to 5 Buttonhole foot. Set the stitch selector Set the stitch selector down the left side stopping at 5 stitches of bartack raise Slide both threads left Make a sample button hole using a piece of •...
- Seite 31 DECORATIVE STITCHING Shell Tuck Machine Setting Place the folded edge along the slot of the Stitch Stitch selector foot. The needle should fall off the edge of the fabric on the right forming a tuck" Top thread tenston Stitch length control to 9 control...
- Seite 32 When caring for your machine, cleaning, removing the thread or any other function please make sure that the power is switched off and the machine is unplugged CARE OF YOUR MACHINE Disconnect your machine from the power souce Dismantling and Assembling Hook Race Oil with drop Of Oil.
- Seite 33 Trouble Shooting Condition Cause Reference Condition Cause Referemce machine does Threads have been caught in hook Skipped stitches See Page 17 A BALL POINT needle is not See page 5 (Continued) run smoothly and is mec hani sm being used for sewing stretch, very The feed dog...
- Seite 34 Meaningof crossedout wheeleddustbin: Do not disposeof electricalappliancesas unsortedmunicipalwaste, use separatecollectionfacilities. Contactyou localgovernmentfor informationregardingthe collectionsystemsavailable. f electricalappliancesare disposedof in landfillsor dumps,hazardoussubstancescan leak into the groundwaterand get into the foodchain, damagingyour healthand well-being. When replacingold applianceswith newones,the retaileris legallyobligatedto take backyour old appliancefor disposalsat least freeof charge. This applianceis not intendedfor use by persons(includingchildren)with reducedphysical,sensoryor mentalcapabilities,or lackof experience and knowledge,unlessthey have been givensupervisionor instructionconcerninguse of the applianceby a personresponsiblefor their safety.
- Seite 36 Italiano SOLO IL REGNO UNITO IMPORTANTE PREGA DI LEGGERE CON ATTENZIONE I fili della presa di alimentazione sono codificati a colori. BLU-NEUTRO MARRONE-ATTIVO Dato che i colori della presa di alimentazione potrebbero non corrispondere alle codifiche che identificano i morsetti della spina, PROCEDERE COME SEGUE: il polo della spina di terra non é...
- Seite 37 ATTENZIONE Non toccare Ie parti in movimento.Prestare particolare attenzione all'ago. Utilizzare sempre placche dell'ago adeguate perché una placca non adatta potrebbe provocare Ia rottura dell'ago. Non utilizzare aghi piegati. Durante Ia cucitura non tirare o spingere il tessuto,che potrebbe piegare I'ago causandone Ia rottura.
- Seite 38 INDICE SEZIONE I PARTI PRINCIPALI Regolazione dei punti stretch Cucitura delle asole---------------------------------------- Comando cucitura indietro- Nome delle parti-- Riga guida-bordi------------------------------------- Placca per il rammendo- SEZIONE V PUNTI DECORATIVI SEZIONE II PREPARAZIONE DELLA Posizione dell'ago a sinistra- Punto conchiglia- MACCHINA DA CUCIRE Modelli di punti strech-- SEZIONE Ill CUCITURE...
- Seite 39 PARTI PRINCIPALI Nome delle parti Portarocchetti Guida del Filo dell'avvolgitore Dispositivo di arresto della bobina dell'avvolgitore della bobina Guida del Filo Aspo avvolgitore della bobina Leva Tendi Filo Selettore Lunghezza Punto Placca Frontale Frontalino Comando cucitura Placca dell'Ago indietro Copertura del braccio Selettore di Cucitura Selettore...
- Seite 40 PREPARAZIONE DELLA MACCHINA DA CUCIRE Connessione della macchina all'alimentazione elettrica Pedale La velocitå di cucitura puö Prima di collegare la macchina alla presa di alimentazione, assicurarsi che il essere modificata agendo voltaggio e a frequenza dell'alimentazione elettrica siano conformi a quelli sul pedale.
- Seite 41 Piano accessorio(scatola degli accessori) Piano accessorio II piano accessorio consente di usufruire di una maggiore superficie utile per le operazioni di cucitura e puö essere rimosso ottenendo cosi un braccio libero Per togliere il piano accessorio,tirarlo verso sinistra. Per inserire il piano accessorio, spingerlo verso destra fino...
- Seite 42 Svitare la vite di fermo per sbloccare l'ago Sostituzione dell'ago Spegnere la macchina da cucire e scollegarla dalla presa di alimentazione. Allentare la vite di fermo dell'ago ruotandola in senso antiorario.Levare l'ago dal fermo. Inserire l'ago nuovo nel fermo con la parte piatta rivolta verso il lato posteriore della macchina Per inserire l'ago nel fermo, spingerlo fino in fondo e serrare la vite del...
- Seite 43 Rimozione o inserimento della capsula Durante questa operazione, spegnere la macchina Incavo Linguetta Incavo dell'anello del gancio e linguetta Inserendo a capsula Aprire il coperchio del gancio inserire la linguetta nell'incavo dell'anello del gancio Alzare l'ago ruotando la il volantino verso di voi.
- Seite 44 Preparazione della capsula O Sistemare l a bobina nellacapsula.@ Inserire il filonell'apertura della O Tirareil filo sotto la molladi Assicurarsi che il filo si svoiga nella capsula della bobina. tensionamento infilandolo direzione indicata dalla freccia. nell'apertura di erogazione *Lasciare circa 10 cm di filo libero.
- Seite 45 Prelievo filo dalla bobina @ Ruotarelentamente @ Tirareverso il retrocirca 15cm di entrambi 1 ollevare il piedino e tenere il filo dell'ago la mano sinistra il volantino verso di voi, facendo scendere i fili e abbassare il piedino e risalire l'ago fino alla sua posizione piü alta Tirare leggermente il filo dell'ago: il filo della bobina formerå...
- Seite 46 Selettore di cucitura segno di regolazione II selettore di cucitura non determina solo il punto scelto, ma regola anche la sua larghezza per punti zig-zag e smerlo stretch NOTA: per evitare danneggiamenti all'ago o al tessuto, assicurarsi che l'ago sia sollevato dal tessuto quando si effettua la regolazione.
- Seite 47 Regolazione dei punti stretch Per selezionare i punti stretch, spostare la manopola sulla segno di regolazione posizione SS. Nelle cuciture a punto stretch, il comando della lunghezza del lunghezza del punto punto deve trovarsi in posizione centrale tra "-"e"+" (posizione SS) per la maggior parte dei tessuti.
- Seite 48 CUCUTURE Dl BASE Prima di iniziare la cucitura assicurarsi che la leva tendifilo sia in posizione alta Cucuture diritte Impostazione macchina selettore punto punto tensione del filo superiore da 2 a 6 Alzare il piedino e posizionare Per fissare i punti di cucitura premere I fili vengono tagliati alla lunghezza tessuto vicino alla riga guida-bordi il comando...
- Seite 49 PUNTI Dl UTILITA'PRATICA Punto sopraffilo Punto sopraggitto Impostazione macchina Impostazioni della macchina selettore punto selettore di cucitura punto punto tensione del filo Regolazione della superiore da I a 4 tensione del filo superiore da I a 4 comanco della lunghezza del punt lunghezza Questo tipo di cucitura viene usata punto.da 1 a 2...
- Seite 50 Applicazione di cerniere Orlo arrotolato Impostazione macchina Impostazione macchina selettore punto selettore punto punto punto tensione del filo tensione del filo superiore da 3 a 6 superiore da 2 a 6 Spillare o imbastire Ia cerniera al capo e posizionarla sotto il piedino.
- Seite 51 Applicazione di bottoni Impostazioni macchina selettore punto punto piedino zig-zag Regolazione della tensione del filo superiore 1 a 4 placca per il rammendo comando della lunghezza del punto: non necessario Per la cucitura dei bottoni,utilizzare la placca per il rammendo(vedere a pag.
- Seite 52 Cucitura asola Regolazioni macchina Selettore punto Punto unghezza punto da Controllo tensione super ore da la5 Pledino asola Impostate il selettore punto su 2 Impostale il selettore punto su I Eseguite il lato sinistro cucite 5 punti della travetta Portate entrambi i fili a sinistra.
- Seite 53 PUNTI DECORATIVI Punto conchiglia Regolazioni macchina Posizionate il bordo ripiegato lungo la fessura del piedino. Punto Selettore punto L'ago deve cadere fuori dal bordo del tessuto, sulla destra, formando una pieghettatura. tensione superlore da 3 a 9 lunghezza punto da 1 a 2 piedino zig-zag Motivi a punto elastico Regolazioni...
- Seite 54 CURA DELLA MACCHINA NOTA:Scollegate la spina dalla presa di corrente quando eseguite la pulizia o la manutenzione della macchina Smontaggio e assemblaggio gruppo gancio Lubrificate una goccia dolio Rimuovete il gancio Aprite i supporti anello gancio Per smontare il gruppo gancio: Alzate l'ago nella posizlone piu alta e aprite il coperchio gancio.
- Seite 55 Risoluzione del problemi Problema Causa Problema Rif. Rif. Causa Macchina rumorosa Filo incastrato nel gancio Arricclature 1. Tensione superiore eccessiva Pag.8 Residui nella griffa Macchina non infilata correttamente Pag.7 a Irregolare 3. Ago troppo grosso per il tessuto Pag.5 Rottura filo superlore Infilatura ago non conetta pag 7 4.
- Seite 56 GETTARE! RICICLAGGIO Ci impegniamo a tutelare l'ambiente.Ci sforziamo di minimizzare I'impatto ambientale dei nostri prodotti tramite un processo continuo di miglioramento del design e dei metodi di fabbricazione. Afine vita del prodotto vi preghiamo di disporne in modo rispettoso della tutela ambientale. II simbolo del bidone sbarrato sopra illustrato, e riportato sull'etichetta riportante...
- Seite 57 IMPORTANT : PRESCRIPTION DE SECURITE Lors de l'utilisation d'un appareil électrique, des mesures élémentaires de sécurité doivent toujours etre respectées. Lire toutes les prescriptions avant utilisation, (de cet appareil) DANGER - Afin de réduire le risque d'électrocution: II ne faut jamais laisser un appareil sans surveillance lorsqu'il...
- Seite 58 ATTENTION 12.Eloignerlesdoigtsde touteslespartiesen mouvement.II faut faire particuliérementattentionau niveaude l'aiguille de la machineå coudre 13 .Toujours utiliser la plaque aiguille appropriée. Si vous n'utilisez pas la plaque appropriée, l'aiguille peut casser 14 .Ne pas utiliser d'aiguilles tordues. 15.Nepaspousser ni tirer le tissupendantquevouscousez.Cettemanoeuvre peutfaire dévier l'aiguille etla casser 16.Eteindrela machineå...
- Seite 59 TABLE MATIERES Couture de la Réglage du point stretch............15 PREMIERE PARTIE PARTIES ESSENTIELLES Marche POINTS DECORATIFS.. Coudre avec le guide fil... Nom des piéces..— Plaque de reprisage... Position de l'aiguille å gauche..........10 PARTIE ENTRETIEN MACHINE DEUXIEME PARTIEAVANT DE COMMENCER A COUDRE Démontage...
- Seite 60 Description de la machine Porte bobine Guide fil pour le bobinage stoppeur bobinage de la canette canette Guide fil pour Bobineur canette Réglage longueur Tendeur de fil de point bouton narche arriere Capot plaque aiguille Capot superieur Sélecteur de point Releveur Volant pied presseur...
- Seite 61 AVANT COMMENCER A COUDRE Le rhéostat Branchement de la pédale et du cordon d'alimentation éleetrique La vitesse de couture peut varier selon la pression exercée sur le rhéostat. Avant de brancher votre machine sur le secteur assurez-vous que la tension est la meme. Plus vous appuyez sur la Branchez le rhéostat å...
- Seite 62 Table d'extension (Boite d'accessoires) Table d'extension Permet d'optimiser votre surface de couture et permet d'utiliser la machine en bras libre Pour la couture en bras libre Enlever la tablette de la machine, comme illustré Pour la remettre en place La pousser dans son logement Pour changer le pied de biche Enlever le pied de biche Pour mettre...
- Seite 63 Changement d'aiguille Désserez la vis sufT1samment afin de libérer l'aiguille. Eteindre la machine et la débraneher Retirer l' aiguille Insérez un nouvelle aiguille dans son logement avec le coté plat vers l'arriére Insérer l'aiguille dans son logement aussi loin qu'elle puisse aller et serrer fermement la vis de maintien l'aide du tournevis.
- Seite 64 Fil supérieur Bourrage Installatio de la tige porte bobine Trous Mise en place du boitier Amenerl'aiguille sa position la plus haute Pour mettre en place le boitier canette, placer Ouvrir le cache coursiére Tirer la tige porte bobin.lnsérez la partie la plus en tournant le volant vers vous...
- Seite 65 Mise en place de la canette @ Passez lefil sous l eressort detension Placer la canette dans le boitier. Tirez le fil dans l'encoche du boitier Assurez vous que le fil sedéplacera et dans l'encoche, laissez peu pres 10 dans la direction de la fleche cm de fil libre...
- Seite 66 Se préparer å coudre Tournez le volant vers vous jusqu' ä ce que Levez le pied presseur, maintenir le fil avec la main Tirez une longueur de 15 emde chaque fil vers l'aiguille descendepuis remonte sa position l'arriére et abaissez le pied presseur la plus haute.
- Seite 67 Sélecteur de point marque Le sélecteur de point n'indique pas seulement le point que vous avez sélectionné mais regle également la largeur du point des points zig-zag et stretch Note : pour éviter de casserl'aiguille, assurezvous toujours que celle-ci est en position haute lors de ce réglage selecteur point...
- Seite 68 Réglage du point stretch Pour sélectionner le point stretch, amener Ie bouton sur la longueur de point position SS. Pour la couture du point stretch, le réglage de la longueur du point doit etre sur la position médiane, entre le - et le marque + (position SS) pour la plupart des tissus.
- Seite 69 BASES DE COUTURE Couture point droit Assurrez vous toujours que le releveur de fil est position haute avant de commencer Réglage de la machine point séleeteur de point contröle de la tension Sélecteur longueur de point supérieure de fil 2 å 6 1.5 —4 Abaissez le pied de biche sur le tissu å...
- Seite 70 Points utilitaires Point de recouvrement Surfilage Réglage de la machine Réglage de la machine point séleeteur de point point sélecteur de point contröle de la tension contröle de la tension supérieure de fil lä4 supérieure de fil lä4 Sélecteur longueur Sélecteur longueur de point SS de point lä2...
- Seite 71 Fermeture å glissiére Coudre un ourlet Réglage de la machine Réglage de la machine sélecteur de point sélecteur de point point point contr61e de la tension contröle de la tension Sélecteur longueur Sélecteur longueur de point 1.5ä4 supérieurede fil 2ä6 supérieurede fil 3ä6 de point 2 Placer la fermeture sous le tissu et le pied Placer les fils...
- Seite 72 Couture des boutons Réglage de la machine point sélecteur de point pied de biche zigzag contröle de la tension contröle longueur supérieure de fil lä4 de point Utiliser la plaque de reprisage pour la couture des boutons Placer le sélecteur sur la position " D"...
- Seite 73 mauvaise photo Point boutonniere Réglage de la machine sélecteur de point point contröle longueur de point contröle de la tesio supérieur de fil Pied de bichc boutornniére Placer le sélecteur sur la position ' " Coudre du coté gaucheet arretez Placer le sélecteur sur la position"...
- Seite 74 POINTS DECORATIFS Placer le tissu et procéder comme indiqué Réglage de la machine (l'aiguille doit piquer au bord du tissu) Réglage de la machine sélecteur de point point contrölede la tension supérieure de fil 3å6 Sélecteur longueur de point lä2 pied de biche zigzag Réglage de la machine contrölede...
- Seite 75 Lors de l'entretienou du nettoyage de votre machine,retirezle fil, débranchez le rhéostat (meme lors d'un changementd'aiguille) Entretient de votre machine Démontage etremontage dela coursiére Débranchez votre machine huiler avec unc goutte d'huile Pour démonter la coursiére amenez l'aiguille å sa Enlevez l'étrier de la eoursiére...
- Seite 76 PROBLEME CAUSE PROBABLE REMEDE CAUSE PROBABLE PROBLEME REMEDE La machine ne fonctionne 4.Une aiguille Ball point n'a pas été utilisée Les fils sont pris dans le crochet Points manqués(suite) II y a un bourrage au niveau de Ia pour Ie stretch,tissu tres fin et synthétique pas correctement ou est bruyante...
- Seite 77 PAS JETER RECYCLAGE Nous sommes concernés par la protection de l'environnement. Nous nous efforqons de reduire l'impact négatif de nos produits sur l'environnement en améliorant continuellement nos produits et nos méthodes de production. Lorsque Ie moment est venu de vous débarrasser de votre ancien appareil, nous vous demandons de le faire de la maniére la...
- Seite 80 ASM GmbH Lindenstraße6 49740 Haselünne Germany 888960005-14 888960005-14 www.aeg-sewingde info@aeg-sewing.de 09-2017 09-2017 AEG is a registered trademark used under license from AB E ectrolux (pub )