
Verwandte Anleitungen für Comfee Smart Cool 7000 Plus


Inhaltszusammenfassung für Comfee Smart Cool 7000 Plus
- Seite 1 MOBILE TYPE AIR CONDITIONER (Local Air Conditioner) Owner’s Manual IMPORTANT NOTE: Smart Cool 7000 Plus Before using your air conditioner, please read Smart Cool 7000 IE this manual carefully and keep it for future reference.
- Seite 2 CONTENTS Safety Precautions Preparation before installation Before you get start product overview Installation instructions Installation overview Installation guide Operation instructions Get to know your AC Drainage guide Cleaning & maintenance Store the unit when not in use TROUBLESHOOTING...
- Seite 3 Safety Precautions Must read the warning message. It’s really important you read Safety Precautions Before Operation and Installation Incorrect installation due to ignoring instructions can cause serious damage or injury. The seriousness of potential damage or injuries is classified as either a WARNING or CAUTION. Explanation of Symbols WARNING The signal word indicates a hazard with a medium level of riskwhich, if not avoided, may result in...
- Seite 4 WARNING Installation must be performed according to the Install the unit on a flat, sturdy surface. Failure to do so installation instructions. Improper installation can cause could result in damage or excessive noise and vibration. water leakage, electrical shock, or fire. The unit must be kept free from obstruction to ensure Use only the included accessories and parts, and proper function and to mitigate safety hazards.
- Seite 5 CAUTION This appliance can be used by children aged from 8 years Prior to cleaning or other maintenance, the appliance and above and person with reduced physical, sensory or must be disconnected from the supply mains. mental capabilities or lack of experience and knowledge Do not remove any fixed covers.
- Seite 6 Note about Fluorinated Gasses(Not applicable to the unit using R290 Refrigerant) 1. Fluorinated greenhouse gases are contained in hermetically sealed equipment. For specific information on the type, the amount and the CO2 equivalent in tonnes of the fluorinated greenhouse gas(on some models), please refer to the relevant labelon the unit itself.
- Seite 7 Compliance with national gas regulations shall be observed.Keep ventilation openings clear of obstruction. • The appliance shall be stored so as to prevent mechanical damage from occurring. • A warning that the appliance shall be stored in a well-ventilated area where the room size corresponds to the room •...
- Seite 8 1.Transport of equipment containing flammable refrigerants See transport regulations 2.Marking of equipment using signs See local regulations. 3.Disposal of equipment using flammable refrigerants See national regulations. 4.Storage of equipment/appliances The storage of equipment should be in accordance with the manufacturer's instructions.
- Seite 9 8)Checks to the refrigeration equipment Where electrical components are being changed, they shall be fit for the purpose and to the correct specification. At all times the manufacturer's maintenance and service guidelines shall be followed. If in doubt consult the manufacturer's technical department for assistance.
- Seite 10 8.Repair to intrinsically safe components Do not apply any permanent inductive or capacitance loads to the circuit without ensuring that this will not exceed the permissible voltage and current permitted for the equipment in use. Intrinsically safe components are the only types that can be worked on while live in the presence of a flammable atmosphere.
- Seite 11 This process shall be repeated until no refrigerant is within the system. When the final OFN charge is used, the system shall be vented down to atmospheric pressure to enable work to take place. This operation is absolutely vital if brazing operations on the pipe-work are to take place.Ensure that the outlet for the vacuum pump is not close to any ignition sources and there is ventilation available.
- Seite 12 15.Labelling Equipment shall be labelled stating that it has been de-commissioned and emptied of refrigerant. The label shall be dated and signed. Ensure that there are labels on the equipment stating the equipment contains flammable refrigerant. 16.Recovery When removing refrigerant from a system, either for servicing or decommissioning, it is recommended good practice that all refrigerants are removed safely.
- Seite 13 Before you get start Preparations before installation The installation must be Installing your AC We recommend We’re here if you need us, n u a carried out in strict should take about doing this with please contact your local accordance with the 30 minutes.
- Seite 14 How to purchasing a mobile type air conditioner. The right air conditioner helps you cool a room e ciently. An undersized unit won't cool adequately while one that's too large will not remove enough humidity, leaving the air feeling damp. To find the proper air conditioner, determine the square footage of the room you want to cool by multiplying the room length by its width.
- Seite 15 PRODUCT INSTALLATION LOCATION Your installation location should meet the following requirements: -Make sure that you install your unit on an even surface to minimize noise and vibration. -The unit must be installed near a grounded plug, and the Collection Tray Drain (found on the back of the unit) must be accessible. -The unit should be located at least 30cm (12”) from the nearest wall to ensure proper air conditioning.
- Seite 16 Product overview NOTE ON ILLUSTRATIONS: All the illustrations in the manual are for explanation purpose only. Your machine may be slightly di erent. The actual shape shall prevail. The unit can be controlled by the unit control panel alone or with the remote controller.
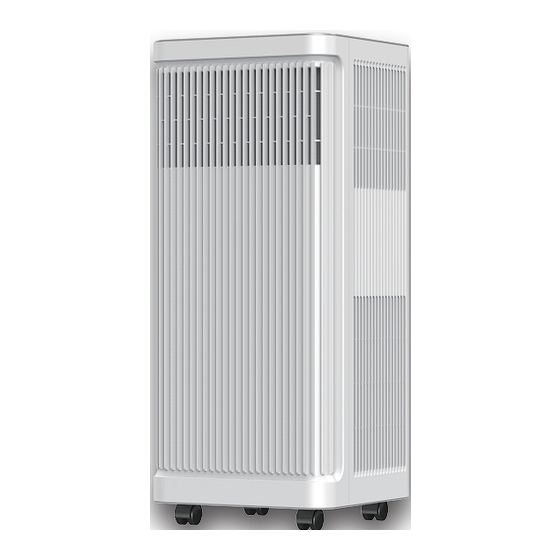
- Seite 17 model B Control panel Remote signal receptor Handle (both sides) Air outlet louver control Air filter lever-manual adjustment upper air intake (On some models) Drain outlet Air outlet Front panel Lower air intake Bottom tray drain outlet Caster Front View Rear View model C Control panel...
- Seite 18 Installation overview Installation Completion Display Window Slider B Window Slider A Extended Exhaust Hose Local Air Conditioner Security Bracket and 2 Screws NOTE Illustrations in this manual are for explanatory purposes. The actual shape of your indoor unit may be slightly di erent.
- Seite 19 List of installation tools (not included) Screwdriver & wrench Pencil A tape measure Scissors or Knife Saw (On some models, to shorten window adaptor for narrow windows) Installation accessories NOTE Items with (*) are on some models. Slight variations in design may occur. North America Unit Adaptor (1pc) Window Slider Adaptor(1pc)
- Seite 20 Other Regions Unit Adaptor (1pc) Window Slider Adaptor(1pc*) Exhaust Hose Adaptor(1pc*) Air exhaust passage(1pc*) Wall Exhaust Adaptor A (only for wall installation models)(1pc*) Foam Seal B (Adhesive) Foam Seal C (Non-adhesive) Security Bracket and 2 Screws (1 set*) Foam Seal A (Adhesive) Drain Hose (1pc) (2pc*) 1 pc(*)
- Seite 21 Confirm your window type (window type and opening size of di erent types) Sliding Window Installation Hung Window Installation For optimal performance in operation INCORRECT CORRECT NOTE: To ensure proper function, DO NOT overextend or bend the hose. Make sure that there is no obstacle around the air outlet of the exhaust hose (in the range of 500mm) in order to the exhaust system works properly.
- Seite 22 Installation guide Model A Model B Model C Model D Extended Exhaust Exhaust hose Air exhaust Exhaust hose hose Exhaust hose Exhaust hose assembly passage assembly Exhaust hose Exhaust hose Unit adaptor Window slider Unit adaptor Window slider Exhaust hose adaptor Air exhaust Unit adaptor...
- Seite 23 Connect the adaptor to the unit and the window MODEL A MODEL B MODEL C Before assembly Before assembly Bolt Window Window Sliders Sliders After assembly After assembly Bolt Window slider A Window slider B Bolt 1+2: 1+2: Bolt Bolt Bolt Bolt Bolt...
- Seite 24 Foam seal A Foam seal B (Adhesive type) (Adhesive type-shorter) Foam seal A Foam seal B (Adhesive type) (Adhesive type-shorter) Hung Window Installation Sliding Window Installation Complete sealing of window Cut the adhesive foam seal A and B strips to the proper lengths, and attach them to the window sash and frame as shown.
- Seite 25 Hung Window Installation Step 1: Step 2: Step 3: Insert the window slider Cut the non-adhesive foam seal C strip to match the width of If desired, install the security bracket assembly into the window the window. Insert the seal between the glass and the window with 2 screws as shown.
- Seite 26 Sliding Window Installation Step 1: Step 2: Step 3: Insert the window Cut the non-adhesive foam seal C strip to match the height of the If desired, install the security bracket slider assembly into window. Insert the seal between the glass and the window frame to with 2 screws as shown.
- Seite 27 Hung Window Installation Sliding Window Installation Install the Exhaust hose assembly Connect the adaptor to the unit to the unit and the window Push the Exhaust hose into the airoutlet opening of the unit along Insert the window slider adaptor into the hole of the window slider. the arrow direction.
- Seite 28 Get to know your AC Electronic control operating instructions 2. MODE function 3. UP and DOWN buttons 1. POWER button Selects the appropriate operating mode. Each Used to adjust (increasing/decreasing) Power switch on/o . time you press the button, the mode is selected temperature settings in Wireless operation(on some models) in a sequence that goes from AUTO, DRY, COOL...
- Seite 29 E4-Display panel communication error. Shows protection code: P1-Bottom tray is full--Connect the drain hose and drain the collected water away. If protection repeats, call for service. NOTE: When one of the above malfunctions occurs, turn o the unit, and check for any obstructions. Restart the unit, if the malfunction is still present, turn o the unit and unplug the power cord.
- Seite 30 Drainage guide Water collection tray Drainage Guide Dehumidifying Mode Drainage Guide Step 1: Remove the Step 2: drain plug Install the continuous drain hose Remove the bottom drain plug During dehumidifying modes, remove the drain plug from the back of When the water level of the bottom tray reaches a predetermined level, the unit, install the drain connector (5/8"...
- Seite 31 Cleaning & maintenance How to clean & maintenance your AC. Air Filter & Cabinet Cleaning Air filter (take out) Clean the unit using a damp, lint-free cloth and mild detergent. Dry the unit with a dry, lint-free cloth. Maintenance Tips ·...
- Seite 32 Store the unit when not in use Step 2 Step 3 NOTE Step 1 Be sure to store the unit in · hours a cool, dark place. Exposure to direct sunshine or extreme heat can shorten the lifespan of the unit. The cabinet and front may ·...
- Seite 33 TROUBLESHOOTING Problem Solving Common Issues The following problems are not a malfunction and in most situations will not require repairs. Problem Possible Causes Solution The Water Collection Tray is full. Turn o the unit, drain the water from the Water P1 Protection Code Collection Tray and restart the unit.
- Seite 34 The design and specifications are subject to change without prior notice for product improvement. Consult with the sales agency or manufacturer for details. Any updates to the manual will be uploaded to the service website, please check for the latest version.
- Seite 35 CP002UI-PA...
- Seite 36 MOBILE KLIMAANLAGE (Lokale Klimaanlage) Benutzerhandbuch WICHTIGER HINWEIS: Smart Cool 7000 Plus Bitte lesen Sie dieses Handbuch sorgfältig durch, bevor Smart Cool 7000 IE Sie Ihre Klimaanlage verwenden, und bewahren Sie es für zukünftige Nachschlagewerke auf.
- Seite 38 INHALTVERZEICHNIS Safety Precautions ----------------------------------------------------------------------- 01 Preparation before installation Before you get start ---------------------------------------------------------------------- 12 Product overview ------------------------------------------------------------------------- 15 Installation instructions Installation overview --------------------------------------------------------------------- 17 Installation guide ------------------------------------------------------------------------- 21 Operation instructions Get to know your AC --------------------------------------------------------------------- 27 Drainage guide ----------------------------------------------------------------------------29 Cleaning &...
- Seite 39 Sicherheitsvorkehrungen Sie müssen den Warnhinweis lesen. Es ist wichtig, die Sicherheitsvorkehrungen vor dem Betrieb und der Installation zu lesen. Eine unsachgemäße Installation, die auf die Nichtbeachtung der Anweisungen zurückzuführen ist, kann zu schweren Schäden oder Verletzungen führen. Die Schwere möglicher Schäden oder Verletzungen wird entweder als WARNUNG oder VORSICHT eingestuft. Erklärung der Symbole WARNUNG Das Signalwort bezeichnet eine Gefahr mit mittlerem Risiko, bei Nichtbeachtung kann es zum Tod oder zu schweren Verletzungen...
- Seite 40 WARNUNG • Die Installation muss gemäß den visuell das Gerät, um sicherzustellen, dass es keine Installationsanweisungen erfolgen. Falsche Installation Schäden aufweist. Wenn Sie vermuten, dass das kann zu Wasserlecks, Stromschlägen oder Bränden Gerät beschädigt wurde, wenden Sie sich an einen führen.
- Seite 41 Kurzschlüssen an elektrischen Bauteilen führen. • Alle Verkabelungen müssen streng gemäß dem Schaltplan im Inneren des Geräts durchgeführt • Installieren Sie das Gerät nicht an einem Ort, an dem werden. es brennbaren Gasen ausgesetzt sein könnte, da dies zu einem Brand führen könnte. •...
- Seite 42 • Bedienen oder stoppen Sie das Gerät nicht, indem Sie • Wenden Sie sich an den autorisierten den Netzstecker einstecken oder herausziehen. Kundendiensttechniker, um dieses Gerät reparieren oder warten zu lassen. • Verwenden Sie keine gefährlichen Chemikalien zur Reinigung des Geräts oder bringen Sie es nicht damit •...
- Seite 43 Hinweis zu Fluorierten Gasen (gilt nicht für das Gerät, das das Kältemittel R290 verwendet) 1. Fluorierte Treibhausgase sind in hermetisch verschlossenen Geräten enthalten. Genauere Informationen zu Art, Menge und das CO2-Äquivalent in Tonnen des fluorierten Treibhausgases (bei einigen Modellen) finden Sie auf dem entsprechenden Etikett am Gerät selbst.
- Seite 44 • Die nationalen Gasvorschriften sollten eingehalten werden. Halten Sie die Lüftungsöffnungen frei. • Das Gerät sollte vor mechanischen Beschädigungen geschützt werden. • Eine Warnung, dass das Gerät in einem gut belüfteten Bereich gelagert werden muss, dessen Raumgröße der Fläche des Raums entspricht, in dem der Betrieb vorgesehen ist. •...
- Seite 45 VORSICHT Dieses Symbol zeigt an, dass die Betriebsanleitung sorgfältig gelesen werden sollte. Dieses Symbol zeigt an, dass das Gerät von einem Servicemitarbeiter unter Bezugnahme VORSICHT auf das Installationshandbuch bedient werden sollte. Dieses Symbol zeigt an, dass Informationen wie die Betriebsanleitung oder das VORSICHT Installationshandbuch verfügbar sind.
- Seite 46 Sie sich, dass das verwendete Lecksuchgerät für den Einsatz mit brennbaren Kältemitteln geeignet ist, d. h. nicht funkensprühend, ausreichend abgedichtet oder eigensicher. 5) Vorhandensein eines Feuerlöschers Wenn thermische Arbeiten an Kälteanlagen oder zugehörigen Teilen durchgeführt werden sollen, ist es erforderlich, geeignete Feuerlöschanlage bereitzuhalten. Stellen Sie einen Trockenpulverlöscher oder CO2- Feuerlöscher in der Nähe des Ladebereichs bereit.
- Seite 47 9) Kontrollen an elektrischen Geräten Die Reparatur und Wartung von elektrischen Komponenten sollte eine initiale Sicherheitsprüfung und eine Komponenteninspektion. Wenn potenziell gefährliche Fehler vorliegen, darf die Stromversorgung nicht an den Stromkreis angeschlossen werden, bevor diese ordnungsgemäß behoben wurden. Wenn der Fehler nicht sofort behoben werden kann, aber der Betrieb fortgesetzt werden muss, sollte eine geeignete Zwischenlösung verwendet werden.
- Seite 48 9. Verkabelung Überprüfen Sie die Kabel vor Verschleiß, Korrosion, übermäßigem Druck, Vibrationen, scharfen Kanten oder anderen nachteiligen Umwelteinflüssen. Bei der Übeprüfung sind auch die Auswirkungen von Alterung oder ständigen Vibrationen von Quellen wie Kompressoren oder Lüftern zu berücksichtigen. 10. Erkennung von brennbaren Kältemitteln Unter keinen Umständen dürfen potentielle Zündquellen bei der Suche oder Erkennung von Kältemittellecks verwendet werden.
- Seite 49 heruntergezogen wird. Dieser Vorgang sollte so lange wiederholt werden, bis kein Kältemittel im System vorhanden ist. Wenn die letzte OFN-Füllung verwendet wird, sollte das System bis zum atmosphärischen Druck entlüftet werden, damit die Arbeiten durchgeführt werden können. Diese Operation ist absolut wichtig, wenn Lötoperationen an Rohren durchgeführt werden sollen.
- Seite 50 f) Stellen Sie sicher, dass der Zylinder auf der Waage steht, bevor die Rückgewinnung stattfindet. g) Starten Sie das Rückgewinnungsgerät und arbeiten Sie gemäß den Anweisungen des Herstellers. h) Die Flaschen dürfen nicht überfüllt werden. (Nicht mehr als 80 % des Volumens an Flüssigkeit einfüllen). i) Überschreiten Sie nicht den maximalen Betriebsdruck des Zylinders, auch nicht vorübergehend.
- Seite 51 nicht im Schmiermittel verbleiben. Der Entleerungsprozess sollte vor der Rückgabe des Kompressors an den Lieferanten durchgeführt werden. Um diesen Vorgang zu beschleunigen, darf nur eine elektrische Beheizung des Kompressorkörpers eingesetzt werden. Das Ablassen von Öl aus einem System muss auf sichere Weise erfolgen.
- Seite 52 Vorbereitung vor der Installation Bevor Sie beginnen Vorbereitungen vor der Installation Wir empfehlen, Die Installation muss Die Installation Wenn Sie uns benötigen, diese Arbeit streng nach den der Klimaanlage wenden Sie sich bitte an mit Hilfe eines Anweisungen in diesem dauert ca.
- Seite 53 Wie man mit einer Neuen Tragbaren Klimaanlage Kühl Bleibt (Für die Modelle, die den Anforderungen des US- Energieministeriums entsprechen). Aufgrund eines neuen bundesweiten Testverfahrens für Tragbare Klimaanlagen können Sie feststellen, dass die Kühlleistungsangaben auf den Verpackungen von tragbaren Klimaanlagen deutlich niedriger sind als bei Modellen, die vor 2017 hergestellt wurden. Dies ist auf eine Änderung des Testverfahrens zurückzuführen, nicht auf die tragbare Klimaanlage selbst.
- Seite 54 EINBAUORT DES PRODUKTS Ihr Aufstellungsort sollte die folgenden Anforderungen erfüllen: -Stellen Sie sicher, dass das Gerät auf einer ebenen Oberfläche installiert wird, um Lärm und Vibrationen zu minimieren. -Das Gerät muss in der Nähe eines geerdeten Steckers installiert werden und der Abfluss der Auffangplatte(auf der Rückseite des Geräts) muss zugänglich sein.
- Seite 55 Produktübersicht ANMERKUNG ZU DEN ABBILDUNGEN: Alle Abbildungen im Handbuch dienen nur der Erläuterung. Ihre Maschine kann etwas anders sein. Die tatsächliche Form ist maßgeblich. Das Gerät kann über das Bedienfeld des Geräts allein oder mit der Fernbedienung gesteuert werden. Die Bedienung der Fernbedienung ist in diesem Handbuch nicht enthalten. Weitere Informationen finden Sie im Lieferumfang >...
- Seite 56 Modell B Bedienfeld Fernsignalempfänger Griff (beide Seiten) Luftauslass Luftfilter Steuerhebel für die oberer Lamelle - manuelle Lufteinlass Einstellung (bei einigen Modellen) Abflussöffnung Luftauslass Frontplatte Unterer Lufteinlass Ablaufauslass für die Bodenwanne Lenkrad Vorderansicht Rückansicht Modell C Bedienfeld Fernsignalempfänger Griff (beide Seiten) Luftauslass Steuerhebel für die Luftfilter...
- Seite 57 Installationsanleitung Übersicht über die Anzeige des Installationsabschlusses Installation Fensterschieber B Fensterschieber A Verlängerter Auspuffschlauch Lokale Klimaanlage Sicherungsbügel und 2 Schrauben HINWEIS Die Abbildungen in diesem Handbuch dienen der Erläuterung. Die tatsächliche Form Ihres Innengeräts kann geringfügig abweichen. Die tatsächliche Form ist maßgeblich.
- Seite 58 Liste der Installationswerkzeuge (nicht im Lieferumfang enthalten) Säge (bei einigen Modellen zur Schraubenzieher und Schere oder Bleistift Ein Maßband Anpassung des Fensteradapters für Schraubenschlüssel Messer schmale Fenster) Installationszubehör HINWEIS Einige Modelle können ein (*) enthalten. Das Design kann leicht abweichen. Nordamerika Schaumdichtung A Geräteadapter (1...
- Seite 59 Andere Regionen Wandauspuffadapter A (nur Adapter für Fensterschieber (1 Adapter für Abgasschlauch (1 Geräteadapter (1 Stück) Abluftkanal (1 Stück*) für Wandmontagemodelle) (1 Stück*) Stück*) Stück*) Schaumdichtung A Schaumdichtung B (Klebstoff) (2 Schaumstoffdichtung C (nicht Sicherheitshalterung und 2 Ablaufschlauch (1 Stück) (Klebstoff) (2 Stücke*) Stücke*) klebend) 1 Stück (*)
- Seite 60 Bestimmen Sie Ihren Fenstertyp (Fenstertypen und verschiedene Öffnungsgröße) Schiebefenster-Montage Hängefenster-Montage Für optimale Laufleistung KORREKT FALSCH HINWEIS: Um eine ordnungsgemäße Funktion zu gewährleisten, sollte der Schlauch NICHT überdehnt oder gebogen werden. Stellen Sie sicher, dass es keine Hindernisse um den Auslass des Abgasschlauchs (im Bereich von 500 mm) gibt, damit die Abgasanlage ordnungsgemäß...
- Seite 61 Installationsanleitung Modell A Modell B Modell C Modell D Verlängerter Abgasschlau- Abgasschlauch Auspuffschlauch Luftabzugskanal Abgasschlauch chbaugruppe Abgasschlauc- Abgasschlauch hbaugruppe Abgasschlauch Geräteadapter Fenstersch- Geräteadapter Fensterschi- Abgasschlau- ieberadapter eberadapter chbaugruppe Geräteadapter Luftabzugskanal Abgasschlauchbaugruppe Installation der Abgasschlauchbaugruppe (für den Fenstereinbau) Drücken Sie den Abgasschlauch (oder den verlängerten Abgasschlauch) in den Fensterschieberadapter und den Gerätadapter und klemmen Sie ihn automatisch durch die elastischen Schnallen des Adapters fest.
- Seite 62 Verbinden Sie den Adapter mit dem Gerät und dem Fenster MODELL A MODELL B MODELL C Vor der Montage Vor der Montage Schraube Fensters- Fensterschieber chieber Nach der Montage Nach der Montage Schraube Fensterschieber B Fensterschieber A Schraube oder Schraube Schraube Schraube Schraube Schraube...
- Seite 63 Schaumstoffdichtung A Schaumstoffdichtung B Schaumstoffdichtung A Schaumstoffdichtung B (Mit Klebstoff-kürzer) (Mit Klebstoff) (Mit Klebstoff) (Mit Klebstoff-kürzer) Hängefenster-Montage Schiebefenster-Montage Vollständige Abdichtung des Fensters Schneiden Sie die Klebeschaumdichtungsstreifen A und B auf die richtige Länge zu und befestigen Sie sie wie gezeigt am Fensterflügel und -rahmen.
- Seite 64 Hängefenster-Montage Schritt 1: Schritt 2: Schritt 3: Setzen Sie die Schneiden Sie den nichtklebenden Schaumdichtungsstreifen Falls gewünscht, montieren Sie den Fensterschieberbaugruppe C auf die Breite des Fensters zu. Fügen Sie die Dichtung Sicherheitsbügel mit 2 Schrauben wie in die Fensteröffnung ein. zwischen Glas und Fensterrahmen ein, um zu verhindern, dass abgebildet.
- Seite 65 Schiebefenster-Montage Schritt 1: Schritt 2: Schritt 3: Setzen Sie die Schneiden Sie den nichtklebenden Schaumdichtungsstreifen Falls gewünscht, montieren Sie den Fensterschieberbaugruppe C auf die Höhe des Fensters zu. Fügen Sie die Dichtung Sicherheitsbügel mit 2 Schrauben wie in die Fensteröffnung ein. zwischen Glas und Fensterrahmen ein, um zu verhindern, dass abgebildet.
- Seite 66 Hängefenster-Montage Schiebefenster-Montage Die Abgasschlauchbaugruppe am Verbinden Sie den Adapter mit Gerät installieren dem Gerät und dem Fenster Schieben Sie den Abgasschlauch entlang der Pfeilrichtung in Setzen Sie den Fensterschieberadapter in die Öffnung des den Luftauslass des Geräts. Fensterschiebers ein.
- Seite 67 Betriebsanleitung Lernen Sie Ihre Klimaanlage kennen Bedienungsanleitung für die elektronische Steuerung Modus wird die Lüftergeschwindigkeit HINWEIS: 1. POWER (STROMVERSORGUNG)-Taste Beim Neustart der automatisch angepasst. Netzschalter ein/aus. KÜHLEN-Modus Wireless-Funktion kann es einige Kabelloser Betrieb (bei einigen Modellen) Drücken Sie die „MODE (MODUS)“-Taste , Zeit dauern, bis automatisch Wird verwendet, um den kabellosen bis die Kontrollleuchte „COOL (KÜHLEN)“...
- Seite 68 Lüfter-Modus Drücken Sie die „FAN SPEED eingestellt werden. Drücken Sie die „MODE (MODUS)“-Taste, (LÜFTERGESCHWINDIGKEIT)“-Taste auf der Halten Sie den Luftkanal nicht an das Fenster. bis die Kontrollleuchte „FAN (LÜFTER)“ Fernbedienung, um die Lüftergeschwindigkeit aufleuchtet. auszuwählen. Die Temperatur kann nicht 4. UP (AUF)- und DOWN (AB)-Tasten Dient zum Anpassen (Erhöhen/Verringern) der Temperatureinstellungen in Schritten von 1°C/2°F (oder 1 °F) in einem Bereich von 16°C/60°F bis 30°C/88°F (oder 86 °F).
- Seite 69 Entwässerungsanleitung Entwässerungsanleitung für Entfeuchtungsmodus Entwässerungsschiene für Wasserauffangwanne Schritt 1: Ablassschraube entfernen Schritt 2: Installieren Sie einen Schlauch Entfernen Sie für den kontinuierlichen Ablauf den unteren Ablassschraube Wenn der Wasserstand der Bodenwanne ein vorbestimmtes Niveau erreicht, piept das Gerät 8 Mal und der digitale Anzeigebereich Entfernen Sie im Entfeuchtungsmodus den Ablaufstopfen von der zeigt „P1“...
- Seite 70 Reinigung & Wartung Wie man seine Klimaanlage reinigt und pflegt. Luftfilter- und Schrankreinigung Luftfilter (herausn- ehmen) Reinigen Sie das Gerät mit einem feuchten fusselfreien Tuch und einem milden Reinigungsmittel. Trocknen Sie das Gerät mit einem trockenen fusselfreien Tuch ab. Tipps zur Wartung •...
- Seite 71 Lagern Sie das Gerät, wenn es nicht benutzt wird HINWEIS Schritt 2 • Bewahren Sie das Gerät an einem kühlen, dunklen Ort auf. Direkte Sonneneinstrahlung Schritt 3 oder extreme Hitze können Schritt 1 die Lebensdauer des Geräts Stunden verkürzen. • Der Schrank und die Vorderseite können mit einem ölfreien Tuch abgestaubt oder mit einem Tuch gewaschen werden, das...
- Seite 72 FEHLERSUCHE Problemlösung Häufige Fehler Die folgenden Probleme sind keine Fehlfunktionen und müssen in den meisten Situationen nicht repariert werden. Problem Mögliche Ursachen Lösung Die Wasserauffangwanne ist voll. Schalten Sie das Gerät aus, lassen Sie das P1 Schutzcode Gerät schaltet sich Wasser aus der Wasserauffangwanne ab und starten Sie das Gerät neu.
- Seite 73 Änderungen der Konstruktion und der technischen Daten zum Zweck der Produktverbesserung ohne vorherige Ankündigung sind vorbehalten. Wenden Sie sich an die Vertriebsstelle oder den Hersteller, um Einzelheiten zu erfahren. Alle Aktualisierungen des Handbuchs werden auf die Service-Website hochgeladen, bitte prüfen Sie die neueste Version.
- Seite 74 CP002UI-PA...
- Seite 75 MOBIELE AIRCONDITIONER (Lokale Airconditioner) Gebruiksaanwijzing BELANGRIJKE MEDEDELING: Voordat u uw airconditioner gebruikt, dient u deze handleiding Smart Cool 7000 Plus aandachtig door te lezen en te bewaren voor toekomstig gebruik. Smart Cool 7000 IE...
- Seite 77 INHOUDSOPGAVE Veiligheidsmaatregelen ------------------------------------------------------------------ 01 Voorbereiding vóór installatie Voordat je aan de slag gaat ------------------------------------------------------------- 14 Productoverzicht ------------------------------------------------------------------------- 17 Installatie-aanwijzingen Installatieoverzicht ----------------------------------------------------------------------- 19 Installatie gids ----------------------------------------------------------------------------- 23 Gebruiksaanwijzing Leer uw AC kennen -----------------------------------------------------------------------29 Afwateringsgids -------------------------------------------------------------------------- 31 Reiniging & onderhoud ------------------------------------------------------------------ 32 Berg de eenheid op als deze niet wordt gebruikt -----------------------------------33 PROBLEEMOPLOSSEN ------------------------------------------------------------------34...
- Seite 78 Veiligheidsmaatregelen Moet het waarschuwingsbericht lezen. Het is echt belangrijk dat u de Veiligheidsmaatregelen leest voordat u het apparaat gaat installeren en gebruiken. Het verkeerd installeren als gevolg van het negeren van de instructies kan tot ernstige schade of letsel leiden. De ernst van mogelijke schade of letsel wordt geclassificeerd als WAARSCHUWING of VOPGELET.
- Seite 79 WAARSCHUWING • De installatie moet worden uitgevoerd volgens de eenheid is beschadigd. installatie-instructies. Een verkeerd uitgevoerde • Bij onweer moet de stroom worden uitgeschakeld om installatie kan waterlekkage, een elektrische schok of schade aan de machine door bliksem te voorkomen. brand veroorzaken.
- Seite 80 • Het apparaat heeft wielen om het verplaatsen te • De printplaat (PCB) van het apparaat is voorzien van vergemakkelijken. Let erop de wieltjes niet op een een zekering om overstroombeveiliging te bieden. dik tapijt te gebruiken of over objecten te laten rollen De specificaties van de zekering zijn afgedrukt op de omdat dit tot omvallen kan leiden.
- Seite 81 • Gebruik geen gevaarlijke chemicaliën om het • Vervoer uw airconditioner tijdens gebruik altijd apparaat schoon te maken of ermee in contact te verticaal en plaats hem op een stabiele, vlakke komen. Gebruik het apparaat niet in de aanwezigheid ondergrond. van ontvlambare stoffen of dampen zoals alcohol, •...
- Seite 82 Opmerking over Gefluoreerde Gassen (Dit is niet van toepassing op de unit die R290-Koelmiddel gebruikt) 1. Gefluoreerde broeikasgassen zitten in de hermetisch afgesloten apparatuur. Voor specifieke informatie over het type, de hoeveelheid en het CO2-equivalent in ton van het gefluoreerde broeikasgas (op sommige modellen), verwijzen wij u naar het relevante etiket op het apparaat zelf.
- Seite 83 • Naleving van de nationale gasregelgeving moet in acht worden genomen. Houd ventilatieopeningen vrij van obstructies. • Het apparaat moet zodanig worden opgeslagen dat mechanische schade wordt voorkomen. • Een waarschuwing dat het apparaat moet worden opgeslagen in een goed geventileerde ruimte waar de kamergrootte overeenkomt met de kameroppervlakte zoals gespecificeerd voor gebruik.
- Seite 84 Verklaring van de symbolen die op de unit weergegeven worden (Alleen voor de unit gebruikt R32/R290- Koelmiddel): Dit symbool geeft aan dat dit apparaat een ontvlambaar koelmiddel gebruikte. Als WAARSCHUWING het koelmiddel lekt en wordt blootgesteld aan een externe ontstekingsbron, bestaat er brandgevaar.
- Seite 85 de ruimte rond het werkgebied is afgezet. Zorg ervoor dat de condities binnen het terrein veilig zijn door het beheersen van brandbaar materiaal. 4) Controleer op de aanwezigheid van koelmiddelen De ruimte moet voorafgaand aan en tijdens het werk worden gecontroleerd met een geschikte koelmiddeldetector om er zeker van te zijn dat de technicus op de hoogte is van mogelijk ontvlambare atmosferen.
- Seite 86 zichtbaar en leesbaar. Markeringen en tekens die onleesbaar zijn, moeten worden gecorrigeerd; Koelleidingen of componenten zijn geïnstalleerd op een plaats waar het onwaarschijnlijk is dat ze worden blootgesteld aan stoffen die koelmiddelhoudende componenten kunnen aantasten, tenzij de componenten zijn vervaardigd van materialen die inherent bestand zijn tegen corrosie of op passende wijze beschermd zijn tegen corrosie.
- Seite 87 8. Reparatie van de intrinsiek veilige componenten Pas geen permanente inductieve of capaciteitsbelastingen toe op het circuit zonder ervoor te zorgen dat dit de toegestane spanning en stroom die is toegestaan voor de gebruikte apparatuur overschrijdt. Intrinsiek veilige componenten zijn de enige typen waaraan gewerkt kan worden terwijl ze in aanwezigheid van een brandbare stoffen bestaan.
- Seite 88 12. Verwijdering en evacuatie Bij het inschakelen van het koudemiddel circuit voor reparatie of voor enig ander doel moeten conventionele procedures gebruikt worden. Het is echter belangrijk dat de beste praktijken worden gevolgd, aangezien ontvlambaarheid een overweging is. De volgende procedure moet worden gevolgd: Verwijder koelmiddel; Spoel het circuit door met een inert gas;...
- Seite 89 b) Isoleer elektrisch het systeem. c) Voordat u de procedure probeert, moet u ervoor zorgen dat: Indien nodig is er mechanische behandelingsapparatuur beschikbaar voor het hanteren van koelmiddelcilinders. Alle persoonlijke beschermingsmiddelen zijn beschikbaar en worden correct gebruikt; Het herstelproces staat te allen tijde onder toezicht van een bevoegd persoon; Terugwinningsapparatuur en cilinders voldoen aan de toepasselijke normen.
- Seite 90 16. Herstel Bij het verwijderen van koelmiddel uit een systeem, hetzij voor onderhoud of buiten bedrijfstelling, wordt aanbevolen om het koelmiddel veilig te verwijderen. Zorg ervoor dat alleen geschikte koelmiddelterugwinnin gscilinders bij het overbrengen van koelmiddel in cilinders worden gebruikt. Zorg ervoor dat het juiste aantal cilinders voor het vasthouden van de totale vulling van het systeem beschikbaar is.
- Seite 91 Voorbereiding vóór installatie Voordat je aan de slag gaat Voorbereidingen vóór installatie De installatie moet worden Het installeren We zijn er als u ons uitgevoerd in strikte Wij raden u aan van uw AC duurt nodig heeft. Neem voor overeenstemming met dit met een ongeveer 30 hulp contact op met uw...
- Seite 92 Hoe u koel kunt blijven met een nieuwe draagbare airconditioner (de modellen voldoen aan de vereisten van het Department of Energy in de VS). Vanwege een nieuwe federale testprocedure voor draagbare airconditioners zult u wellicht merken dat de claims over het koelvermogen op de verpakking van draagbare airconditioners aanzienlijk lager zijn dan die van modellen die vóór 2017 zijn geproduceerd.
- Seite 93 PRODUCTINSTALLATIELOCATIE De plek waar u de eenheid wilt installeren moet aan de volgende vereisten voldoen: -Zorg ervoor dat u uw apparaat op een vlakke ondergrond installeert om geluid en trillingen te minimaliseren. -De unit moet in de buurt van een geaarde stekker worden geïnstalleerd en de afvoer van de opvangbak (aan de achterkant van de unit) moet toegankelijk zijn.
- Seite 94 Productoverzicht MEDEDELING OVER DE ILLUSTRATIES: Alle illustraties in deze gebruiksaanwijzing zijn er alleen ter demonstratie. Uw machine kan ietwat afwijken. De daadwerkelijke vorm heeft voorrang. De eenheid kan worden gebruikt door middel van het bedieningspaneel of de afstandsbediening. In deze gebruiksaanwijzing wordt de bediening van de afstandsbediening niet vermeld.
- Seite 95 model B Bedieningspaneel Signaalontvanger Handvat op afstand (beide zijden) Luchtuitlaat Luchtfilter jaloeziebedieningshendel Luchtinlaat - handmatige aanpassing boven (op sommige modellen) Afvoeruitlaat Luchtuitlaat Frontpaneel Lagere luchtinlaat Afvoer bodembak Zwenkwieltje Vooraanzicht Achteraanzicht model C Bedieningspaneel Signaalontvanger Handvat op afstand (beide zijden) Luchtuitlaat jaloeziebedieningshendel Luchtfilter - handmatige aanpassing...
- Seite 96 Installatie-aanwijzingen Installatieoverzicht Weergave voltooid installatie Raamschuif B Schuifraam A Verlengde uitlaatslang Lokale airconditioner Beugel en 2 schroeven OPMERKING De illustraties in deze gebruiksaanwijzing zijn er om uitleg te geven. De daadwerkelijke vorm van uw binneneenheid kan ietwat afwijken. De daadwerkelijke vorm heeft voorrang.
- Seite 97 Lijst met installatietools (niet inbegrepen) Zaag (bij sommige modellen om de Schroevendraaier en Potlood Rolmaat Schaar of mes raamadapter voor smalle ramen te moersleutel verkorten). Installatieaccessoires OPMERKING Artikelen met een (*) bevinden zich op sommige modellen. Er kunnen wat afwijkingen in het ontwerp zitten. Noord-Amerika Eenheidsadapter (1 Schuimafdichting A...
- Seite 98 Andere regio’s Muuruitlaatadapter A Eenheidsadapter (1 st) Raamschuifadapter (1 st*) Uitlaatslangadapter (1 st*) Luchtuitlaatdoorgang (1 st*) (alleen voor modellen voor wandmontage) (1 st*) Schuimafdichting A Schuimafdichting B (klevend) (2 Schuimafdichting C (niet-klevend) Beugel en 2 Schroeven (1 set*) Afvoerslang (1 stk) (klevend) (2 st*) st*) 1 st(*)
- Seite 99 Bevestig uw raamtype (raamtype en openingsgrootte van verschillende typen) Installatie van opgehangen Schuifraam installatie ramen Voor optimale prestaties tijdens gebruik ONJUIST JUIST OPMERKING: Voor een goede werking mag u de slang NIET te ver uitrekken of buigen. Controleer of er een obstakels zitten rondom de luchtuitlaat van de uitlaatslang (rondom 500mm) zodat het uitlaatsysteem goed functioneert.
- Seite 100 Installatie gids Model A Model B Model C Model D Uitlaatslang verlenging Uitlaatslang Doorvoer Uitlaatslang Uitlaatslang montage Uitlaatslang luchtuitlaat Uitlaatslang montage Uitlaatslang Adapter Adapter voor Adapter Adapter voor Uitlaatslang schuifraam Doorvoer Adapter schuifraam montage luchtuitlaat Assemblage uitlaatslang De montage-installatie van de uitlaatslang (raamtype) Druk de uitlaatslang (of verlengde uitlaatslang) in de raamschuifadapter en unitadapter, klem automatisch vast door elastische gespen van de adapters.
- Seite 101 Sluit de adapter aan op het toestel en het raam Model A Model B Model C Vóór het assembleren Vóór het assembleren Bout Schuiframen Schuiframen Na het assembleren Na het assembleren Bout Schuifraam B Schuifraam A Bout Bout Bout Bout Bout Bout Buiten Binnen...
- Seite 102 Schuim afdichting B Schuim afdichting A Schuim afdichting A Schuim afdichting B (Kleefmiddeltype - korter) (Kleefmiddeltype) (Kleefmiddeltype - korter) (Kleefmiddeltype) Hangende Ramen Installatie Schuifraam installatie Volledige afdichting van het raam Zaag de plakkende schuimafdichtingen van de A en B-stroken op de juiste lengte, en sluit ze aan op het schuifraam en frame zoals geïllustreerd.
- Seite 103 Hangende Ramen Installatie Stap 1: Stap 2: Stap 3: Steek de assemblage Snijd de niet-klevende C-strip van schuimrubber zo af zodat Plaats de beugel met behulp van de 2 van de schuiver voor het deze overeenkomt met de breedte van het raam. Steek de schroeven zoals geïllustreerd, indien raam in de raamopening.
- Seite 104 Schuifraam installatie Stap 1: Stap 2: Stap 3: Steek de assemblage Snijd de niet-klevende C-strip van schuimrubber zo af zodat Plaats de beugel met behulp van de 2 van de schuiver voor het deze overeenkomt met de hoogte van het raam. Steek de schroeven zoals geïllustreerd, indien raam in de raamopening.
- Seite 105 Hangende Ramen Installatie Schuifraam installatie Installeer de assemblage van de Sluit de adapter aan op het toestel uitlaatslang op de eenheid. en het raam Duw de uitlaatslang in de luchtuitlaatopening van het apparaat Steek de adapter van de verschuiver voor het raam in het gat van in de richting van de pijl.
- Seite 106 Gebruiksaanwijzing Leer uw AC kennen Gebruiksaanwijzing elektronische besturing COOL (KOELEN) modus OPMERKING: 1. POWER (VERMOGEN)- knop Wanneer u de Houdt de knop “MODE (WIJZE)” net On/off (Aan/Uit) uitschakelen. zolang ingedrukt totdat de indicator “COOL draadloze functie opnieuw start, Draadloze bediening (op sommige modellen) (KOELEN)”...
- Seite 107 4. UP (OMHOOG)- en DOWN (OMLAAG)-knoppen Wordt gebruikt om de temperatuurinstellingen aan te passen (verhogen/verlagen) in stappen van 1°C/2°F (of 1°F) in een bereik van 16°C/60°F tot 30°C/88°F (of 86°F). OPMERKING: De bediening kan de temperatuur in zowel Fahrenheit als Celsius weergeven. Houd de knoppen Up (Omhoog) en Down (Omlaag) tegelijkertijd 3 seconden lang ingedrukt om van de ene eenheid naar de andere over te schakelen.
- Seite 108 Afwateringsgids Ontvochtigingsmodus Afvoergids Wateropvangbak Afvoergids Stap 1: Stap 2: Verwijder de Installeer de aftapplug doorlopende afvoerslang Verwijder de onderste aftapplug Als het water in de opvangbak een van tevoren vastgesteld peil Tijdens de ontvochtigingsmodi verwijdert u de aftapplug uit de heeft bereik zal de eenheid 8 keer piepen en verschijnt “P1”...
- Seite 109 Reiniging & onderhoud Hoe u uw airco schoonmaakt en onderhoudt. Luchtfilter en kastreiniging Luchtfilter (uitnemen) Maak de eenheid schoon met een vochtig, pluisvrije doek en een zacht schoonmaakmiddel. Droog de eenheid af met een droge, pluisvrije doek. Tips voor het onderhoud. •...
- Seite 110 Berg de eenheid op als deze niet wordt gebruikt Stap 2 OPMERKING • Zorg ervoor dat u het apparaat op een koele, donkere plaats Stap 3 bewaart. Blootstelling aan direct Stap 1 zonlicht of extreme hitte kan de levensduur van de eenheid verkorten.
- Seite 111 PROBLEEMOPLOSSEN Probleemoplossing Veelvoorkomende Problemen De volgende problemen zijn geen defecten en meestal zijn er geen reparaties voor nodig. Probleem Mogelijke Oorzaken Oplossing De wateropvangbak is vol. Schakel het apparaat uit, laat het water uit de P1 Beveiligingscode Het apparaat gaat wateropvangbak lopen en start het apparaat opnieuw op.
- Seite 112 Het ontwerp en de specificaties kunnen ter verbetering van het product zonder voorafgaande kennisgeving gewijzigd worden. Neem contact op met de verkoopvertegenwoordiger of fabrikant voor informatie. Updates van de gebruiksaanwijzing zullen worden geüpload naar de onderhoudswebsite; raadpleeg deze website voor de nieuwste versie.
- Seite 113 CP002UI-PA...
- Seite 114 CLIMATISEUR MOBILE (Climatiseur monobloc mobile) Manuel d’utilisateur REMARQUE IMPORTANTE : Smart Cool 7000 Plus Avant d'utiliser votre climatiseur, veuillez lire Smart Cool 7000 IE attentivement ce manuel et le conserver pour toute référence ultérieure.
- Seite 116 SOMMAIRE Précautions de sécurité ------------------------------------------------------------------ 01 Préparation avant l’installation Avant de commencer -------------------------------------------------------------------- 13 Présentation du produit ----------------------------------------------------------------- 1 6 Instructions d’installation Généralités de l'installation ------------------------------------------------------------- 18 Guide d'installation ----------------------------------------------------------------------- 2 2 Instructions d'opération Connaître votre climatiseur -------------------------------------------------------------28 Guide de drainage ----------------------------------------------------------------------- 30 Nettoyage et Entretien ------------------------------------------------------------------ 31 Ranger l’unité...
- Seite 117 Précautions de sécurité Il faut lire le message d'avertissement. Il est très important de lire les précautions de sécurité avant l'utilisation et l'installation. Une installation incorrecte due à l'ignorance des instructions peut entraîner des dommages ou des blessures graves. La gravité des dommages ou blessures potentiels est classée soit par AVERTISSEMENT ou par ATTENTION. Explication des symboles AVERTISSEMENT Le mot de signalisation indique un danger avec un niveau de risque moyen qui, s'il n'est pas évité,...
- Seite 118 AVERTISSEMENT • L’installation doit être effectuée conformément aux • En cas d’orage, le courant doit être coupé pour éviter instructions d’installation. Une installation incorrecte que la machine ne soit endommagée par la foudre. peut provoquer une fuite d’eau, un choc électrique ou •...
- Seite 119 • L'appareil avec chauffage électrique doit avoir au sont imprimées sur le circuit imprimé, telles que : T moins 1 mètre d'espace par rapport au matériau 3.15A/250V, etc. combustible le plus proche. • Lorsque la fonction de drainage de l'eau n'est pas •...
- Seite 120 • Ne faites pas fonctionner l’unité avec un câble, une prise, un fusible ou un disjoncteur endommagé. Jetez l'unité ou renvoyez-la à un centre de service autorisé pour examen et/ou réparation. • Pour réduire les risques d’incendie ou de choc électrique, n’utilisez pas ce ventilateur avec un dispositif de contrôle de la vitesse à...
- Seite 121 Remarque sur les gaz fluorés (Non applicable à l'unité utilisant le réfrigérant R290) 1. Les gaz à effet de serre fluorés sont contenus dans un équipement hermétiquement fermé. Pour des informations spécifiques sur le type, la quantité et l’équivalent CO2 en tonnes de gaz à effet de serre fluoré (sur certains modèles), veuillez-vous reporter à...
- Seite 122 • Un avertissement indiquant que l’appareil doit être rangé dans une zone bien ventilée où la taille de la pièce correspond à celle spécifiée pour le fonctionnement. • Toute personne engagée dans des travaux de circuit frigorifique ou impliquée dans le circuit frigorifique doit détenir le dernier certificat valide d’une agence d’évaluation reconnue par l’industrie, qui peut les autoriser à...
- Seite 123 1. Transport d’équipements contenant des réfrigérants inflammables Voir les réglementations de transport 2. Marquage de l’équipement à l’aide de panneaux Voir les réglementations locales 3. Élimination des équipements utilisant des réfrigérants inflammables Voir les réglementations nationales. 4. Stockage des équipements/appareils Le stockage des équipements devrait se conformer aux instructions du fabricant.
- Seite 124 6) Aucune source d’inflammation Aucune personne effectuant des travaux en relation avec un système de réfrigération impliquant l’exposition de tuyauteries contenant ou ayant contenu du réfrigérant inflammable ne doit utiliser une source d’inflammation susceptible de provoquer un incendie ou une explosion. Toutes les sources d’inflammation possibles, y compris la cigarette, doivent être suffisamment éloignées du lieu d’installation, de réparation, d’élimination et d’élimination, pendant lesquelles un réfrigérant inflammable peut éventuellement être rejeté...
- Seite 125 Les contrôles de sécurité initiaux doivent inclure : Que les condensateurs soient déchargés : cela doit être fait de manière sûre pour éviter la possibilité d’étincelles ; Qu’il n’y ait pas de composants électriques et de câbles sous tension exposés lors du chargement, de la récupération ou de la purge du système ;...
- Seite 126 11. Méthodes de détection des fuites Les méthodes de détection des fuites suivantes sont jugées acceptables pour les systèmes contenant des réfrigérants inflammables. Des détecteurs électroniques de fuite doivent être utilisés pour détecter les réfrigérants inflammables, mais la sensibilité peut être insuffisante ou nécessite un réétalonnage. (L’équipement de détection doit être calibré...
- Seite 127 mis à la terre avant de le charger avec du réfrigérant. Étiquetez le système lorsque le chargement est terminé (s’il n’est pas prêt). Un soin extrême doit être pris pour ne pas trop remplir le système de réfrigération. Avant de recharger le système, il doit être testé...
- Seite 128 k) Le réfrigérant récupéré ne doit pas être chargé dans un autre système de réfrigération, sauf s’il a été nettoyé et vérifié. 15. Étiquetage L’équipement doit porter une étiquette indiquant qu’il a été mis hors service et vidé du réfrigérant. L’étiquette doit être datée et signée.
- Seite 129 Préparation avant l’installation Avant de commencer Préparation avant l’installation L'installation de Nous sommes là si vous Nous vous L'installation sera votre climatiseur avez besoin de nous, recommandons conforme aux instructions devrait prendre veuillez contacter votre de vous faire de ce manuel. environ 30 distributeur local pour aider.
- Seite 130 Comment acheter un climatiseur mobile. Le bon climatiseur vous aide à refroidir efficacement une pièce. Une unité sous-dimensionnée ne refroidira pas correctement tandis qu'une unité trop grande n'éliminera pas assez d'humidité, laissant une sensation d'humidité dans l'air. Pour trouver le bon climatiseur, déterminez la superficie en pieds carrés de la pièce que vous souhaitez rafraîchir en multipliant la longueur par sa largeur.
- Seite 131 EMPLACEMENT D’INSTALLATION DU PRODUIT Votre emplacement d'installation doit répondre aux exigences suivantes: - Assurez-vous d’installer votre unité sur une surface plane afin de minimiser le bruit et les vibrations. - L’unité doit être installée à proximité d’une prise mise à la terre et le drain du plateau de récupération (situé à l’arrière de l’unité) doit être accessible.
- Seite 132 Présentation du produit REMARQUE SUR LES ILLUSTRATIONS : Toutes les illustrations de ce manuel sont uniquement à des fins d’explication. Votre machine peut être légèrement différente. La forme réelle prévaut. L’unité peut être contrôlée par le panneau de commande de l’unité seul ou avec la télécommande.
- Seite 133 Modèle B Panneau de commande Récepteur de signal à Poignée distance (deux côtés) Sortie d'air Filtre à air Levier de Entrée d'air commande de la supérieure persienne - réglage manuel (sur certains Sortie de drainage modèles) Sortie d'air Panneau avant Entrée d'air inférieure Sortie de...
- Seite 134 Instructions d’installation Généralités de l'installation Affichage de fin d'installation Coulisseau de fenêtre B Coulisseau de fenêtre A Tuyau d'échappement rallongé Climatiseur local Support de sécurité et 2 vis REMARQUE Les illustrations de ce manuel sont à titre explicatif. La forme réelle de votre unité...
- Seite 135 Liste des outils d'installation (non inclus) Scie (Sur certains modèles, pour Tournevis et clé à Ciseaux ou Crayon Un mètre ruban raccourcir l'adaptateur de fenêtre pour molette couteau les fenêtres étroites) Accessoires d’installation REMARQUE Les éléments avec (*) sont sur certains modèles. De légères variations dans la conception peuvent se produire. Amérique du Nord Adaptateur d'unité...
- Seite 136 Autres régions Adaptateur d'échappement Adaptateur pour coulisseau de Adaptateur du tuyau Passage d'échappement d'air (1 mural A (uniquement pour les Adaptateur d'unité (1 U) fenêtre (1 U*) d'échappement (1 U*) modèles d’installation murale) (1 U*) Joint en mousse A Joint en mousse B (adhésif) (2 Joint en mousse C (non adhésif) 1 U Support de sécurité...
- Seite 137 Confirmez votre type de fenêtre (type de fenêtre et taille d'ouverture des différents types) Installation de fenêtre Installation de fenêtres à coulissante guillotine Pour un fonctionnement optimal CORRECT INCORRECT REMARQUE : Pour assurer le fonctionnement correct, NE PAS trop étendre ou plier le tuyau. Assurez-vous qu’il n’y a pas d’obstacle autour de la sortie d’air du tuyau d’échappement (de l’ordre de 500 mm) afin que le système d’échappement fonctionne...
- Seite 138 Guide d'installation Modèle A Modèle B Modèle C Modèle D Tuyau Tuyau Assemblage Passage d'échappement d’échappement Assemblage du tuyau Tuyau d'échappement d'air rallongé du tuyau Tuyau Tuyau d’échappement d’échappement d’échappement d’échappement d’échappement Adaptateur Adaptateur pour Adaptateur Adaptateur Assemblage d’appareil coulisseau de d’appareil pour du tuyau...
- Seite 139 Raccordez l'adaptateur à l'unité et à la fenêtre Modèle A Modèle B Modèle C Avant l’assemblage Avant l’assemblage Boulon Coulisseau Coulisseau de fenêtre de fenêtre Après l'assemblage Après l'assemblage Boulon Coulisseau de fenêtre B Coulisseau de fenêtre A Boulon Boulon Boulon Boulon Boulon Boulon...
- Seite 140 Joint en mousse B Joint en mousse A Joint en mousse A Joint en mousse B (Type adhésif - plus court) (Type adhésif) (Type adhésif - plus court) (Type adhésif) Installation de fenêtres à guillotine Installation de fenêtre coulissante Étanchéité complète de la fenêtre Coupez les joints en mousse adhésifs A et B à...
- Seite 141 Installation de fenêtres à guillotine Étape 1 : Étape 2 : Étape 3 : Insérez l’assemblage du Coupez le joint en mousse non-adhésif C en fonction de la Si vous le souhaitez, installez le support coulisseau de fenêtre largeur de la fenêtre. Insérez le joint entre le verre et le cadre de sécurité...
- Seite 142 Installation de la fenêtre coulissante Étape 1 : Étape 2 : Étape 3 : Insérez l’assemblage du Coupez le joint en mousse non-adhésif C en fonction de la Si vous le souhaitez, installez le support coulisseau de fenêtre hauteur de la fenêtre. Insérez le joint entre le verre et le cadre de sécurité...
- Seite 143 Installation de fenêtres à guillotine Installation de fenêtre coulissante Installation de l’assemblage du Raccordement de l'adaptateur à tuyau d’échappement à l’unité l'unité et à la fenêtre Poussez le tuyau d'échappement dans l'ouverture de sortie d'air Insérez l’adaptateur pour coulisseau de fenêtre dans le trou du de l'appareil selon le sens de la flèche.
- Seite 144 Instructions d'opération Connaître votre climatiseur Instructions d'utilisation de la commande électronique Appuyez sur les boutons UP (HAUT) et 1. Bouton POWER (ALIMENTATION) 2. Bouton FAN (VENTILATEUR) DOWN (BAS) « » ou « » pour sélectionner la Commutateur d’alimentation on/off. Appuyez sur ce bouton pour contrôler température ambiante souhaitée.
- Seite 145 4. Boutons UP (HAUT) ET DOWN (BAS) Permettent de régler (augmenter/diminuer) la température par paliers de 1°C/2°F (ou 1°F) dans une plage de 16°C/60°F à 30°C/88°F (ou 86°F). REMARQUE : Le contrôle peut afficher la température en degrés Fahrenheit ou en degrés Celsius. Pour convertir l’un de l’autre, maintenez enfoncés les boutons Up (Haut) et Down (Bas) simultanément pendant 3 secondes.
- Seite 146 Guide de drainage Guide de drainage du Mode déshumidification Guide de drainage du Bac de récupération d’eau Étape 1 : Enlever le Étape 2 : bouchon de Installer le tuyau de drainage drainage continu Retirer le bouchon de drainage inférieur Lorsque le niveau d’eau du bac inférieur atteint un niveau prédéterminé, l’unité...
- Seite 147 Nettoyage et Entretien Comment nettoyer et entretenir votre climatiseur. Nettoyage du filtre et de l’armoire Filtre à air (retirer) Nettoyez l’appareil avec un chiffon humide non pelucheux et un détergent doux. Séchez l’unité avec un chiffon sec et non pelucheux. Conseils de maintenance •...
- Seite 148 Ranger l’unité lorsqu’elle n’est pas utilisée Étape 2 REMARQUE • Veillez à ranger l’unité dans Étape 3 un endroit sombre et frais. Étape 1 L’exposition directe au soleil heures ou à une chaleur extrême peut raccourcir la durée de vie de l’unité.
- Seite 149 DÉPANNAGE Résolution des problèmes Problèmes courants Les problèmes suivants ne constituent pas un dysfonctionnement et, dans la plupart des cas, ne nécessitent aucune réparation. Problèmes Causes possibles Solutions L’unité ne Le plat de collecte d’eau est plein. Éteignez l’unité, vidangez l’eau du bac de Code de protection P1 : fonctionne pas récupération d’eau et redémarrez l’unité.
- Seite 150 La conception et les spécifications sont sujettes à changement sans préavis pour l’amélioration du produit. Veuillez consulter l'agence de vente ou le fabricant pour plus de détails. Toute mise à jour du manuel sera téléchargée sur le site web du service, veuillez vérifier la dernière version.
- Seite 151 CP002UI-PA...
- Seite 152 KLIMATYZATOR PRZENOŚNY (Klimatyzator Lokalny) Instrukcja Obsługi WAŻNA UWAGI: Smart Cool 7000 Plus Przed użyciem klimatyzatora należy uważnie przeczytać Smart Cool 7000 IE niniejszą instrukcję i zachować ją na przyszłość.
- Seite 154 ZAWARTOŚĆ Środki Ostrożności ----------------------------------------------------------------------- 01 Przygotowanie przed instalacją Przed włączeniem klimatyzatora------------------------------------------------------- 13 Przegląd produktów --------------------------------------------------------------------- 16 Instrukcje Instalacji Omówienie instalacji --------------------------------------------------------------------- 18 Instrukcja montażu ----------------------------------------------------------------------- 22 Instrukcje obsługi Dane klimatyzatora -----------------------------------------------------------------------28 Obsługi do odprowadzania wody ----------------------------------------------------- 30 Czyszczenia i konserwacje -------------------------------------------------------------- 31 Przechowuj urządzenie, gdy nie jest używane --------------------------------------- 32 ROZWIĄZYWANIE PROBLEMÓW -----------------------------------------------------33...
- Seite 155 Środki Ostrożności Należy zwrócić uwagę na komunikat ostrzegawczy. Należy przeczytać najpierw „Środki ostrożności dotyczące bezpieczeństwa” przed wykonaniem pracy instalacyjnych. Nieprawidłowe czynności może spowodować uszkodzenia ciała lub szkody. Powaga potencjalnych uszkodzeń lub urazów jest klasyfikowana jako OSTRZEŻENIE lub OSTROŻNOŚĆ. Objaśnienie Symboli OSTRZEŻENIE Słowo ostrzegawcze wskazuje na niebezpieczną...
- Seite 156 OSTRZEŻENIE • Instalacja musi przebiegać według instrukcji instalacji. • Podczas burzy, zasilanie musi zostać odłączone, aby Nieprawidłowa instalacja może powodować wyciek uniknąć uszkodzenia urządzenia przez pioruny. wody, porażenie prądem lub pożar. • Twoja klimatyzacja powinna być używana w taki • Używaj tylko z dołączonymi akcesoriami i częściami sposób by chronić...
- Seite 157 • Nie uruchamiaj urządzenia, które przewróciło się lub • Płytka obwodu urządzenia (PCB) została jest uszkodzone. zaprojektowana z bezpiecznikiem zapewniającym • Urządzenie z ogrzewaniem elektrycznym powinno zabezpieczenie izolacyjne. Specyfikacje bezpiecznika znajdować się przynajmniej 1 metr od materiałów są wydrukowane na płycie głównej, takie jak: T palnych.
- Seite 158 • Nie należy zdejmować żadnych stałych osłon. Nie • Trzymaj wtyczkę kabla za główkę podczas wyciągania używaj tego urządzenia, jeżeli nie działa poprawnie wtyczki zasilania. lub jeśli zostało upuszczone lub uszkodzone. • Wyłącz urządzenie, kiedy go nie używasz. • Nie prowadź kabli pod dywanem. Nie należy •...
- Seite 159 Uwaga na temat Fluorowanych Gazów (Nie dotyczy urządzeń używających czynnika chłodniczego R290) 1. Fluorowane gazy cieplarniane są zawarte w hermetycznie zamkniętych urządzeniach. Szczegółowe informacje na temat typu, ilości i ekwiwalentu CO2 w tonach fluorowanych gazów cieplarnianych (w niektórych modelach) można znaleźć na odpowiedniej etykiecie umieszczonej na klimatyzatorze. 2.
- Seite 160 • Należy przestrzegać krajowych przepisów dotyczących gazu. Nie wolno blokować otworów wentylacyjnych. • Urządzenie powinno być przechowywane tak, aby uniknąć występowania uszkodzeń mechanicznych. • Ostrzeżenie, urządzenie będzie przechowywane w dobrze wentylowanym pomieszczeniu, w którym wielkość pomieszczenia odpowiada powierzchni pomieszczenia określonej dla działania. •...
- Seite 161 OSTROŻNOŚĆ Ten symbol pokazuje, należy uważnie przeczytać tą instrukcję. Ten symbol oznacza, że personel serwisowy powinien obchodzić się z tym urządzeniem OSTROŻNOŚĆ zgodnie z instrukcją instalacji. Ten symbol pokazuje, że dostępne są informacje, takie jak instrukcja obsługi lub OSTROŻNOŚĆ instrukcja montażu. 1.
- Seite 162 6) Brak źródeł zapłonu Żadna osoba wykonująca pracę związaną z układem chłodniczym, który zawiera lub zawierał łatwopalny czynnik chłodniczy, powinna używać jakichkolwiek źródeł zapłonu w sposób który może grozić pożarem lub wybuchem. Wszystkie możliwe źródła zapłonu, w tym palenie papierosów, powinny być utrzymywane w dostatecznej odległości od miejsca instalacji, naprawy, usuwania i likwidacji, ze względu na to że łatwopalny czynnik chłodniczy może przedostać...
- Seite 163 7. Naprawy uszczelnionych elementów 1) Podczas napraw uszczelnianych elementów należy odłączyć wszystkie urządzenia elektryczne od obrabianego sprzętu przed każdym usunięciem zapieczętowanych pokryw itp. Jeśli jest absolutnie konieczne, aby podczas serwisowania było zapewnione zasilanie elektryczne urządzeń, to stale działająca forma wykrywanie nieszczelności powinno znajdować...
- Seite 164 zawierające łatwopalne czynniki chłodnicze. (Urządzenia wykrywające należy skalibrować w miejscu wolnym od czynnika chłodniczego). Upewnij się, że wykrywacz nie jest potencjalnym źródłem zapłonu i jest odpowiedni dla używanego czynnika chłodniczego. Urządzenia do wykrywania wycieków należy ustawić w procentach LFL czynnika chłodniczego i należy je skalibrować...
- Seite 165 ostrożność, aby nie przepełnić układu chłodniczego. Przed ponownym naładowaniem systemu należy przeprowadzić próbę ciśnieniową przy pomocy OFN. Po zakończeniu ładowania należy przeprowadzić kontrolę szczelności układu, ale przed uruchomieniem. Kontrolę szczelności należy przeprowadzić przed opuszczeniem miejsca. 14. Likwidacja Przed wykonaniem tej procedury ważne jest, aby technik był w pełni zaznajomiony z urządzeniem i wszystkimi jego szczegółami.
- Seite 166 15. Oznakowanie Urządzenie powinno być oznakowane stwierdzając, że zostało wycofane z użytku i opróżnione z czynnika chłodzącego. Etykieta powinna być podpisana i opatrzona datą. Upewnij się, że etykieta została umieszczona na urządzeniu mówiąc, że zawiera łatwopalny czynnik chłodzący. 16. Odzyskiwanie Kiedy usuwasz czynnik chłodzący z systemu, bez względu czy ze względu na serwis czy likwidację, jest zalecane jako dobra praktyka by bezpiecznie usunąć...
- Seite 167 Przygotowanie przed instalacją Przed włączeniem klimatyzatora Prace przygotowawcze przed montażem Instalacja musi być Instalacja Zaleca się przeprowadzona w sposób W przypadku potrzeby klimatyzatora wykonanie tej zgodny z instrukcjami pomocy skontaktować się z zajmie około 30 czynności z zawartymi w niniejszej lokalnym dystrybutorem.
- Seite 168 Jak zapewnić sobie komfort za pomocą nowego przenośnego klimatyzatora (w przypadku modeli zgodnych z wymogami Departamentu Energii w USA) Ze względu na nowe federalne procedury testowania przenośnych klimatyzatorów, moc chłodzenia podawana na opakowaniach przenośnych klimatyzatorów, które można znaleźć, jest znacznie niższa niż w modelach wyprodukowanych do roku 2017. Należy podkreślić, że jest to spowodowane zmianami w procedurze testowej, a nie zmianami w samych klimatyzatorach przenośnych.
- Seite 169 MIEJSCA MONTAŻU KLIMATYZATORA Twoje miejsce instalacji powinno spełniać następujące wymagania: -Upewnij się, że urządzenie jest zainstalowana na równej powierzchni by zminimalizować hałas i wibracje. -Urządzenie musi być zainstalowane blisko uziemionego gniazdka, a tacka zbierania drenażu (z tyłu urządzenia) musi być dostępna. -Urządzenie powinno być...
- Seite 170 Przegląd produktów UWAGI DO ILUSTRACJI: Wszystkie ilustracje w instrukcji służą tylko celom wyjaśniającym. Twoje urządzenie może się nieznacznie różnić. Rzeczywisty kształt ma pierwszeństwo. Urządzenie może być sterowane przez panel kontrolny urządzenia sam lub dzięki pilotowi. Ta instrukcja nie zawiera Działań pilota, po więcej szczegółów zobacz <<Instrukcja Obsługi Pilota Zdalnego Sterowania>>...
- Seite 171 model B Panel sterowania Odbiornik sygnału Uchwyt zdalnego (obie strony) Wylot powietrza Filtr powietrza Dźwignia sterowania górny wlot żaluzją: do regulacji powietrza ręcznej w niektórych modelach ujście spustowe Wylot powietrza Panel przedni Dolny wlot powietrza Wylot spustowy dolnej tacy Odlew Widok z przodu Widok z tyłu Model C...
- Seite 172 Instrukcje Instalacji Omówienie instalacji Wyświetlanie zakończenia montażu Suwak okna B Suwak okna A Przedłużony przewód odprowadzający Lokalny klimatyzator Wspornik bezpieczeństwa i 2 śruby UWAGI Ilustracje w tym podręczniku służą wyłącznie celom informacyjnym. Rzeczywisty kształt jednostki wewnętrznej może się nieznacznie różnić. Rzeczywisty kształt ma pierwszeństwo.
- Seite 173 Lista narzędzi do montażu (narzędzie nie są dostarczone w zestawie) Piła (w niektórych modelach, do Śrubokręt i klucz Ołówek Rolka pomiarowa Nożyczki lub nóż skrócenia adaptera okiennego w przypadku wąskich okien) Instalacja wyposażenia UWAGI Pozycje z (*) występują w niektórych modelach. Mogą pojawić się niewielkie różnice w projekcie Ameryka Połnocna Uszczelka piankowa A Adapter do przewodu...
- Seite 174 Inne Regiony Adapter ścienny A do Adapter urządzenia (1 Adapter do suwaka okiennego (1 Adapter do przewodu przewodu odprowadzającego Wylot powietrza (1szt.*) szt.) szt.*) odprowadzającego (1 szt.) (tylko w przypadku modeli do montażu na ścianie) (1 szt.*) Uszczelka piankowa A Uszczelka piankowa B Uszczelka piankowa C Wspornik zabezpieczający i 2...
- Seite 175 Określić typ okna (typ okna i rozmiar otworu) Montaż do okien przesuwnych Montaż do okien wiszących Dla zapewnienia optymalnej wydajności podczas pracy BŁĘDNY POPRAWNY UWAGI: Aby zapewnić prawidłowe działanie, NIE przedłużaj ani nie wygninaj węża. Upewnij się, że wokół wylotu powietrza węża wylotowego nie ma żadnych przeszkód (w zakresie 500 mm), aby układ wydechowy działał...
- Seite 176 Instrukcja montażu Model A Model B Model C Model D Przedłużony przewód Montaż węża Wąż odprowadzający Wylot Wąż wydechowy wydechowego Montaż węża wydechowy powietrza Wąż wydechowy Wąż wydechowego wydechowy Adapter Adapter suwaka Wylot powietrza Adapter Adapter Montaż węża Adapter urządzenia okna urządzenia suwaka okna...
- Seite 177 Podłączyć adapter do klimatyzatora i okna Model A Model B Model C Przed montażem Przed montażem Śruba Suwak Suwak Okienny Okienny Po montażu Po montażu Śruba Suwak okna B Suwak okna A Śruba albo Śruba Śruba Śruba Śruba Śruba Wewn- Zewnę- Śruba Śruba...
- Seite 178 Uszczelka piankowa B Uszczelka piankowa A Uszczelka piankowa A Uszczelka piankowa B (Klej krótszy) (samoprzylepna) (Klej krótszy) (samoprzylepna) Montaż do okien wiszących Montaż do okien przesuwnych Zakończenie uszczelniania okna Odetnij paski z pianki A i B z pianki na odpowiednią długość i przymocuj je do skrzydła okiennego i ramy, jak pokazano.
- Seite 179 Montaż do okien wiszących Krok 1: Krok 2: Krok 3: Włóż zespół suwaka Wytnij nieprzylepną piankową taśmę C, dopasowaną do W razie potrzeby zainstaluj wspornik okiennego do otworu szerokości okna. Włóż uszczelkę między szybę i ramę okna, zabezpieczający za pomocą 2 śrub, jak okna.
- Seite 180 Montaż do Okien Przesuwnych Krok 1: Krok 2: Krok 3: Włóż zespół suwaka Wytnij nieprzylepną piankową taśmę C, dopasowaną do W razie potrzeby zainstaluj wspornik okiennego do otworu szerokości okna. Włóż uszczelkę między szybę i ramę okna, zabezpieczający za pomocą 2 śrub, jak okna.
- Seite 181 Montaż do okien wiszących Montaż do okien przesuwnych Zainstaluj zespół węża Podłączyć adapter do wydechowego do urządzenia klimatyzatora i okna Wsunąć przewód odprowadzający do otworu wylotu powietrza Włóż adapter suwaka okna do otworu suwaka okna. klimatyzatora zgodnie z kierunkiem strzałki.
- Seite 182 Instrukcje obsługi Dane klimatyzatora Instrukcja obsługi sterowania elektronicznego Tryb COOL (CHŁODZENIA) UWAGI: 1. Przycisk POWER (ZASILANIA) Kiedy resetujesz funkcję Wciśnij przycisk “MODE (TRYB)” dopóki Włącznik/wyłącznik zasilania. bezprzewodową, może zająć chwilę nie pojawi się lampka oznaczjąca “COOL Przycisk sieci bezprzewodowej (w niektórych by połączyć...
- Seite 183 Tryb FAN (WENTYLACJI) Naciśnij przycisk “FAN SPEED (PRĘDKOŚĆ temperatury. WENTYLATORA)” na pilocie aby wybrać Wciśnij przycisk "MODE (TRYB)", aż zapali się Nie umieszczaj izolacji w oknie. prędkość wentylatora. Nie można regulować kontrolka "FAN (WENTYLACJI)". 4. Przyciski UP (GÓRA) i DOWN (DÓŁ) Służy do regulacji (zwiększanie/zmniejszanie) ustawień...
- Seite 184 Obsługi do odprowadzania wody Obsługi Do Odprowadzania Wody w Trybie Osuszania Obsługi do Odprowadzania Wody z Tacy Krok 1: Krok 2: Wyjmij korek Zainstalować ciągły spustowy wąż spustowy Odkręcić dolny korek spustowy Gdy poziom wody w zasobniku dolnym osiągnie określony poziom, Podczas trybów osuszania wyjmij korek spustowy z tyłu urządzenia, urządzenie wyemituje 8 sygnałów dźwiękowych, a na cyfrowym zainstaluj złącze spustowe (uniwersalny zagniatacz 5/8 ") z wężem...
- Seite 185 Czyszczenia i Jak czyścić i wykonać czynności do utrzymania klimatyzatora konserwacje Czyszczenie filtra powietrza i obudowy Filtr powietrza (wyjąć) Wyczyść urządzenie za pomocą wilgotnej, niepozostawiającej włókien ściereczki i łagodnego detergentu. Osusz urządzenie suchą, niestrzępiącą się szmatką. Wskazówki dotyczące konserwacji • Aby uzyskać optymalną wydajność, należy czyścić filtr powietrza co 2 tygodnie.
- Seite 186 Przechowuj urządzenie, gdy nie jest używane Krok 2 UWAGI • Przechowuj urządzenie w Krok 3 chłodnym, ciemnym miejscu. Krok 1 Ekspozycja na bezpośrednie godziny światło słoneczne lub ekstremalne ciepło może skrócić żywotność urządzenia. • Szafka I przód mogą być odkurzone ścierką bez oleju * Opróżnić...
- Seite 187 ROZWIĄZYWANIE PROBLEMÓW Sposób do usunięcia awarii Częste Problemy Następujące problemy nie są awariami i większości wypadków nie będzie konieczna naprawa. Problem Możliwe Przyczyny Rozwiązanie Tacka na wodę jest pełna. Wyłącz urządzenie, spuść wodę z tacy gromadzącej wodę i P1 Kod zabezpieczający Urządzenie nie ponownie uruchom urządzenie.
- Seite 188 Projekt i specyfikacje mogą ulec zmianie bez wcześniejszego powiadomienia w celu ulepszenia produktu. Skontaktuj się ze sprzedawcą lub producentem po więcej szczegółów. Wszelkie aktualizacje instrukcji będą umieszczane na stronie internetowej serwisu, należy zapoznać się z najnowszą wersją.
- Seite 189 CP002UI-PA...
- Seite 190 MOBILNÁ KLIMATIZÁCIA (Lokálna Klimatizácia) Návod na Použitie DÔLEŽITÁ POZNÁMKA: Smart Cool 7000 Plus Pred použitím vašej klimatizácie si pozorne prečítajte tento návod a uschovajte ho pre budúce použitie. Smart Cool 7000 IE...
- Seite 192 OBSAH Safety Precautions ----------------------------------------------------------------------- 01 Prepara.tion before installation Before you get start ---------------------------------------------------------------------- 12 Product overview ------------------------------------------------------------------------- 15 Installation instructions Installation overview --------------------------------------------------------------------- 17 Installation guide ------------------------------------------------------------------------- 21 Operation instructions Get to know your AC --------------------------------------------------------------------- 27 Drainage guide ----------------------------------------------------------------------------29 Cleaning &...
- Seite 193 Bezpečnostné Opatrenia Musíte si prečítať varovnú správu. Je naozaj dôležité, aby ste si prečítali Bezpečnostné opatrenia pred prevádzkou a inštaláciou Nesprávna inštalácia v dôsledku ignorovania pokynov môže spôsobiť vážne poškodenie alebo zranenie. Závažnosť potenciálnych škôd alebo zranení je klasifikovaná buď ako VAROVANIE alebo UPOZORNENIE. Vysvetlenie Symbolov VAROVANIE Signálne slovo označuje nebezpečenstvo so stredným stupňom rizika, ktoré, ak sa mu nezabráni,...
- Seite 194 VAROVANIE • Inštalácia musí byť vykonaná podľa návodu na • Klimatizácia by mala byť použitá tak, aby bola inštaláciu. Nesprávna inštalácia môže spôsobiť únik chránená pred vlhkosťou, napr. z kondenzácie, vody, zásah elektrickým prúdom alebo požiar. striekajúcej vody atď. Neumiestňujte ani neuchovávajte klimatizačné...
- Seite 195 • Spotrebič s elektrickým ohrievačom musí byť poistkou na zabezpečenie nadprúdovej ochrany. vzdialený aspoň 1 meter od akýchkoľvek horľavých Špecifikácie poistky sú vytlačené na obvodovej doske, materiálov. ako napríklad: T 3,15A / 250V atd. • Elektrické vedenie musí byť vykonané striktne v •...
- Seite 196 • Neukladajte kábel pod koberec. Nezakrývajte kábel kobercami, bežcami alebo podobnými krytinami. Kábel neumiestňujte pod nábytok či spotrebiče. Umiestnite kábel mimo oblasť s častou prevádzkou a tam, kde sa oň nikto nepotkne. • Nepoužívajte zariadenie s poškodeným káblom, zástrčkou, poistkou alebo ističom. Zariadenie zlikvidujte alebo sa vráťte do autorizovaného servisu na kontrolu a / alebo opravu.
- Seite 197 Poznámka o Fluórovaných Plynoch (Netýka sa jednotky používajúcej chladivo R290) 1. Fluórové skleníkové plyny sa nachádzajú v hermeticky uzavretom vybavení. Podrobné informácie o type, množstve a ekvivalentu CO2 v tonách fluórového skleníkového plynu (na niektorých modeloch) nájdete na príslušnom štítku na samotnej jednotke. 2.
- Seite 198 • Je potrebné dodržiavať národné predpisy pre plyn. Udržujte vetracie otvory voľné. • Zariadenie musí byť skladované tak, aby nedošlo k mechanickému poškodeniu. • Pozor, zariadenie musí byť skladované v dobre vetranom priestore, kde veľkosť priestoru zodpovedá miestnosti určenej na prevádzku. •...
- Seite 199 Tento symbol znamená, že obsluhujúci personál by mal manipulovať s týmto UPOZORNENIE zariadením s ohľadom na návod na inštaláciu. Tento symbol znamená, že sú k dispozícii informácie, ako napríklad návod na obsluhu UPOZORNENIE alebo návod na inštaláciu. 1. Preprava zariadenia obsahujúceho horľavé chladivá Pozri prepravné predpisy 2.
- Seite 200 6) Žiadne zdroje zapálenia Žiadna osoba vykonávajúca prácu vo vzťahu k chladiacemu systému, ktorá zahŕňa vystavenie akejkoľvek potrubnej práce, ktorá obsahuje alebo obsahovala horľavé chladivo, musí použiť akékoľvek zdroje vznietenia tak, aby mohla viesť k nebezpečenstvu požiaru alebo výbuchu. Všetky možné zdroje vznietenia, vrátane fajčenia cigariet, by mali byť...
- Seite 201 napätím. Existuje spojitosť zemských väzieb. 7. Opravy zapečatených komponentov 1) Pri opravách utesnených súčiastok sa všetky elektrické spotrebiče musia odpojiť od zariadenia, s ktorým sa má pracovať, pred odstránením utesnených krytov atď. Ak je absolútne nevyhnutné mať k dispozícii elektrické napájanie zariadenia počas servisu, potom trvale fungujúca forma detekcie netesností...
- Seite 202 Uistite sa, že detektor nie je potenciálnym zdrojom vznietenia a je vhodný pre používané chladivo. Zariadenie na detekciu únikov sa nastaví na percentuálnu hodnotu NLH (nižší limit horľavosti) chladiva a kalibruje sa na použitý chladič a potvrdí sa príslušné percento plynu (maximálne 25%). Kvapaliny na zisťovanie netesností...
- Seite 203 14. Vyraďovanie Pred vykonaním tohto postupu je dôležité, aby technik úplne poznal zariadenie a všetky jeho detaily. Odporúča sa správna prax, aby sa všetky chladivá bezpečne odobrali zo zariadenia. Pred uskutočnením úlohy sa odoberie vzorka oleja a chladiva v prípade, že sa vyžaduje analýza pred opätovným použitím daného chladiva. Je dôležité, aby bola elektrická...
- Seite 204 určené na odobraté chladivo a označené pre toto chladivo (t. j. špeciálne bomby na odobratie chladiva). Bomby musia byť vybavené tlakovým poistným ventilom a príslušnými uzatváracími ventilmi v dobrom prevádzkovom stave. Prázdne bomby na chladivo sa pred odobratím chladiva úplne vyprázdnia a ak je to možné, vychladia sa.
- Seite 205 Príprava pred inštaláciou Skôr ako začnete Prípravy pred inštaláciou Inštalácia musí byť Inštalácia Sme tu, ak nás potrebujete, Odporúčame vykonaná v prísnom klimatizácie kontaktujte svojho to robiť s súlade s pokynmi v tomto by mala trvať miestneho distribútora a pomocníkom. návode.
- Seite 206 Ako Udržať Chlad s Novým Prenosným Klimatizačným Zariadením (Modely vyhovujú požiadavkám Ministerstva Energetiky USA). Z dôvodu nového federálneho skúšobného postupu pre Prenosné Klimatizačné Zriadenia si môžete všimnúť, že nároky na chladiacu kapacitu na prenosných obaloch klimatizačných zariadení sú výrazne nižšie ako v prípade modelov vyrobených pred rokom 2017. Je to kvôli zmenám v skúšobnom postupe, a nie samotným prenosným klimatizačným zariadeniam.
- Seite 207 MIESTO INŠTALÁCIE PRODUKTU Miesto inštalácie by malo spĺňať nasledujúce požiadavky: - Uistite sa, že zariadenie inštalujete na rovný povrch, aby ste minimalizovali hluk a vibrácie. - Prístroj musí byť inštalovaný v blízkosti uzemnenej zásuvky a musí byť prístupný odtokový zásobník (nachádzajúci sa na zadnej strane prístroja). - Jednotka by mala byť...
- Seite 208 Prehľad výrobku POZNÁMKA K ILUSTRÁCIÁM: Všetky obrázky v príručke slúžia iba na vysvetlenie. Vaše zariadenie sa môže mierne líšiť. Celkový tvar sa nelíši. Jednotku možno ovládať iba ovládacím panelom jednotky alebo diaľkovým ovládaním. Táto príručka nezahŕňa Funkcie Diaľkového Ovládača, podrobnosti nájdete v pokynoch << Pokyny Pre Diaľkový Ovládač>>...
- Seite 209 model B Ovládací panel Receptor Rukoväť (obe vzdialeného signálu strany) výstup vzduchu páka ovládania Vzduchový filter lamiel – manuálne horný prívod nastavenie vzduchu (Pri niektorých Vypúšťací otvor modeloch) výstup vzduchu Predný panel Nižší prívod vzduchu Spodný vypúšťací otvor koliesko Náhľad Spredu Zadný...
- Seite 210 Pokyny Na Inštaláciu Prehľad inštalácie Zobrazenie Dokončenia Inštalácie Okenný Posúvač B Okenný Posúvač A Predĺžená Výfuková Hadica Lokálna Klimatizácia Bezpečnostná Sorka a 2 Srutky POZNÁMKA Ilustrácie v tejto príručke slúžia na vysvetlenie. Skutočný tvar vašej vnútornej jednotky sa môže mierne líšiť.
- Seite 211 Zoznam inštalačných nástrojov (nie sú súčasťou dodávky) Píla (Na niektorých modeloch na Nožnice alebo Skrutkovač a kľúč Ceruzka Zvinovací meter skrátenie okenného adaptéra pre úzke Nôž okná) Inštaláčné príslušenstvo POZNÁMKA Položky s (*) sú na niektorých modeloch. Môžu sa vyskytnúť malé zmeny v konštrukcii. Severná...
- Seite 212 Ďalšie Regióny Adaptér Na Odsávanie Na Adaptér okenného posúvača Priechod na Odvod Vzduchu Adaptér Jednotky (1ks) Adaptér Výfukovej Hadice (1 ks*) Stenu A (len pre modely na (1 ks*) (1 ks*) stenu) (1 ks*) Penové Tesnenie A Penové Tesnenie B (Lepidlo) Penové...
- Seite 213 Potvrďte svoj typ okna (typ okna a veľkosť otvoru rôznych typov) Inštalácia Posuvného Okna Montáž Závesného Okna Pre optimálny výkon v prevádzke SPRÁVNE NESPRÁVNE POZNÁMKA: Aby ste zabezpečili správnu funkciu, NENAŤAHUJTE ani neohýbajte hadicu. Ubezpečte sa, že okolo vývodu vzduchu výfukovej hadice (v blízkosti 500 mm) nie je žiadna prekážka, aby správne fungoval výfukový...
- Seite 214 Návod na inštaláciu Model A Model B Model C Model D Predĺžená Zostava Výfuková Výfuková Odvod Výfuková Hadica výfukovej Zostava hadica vzduchu hadica Výfuková hadice výfukovej Výfuková hadica hadice hadica Adaptér Adaptér Adaptér Zostava Adaptér okenného jednotky jednotky okenného výfukovej posúvača Odvod vzduchu Adaptér...
- Seite 215 Pripojte adaptér k jednotke a oknu Model A Model B Model C Pred montážou Pred montážou Skrutka Okenné Okenné Posuvníky Posuvníky Po montáži Po montáži Skrutka Okenný Posúvač B Okenný Posúvač A Skrutka alebo Skrutka Skrutka Skrutka Skrutka Skrutka Vonku Vnútri Skrutka Skrutka...
- Seite 216 Penové tesnenie B Penové tesnenie A Penové tesnenie A Penové tesnenie B (Typ lepidla - kratší) (Typ lepidla) (Typ lepidla - kratší) (Typ lepidla) Montáž Závesného Okna Inštalácia Posuvného Okna Kompletné utesnenie okna Odrežte lepiace penové tesnenia A a B do príslušnej dĺžky a pripevnite ich k okennému krídlu a rámu, ako je to znázornené.
- Seite 217 Montáž Závesného Okna Krok 1: Krok 2: Krok 3: Vložte zostavu okenného Odrežte nelepivý penový tesniaci pásik C tak, aby zodpovedal Ak je to potrebné, nainštalujte posúvača do otvoru šírke okna. Vložte tesnenie medzi sklo a rám okna, aby sa bezpečnostný...
- Seite 218 Inštalácia Posuvného Okna Krok 1: Krok 2: Krok 3: Vložte zostavu okenného Nelepivý penový tesniaci pás C odrežte tak, aby zodpovedal Ak je to potrebné, nainštalujte posúvača do otvoru výške okna. Vložte tesnenie medzi sklo a rám okna, aby sa bezpečnostný...
- Seite 219 Montáž Závesného Okna Inštalácia Posuvného Okna Namontujte zostavu výfukovej Pripojte adaptér k jednotke a oknu hadice do jednotky Zatlačte Výfukovú hadicu do otvoru chladiča jednotky v smere Vložte adaptér okenného posúvača do otvoru okenného šípky. posúvača.
- Seite 220 Prevádzkové pokyny Spoznajte svoje AC Návod na obsluhu elektronického ovládania Režime COOL (CHLADENIA) POZNÁMKA: 1. Tlačidlá POWER (NAPÁJANIA) Keď reštartujete Stlačte tlačidlo „MODE (REŽIME)“, kým sa funkciu bezdrôtového pripojenia, Zapnutie / vypnutie hlavného vypínača. nerozsvieti kontrolka „COOL (CHLADNÝ)“. Bezdrôtová prevádzka (na niektorých môže to trvať...
- Seite 221 4. Tlačidlá UP (HORE) a DOWN (DOLE) Používa sa na úpravu (zvýšenie / zníženie) teploty v krokoch 1°C/2°F (alebo 1°F) v rozsahu 16°C/60°F až 30°C/88°F (alebo 86°F). POZNÁMKA: Ovládanie je schopné zobrazovať teplotu v stupňoch Fahrenheita alebo stupňoch Celzia. Ak chcete previesť...
- Seite 222 Sprievodca odvodňovaním Sprievodca Odvodňovaním v Režime Odvlhčovania Podnos na zber vody Sprievodca Odtokom Krok 1: Vyberte Krok 2: vypúšťaciu Nainštalujte priebežnú zátku vypúšťaciu hadicu Odstráňte spodnú vypúšťaciu zátku Keď hladina vody v spodnom zásobníku dosiahne vopred stanovenú úroveň, jednotka pípne 8-krát, oblasť digitálneho displeja zobrazí „P1“. Počas režimov odvlhčovania vytiahnite vypúšťaciu zátku zo zadnej V tomto okamihu sa proces klimatizácie / odvlhčovania ihneď...
- Seite 223 Čistenie a údržba Ako čistiť a udržiavať klimatizáciu. Čistenie Vzduchového Filtra a Skrine Vzduchový filter (vytiahnite) Vyčistite jednotku vlhkou handričkou bez chĺpkov a jemným čistiacim prostriedkom. Vysušte jednotku suchou utierkou bez chĺpkov. Tipy na Údržbu • Aby ste dosiahli optimálny výkon, vyčistite vzduchový filter každé 2 týždne.
- Seite 224 Keď sa nepoužíva, zariadenie skladujte Krok 2 POZNÁMKA Zariadenie ukladajte na • chladnom, tmavom mieste. Krok 3 Krok 1 Vystavenie priamemu slnečnému žiareniu alebo extrémnemu teplu hodiny môže skrátiť životnosť jednotky. Skrinka a predná časť môžu byť • očistené od prachu handričkou bez oleja alebo umyté...
- Seite 225 RIEŠENIE PROBLÉMOV Riešenie Problémov Bežné Problémy Nasledujúce problémy nie sú poruchou a vo väčšine prípadov si nevyžadujú opravu. Problém Možná Príčina Riešenie Zásobník na vodu je plný. Vypnite jednotku, vypustite vodu zo zásobníka na vodu Zariadenie sa Ochranný Kód P1 a reštartujte zariadenie.
- Seite 226 Dizajn a špecifikácie sa môžu meniť bez predchádzajúceho upozornenia kvôli zdokonaľovaniu produktu. Ďalšie informácie získate u predajnej kancelárie alebo u výrobcu. Akékoľvek aktualizácie príručky budú dostupné na servisnej webovej stránke, nájdite si prosím najnovšiu verziu.
- Seite 227 CP002UI-PA...
- Seite 228 KLIMATIZACE MOBILNÍHO TYPU (Místní Klimatizace) Manuál pro Majitele DŮLEŽITÁ POZNÁMKA: Před použitím vaší klimatizace si prosím pečlivě Smart Cool 7000 Plus přečtěte tento návod a uschovejte jej pro Smart Cool 7000 IE budoucí použití.
- Seite 230 OBSAH Bezpečnostní Opatření ------------------------------------------------------------------ 01 Příprava před instalací Než začnete ------------------------------------------------------------------------------- 12 Popis výrobku ----------------------------------------------------------------------------- 15 Instrukce k instalaci Přehled Instalace ------------------------------------------------------------------------- 17 Průvodce instalací ------------------------------------------------------------------------ 21 Provozní pokyny Seznamte se se svým AC ---------------------------------------------------------------- 27 Průvodce odvodněním -------------------------------------------------------------------29 Čištění a údržba -------------------------------------------------------------------------- 30 Pokud jednotku nepoužíváte, uložte ji ------------------------------------------------ 31 ODSTRAŇOVÁNÍ...
- Seite 231 Bezpečnostní Musíte si přečíst varovnou zprávu. Opatření Je opravdu důležité, abyste si přečetli Bezpečnostní opatření před provozem a instalací Nesprávná instalace z důvodu ignorování pokynů může způsobit vážné poškození nebo zranění. Závažnost potenciálního VAROVÁNÍ nebo POZOR je klasifikována jako varování nebo obezřetnost. Vysvětlení...
- Seite 232 VAROVÁNÍ • Instalace musí být provedena podle pokynů k instalaci. • Vaše klimatizace by měla být používána tak, aby byla Nesprávná instalace může způsobit únik vody, úraz chráněna před vlhkostí. např. kondenzace, stříkající elektrickým proudem nebo požár. voda atd. Neumísťujte a neskladujte klimatizaci tam, kde by mohla spadnout nebo být vtažena do vody •...
- Seite 233 • Veškeré zapojení musí být provedeno přesně podle například: T 3,15A/250V atd. schématu zapojení umístěného uvnitř jednotky. • Když funkci vypouštění vody nepoužíváte, držte horní • Obvodová deska (PCB) obsahuje pojistku, která a spodní vypouštěcí zátku pevně na jednotce, abyste zajišťuje nadproudovou ochranu.
- Seite 234 • Chcete-li snížit pravděpodobnost požáru nebo úrazu elektrickým proudem, nepoužívejte tento přístroj s jakýmkoli zařízením pro regulaci otáček. • Spotřebič musí být instalován v souladu s vnitrostátními národními předpisy o elektroinstalacích. • Pro opravu nebo údržbu této jednotky kontaktujte autorizovaného servisního technika. •...
- Seite 235 Poznámka k Fluorovaným Plynům (Nevztahuje se na jednotku používající chladivo R290) 1. Fluorované skleníkové plyny jsou obsaženy v hermeticky uzavřených zařízeních. Konkrétní informace o typu, množství a ekvivalentu CO2 v tunách fluorovaného skleníkového plynu (u některých modelů) naleznete na příslušném štítku na samotné jednotce. 2.
- Seite 236 • Je třeba dodržovat národní předpisy pro plyn. Udržujte ventilační otvory volné. • Spotřebič musí být skladován tak, aby nedošlo k mechanickému poškození. • Spotřebič musí být skladován v dobře větraném prostoru, jehož rozměry odpovídají minimálním uvedeným rozměrům, které jsou nutné pro správný provoz spotřebiče. •...
- Seite 237 1. Přeprava zařízení obsahujícího hořlavá chladiva Viz přepravní předpisy 2. Označení zařízení pomocí značek Viz místní předpisy. 3. Likvidace zařízení s použitím hořlavých chladiv Viz národní předpisy. 4. Skladování zařízení/zařízení Skladování zařízení by mělo být v souladu s pokyny výrobce. 5.
- Seite 238 7) Větraný prostor Před vniknutím do systému nebo prováděním prací za horka se ujistěte, že je oblast na volném prostranství nebo že je dostatečně větraná. Po dobu provádění prací musí být spuštěná ventilace. Větrání by mělo bezpečně rozptýlit uvolněné chladivo a nejlépe ho vytlačit externě do atmosféry. 8) Kontroly chladicího zařízení...
- Seite 239 specifikacemi výrobce. POZNÁMKA: Použití silikonového tmelu může snížit účinnost některých typů zařízení pro detekci úniků. Jiskrově bezpečné součásti nemusí být před prací na nich izolovány. 8. Opravy jiskrově bezpečných součástí Nepřipojujte na obvod stálé indukční ani kapacitní zátěže, aniž byste zajistili, že nepřekročí povolené napětí a proud povolený...
- Seite 240 OFN, aby se zajistila bezpečnost přístroje. Tento proces bude možná nutné několikrát opakovat. Pro tento úkol se nesmí používat stlačený vzduch nebo kyslík. Proplachování se musí provést přerušením vakua v systému pomocí OFN a pokračováním v plnění, dokud není dosaženo pracovního tlaku, poté odvětráním do atmosféry a nakonec stažením do vakua.
- Seite 241 j) Po správném naplnění lahví a dokončení procesu se ujistěte, že jsou lahve a zařízení neprodleně odstraněny z místa a všechny uzavírací ventily na zařízení jsou uzavřeny. k) Zpětně získané chladivo se nesmí plnit do jiného chladicího systému, pokud nebylo vyčištěno a zkontrolováno.
- Seite 242 Příprava před instalací Než začnete Přípravy před instalací Instalace musí být Instalace Jsme tu, pokud nás Doporučujeme provedena přesně v klimatizace by potřebujete, kontaktujte to provést s souladu s pokyny v tomto měla trvat asi 30 prosím svého místního pomocníkem. návodu.
- Seite 243 Jak koupit klimatizaci mobilního typu. Správná klimatizace vám pomůže efektivně chladit místnost. Poddimenzovaná jednotka nebude dostatečně chladit, zatímco příliš velká neodstraní dostatek vlhkosti, takže vzduch zůstane vlhký. Chcete-li najít správnou klimatizaci, určete plochu místnosti, kterou chcete ochladit, vynásobením délky místnosti její šířkou. Musíte také znát hodnocení BTU (British Thermal Unit) klimatizační jednotky, které udává množství tepla, které...
- Seite 244 MÍSTO INSTALACE PRODUKTU Místo instalace by mělo splňovat následující požadavky: -Ujistěte se, že instalujete jednotku na rovný povrch, abyste minimalizovali hluk a vibrace. -Jednotka musí být instalována v blízkosti uzemněné zástrčky a odtok sběrné nádoby (nachází se na zadní straně jednotky) musí být přístupný. -Jednotka by měla být umístěna alespoň...
- Seite 245 Popis výrobku POZNÁMKA K ILUSTRACI: Všechny ilustrace v tomto manuálu slouží pouze pro informativní účely. Váš přístroj může být lehce odlišný. Skutečný tvar má přednost. Jednotka může být ovládána ovládacím panelem nebo dálkovým ovladačem. Tato příručka nezahrnuje informace o funkcích dálkového ovládání viz instrukce << dálkový ovladač >>, který je součástí...
- Seite 246 model B Ovládací panel Receptor Rukojeť (obě vzdáleného signálu strany) Vývod vzduchu Vzduchový filtr páka ovládání horní přívod vzduchu žaluzií – ruční nastavení (u některých modelů) Vypouštěcí otvor Vývod vzduchu Přední panel Nižší přívod vzduchu Výpust spodního zásobníku Caster Pohled Zepředu Pohled Zezadu model C Ovládací...
- Seite 247 Instrukce k instalaci Přehled Instalace Zobrazení dokončení instalace Posuvník okna B Posuvník okna A Prodloužená výfuková hadice Místní klimatizace Bezpečnostní držák a 2 šrouby POZNÁMKA Ilustrace v této příručce slouží pouze pro vysvětlení. Skutečný tvar vaší vnitřní jednotky se může mírně lišit.
- Seite 248 Seznam instalačních nástrojů (není součástí dodávky) Pila (u některých modelů ke zkrácení Šroubovák a klíč Tužka Svinovací metr Nůžky nebo nůž okenního adaptéru pro úzká okna) Instalační příslušenství POZNÁMKA Položky označené (*) jsou u některých modelů. Mohou se vyskytnout drobné odchylky v designu. Severní...
- Seite 249 Ostatní regiony Nástěnný výfukový adaptér Průchod pro odvod vzduchu Adaptér jednotky (1ks) Adaptér posuvného okna (1ks*) Adaptér výfukové hadice (1ks*) A (pouze pro modely pro (1ks*) instalaci na stěnu) (1ks*) Pěnové těsnění A Pěnové těsnění C (neadhezivní) 1 Bezpečnostní držák a 2 šrouby Pěnové...
- Seite 250 Potvrďte svůj typ okna (typ okna a velikost otvoru různých typů) Montáž posuvných oken Montáž zavěšeného okna Pro optimální výkon v provozu OPRAVIT NESPRÁVNÝ POZNÁMKA: Aby byla zajištěna správná funkce, NEPŘEDNAŽUJTE ani neohýbejte hadici. Ujistěte se, že kolem výstupu vzduchu z výfukové hadice není...
- Seite 251 Průvodce instalací Model A Model B Model C Model D Prodloužená Sestava Výfuková Průchod výfuková hadice Výfuková výfukové výfuku hadice Sestava Výfuková hadice hadice vzduchu výfukové hadice Výfuková hadice hadice Adaptér Adaptér Adaptér Adaptér Sestava Průchod výfuku Adaptér jednotky posuvného okna jednotky posuvného výfukové...
- Seite 252 Připojte adaptér k jednotce a oknu Model A Model B Model C Před montáží Před montáží Šroub Posuvníky Posuvníky oken oken Po sestavení Po sestavení Šroub Posuvník okna B Posuvník okna A Šroub nebo Šroub Šroub Šroub Šroub Šroub Mimo Uvnitř...
- Seite 253 Pěnové těsnění B Pěnové těsnění A Pěnové těsnění A Pěnové těsnění B (typ lepidla - kratší) (typ lepidla) (typ lepidla - kratší) (typ lepidla) Montáž zavěšeného okna Montáž posuvných oken Kompletní utěsnění okna Odřízněte lepicí pěnové těsnicí pásy A a B na správnou délku a připevněte je k okennímu křídlu a rámu podle obrázku.
- Seite 254 Montáž zavěšeného okna Krok 1: Krok 2: Krok 3: Vložte sestavu Odřízněte nelepivý pěnový těsnící pás C tak, aby odpovídal V případě potřeby nainstalujte posuvného okna do šířce okna. Vložte těsnění mezi sklo a rám okna, aby se do bezpečnostní držák pomocí 2 šroubů otvoru okna.
- Seite 255 Montáž posuvných oken Krok 1: Krok 2: Krok 3: Vložte sestavu Odřízněte nelepivý pěnový těsnící pás C tak, aby odpovídal V případě potřeby nainstalujte posuvného okna do výšce okna. Vložte těsnění mezi sklo a rám okna, aby se do bezpečnostní držák pomocí 2 šroubů otvoru okna.
- Seite 256 Montáž zavěšeného okna Montáž posuvných oken Namontujte sestavu výfukové Připojte adaptér k jednotce a oknu hadice na jednotku Zasuňte výfukovou hadici do otvoru pro výstup vzduchu na Vložte adaptér okenního posuvníku do otvoru posuvného okna. jednotce ve směru šipky.
- Seite 257 Provozní pokyny Seznamte se se svým AC Návod k obsluze elektronického ovládání Stiskněte tlačítko "FAN (VENTILÁTOR)" pro 1. Tlačítko POWER (NAPÁJENÍ) 2. Tlačítka FAN (VENTILÁTOR) volbu rychlosti ventilátoru. Stiskněte pro ovládání rychlosti ventilátoru ve Zapnutí/vypnutí napájení. Režim DRY (SUCHÝ) třech krocích HIGH (VYSOKÉ), LOW (NÍZKÁ) Bezdrátový...
- Seite 258 4. tlačítka UP (NAHORU) a DOWN (DOLŮ) Používá se k úpravě (zvýšení/snížení) nastavení teploty v krocích po 1°C/2°F (nebo 1°F) v rozsahu 16°C/60°F až 30°C/88°F (nebo 86°F) . POZNÁMKA: Ovladač je schopen zobrazovat teplotu ve stupních Fahrenheita nebo stupních Celsia. Chcete-li převést z jednoho na druhý, stiskněte a podržte tlačítka Up (Nahoru) a Down (Dolů) současně...
- Seite 259 Průvodce odvodněním Průvodce odvodněním režimu odvlhčování Zásobník na vodu Drenážní průvodce Krok 1: Odstraňte Krok 2: vypouštěcí Nainstalujte zátku průběžnou Odstraňte vypouštěcí hadici spodní vypouštěcí zátku Když hladina vody ve spodním tácu dosáhne předem stanovené Během režimů odvlhčování odstraňte vypouštěcí zátku ze zadní části úrovně, jednotka 8x pípne, na digitálním displeji se zobrazí...
- Seite 260 Čištění a údržba Jak čistit a udržovat klimatizaci. Čištění vzduchového filtru a skříně Vzduchový filtr (vyjmout) Vyčistěte jednotku vlhkým hadříkem nepouštějícím vlákna a jemným čisticím prostředkem. Osušte jednotku suchým hadříkem, který nepouští vlákna. Tipy na údržbu • Pro dosažení optimálního výkonu vzduchový filtr čistěte každé 2 týdny.
- Seite 261 Pokud jednotku nepoužíváte, uložte ji Krok 2 POZNÁMKA • Ujistěte se, že jednotku skladujete na Krok 3 Krok 1 chladném a tmavém místě. Vystavení přímému slunečnímu hodin záření nebo extrémnímu teplu může zkrátit životnost jednotky. • Skříň a přední část mohou být oprášeny suchým hadříkem * Vypusťte sběrnou nádobu na * Podívejte se prosím na...
- Seite 262 ODSTRAŇOVÁNÍ PROBLÉMŮ Řešení problému Běžné problémy Následující problémy nepředstavují závadu a ve většině situací nebudou vyžadovat opravy. Problém Možné Příčiny Řešení Zásobník na vodu je plný. Vypněte jednotku, vypusťte vodu ze sběrné misky na vodu a Ochranný kód P1 Jednotka se po restartujte jednotku.
- Seite 263 Design a specifikace se mohou změnit bez předchozího upozornění za účelem vylepšení produktu. Podrobnosti získáte od obchodní agentury nebo výrobce. Veškeré aktualizace příručky se nahrají na servisní web. Zkontrolujte prosím nejnovější verzi.
- Seite 264 CP002UI-PA...