Endress+Hauser Promag 55S Einbauanleitung
Vorschau ausblenden
Andere Handbücher für Promag 55S:
- Technische information (48 Seiten) ,
- Umbauanleitung (9 Seiten) ,
- Einbauanleitung (20 Seiten)
Werbung
Verfügbare Sprachen
Verfügbare Sprachen
Quicklinks
EA00069D/06/A2/14.18
71414882
2018-11-15
Products
Installation Instructions
Conversion transmitter
Promag 55 compact version to
Promag 55 remote version
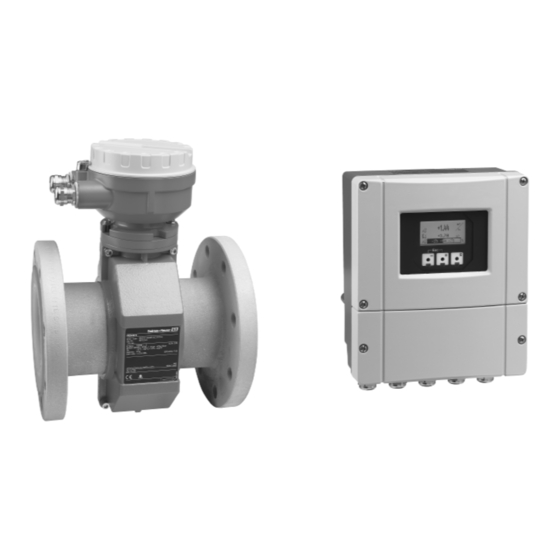
Promag 55S
EN Installation Instructions: EA00069D → 3
DE Einbauanleitung: EA00069D → 15
Solutions
Services
Werbung

Verwandte Anleitungen für Endress+Hauser Promag 55S


Inhaltszusammenfassung für Endress+Hauser Promag 55S
- Seite 1 Products Solutions Services EA00069D/06/A2/14.18 71414882 2018-11-15 Installation Instructions Conversion transmitter Promag 55 compact version to Promag 55 remote version Promag 55S EN Installation Instructions: EA00069D → 3 DE Einbauanleitung: EA00069D → 15...
- Seite 3 Conversion of transmitter Promag 55 compact version to Promag 55 remote version Promag 55S Table of contents Overview of conversion kits ............4 Transmitters that can be used for the conversion .
- Seite 4 2, 3 For custody transfer 1 = Qualified specialist on customer side, 2 = Service technician authorized by Endress+Hauser, 3 = Endress+Hauser (return measuring device to manufacturer) 4 = Check with local approval center if installation/modification must be performed under supervision.
- Seite 5 EA00069D Safety instructions • Only use original parts from Endress+Hauser. • Comply with national regulations governing mounting, electrical installation, commissioning, maintenance and device conversion procedures. • The specialized technical staff involved in the mounting, electrical installation, commissioning, maintenance and modification of the measuring devices must meet the following requirements: –...
- Seite 6 (e.g. Field Care). Notify the plant operator in the event of functional changes. • Replace defective seals only with original seals from Endress+Hauser. • If threads are damaged or defective, the measuring device must be repaired.
- Seite 7 Procedures, processes or actions that are forbidden. Indicates additional information. … Series of steps Tools list 0.5 x 3.5 mm 3 mm Wire cutter Acid-free, non- Pen/tool hardening lubricant Ø < 2 mm (0.08 in) 8 mm, 22 mm Cable ties Endress+Hauser...
- Seite 8 Conversion of Promag 55 compact version to Promag 55 remote version Removing the aluminum transmitter housing CAUTION The measuring device is energized! Risk of fatal injury from electric shock. ‣ Open the measuring device only when the device is deenergized. Endress+Hauser...
- Seite 9 Disconnect the T-DAT, S-DAT and F-Chip (if provided) from the cable tie and remove from the existing transmitter. 1 → 2 → 3 → 3 (0.12) 3 mm 3 mm 4 → 5 → 6 → S-DAT T-DAT 7 → 8 → 9 → Ø < 2 mm Endress+Hauser...
- Seite 10 EA00069D 10 → 11 → 8 mm Mounting the sensor connection housing 1 → 2 → 3 → 3 mm 12 Nm (8.9 lbf ft) 8 mm Endress+Hauser...
- Seite 11 3 (0.12) 0.5 × 3.5 Mounting the transmitter wall-mount housing Insert the T-DAT, S-DAT and F-Chip (if provided) into the transmitter. See Figure 2 below. 1 → 2 → 3 → S-DAT T-DAT 4 → 3 (0.12) PH 2 Endress+Hauser...
- Seite 12 For detailed information on commissioning, see the "Commissioning" section of the Operating Instructions for the device. Modifying the label Following conversion, enter the date of the conversion on the information label and attach the information label (1) in accordance with the diagram. Endress+Hauser...
- Seite 13 Technical changes such as upgrades, changes to configurations at inputs and outputs or modifications to Endress+Hauser flowmeters necessitate the modification of the product root (e.g. 5W4B => 5W4C) and/or the extended order code or the order code of the affected device.
- Seite 15 Umbau Messumformer Promag 55 Kompaktausführung zu Promag 55 Getrenntausführung Promag 55S Inhaltsverzeichnis Übersicht Umbausätze ............16 Messumformer, die für den Umbau verwendet werden dürfen .
- Seite 16 Zulassung (z.B. IECEx) 2, 3 Bei eichfähigem Verkehr 1 = Ausgebildete Fachkraft des Kunden, 2 = Von Endress+Hauser autorisierter Servicetechniker, 3 = Endress+Hauser (Messgerät an Hersteller zurücksenden) 4 = Mit der lokalen Zulassungsstelle prüfen, ob ein Ein-/Umbau unter Aufsicht erfolgen muss.
- Seite 17 EA00069D Sicherheitshinweise • Nur Originalteile von Endress+Hauser verwenden. • Nationale Vorschriften bezüglich der Montage, elektrischen Installation, Inbetriebnahme, Wartung und Umbau einhalten. • Folgende Anforderungen an das Fachpersonal für Montage, elektrische Installation, Inbetriebnahme, Wartung und Umbau der Messgeräte müssen erfüllt sein: –...
- Seite 18 Wenn die Software der Platine nicht kompatibel ist, muss mit Hilfe einer Bediensoftware (z. B. Field Care) ein Update durchgeführt werden. Bei funktionalen Änderungen Anlagenbetreiber informieren. • Defekte Dichtungen nur durch Original-Dichtungen von Endress+Hauser ersetzen. • Defekte Gewinde erfordern eine Instandsetzung des Messgeräts. • Gewinde (z.B. von Elektronikraum- und Anschlussraumdeckel) müssen geschmiert sein, sofern keine abriebfeste Trockenschmierung vorhanden ist.
- Seite 19 Abläufe, Prozesse oder Handlungen, die verboten sind. Tipp Kennzeichnet zusätzliche Informationen. … Handlungsschritte Werkzeugliste 0.5 x 3.5 mm 3 mm Seitenschneider säurefreies, nicht Stift / Werkzeug härtendes Fett Ø < 2 mm (0,08 in) 8 mm, 22 mm Kabelbinder Endress+Hauser...
- Seite 20 F-CHIP (optional) Wiedereinbau Gültige Dokumentation Gültig ist die mit dem neuem Messumformer mitgelieferte neue Dokumentation. Umbau Promag 55 Kompaktausführung zu Promag 55 Getrenntausführung Messumformergehäuse Alu ausbauen VORSICHT Messgerät unter Spannung! Lebensgefahr durch Stromschlag. ‣ Messgerät nur im spannungslosen Zustand öffnen. Endress+Hauser...
- Seite 21 Den vorhandenen T-DAT, S-DAT und F-Chip (soweit vorhanden) vom Kabelbinder trennen und aus bestehenden Messumformer herausziehen. 1 → 2 → 3 → 3 (0.12) 3 mm 3 mm 4 → 5 → 6 → S-DAT T-DAT 7 → 8 → 9 → Ø < 2 mm Endress+Hauser...
- Seite 22 EA00069D 10 → 11 → 8 mm Sensor Anschlussgehäuse montieren 1 → 2 → 3 → 3 mm 12 Nm (8.9 lbf ft) 8 mm Endress+Hauser...
- Seite 23 5 → 3 (0.12) 0.5 × 3.5 Messumformer Wandgehäuse montieren Den vorhandenen T-DAT, S-DAT und F-Chip (soweit vorhanden) in den Messumformer einsetzen. Siehe Bild 2 unten. 1 → 2 → 3 → S-DAT T-DAT 4 → 3 (0.12) PH 2 Endress+Hauser...
- Seite 24 Datenbank). Detaillierte Angaben zum elektrischen Anschluss: Kapitel "Elektrischer Anschluss", Betriebsanleitung zum Gerät. Detaillierte Angaben zur Inbetriebnahme: Kapitel "Inbetriebnahme", Betriebsanleitung zum Gerät. Anpassung der Kennzeichnung Nach dem Umbau das Umbau-Datum auf das Hinweisschild eintragen und Hinweisschild (1) gemäss Abbildung aufkleben. Endress+Hauser...
- Seite 25 Verpflichtende Anweisung Technische Änderungen wie Upgrades-, Änderungen von Konfigurationen an Ein-/ Ausgängen, sowie Umbauten an Endress+Hauser Durchflussmessgeräten führen zu einer notwendigen Anpassung der Gerätewurzel (z.B. 5W4B => 5W4C) und/oder des erweiterten Bestellcodes, bzw. des Bestellcodes des betroffenen Gerätes. Veränderungen dieser Art erfordern somit neue Typenschilder, welche jede technische Veränderung der genannten...
- Seite 28 *71414882* 71414882 www.addresses.endress.com...