Werbung
Quicklinks
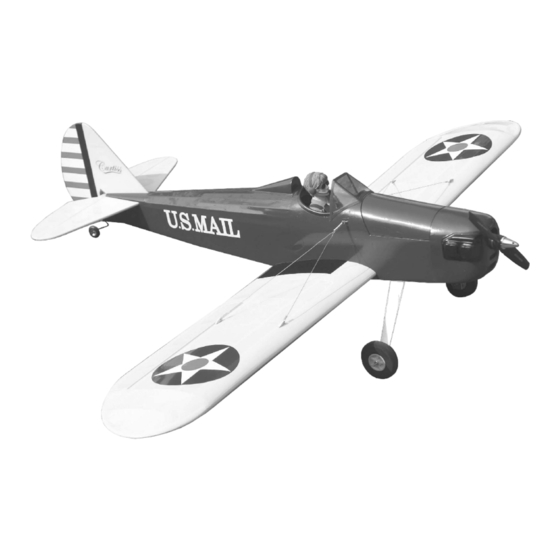
Radio control model
R/C Flugmodell
INSTRUCTION MANUAL
MONTAGEANLEITUNG
SPECIFICATIONS
Wingspan
Length
Electric Motor
Radio
4 Channel / 4 Servos
TECHNISCHE DATEN
Spannweite
Lange
Elektroantrieb
(siehe nächste Seite)
Fernsteuerung
4 Kanal / 4 Servos
WARNING! This radio controlled model is NOT a toy. If modified or flown carelessly it could go out of controll and
cause serious human injury or property damage. Before flying your airplane, ensure the air field is spacious enough.
Always fly it outdoors in safe areas and seek professional advice if you are unexperienced.
ACHTUNG! Dieses ferngesteuerte Modell ist KEIN Spielzeug! Es ist für fortgeschrittene Modellflugpiloten bestimmt,
die ausreichende Erfahrung im Umgang mit derartigen Modellen besitzen Bei unsachgemäßer Verwendung kann
hoher Personen- und/oder Sachschaden entstehen. Fragen Sie in einem Modellbauverein in Ihrer Nähe um
professionelle Unterstützung, wenn Sie Hilfe im Bau und Betrieb benötigen. Der Zusammenbau dieses Modells ist
durch die vielen Abbildungen selbsterklärend und ist für fortgeschrittene, erfahrene Modellbauer bestimmt.
1210mm (49in.)
880mm (34.6 in.)
(See next page)
1210mm
880 mm
FLY BABY
U.S.MAIL
VERSION
Item No. 1600133
U.S.MAIL
Werbung

Inhaltszusammenfassung für pichler FLY BABY U.S.MAIL
- Seite 1 Radio control model R/C Flugmodell FLY BABY INSTRUCTION MANUAL MONTAGEANLEITUNG U.S.MAIL U.S.MAIL VERSION Item No. 1600133 SPECIFICATIONS Wingspan 1210mm (49in.) Length 880mm (34.6 in.) Electric Motor (See next page) Radio 4 Channel / 4 Servos TECHNISCHE DATEN Spannweite 1210mm Lange 880 mm Elektroantrieb (siehe nächste Seite)
-
Seite 2: Empfohlenes Zubehör (Nicht Im Lieferumfang Enthalten)
RECOMMENDED ACCESSORIES (Purchase separately) Empfohlenes Zubehör (Nicht im Lieferumfang enthalten) Hobby People ESC Servo: Brushless, 40A LHS Electronics LS-11D 2-6S Li-Po BB MG Micro servo Digital Extension cord Servoverlangerungskabel 4 - channel radio Brushless Motor: 4 - Kanal 2814/06 Hobby People Fernsteuerung Li-po Battery: 11.1v, 2600mAh... - Seite 3 TOP VIEW / Draufsicht 1A -Trial fit the horizontal stabilizer in place . Cut away only the covering both side Check the alignment of the horizontal stabilizer. When you are satisfied with the alignment, use a pencil to trace around the top and bottom of the stabilizer where it meets the fuselage.
- Seite 4 Thin CA Thin CA Cut away only the covering Note: The rectangular hole on the rudder for the rudder control horn installation is Plastic control horn pre-cut at factory. Tail wheel gear .....1 A=1.2”(37mm) 2mm collar...1 Note: Making sure that you drill the hole perpendicular to the 25mm ..1 5/64”...
- Seite 5 1-Connect the 30cm extension (not include) to the aileron servo and secure with the adhesive tape. 2-Using the thread (pre-installed at factory), full the extension out of the wing as shown. 3-Attach the aileron servo into the wing. 4-Attach the aileron control horn using CA glue. Do the same way with second wing half.
- Seite 6 Rudder servo Elevator servo Fuselage - Left view Fuselage - Right view Note: The rectangular holes on each side of the fuselage for the rudder and elevator servo installation are pre-cut at factory. Cut away only the covering. Thin CA Thin CA 6x50mm plastic bolt ..1...
- Seite 7 Control surface / Ruderausschlage 1”(25mm) 21/64” 7/16” (8mm) (11mm) 21/64” 7/16” 1”(25mm) (8mm) (11mm) AILERON STROKE RUDDER STROKE ELEVATOR STROKE Seitenruderausschlag Querruderausschlag Hohenruderausschlag WARNING ! Securely install the receiver and power Balance / Schwerpunkt pack, ensuring they will not come loose or rattle during flight.


