AEG BSB578270M Benutzerinformation
Vorschau ausblenden
Andere Handbücher für BSB578270M:
- Benutzerinformation (184 Seiten) ,
- Benutzerinformation (184 Seiten)

Verwandte Anleitungen für AEG BSB578270M


Inhaltszusammenfassung für AEG BSB578270M
- Seite 1 BSB578270M User Manual Oven BSE578270M Notice d'utilisation BSS57807BM Four BSS578270M Benutzerinformation Backofen Istruzioni per l’uso Forno USER MANUAL...
-
Seite 2: Inhaltsverzeichnis
FOR PERFECT RESULTS Thank you for choosing this AEG product. We have created it to give you impeccable performance for many years, with innovative technologies that help make life simpler – features you might not find on ordinary appliances. Please spend a few minutes reading to get the very best from it. - Seite 3 10. ADDITIONAL FUNCTIONS..... 29 Information Sheet*....... 42 14.2 Energy saving......43 10.1 Lock..........29 10.2 Automatic switch-off.....29 15. MENU STRUCTURE........43 10.3 Cooling fan........30 15.1 Menu..........43 11. HINTS AND TIPS........30 16. ENVIRONMENTAL CONCERNS.....44 11.1 Moist Fan Baking......30 My AEG Kitchen app 3/188...
-
Seite 4: Safety Information
Children should be supervised to ensure that they do not • play with the appliance and mobile devices with My AEG Kitchen . Keep all packaging away from children and dispose of it •... - Seite 5 SAFETY INFORMATION This appliance may be used in, offices, hotel guest rooms, • bed & breakfast guest rooms, farm guest houses and other similar accommodation where such use does not exceed (average) domestic usage levels. Only a qualified person must install this appliance and •...
-
Seite 6: Safety Instructions
SAFETY INSTRUCTIONS 2. SAFETY INSTRUCTIONS 2.1 Installation WARNING! Only a qualified person must install this appliance. • Remove all the packaging. • Do not install or use a damaged appliance. • Follow the installation instructions supplied with the appliance. • Always take care when moving the appliance as it is heavy. Always use safety gloves and enclosed footwear. -
Seite 7: Electrical Connection
SAFETY INSTRUCTIONS 2.2 Electrical connection WARNING! Risk of fire and electric shock. • All electrical connections should be made by a qualified electrician. • The appliance must be earthed. • Make sure that the parameters on the rating plate are compatible with the electrical ratings of the mains power supply. -
Seite 8: Use
SAFETY INSTRUCTIONS 2.3 Use WARNING! Risk of injury, burns and electric shock or explosion. • Do not change the specification of this appliance. • Make sure that the ventilation openings are not blocked. • Do not let the appliance stay unattended during operation. •... -
Seite 9: Pyrolytic Cleaning
SAFETY INSTRUCTIONS • Clean regularly the appliance to prevent the deterioration of the surface material. • Clean the appliance with a moist soft cloth. Use only neutral detergents. Do not use abrasive products, abrasive cleaning pads, solvents or metal objects. •... -
Seite 10: Service
• Cut off the mains electrical cable close to the appliance and dispose of it. • Remove the door catch to prevent children or pets from becoming trapped in the appliance. 3. INSTALLATION WARNING! Refer to Safety chapters. 3.1 Building in www.youtube.com/electrolux www.youtube.com/aeg How to install your AEG/Electrolux Oven - Column installation 10/188... -
Seite 11: Securing The Oven To The Cabinet
INSTALLATION (*mm) min. 550 min. 560 (*mm) min. 550 min. 560 3.2 Securing the oven to the cabinet 11/188... -
Seite 12: Product Description
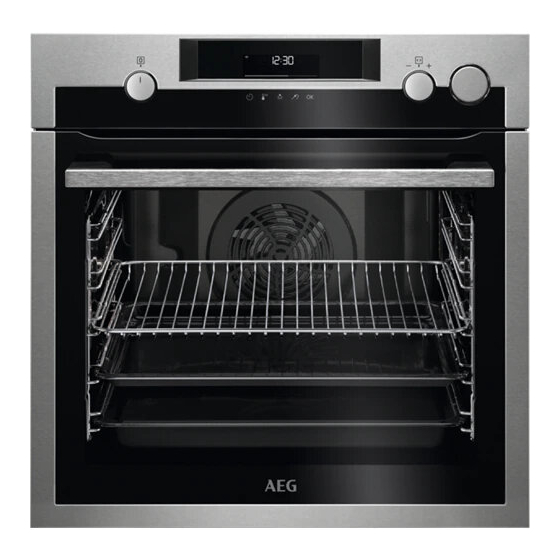
PRODUCT DESCRIPTION 4. PRODUCT DESCRIPTION 4.1 General overview Control panel Knob for the heating functions Display Control knob Water drawer Heating element Socket for the food sensor Lamp Shelf support, removable Draining pipe Water outlet valve Shelf positions Steam inlet 4.2 Accessories •... -
Seite 13: How To Turn Appliance On And Off
HOW TO TURN APPLIANCE ON AND OFF 5. HOW TO TURN APPLIANCE ON AND OFF 5.1 Retractable knobs To use the appliance press the knob. The knob comes out. 5.2 Control panel Control panel sensor fields Press Turn the knob Fast Food Sen‐... -
Seite 14: Before First Use
BEFORE FIRST USE Timer indi‐ cators: Wi-Fi indicator - flashes when the oven can be Remote operation indicator - the oven connected to Wi-Fi. can be controlled remotely. Wi-Fi connection is turned on. Remote operation is turned on. Progress bar - for temperature or time. The bar is fully red when the oven reaches the set tempera‐... -
Seite 15: Wireless Connection
To connect the appliance you need: • Wireless network with the Internet connection. • Mobile device connected to your wireless network. Step 1 Download the mobile app My AEG Kitchen and follow the instructions for the next steps. Step 2 Turn the knob to select: Frequency 2.4 GHz WLAN... -
Seite 16: Software Licences
6.4 Software licences The software in this product contains components that are based on free and open source soft‐ ware. AEG gratefully acknowledges the contributions of the open software and robotics communi‐ ties to the development project. To access the source code of these free and open source software components whose license conditions require publishing, and to see their full copyright information and applicable license terms, please visit: http://aeg.opensoftwarerepository.com (folder NIU5). -
Seite 17: Heating Functions
DAILY USE Steam cooking Press the cover Fill the water Push the water Select the of the water drawer with 900 drawer to its ini‐ steam heating Set the temperature. drawer to open ml of water. tial position. function. 7.2 Heating functions Standard heating functions Heating function Application... -
Seite 18: Notes On: Moist Fan Baking
DAILY USE Heating function Application To grill thin pieces of food and to toast bread. Grill To roast large meat joints or poultry with bones on one shelf position. To make gratins and to brown. Turbo Grilling To enter the Menu: Assisted Cooking, Cleaning, Settings. Menu 7.3 Notes on: Moist Fan Baking This function was used to comply with the energy efficiency class and ecodesign requirements... -
Seite 19: How To Set: Assisted Cooking
DAILY USE Emptying the water tank Turn off the oven, leave it with the door Step 1 open and wait until the oven is cold. Connect the draining pipe (C) to the outlet Step 2 valve (A) through the connector (B). Keep the end of the pipe below the level of Step 3 A and push B repeatedly to collect remain‐... -
Seite 20: Assisted Cooking
DAILY USE 7.6 Assisted Cooking Legend Food sensor available. Place the Food sensor in the thickest part of the dish. The oven turns off when the set Food sensor temperature is reached. Add water to the tank. Preheat the oven before you start cooking. Shelf level. - Seite 21 DAILY USE Dish Weight Shelf level / Accessory Duration time Roast Beef, rare (slow ~ 75 min cooking) 2; baking tray Roast Beef, 1 - 1,5 kg; 4 Use your favourite spices or simply salt medium (slow - 5 cm thick ~ 85 min and fresh grounded pepper.
- Seite 22 DAILY USE Dish Weight Shelf level / Accessory Duration time Spare Ribs 2 - 3 kg; use 90 min 3; deep pan raw, 2 - 3 Add liquid to cover the bottom of a dish. cm thin Turn the meat after half of the cooking spare ribs time.
- Seite 23 DAILY USE Dish Weight Shelf level / Accessory Duration time Other Meat loaf 1 kg ~ 60 min 2; wire shelf Use your favourite spices. Fish Whole fish, 0,5 - 1 kg ~ 30 min 2; baking tray grilled per fish Fill the fish with butter and use your fa‐...
- Seite 24 DAILY USE Dish Weight Shelf level / Accessory Duration time Wegdes 1 kg 35 min 3; baking tray lined with baking pa‐ Use your favourite spices. Cut potatoes into pieces. Grilled mixed 1 - 1,5 kg 30 min 3; baking tray lined with baking pa‐ vegetables Use your favourite spices.
-
Seite 25: Clock Functions
CLOCK FUNCTIONS Dish Weight Shelf level / Accessory Duration time All grain / 1 kg 60 min 2; baking tray lined with baking rye / dark paper / wire shelf bread all grain in loaf 8. CLOCK FUNCTIONS 8.1 Clock functions Clock Function Application Minute minder. - Seite 26 CLOCK FUNCTIONS How to set: Minute minder Step 1 Step 2 Step 3 The display shows: 0:00 Set the Minute minder Press: Press: Timer starts counting down immediately. How to set: Cooking time Step 1 Step 2 Step 3 Step 4 The display shows: 0:00...
-
Seite 27: How To Use: Accessories
HOW TO USE: ACCESSORIES 9. HOW TO USE: ACCESSORIES 9.1 Inserting accessories A small indentation at the top increases safety. The indentations are also anti-tip devices. The high rim around the shelf prevents cookware from slipping of the shelf. Wire shelf: Push the shelf between the guide bars of the shelf support and make sure that the feet point down. - Seite 28 HOW TO USE: ACCESSORIES There are two temperatures to be set: The oven temperature. The core temperature. For the best cooking results: Ingredients should be at Do not use it for liquid During cooking it must remain in room temperature. dishes.
-
Seite 29: Additional Functions
ADDITIONAL FUNCTIONS Step 5 - press to set the core temperature of the sensor. Step 6 - press to confirm. When food reaches the set temperature, the signal sounds. You can choose to stop or to continue cooking to make sure the food is well done. Step 7 Remove Food Sensor plug from the socket and remove the dish from the oven. -
Seite 30: Cooling Fan
HINTS AND TIPS The Automatic switch-off does not work with the functions: Light, Food sensor, Time Delay. 10.3 Cooling fan When the appliance operates, the cooling fan turns on automatically to keep the surfaces of the appliance cool. If you turn off the appliance, the cooling fan can continue to operate until the appliance cools down. -
Seite 31: Moist Fan Baking - Recommended Accessories
HINTS AND TIPS (°C) (min) Poached meat, baking tray or dripping 35 - 45 0.25 kg Shashlik, 0.5 kg baking tray or dripping 25 - 30 Cookies, 16 baking tray or dripping 20 - 30 pieces Macaroons, 24 baking tray or dripping 25 - 35 pieces Muffins, 12... -
Seite 32: Cooking Tables For Test Institutes
HINTS AND TIPS Ramekins Pizza pan Baking dish Flan base tin Ceramic Dark, non-reflective Dark, non-reflective Dark, non-reflective 8 cm diameter, 28 cm diameter 26 cm diameter 28 cm diameter 5 cm height 11.3 Cooking tables for test institutes Information for test institutes Tests according to IEC 60350-1. - Seite 33 HINTS AND TIPS (°C) (min) Sponge Conven‐ Wire shelf 40 - 50 Preheat the oven cake, tional for 10 minutes. cake Cooking mould Ø26 cm Sponge True Fan Wire shelf 40 - 50 Preheat the oven cake, Cooking for 10 minutes. cake mould Ø26 cm...
-
Seite 34: Care And Cleaning
CARE AND CLEANING 12. CARE AND CLEANING WARNING! Refer to Safety chapters. 12.1 Notes on cleaning Clean the front of the appliance with a microfibre cloth with warm water and a mild detergent. Use a cleaning solution to clean metal surfaces. Cleaning Clean stains with a mild detergent. -
Seite 35: How To Use: Pyrolytic Cleaning
CARE AND CLEANING Step 3 Pull the rear end of the shelf support away from the side wall and remove it. Step 4 Install the shelf supports in the opposite sequence. 12.3 How to use: Pyrolytic Cleaning Clean the oven with Pyrolytic Cleaning. WARNING! There is a risk of burns. -
Seite 36: Cleaning Reminder
CARE AND CLEANING Pyrolytic Cleaning During the cleaning the oven lamp is off. When the oven is at the set temperature, the door locks. Until the door unlocks the display shows: When the cleaning ends: Turn off the oven and wait Clean the cavity with a soft Remove the residue from the until it is cold. -
Seite 37: How To Remove And Install: Door
CARE AND CLEANING When the cleaning ends: Turn off the oven. Empty the water Rinse the water tank and Clean the drain pipe tank. Refer to Daily clean the remaining lime‐ with warm water use, "Emptying the stone residue with a soft and a mild deter‐... - Seite 38 CARE AND CLEANING Step 2 Lift and pull the latches until they click. Step 3 Close the oven door halfway to the first opening position. Then lift and pull to remove the door from its seat. Step 4 Put the door on a soft cloth on a sta‐ ble surface.
-
Seite 39: How To Replace: Lamp
CARE AND CLEANING Make sure that you put the glass panels (A and B) back in the correct sequence. Check for the symbol / printing on the side of the glass panel, each of the glass panels looks different to make the disassembly and as‐ sembly easier. -
Seite 40: Troubleshooting
TROUBLESHOOTING 13. TROUBLESHOOTING WARNING! Refer to Safety chapters. 13.1 What to do if... In any cases not included in this table please contact with an Authorised Service Centre. The oven does not turn on or does not heat up Problem Check if... -
Seite 41: Service Data
TROUBLESHOOTING Error codes Err F102 The oven door is closed. Err F102 The door lock is not broken. 00:00 There was a power cut. Set the time of day. If the display shows an error code that is not in this table turn the house fuse off and on to restart the oven. -
Seite 42: Energy Efficiency
We recommend that you write the data here: Product number (PNC) ......... Serial number (S.N.) ......... 14. ENERGY EFFICIENCY 14.1 Product Information and Product Information Sheet* Supplier's name BSB578270M 949494787 BSE578270M 949494772 Model identification BSS57807BM 949494790 BSS578270M 949494786 Energy Efficiency Index 81.2 Energy efficiency class Energy consumption with a standard load, conventional 0.93 kWh/cycle... -
Seite 43: Energy Saving
MENU STRUCTURE * For European Union according to EU Regulations 65/2014 and 66/2014. For Republic of Belarus according to STB 2478-2017, Appendix G; STB 2477-2017, Annexes A and B. For Ukraine according to 568/32020. Energy efficiency class is not applicable for Russia. EN 60350-1 - Household electric cooking appliances - Part 1: Ranges, ovens, steam ovens and grills - Methods for measuring performance. -
Seite 44: Environmental Concerns
MENU STRUCTURE Menu structure Assisted Cooking Cleaning Settings Step 1 Step 2 Step 3 Step 4 Step 5 O1 - O15 Adjust the value Select the Menu, Select the set‐ Confirm setting. Confirm setting. Settings. ting. and press Settings Time of day Change Display brightness 1 - 5... - Seite 45 MENU STRUCTURE appliances. Do not dispose of appliances marked with the symbol with the household waste. Return the product to your local recycling facility or contact your municipal office. 45/188...
- Seite 46 TABLE DES MATIÈRES POUR DES RÉSULTATS PARFAITS Merci d’avoir choisi ce produit AEG. Nous l’avons conçu pour qu’il vous offre des performances irréprochables pendant de nombreuses années, en intégrant des technologies innovantes vous simplifiant la vie – fonctions que vous ne trouverez peut-être pas sur des appareils ordinaires.
- Seite 47 TABLE DES MATIÈRES 5. COMMENT ALLUMER ET ÉTEINDRE 11. CONSEILS..........76 L'APPAREIL..........58 11.1 Circulation d'air humide....76 5.1 Manettes rétractables....58 11.2 Circulation d'air humide - 5.2 Bandeau de commande....58 accessoires recommandés....78 11.3 Tableaux de cuisson pour les 6.
-
Seite 48: Information Sur La Sécurité
INFORMATION SUR LA SÉCURITÉ My AEG Kitchen app INFORMATION SUR LA SÉCURITÉ Avant d'installer et d'utiliser cet appareil, lisez soigneusement les instructions fournies. Le fabricant ne pourra être tenu pour responsable des blessures et dégâts résultant d'une mauvaise installation ou utilisation. Conservez toujours les instructions dans un lieu sûr et accessible pour vous y référer... -
Seite 49: Sécurité Générale
INFORMATION SUR LA SÉCURITÉ Veillez à ce que les enfants ne jouent pas avec l’appareil et • les appareils mobiles avec My AEG Kitchen . Ne laissez pas les emballages à la portée des enfants et • jetez-les convenablement. AVERTISSEMENT : L'appareil et ses parties accessibles •... -
Seite 50: Consignes De Sécurité
CONSIGNES DE SÉCURITÉ AVERTISSEMENT : L'appareil et ses parties accessibles • deviennent chauds pendant l'utilisation. Des précautions doivent être prises pour éviter de toucher les éléments chauffants ou la surface de la cavité de l'appareil. Utilisez toujours des gants de cuisine pour retirer ou insérer •... -
Seite 51: Branchement Électrique
CONSIGNES DE SÉCURITÉ Largeur du meuble 560 mm Profondeur du meuble 550 (550) mm Hauteur de l’avant de l’appareil 594 mm Hauteur de l’arrière de l’appareil 576 mm Largeur de l’avant de l’appareil 595 mm Largeur de l’arrière de l’appareil 559 mm Profondeur de l'appareil 569 mm... -
Seite 52: Utilisation
CONSIGNES DE SÉCURITÉ • Si la prise secteur est détachée, ne branchez pas la fiche secteur. • Ne tirez pas sur le câble secteur pour débrancher l'appareil. Tirez toujours sur la fiche de la prise secteur. • N'utilisez que des systèmes d'isolation appropriés : des coupe-circuits, des fusibles (les fusibles à... -
Seite 53: Entretien Et Nettoyage
CONSIGNES DE SÉCURITÉ • Ne placez pas de produits inflammables ou d’éléments imbibés de produits inflammables à l’intérieur, à proximité ou au-dessus de l’appareil. • Ne communiquez pas votre mot de passe wifi. AVERTISSEMENT! Risque d'endommagement de l'appareil. • Pour éviter tout endommagement ou décoloration de l’émail : –... -
Seite 54: Cuisson À La Vapeur
CONSIGNES DE SÉCURITÉ • Avant d'utiliser la fonction de nettoyage par pyrolyse ou la fonction Première utilisation, retirez de la cavité du four : – tout résidu excessif de nourriture, tout dépôt ou toute éclaboussure de graisse ou d'huile. – tout objet amovible (y compris les grilles, les rails, etc., fournis avec le produit), en particulier les récipients, plateaux, plaques, ustensiles, etc. -
Seite 55: Service
• Retirez le dispositif de verrouillage du hublot pour empêcher les jeunes et les animaux de s'enfermer dans l'appareil. 3. INSTALLATION AVERTISSEMENT! Reportez-vous aux chapitres concernant la sécurité. 3.1 Encastrement www.youtube.com/electrolux www.youtube.com/aeg How to install your AEG/Electrolux Oven - Column installation (*mm) min. 550 min. 560 55/188... -
Seite 56: Fixation Du Four Au Meuble
INSTALLATION (*mm) min. 550 min. 560 3.2 Fixation du four au meuble 56/188... -
Seite 57: Description De L'appareil
DESCRIPTION DE L'APPAREIL 4. DESCRIPTION DE L'APPAREIL 4.1 Vue d’ensemble Bandeau de commande Manette de sélection des modes de cuisson Affichage Manette de commande Bac à eau Résistance Prise pour la sonde à viande Éclairage Chaleur tournante Support de grille, amovible Tuyau de vidange Vanne de vidange de l'eau Niveaux de la grille... -
Seite 58: Comment Allumer Et Éteindre L'appareil
COMMENT ALLUMER ET ÉTEINDRE L'APPAREIL 5. COMMENT ALLUMER ET ÉTEINDRE L'APPAREIL 5.1 Manettes rétractables Pour utiliser l'appareil, appuyez sur la manette. La manette sort alors de son logement. 5.2 Bandeau de commande Appuyez sur Tournez la ma‐ Touches tactiles du bandeau de commande la touche nette Pré‐... -
Seite 59: Avant La Première Utilisation
AVANT LA PREMIÈRE UTILISATION Touches Cuisson assistée Nettoyage Configurations Préchauffage rapide Verrouil. Voyants du minu‐ teur : Voyant Wi-Fi - clignote lorsque le four peut être Télécommande indicateur - le four peut connecté au Wi-Fi. être contrôlé à distance. La connexion Wi-Fi est activée. Télécommande est allumé. -
Seite 60: Préchauffage Initial
• Un réseau sans fil avec connexion Internet. • d'un appareil mobile connecté à votre réseau sans fil. Étape 1 Téléchargez l'application mobile My AEG Kitchen et suivez les instructions pour les étapes suivantes. Étape 2 Tournez la manette pour sélectionner : Fréquence... -
Seite 61: Licences Du Logiciel
Pologne, Portugal, Roumanie, Slovénie, Slovaquie, Finlande, Suède, Norvège, Islande, Liechtenstein, Suisse, Turquie. 6.4 Licences du logiciel Le logiciel de ce produit contient des composants basés sur un logiciel libre et ouvert. AEG recon‐ naît pleinement les contributions du logiciel ouvert et des communautés robotiques au projet de développement. -
Seite 62: Modes De Cuisson
UTILISATION QUOTIDIENNE Cuisson à la vapeur Appuyez sur le Replacez le Remplissez le Sélectionnez le couvercle du bac à eau dans Réglez la tempéra‐ bac à eau avec mode de cuis‐ bac à eau pour sa position ini‐ ture. 900 ml d’eau. son vapeur. -
Seite 63: Remarques Sur : Circulation D'air Humide
UTILISATION QUOTIDIENNE Mode de cuisson Application Cette fonction est conçue pour économiser de l'énergie en cours de cuis‐ son. Lorsque vous utilisez cette fonction, la température à l’intérieur de la cavité peut différer de la température sélectionnée. La chaleur résiduelle Circulation d'air est utilisée. -
Seite 64: Comment Régler : Cuisson Assistée
UTILISATION QUOTIDIENNE Vidange du réservoir d'eau Éta‐ Éteignez le four, laissez la porte ouverte et pe 1 attendez que le four soit froid. Éta‐ Raccordez le tuyau de vidange (C) à la pe 2 vanne de vidange (A) via le connecteur (B). Maintenez l'extrémité... -
Seite 65: Cuisson Assistée
UTILISATION QUOTIDIENNE 7.6 Cuisson assistée Légende Sonde de cuisson disponible. Placez la Sonde de cuisson dans la partie la plus épaisse du plat. Le four s’éteint lorsque la température définie de la Sonde de cuisson est atteinte. Ajoutez de l’eau dans le réservoir. Préchauffez le four avant de commencer la cuisson. - Seite 66 UTILISATION QUOTIDIENNE Plat Poids Niveau/Accessoire Durée Rôti de bœuf, saignant ~ 75 min (cuisson basse température) 2 ; plateau de cuisson Rôti de bœuf, Servez-vous de vos épices préférées ou 1 - 1,5 kg ; 4 à point (cuis‐ simplement du sel et du poivre fraîche‐ - 5 cm ~ 85 min son basse...
- Seite 67 UTILISATION QUOTIDIENNE Plat Poids Niveau/Accessoire Durée Émincé de 1,5 - 2 kg ~ 215 min 2 ; plateau de cuisson porc (cuisson Utilisez vos épices préférées. Retournez lente) la viande à la moitié du temps de cuisson pour faire dorer de manière homogène. Longe, fraî‐...
- Seite 68 UTILISATION QUOTIDIENNE Plat Poids Niveau/Accessoire Durée Canard entier 2 - 3 kg ~ 100 min 2 ; plat à rôtir sur grille métalli‐ Utilisez vos épices préférées. Placez la viande sur un plat à rôtir. Retournez le canard à la moitié du temps de cuisson. Oie entière 4 - 5 kg ~ 110 min...
- Seite 69 UTILISATION QUOTIDIENNE Plat Poids Niveau/Accessoire Durée Brownies 2 kg 30 min 3 ; plat profond Muffins au 25 min 3 ; bac à muffins sur grille métalli‐ chocolat Quatre-quarts 50 min 2 ; moule quatre-quarts sur grille mé‐ tallique Légumes/Garnitures Pommes de 1 kg 50 min...
-
Seite 70: Fonctions De L'horloge
FONCTIONS DE L'HORLOGE Plat Poids Niveau/Accessoire Durée Gratin de 1 - 1,5 kg 60 min 1 ; cocotte sur grille métallique pommes de Tournez le plat après la moitié du temps terre (pommes de cuisson. de terre crues) Pizza fraîche, 2 ;... -
Seite 71: Comment Régler : Fonctions De L'horloge
FONCTIONS DE L'HORLOGE Fonctions de l’horlo‐ Application Compteur. Le maximum est de 23 h 59 min. Cette fonction n’a aucun effet sur le fonctionnement du four. Pour activer et désactiver le Compteur, sélectionnez : Menu , Configu‐ rations. 8.2 Comment régler : Fonctions de l’horloge Comment régler Heure actuelle Étape 1 Étape 2... -
Seite 72: Conseils D'utilisation : Accessoires
CONSEILS D'UTILISATION : ACCESSOIRES Comment régler Heure de cuisson Étape 1 Étape 2 Étape 3 Étape 4 L’affichage in‐ dique : 0:00 Choisissez le mo‐ Appuyez à plu‐ de de cuisson et Réglez le temps sieurs reprises : Appuyez sur réglez la tempéra‐... -
Seite 73: Sonde De Cuisson
CONSEILS D'UTILISATION : ACCESSOIRES Grille métallique: Poussez la grille entre les barres de guida‐ ge des supports de grille et assurez-vous que les pieds sont orientés vers le bas. Plateau de cuisson / Plat à rôtir: Poussez la plaque entre les rails du sup‐ port de grille. - Seite 74 CONSEILS D'UTILISATION : ACCESSOIRES Pour obtenir les meilleurs résultats de cuisson : Les ingrédients doivent être Ne l’utilisez pas pour des Pendant la cuisson, l'aliment doit à température ambiante. plats liquides. rester dans le plat. Comment utiliser : Sonde de cuisson Étape 1 Allumez le four.
-
Seite 75: Fonctions Supplémentaires
FONCTIONS SUPPLÉMENTAIRES Étape 6 - appuyez pour confirmer. Lorsque les aliments atteignent la température définie, un signal sonore retentit. Vous pouvez choisir d’arrêter ou de poursuivre la cuisson pour vous assurer que l’aliment est bien cuit. Étape 7 Retirez la fiche de la Sonde de cuisson de la prise et retirez le plat du four. AVERTISSEMENT! Attention au risque de brûlure car la Sonde de cuisson devient chau‐... -
Seite 76: Ventilateur De Refroidissement
CONSEILS (°C) 250 -maximum L'arrêt automatique ne fonctionne pas avec les fonctions : Eclairage four, Sonde de cuisson, Départ différé. 10.3 Ventilateur de refroidissement Lorsque l'appareil fonctionne, le ventilateur de refroidissement se met automatiquement en marche pour refroidir les surfaces de l'appareil. Si vous éteignez l'appareil, le ventilateur de refroidissement peut continuer à... - Seite 77 CONSEILS (°C) (min) Poisson poché, Plateau de cuisson ou 20 - 25 0,3 kg plat à rôtir Poisson entier, Plateau de cuisson ou 25 - 35 0,2 kg plat à rôtir Filet de poisson, plaque à pizza sur la gril‐ 25 - 30 0,3 kg le métallique...
-
Seite 78: Circulation D'air Humide - Accessoires Recommandés
CONSEILS 11.2 Circulation d'air humide - accessoires recommandés Utilisez les moules et récipients foncés et non réfléchissants. Ils offrent une meilleure absorption de la chaleur que les plats réfléchissants de couleur claire. Ramequins Moule pour fond de Plaque à pizza Plat de cuisson tarte Céramique... - Seite 79 CONSEILS (°C) (min) Tarte Chauffage Grille mé‐ 70 - 90 Haut/Bas tallique pom‐ mes, 2 mou‐ Ø20 cm Tarte Chaleur Grille mé‐ 70 - 90 tournante tallique pom‐ mes, 2 mou‐ Ø20 cm Génoi‐ Chauffage Grille mé‐ 40 - 50 Préchauffez le se, mou‐...
-
Seite 80: Entretien Et Nettoyage
ENTRETIEN ET NETTOYAGE (°C) (min) Sablé Chauffage Plateau 140 - 25 - 45 Haut/Bas de cuis‐ Pain Gril Grille mé‐ max. 2 à 3 mi‐ Préchauffez le grillé, 4 tallique nutes sur four pendant 3 mi‐ à 6 mor‐ la premiè‐ nutes. -
Seite 81: Comment Retirer : Supports De Grille
ENTRETIEN ET NETTOYAGE Nettoyez la cavité après chaque utilisation. L’accumulation de graisse ou d’au‐ tres résidus peut provoquer un incendie. De l'humidité peut se déposer dans l'enceinte de l'appareil ou sur les vitres de la porte. Pour diminuer la condensation, laissez fonctionner l'appareil pendant 10 minutes avant la cuisson. - Seite 82 ENTRETIEN ET NETTOYAGE Avant le Nettoyage par pyrolyse : Éteignez le four et atten‐ Retirez les accessoires . Nettoyez la sole du four et la vitre dez qu’il soit froid. interne de la porte avec de l’eau tiède, un chiffon doux et un dé‐ tergent doux.
-
Seite 83: Nettoyage Conseillé
ENTRETIEN ET NETTOYAGE 12.4 Nettoyage conseillé Le four vous rappelle lorsque le nettoyage par pyrolyse est terminé. Pour désactiver le rappel, accédez au Menu et clignote sur l’affichage pendant 5 secondes sélectionnez Configurations, Nettoyage con‐ après chaque session de cuisson. seillé. -
Seite 84: Comment Démonter Et Installer : Couvercle
ENTRETIEN ET NETTOYAGE Dureté de l'eau Bandelette Dépôt calcaire Classifica‐ Nettoyez le de test (mg/l) tion de l'eau réservoir d'eau tous Niveau 0 - 7 0 - 50 douce 75 cycles - 2,5 mois 8 - 14 51 - 100 modérément 50 cycles - dure... - Seite 85 ENTRETIEN ET NETTOYAGE Étape 3 Fermez la porte du four à mi-chemin de la première position d’ouverture. Puis, soulevez et tirez pour retirer la porte de son emplacement. Étape 4 Posez la porte sur un chiffon doux placé sur une surface stable. Étape 5 Tenez la garniture de porte (B) sur le bord supérieur de la porte des deux...
-
Seite 86: Comment Remplacer : Éclairage
ENTRETIEN ET NETTOYAGE Veillez à replacer les panneaux de verre (A et B) dans le bon ordre. Cherchez le symbole / l'impression se trouvant sur le côté du pan‐ neau de verre. Tous les panneaux ont un symbole différent pour faciliter le démontage et le montage. -
Seite 87: Dépannage
DÉPANNAGE 13. DÉPANNAGE AVERTISSEMENT! Reportez-vous aux chapitres concernant la sécurité. 13.1 Que faire si… Dans tous les cas ne figurant pas dans ce tableau, veuillez contacter un service après-vente agréé. Le four ne fonctionne pas ou ne chauffe pas Problème Vérifiez si... -
Seite 88: Données De Maintenance
DÉPANNAGE Codes d'erreur Err F102 La porte du four est fermée. Err F102 Le verrouillage de la porte n’est pas cassé. 00:00 Une coupure de courant s’est produite. Réglez l’heure actuelle. Si l’affichage indique un code d’erreur qui ne figure pas dans ce tableau, désactivez et réenclen‐ chez le fusible de l’habitation pour redémarrer le four. -
Seite 89: Rendement Énergétique
Référence produit (PNC) ......... Numéro de série (SN) ......... 14. RENDEMENT ÉNERGÉTIQUE 14.1 Informations produit et fiche d’informations produit* Nom du fournisseur BSB578270M 949494787 BSE578270M 949494772 Identification du modèle BSS57807BM 949494790 BSS578270M 949494786 Indice d’efficacité énergétique 81.2 Classe d’efficacité énergétique Consommation d’énergie avec charge standard, en mode... -
Seite 90: Économie D'énergie
STRUCTURE DES MENUS * Pour l’Union européenne conformément aux Règlements UE 65/2014 et 66/2014. Pour la République de Biélorussie conformément à STB 2478-2017, Annexe G ; STB 2477-2017, Annexes A et B. Pour l’Ukraine conformément à 568/32020. La classe d’efficacité énergétique n’est pas applicable pour la Russie. EN 60350-1 - Appareils de cuisson domestiques électriques - Partie 1 : Cuisinières, fours, fours à... - Seite 91 STRUCTURE DES MENUS Structure du Menu Cuisson assistée Nettoyage Configurations Étape 1 Étape 2 Étape 3 Étape 4 Étape 5 O1 -O15 Ajustez la valeur Sélectionnez le Confirmez la Sélectionnez la Confirmez la et appuyez sur Menu , Configu‐ configuration. configuration.
-
Seite 92: En Matière De Protection De L'environnement
STRUCTURE DES MENUS 16. EN MATIÈRE DE PROTECTION DE L'ENVIRONNEMENT Recyclez les matériaux portant le symbole . Déposez les emballages dans les conteneurs prévus à cet effet. Contribuez à la protection de l'environnement et à votre sécurité, recyclez vos produits électriques et électroniques. Ne jetez pas les appareils portant le symbole avec les ordures ménagères. -
Seite 93: Für Perfekte Ergebnisse
INHALTSVERZEICHNIS FÜR PERFEKTE ERGEBNISSE Danke, dass Sie sich für dieses AEG Produkt entschieden haben. Wir haben es geschaffen, damit Sie viele Jahre von seiner ausgezeichneten Leistung und den innovativen Technologien, die Ihnen das Leben erleichtern, profitieren können. Es ist mit Funktionen ausgestattet, die in gewöhnlichen Geräten nicht vorhanden sind. - Seite 94 INHALTSVERZEICHNIS 4.2 Zubehör........104 10.3 Kühlgebläse....... 123 5. SO WIRD DAS GERÄT EIN- UND 11. TIPPS UND HINWEISE......123 AUSGESCHALTET........105 11.1 Feuchte Umluft......123 5.1 Versenkbare Knöpfe....105 11.2 Feuchte Umluft - 5.2 Bedienfeld........105 Empfohlenes Zubehör....... 125 11.3 Gartabellen für Prüfinstitute..125 6.
-
Seite 95: Sicherheitshinweise
SICHERHEITSHINWEISE My AEG Kitchen app SICHERHEITSHINWEISE Lesen Sie vor der Montage und dem Gebrauch des Geräts zuerst die Bedienungsanleitung. Bei Verletzungen oder Schäden infolge nicht ordnungsgemäßer Montage oder Verwendung übernimmt der Hersteller keine Haftung. Bewahren Sie die Anleitung zum Nachschlagen an einem sicheren und zugänglichen Ort auf. -
Seite 96: Allgemeine Sicherheit
Kinder sollten beaufsichtigt werden, um sicherzustellen, • dass sie nicht mit dem Gerät und mit Mobilgeräten über My AEG Kitchen spielen. Halten Sie sämtliches Verpackungsmaterial von Kindern • fern und entsorgen Sie es ordnungsgemäß. -
Seite 97: Sicherheitsanweisungen
SICHERHEITSANWEISUNGEN WARNUNG: Vergewissern Sie sich, dass das Gerät • ausgeschaltet ist, bevor Sie die Lampe austauschen, um einen Stromschlag zu vermeiden. WARNUNG: Das Gerät und die zugänglichen Geräteteile • werden während des Betriebs heiß. Es ist darauf zu achten, die Heizelemente oder die Oberfläche des Garraums nicht zu berühren. -
Seite 98: Elektrischer Anschluss
SICHERHEITSANWEISUNGEN • Überprüfen Sie vor der Montage des Gerätes, ob sich die Gerätetür ungehindert öffnen lässt. • Das Gerät ist mit einem elektrischen Kühlsystem ausgestattet. Es muss mit der elektrischen Stromversorgung betrieben werden. Mindesthöhe des Einbaumöbels (Mindesthöhe des 590 (600) mm Schranks unter der Arbeitsplatte) Schrankbreite 560 mm... -
Seite 99: Gebrauch
SICHERHEITSANWEISUNGEN • Achten Sie darauf, Netzstecker und Netzkabel nicht zu beschädigen. Falls das Netzkabel des Geräts ersetzt werden muss, lassen Sie diese Arbeit durch unseren autorisierten Kundendienst durchführen. • Achten Sie darauf, dass das Netzkabel die Gerätetür oder die Nische unter dem Gerät nicht berührt oder in ihre Nähe gelangt, insbesondere wenn das Gerät eingeschaltet oder die Tür heiß... -
Seite 100: Reinigung Und Pflege
SICHERHEITSANWEISUNGEN • Gehen Sie beim Öffnen der Tür vorsichtig vor, wenn das Gerät in Betrieb ist. Es kann heiße Luft freigesetzt werden. • Benutzen Sie das Gerät nicht mit nassen Händen oder wenn es mit Wasser Kontakt hat. • Üben Sie keinen Druck auf die offene Tür aus. •... -
Seite 101: Pyrolysereinigung
SICHERHEITSANWEISUNGEN • Reinigen Sie das Geräts mit einem weichen, feuchten Tuch. Verwenden Sie ausschließlich Neutralreiniger. Benutzen Sie keine Scheuermittel, scheuernde Reinigungsschwämmchen, Lösungsmittel oder Metallgegenstände. • Falls Sie ein Backofenspray verwenden, befolgen Sie die Sicherheitsanweisungen auf seiner Verpackung. 2.5 Pyrolysereinigung WARNUNG! Im Pyrolyse-Modus besteht Verletzungs- und Brandgefahr und es können chemische Emissionen (Dämpfe) austreten. -
Seite 102: Wartung
• Schneiden Sie das Netzkabel in der Nähe des Geräts ab, und entsorgen Sie es. • Entfernen Sie das Türschloss, um zu verhindern, dass sich Kinder, oder Haustiere im Gerät einschließen. 3. MONTAGE WARNUNG! Siehe Kapitel Sicherheitshinweise. 3.1 Montage www.youtube.com/electrolux www.youtube.com/aeg How to install your AEG/Electrolux Oven - Column installation 102/188... -
Seite 103: Befestigung Des Ofens Am Möbel103
MONTAGE (*mm) min. 550 min. 560 (*mm) min. 550 min. 560 3.2 Befestigung des Ofens am Möbel 103/188... -
Seite 104: Gerätebeschreibung
GERÄTEBESCHREIBUNG 4. GERÄTEBESCHREIBUNG 4.1 Gesamtansicht Bedienfeld Einstellknopf für die Ofenfunktionen Display Einstellknopf Wassertank Heizelement Buchse für den Temperatursensor Lampe Ventilator Einschubschienen, herausnehmbar Ablaufschlauch Wasserauslassventil Einschubebenen Dampfeinlass 4.2 Zubehör • Kombirost Für Kochgeschirr, Kuchenformen, Braten. • Backblech Für Kuchen und Plätzchen. •... -
Seite 105: So Wird Das Gerät Ein- Und Ausgeschaltet
SO WIRD DAS GERÄT EIN- UND AUSGESCHALTET. 5. SO WIRD DAS GERÄT EIN- UND AUSGESCHALTET. 5.1 Versenkbare Knöpfe Drücken Sie zum Benutzen des Geräts den Knopf. Der Knopf kommt dann heraus. 5.2 Bedienfeld Drehen Sie Sensorfelder des Bedienfelds Drücken Sie den Knopf Back‐... -
Seite 106: Vor Der Ersten Verwendung
VOR DER ERSTEN VERWENDUNG Verriege‐ Koch-Assistent Reinigung Einstellungen Schnellaufheizung lung Timer-An‐ zeigen: Wi-Fi Anzeige - blinkt, wenn der Backofen mit Fernsteuerung-Anzeige – Der Backofen WLAN verbunden werden kann. kann aus der Ferne gesteuert werden. Die Wi-Fi-Verbindung ist eingeschaltet. Fernsteuerung ist eingeschaltet. Fortschrittsbalken - für Temperatur oder Zeit. -
Seite 107: Erstes Vorheizen
• Ein drahtloses Netzwerk mit Internetverbindung. • Ein Mobilgerät, das mit Ihrem drahtlosen Netzwerk verbunden ist. Schritt Laden Sie die mobile App My AEG Kitchen herunter und folgen Sie den Anweisungen für die nächsten Schritte. Schritt Drehen Sie den Knopf, um Folgendes auszuwählen:... -
Seite 108: Softwarelizenzen
Finnland, Schweden, Norwegen, Island, Liechtenstein, Schweiz, Türkei. 6.4 Softwarelizenzen Die Software in diesem Produkt enthält Bauteile, die auf kostenloser und Open-Source-Software basieren. AEG anerkennt die Beiträge der offenen Software- und Roboter-Communities zum Ent‐ wicklungsprojekt. Um den Quellcode dieser kostenlosen und Open-Source-Software-Bauteile aufzurufen, deren Li‐... -
Seite 109: Ofenfunktionen
TÄGLICHER GEBRAUCH Garen mit Dampf Drücken Sie Schieben Sie auf den Deckel Füllen Sie den den Wasser‐ Wählen Sie die Stellen Sie die Tem‐ des Wasser‐ Wassertank mit tank in seine Dampffunktion peratur ein. tanks, um ihn 900 ml Wasser. ursprüngliche aus. -
Seite 110: Hinweise Zu: Feuchte Umluft
TÄGLICHER GEBRAUCH Ofenfunktion Gerät Lässt Fertiggerichte (z. B. Pommes frites, Kroketten oder Frühlingsrollen) schön knusprig werden. Tiefkühlgerichte Diese Funktion ist entwickelt worden, um während des Kochvorgangs Energie zu sparen. Wenn Sie diese Funktion nutzen, kann die Temperatur im Garraum von der eingestellten Temperatur abweichen. Es wird die Feuchte Umluft Restwärme genutzt. -
Seite 111: Einstellung: Koch-Assistent
TÄGLICHER GEBRAUCH Wassertank-Füllstandsanzeige Der Tank ist leer. Füllen Sie den Tank auf. Wenn Sie zu viel Wasser in den Tank füllen, leitet der Sicherheitsauslass das überschüssige Was‐ ser in den Boden des Garraums. Saugen Sie das Wasser mit einem Schwamm auf. Entleeren des Wasserbehälters Schalten Sie den Backofen aus, lassen Sie Schrit... -
Seite 112: Koch-Assistent
TÄGLICHER GEBRAUCH Koch-Assistent - Verwenden Sie diese Funktion, um ein Gericht schnell mit den Standard‐ einstellungen zuzubereiten: P1 - P45 Öffnen Sie das Menü. Wählen Koch-Assis‐ Wählen Sie das Ge‐ Geben Sie das Ge‐ tent. Drücken Sie richt. Drücken Sie richt in den Backofen. - Seite 113 TÄGLICHER GEBRAUCH Speise Gewicht Einschubebene / Zubehör Dauer Steak, rosa 180 - 220 g ~ 15 Min. 3; Bräter auf Kombirost pro Stück; 3 Braten Sie das Fleisch einige Minuten in cm dicke einer heißen Pfanne. Setzen Sie es in Scheiben den Backofen ein.
- Seite 114 TÄGLICHER GEBRAUCH Speise Gewicht Einschubebene / Zubehör Dauer Schweinefleisch Schweinebra‐ 1,5 - 2 kg ~ 165 Min. 1; Bräter auf Kombirost ten oder Wenden Sie das Fleisch nach der Hälfte Schulter der Gardauer. Pulled Pork 1,5 - 2 kg ~ 215 Min. 2;...
- Seite 115 TÄGLICHER GEBRAUCH Speise Gewicht Einschubebene / Zubehör Dauer Hähnchen‐ 180 - 200 g ~ 25 Min. 2; Auflaufform auf Kombirost brust pro Stück Verwenden Sie Ihre Lieblingsgewürze. Braten Sie das Fleisch einige Minuten in einer heißen Pfanne. Hähnchen‐ ~ 30 Min. 3;...
- Seite 116 TÄGLICHER GEBRAUCH Speise Gewicht Einschubebene / Zubehör Dauer Apfelkuchen 45 Min. 3; Backblech Apfelkuchen 40 Min. 2; Kuchenform auf Kombirost Apfelkuchen 60 Min. 22 cm Kuchenform auf Kom‐ birost Brownies 2 kg 30 Min. 3; tiefe Pfanne Schokoladen‐ 25 Min. 3;...
-
Seite 117: Uhrfunktionen
UHRFUNKTIONEN Speise Gewicht Einschubebene / Zubehör Dauer Fleisch-/ 1 - 1,5 kg 55 Min. 2; Auflaufform auf Kombirost Gemüsela‐ sagne mit tro‐ ckenen Nu‐ delplatten Kartoffelgra‐ 1 - 1,5 kg 60 Min. 1; Auflaufform auf Kombirost tin (rohe Kar‐ Drehen Sie das Gericht nach der Hälfte toffeln) der Garzeit um. -
Seite 118: Einstellung: Uhrfunktionen
UHRFUNKTIONEN Uhrfunktion Verwendung Uptimer. Max. 23 Std. 59 Min. Diese Funktion wirkt sich nicht auf den Betrieb des Backofens aus. Um den Uptimer ein- oder auszuschalten, wählen Sie: Menü, Einstel‐ lungen. 8.2 Einstellung: Uhrfunktionen Einstellung: Uhrzeit Schritt 1 Schritt 2 Schritt 3 Um die Uhrzeit zu ändern, rufen Sie das Stellen Sie die Uhrzeit... -
Seite 119: Verwendung: Zubehör
VERWENDUNG: ZUBEHÖR Einstellung: Garzeitdauer Schritt 1 Schritt 2 Schritt 3 Schritt 4 Im Display wird Folgen‐ des ange‐ zeigt: 0:00 ange‐ zeigt. Wählen Sie eine Drücken Sie wie‐ Drücken Sie: Ofenfunktion und Stellen Sie die stellen Sie die Gardauer ein. derholt: Temperatur ein. -
Seite 120: Temperatursensor
VERWENDUNG: ZUBEHÖR Kombirost: Schieben Sie den Rost zwischen die Füh‐ rungsschienen der Einhängegitter mit den Füßen nach unten zeigend. Backblech / Auflaufpfanne: Schieben Sie das Backblech zwischen die Führungsstäbe der Einhängegitter. Kombirost, Backblech / Auflaufpfanne: Schieben Sie das Backblech zwischen die Führungsstäbe der Einhängegitter und dem Kombirost auf die Führungsstäbe da‐... -
Seite 121: Benutzung: Temperatursensor
VERWENDUNG: ZUBEHÖR Für beste Garergebnisse: Die Zutaten sollten Raum‐ Verwenden Sie ihn nicht Er muss während des Garvor‐ temperatur haben. für flüssige Speisen. gangs in der Speise bleiben. Benutzung: Temperatursensor Schritt Schalten Sie den Backofen ein. Schritt Stellen Sie die Ofenfunktion und, falls notwendig, die Temperatur ein. Schritt Einsetzen: Temperatursensor. -
Seite 122: Zusatzfunktionen
ZUSATZFUNKTIONEN Schritt - Zur Bestätigung drücken. Wenn die Speise die eingestellte Temperatur erreicht, ertönt ein Signalton. Sie kön‐ nen den Garprozess anhalten oder fortsetzen, um sicherzustellen, dass die Speise durchgegart ist. Schritt Ziehen Sie den Stecker des Temperatursensor aus der Buchse und nehmen Sie das Gericht aus dem Ofen. -
Seite 123: Kühlgebläse
TIPPS UND HINWEISE (°C) (Std.) 250 - max. Die Abschaltautomatik funktioniert nicht mit den Funktionen: Backofenbeleuchtung, Temperatursensor, Zeitvorwahl. 10.3 Kühlgebläse Wenn das Gerät in Betrieb ist, schaltet sich das Kühlgebläse automatisch ein, um die Oberflächen des Geräts kühl zu halten. Nach dem Abschalten des Geräts kann das Kühlgebläse weiterlaufen, bis das Gerät abgekühlt ist. - Seite 124 TIPPS UND HINWEISE (°C) (Min.) Englischer Sand‐ Backform auf Kombirost 40 - 50 wichkuchen à la Victoria Fisch, pochiert, Backblech oder tiefes 20 - 25 0,3 kg Blech Fisch, ganz, 0,2 Backblech oder tiefes 25 - 35 Blech Fischfilet, 0,3 kg Pizzapfanne auf Kombi‐...
-
Seite 125: Feuchte Umluft - Empfohlenes Zubehör
TIPPS UND HINWEISE (°C) (Min.) Mediterranes Ge‐ Backblech oder tiefes 25 - 30 müse, 0,7 kg Blech 11.2 Feuchte Umluft - Empfohlenes Zubehör Verwenden Sie die dunklen und nicht reflektierenden Formen und Behälter. Sie haben eine bessere Wärmeabsorption als helle Farbe und reflektierende Schüsseln. Förmchen Pizzapfanne Backform... - Seite 126 TIPPS UND HINWEISE (°C) (Min.) Tört‐ Heißluft Back‐ 2 und 4 150 - 20 - 35 chen, 20 blech Blech Apfelku‐ Ober-/ Kombirost 70 - 90 chen, 2 Unterhitze Formen à Ø 20 Apfelku‐ Heißluft Kombirost 70 - 90 chen, 2 Formen à...
-
Seite 127: Reinigung Und Pflege
REINIGUNG UND PFLEGE (°C) (Min.) Toast, 4 Grill Kombirost Max. 2 - 3 Mi‐ Backofen 3 Minu‐ nuten auf ten vorheizen. Stück der ers‐ ten Seite, 2 - 3 Mi‐ nuten auf der zwei‐ ten Seite Hambur‐ Grill Kombirost Max. 20 - 30 Kombirost in die ger aus... -
Seite 128: Entfernen: Einhängegitter
REINIGUNG UND PFLEGE Reinigen Sie den Garraum nach jedem Gebrauch. Fettansammlungen oder an‐ dere Speisereste könnten einen Brand verursachen. Es kann sich Feuchtigkeit im Gerät oder an den Glasscheiben der Tür nieder‐ schlagen. Um die Kondensation zu reduzieren, schalten Sie das Gerät immer 10 Minuten vor dem Garen ein. - Seite 129 REINIGUNG UND PFLEGE Vor dem Pyrolytische Reinigung: Schalten Sie den Back‐ Entfernen Sie alle Zubehörteile Reinigen Sie den Backofenboden ofen aus und warten Sie, aus dem Backofen. und die innere Türglasscheibe bis er abgekühlt ist. mit warmem Wasser, einem wei‐ chen Tuch und einem milden Reinigungsmittel.
-
Seite 130: Erinnerungsfunktion Reinigen
REINIGUNG UND PFLEGE 12.4 Erinnerungsfunktion Reinigen Der Backofen erinnert Sie daran, wann er mit der pyrolytischen Reinigung gereinigt werden muss. Zum Ausschalten der Erinnerung geben Sie die blinkt 5 Sekunden nach jedem Kochvor‐ Menü ein und wählen Sie Einstellungen, Erin‐ gang im Display. -
Seite 131: Aus- Und Einbau: Tür
REINIGUNG UND PFLEGE Wasserhärte Teststreifen Kalkgehalt Wasserein‐ Reinigen Sie (mg/l) stufung den Wasser‐ tank alle Ebene 0 - 7 0 - 50 weich 75 Zyklen - 2,5 Monate 8 - 14 51 - 100 mittelhart 50 Zyklen - 2 Monate 15 - 21 101 - 150 hart... - Seite 132 REINIGUNG UND PFLEGE Schritt Schließen Sie die Backofentür halb bis zur ersten Öffnungsstellung. An‐ schließend heben und ziehen Sie die Tür aus der Aufnahme heraus. Schritt Legen Sie die Tür auf einer stabilen Oberfläche auf ein weiches Tuch. Schritt Fassen Sie die Türabdeckung (B) an der Oberkante der Tür an beiden Sei‐...
-
Seite 133: Austausch: Lampe
REINIGUNG UND PFLEGE Achten Sie beim Wiedereinsetzen der Glas‐ scheiben (A und B) auf die richtige Reihenfol‐ ge. Überprüfen Sie das Symbol/den Aufdruck auf der Seite der Glasscheibe. Jede Glas‐ scheibe sieht anders aus, um den Aus- und Einbau zu erleichtern. Bei korrektem Einbau macht die Türabde‐... -
Seite 134: Fehlersuche
FEHLERSUCHE Schritt Ersetzen Sie die Lampe durch eine geeignete, bis 300 °C hitzebeständige Lampe. Schritt Bringen Sie die Glasabdeckung an. 13. FEHLERSUCHE WARNUNG! Siehe Kapitel Sicherheitshinweise. 13.1 Was zu tun ist, wenn … In allen Fällen, die nicht in dieser Tabelle aufgeführt sind, wenden Sie sich bitte an einen autorisierten Kundendienst. - Seite 135 FEHLERSUCHE Fehlercodes Im Display erscheint … Prüfen Sie, ob Folgendes zutrifft ... Err C2 Sie haben den Temperatursensor Stecker aus der Buchse entfernt. Err C3 Die Backofen-Tür ist geschlossen und die Tür‐ verriegelung ist nicht beschädigt. Err F102 Die Backofen-Tür ist geschlossen. Err F102 Die Türverriegelung nicht defekt ist.
-
Seite 136: Service-Daten
Wir empfehlen Ihnen, die Daten hier zu notieren: Modell (MOD.): ......... Produktnummer (PNC) ......... Seriennummer (S.N.) ......... 14. ENERGIEEFFIZIENZ 14.1 Produktinformationen und Produktinformationsblatt* Name des Lieferanten BSB578270M 949494787 BSE578270M 949494772 Modellbezeichnung BSS57807BM 949494790 BSS578270M 949494786 Energieeffizienzindex 81.2 Energieeffizienzklasse Energieverbrauch mit einer Standardbeladung, konventi‐ 0.93 kWh/Programm... -
Seite 137: Energiesparen
ENERGIEEFFIZIENZ Wärmequelle Strom Volumen 72 l Art des Backofens Eingebauter Backofen BSB578270M 33.7 kg BSE578270M 32.9 kg Masse BSS57807BM 34.8 kg BSS578270M 33.8 kg * Für die Europäische Union gemäß EU-Richtlinien 65/2014 und 66/2014. Für die Republik Weißrussland gemäß STB 2478-2017, Anhang G; STB 2477-2017, Anlagen A und B Für die Ukraine gemäß... -
Seite 138: Menüstruktur
MENÜSTRUKTUR Warmhalten von Speisen Wählen Sie die niedrigste Temperatureinstellung, wenn Sie die Restwärme zum Warmhalten von Speisen nutzen möchten. Die Restwärmeanzeige oder Temperatur werden auf dem Display angezeigt. Garen bei ausgeschalteter Backofenbeleuchtung Schalten Sie die Lampe während des Garvorgangs aus. Schalten Sie sie nur ein, wenn Sie sie benötigen. -
Seite 139: Informationen Zur Entsorgung
MENÜSTRUKTUR Einstellungen Temperatursensor Ak‐ 1 - Alarm Uptimer Ein / Aus tion und Stopp 2 - Alarm Backofenbeleuchtung Ein / Aus Schnellaufheizung Ein / Aus Erinnerungsfunktion Ein / Aus Wi-Fi Ein / Aus Reinigen Automatischer Fernbe‐ Ein / Aus Netzwerk ignorieren Ja / Nein trieb DEMO... - Seite 140 MENÜSTRUKTUR Helfen Sie mit, alle Materialien zu recyceln, die mit diesem Symbol gekennzeichnet sind. Entsorgen Sie solche Materialien, insbesondere Verpackungen, nicht im Hausmüll sondern über die bereitgestellten Recyclingbehälter oder die entsprechenden örtlichen Sammelsysteme. Recyceln Sie zum Umwelt- und Gesundheitsschutz auch elektrische und elektronische Geräte. Rücknahmepflichten der Vertreiber in Deutschland Wer auf mindestens 400 m²...
- Seite 141 INDICE PER RISULTATI PERFETTI Grazie per aver scelto di acquistare questo prodotto AEG. Lo abbiamo creato per fornirvi prestazioni impeccabili per molti anni, grazie a tecnologie innovative che vi semplificheranno la vita - funzioni che non troverete sulle normali apparecchiature. Vi invitiamo di dedicare qualche minuto alla lettura per sapere come trarre il massimo dal vostro elettrodomestico.
-
Seite 142: Indice
INDICE 5. ACCENSIONE E SPEGNIMENTO 11. CONSIGLI E SUGGERIMENTI UTILI..170 DELL'APPARECCHIATURA....... 153 11.1 Cottura ventilata umida....170 5.1 Manopola incassabile....153 11.2 Cottura ventilata umida - 5.2 Pannello dei comandi....153 accessori consigliati......172 11.3 Tabelle di cottura per gli istituti 6. -
Seite 143: Informazioni Di Sicurezza
INFORMAZIONI DI SICUREZZA My AEG Kitchen app INFORMAZIONI DI SICUREZZA Leggere attentamente le istruzioni fornite prima di installare e utilizzare l'apparecchiatura. I produttori non sono responsabili di eventuali lesioni o danni derivanti da un'installazione o un uso scorretti. Conservare sempre le istruzioni in un luogo sicuro e accessibile per poterle consultare in futuro. -
Seite 144: Avvertenze Di Sicurezza Generali
INFORMAZIONI DI SICUREZZA I bambini devono essere sorvegliati per assicurarsi che non • giochino con l’apparecchiatura e i dispositivi mobili con My AEG Kitchen . Tenere gli imballaggi lontano dai bambini e smaltirli in modo • adeguato. AVVERTENZA: L’elettrodomestico e le parti accessibili si •... -
Seite 145: Istruzioni Di Sicurezza
ISTRUZIONI DI SICUREZZA AVVERTENZA: Assicurarsi che l'elettrodomestico sia • spento prima di sostituire la lampadina per evitare la possibilità di scosse elettriche. AVVERTENZA: L’elettrodomestico e le parti accessibili si • riscaldano molto durante l'uso. Prestare attenzione a non toccare le resistenze o la superficie della cavità dell’apparecchiatura. -
Seite 146: Collegamento Elettrico
ISTRUZIONI DI SICUREZZA • L'apparecchiatura è dotata di un sistema di raffreddamento elettrico. Quest’ultimo funziona a corrente elettrica. Altezza minima del mobiletto (mobiletto sotto all'al‐ 590 (600) mm tezza minima del piano di lavoro) Larghezza del mobiletto 560 mm Profondità del moibiletto 550 (550) mm Altezza della parte anteriore dell'apparecchiatura 594 mm... -
Seite 147: Utilizzo
ISTRUZIONI DI SICUREZZA • Evitare che i cavi entrino a contatto o si trovino vicino alla porta dell'apparecchiatura o sulla nicchia sotto all'apparecchiatura, in particolare quando il dispositivo è in funzione o la porta è calda. • I dispositivi di protezione da scosse elettriche devono essere fissati in modo tale da non poter essere disattivati senza l'uso di attrezzi. -
Seite 148: Pulizia E Cura
ISTRUZIONI DI SICUREZZA • Prestare attenzione in fase di apertura dello sportello dell'elettrodomestico, quando quest'ultimo è in funzione. Può esservi un rilascio di aria calda. • Non accendere l’elettrodomestico con le mani bagnate o quando è a contatto con l'acqua. •... -
Seite 149: Pulizia Pirolitica
ISTRUZIONI DI SICUREZZA • Se si utilizza uno spray per il forno, seguire attentamente le istruzioni di sicurezza sulla confezione. 2.5 Pulizia pirolitica AVVERTENZA! Rischio di lesioni/Incendi/Emissioni chimiche (Fumi) in Modalità Pirolitica. • Prima di eseguire una funzione di pulizia automatica per Pirolisi o prima del Primo Utilizzo, rimuovere dalla cavità... -
Seite 150: Assistenza
• Tagliare il cavo elettrico dell'apparecchiatura e smaltirlo. • Togliere il blocco porta per evitare che bambini, o animali restino intrappolati nell'apparecchiatura. 3. INSTALLAZIONE AVVERTENZA! Fare riferimento ai capitoli sulla sicurezza. 3.1 Incasso www.youtube.com/electrolux www.youtube.com/aeg How to install your AEG/Electrolux Oven - Column installation 150/188... -
Seite 151: Fissaggio Nel Mobile
INSTALLAZIONE (*mm) min. 550 min. 560 (*mm) min. 550 min. 560 3.2 Fissaggio nel mobile 151/188... -
Seite 152: Descrizione Del Prodotto
DESCRIZIONE DEL PRODOTTO 4. DESCRIZIONE DEL PRODOTTO 4.1 Panoramica generale Pannello dei comandi Manopola di regolazione delle funzioni cottura Display Manopola di regolazione Vaschetta dell’acqua Resistenza Presa per la termosonda Lampadina Ventola Supporto ripiano, rimovibile Tubo di scarico Valvola di scarico dell’acqua Posizioni ripiano Foro di entrata vapore 4.2 Accessori... - Seite 153 ACCENSIONE E SPEGNIMENTO DELL'APPARECCHIATURA 5. ACCENSIONE E SPEGNIMENTO DELL'APPARECCHIATURA 5.1 Manopola incassabile Per utilizzare l'apparecchiatura, premere la manopola. La manopola fuoriesce. 5.2 Pannello dei comandi Ruotare la ma‐ Tasti sensore pannello dei comandi Premere nopola Riscal‐ Confermare Luce Sensore Timer damento l'imposta‐...
-
Seite 154: Prima Del Primo Utilizzo
PRIMA DEL PRIMO UTILIZZO Blocco Cottura guidata Pulizia Impostazioni Riscaldamento rapi‐ Spie timer: Operazione da remoto indicatore - il for‐ Wi-Fi indicatore - lampeggia quando il forno può no può essere controllato in modalità remo‐ essere connesso al Wi-Fi. Wi-Fi la connessione è attiva. Operazione da remoto è... -
Seite 155: Connessione Wireless
Per collegare l'apparecchiatura occore: • Rete wireless con connessione a Internet. • Dispositivo mobile connesso alla rete wireless. Passa‐ Scaricare l’app mobile My AEG Kitchen e seguire le istruzioni per i passaggi successi‐ gio 1 Pas‐ Ruotare la manopola per selezionare:... -
Seite 156: Utilizzo Quotidiano
Liechtenstein, Svizzera, Turchia. 6.4 Licenze software Il software di questo prodotto contiene componenti basati su software gratuiti e open source. AEG riconosce appieno il contributo delle comunità software e robotiche al progetto di sviluppo. Per accedere al codice sorgente dei componenti software gratuiti e open source, le cui condizioni di licenza richiedono la pubblicazione, e per vedere le informazioni complete sul copyright oltre che i termini di licenza applicabili, visitare il sito: http://aeg.opensoftwarerepository.com (cartella... - Seite 157 UTILIZZO QUOTIDIANO Cottura a vapore Premere il co‐ Premere per ri‐ Riempire la va‐ perchio della portare la va‐ Selezionare la schetta dell’ac‐ Impostare la tempe‐ vaschetta del‐ schetta dell'ac‐ funzione cottu‐ qua con 900 ml ratura. l'acqua per qua nella posi‐ ra a vapore.
-
Seite 158: Serbatoio Dell'acqua
UTILIZZO QUOTIDIANO Funzione cottura Applicazione Per rendere croccanti i cibi confezionati, come ad esempio patatine fritte, crocchette o involtini primavera. Cibi congelati Questa funzione è progettata per il risparmio energetico durante la cottu‐ ra. Quando viene usata questa funzione, la temperatura all’interno della cavità... - Seite 159 UTILIZZO QUOTIDIANO Indicatore del serbatoio d’acqua Il serbatoio è mezzo pieno. Il serbatoio è vuoto. Riempire nuovamente il serbatoio. Se si versa troppa acqua nel serbatoio, lo scarico di sicurezza fa defluire l’acqua in eccesso dal fondo della cavità. Togliere l’acqua con una spugna. Svuotamento del serbatoio dell'acqua Spegnere il forno, lasciarlo con la porta Fase 1...
- Seite 160 UTILIZZO QUOTIDIANO Cottura guidata - utilizzare per preparare un piatto rapidamente con le impostazioni prede‐ finite: P1 - P45 Accedere al menu. Selezionare Cottura Selezionare la pietan‐ Inserire la pietanza guidata. Premere nel forno. Confermare za. Premere l'impostazione. 7.6 Cottura guidata Legenda Termosonda disponibile.
- Seite 161 UTILIZZO QUOTIDIANO Piatto Peso Livello / Accessorio ripiano Durata Bistecca, me‐ 180 - 220 g ~ 15 min 3; pirofila su ripiano a filo dia cottura per pezzo; Friggere la carne per alcuni minuti in una fette di 3 cm padella calda.
- Seite 162 UTILIZZO QUOTIDIANO Piatto Peso Livello / Accessorio ripiano Durata Collo o spalla 1,5 - 2 kg ~ 165 min 1; pirofila su ripiano a filo di maiale ar‐ Girare la carne a metà cottura. rosto Maiale sfilac‐ 1,5 - 2 kg ~ 215 min 2 lamiera dolci ciato (cottura...
- Seite 163 UTILIZZO QUOTIDIANO Piatto Peso Livello / Accessorio ripiano Durata Cosce di pol‐ ~ 30 min 3; lamiera dolci lo, fresche Se le cosce di pollo sono state marinate prima, impostare la temperatura più bas‐ sa e cuocerle più a lungo. Anatra, intera 2 - 3 kg ~ 100 min...
- Seite 164 UTILIZZO QUOTIDIANO Piatto Peso Livello / Accessorio ripiano Durata Torta di mele 60 min tortiera da 22 cm su ripiano a americana filo Brownies 2 kg 30 min 3 leccarda Muffin al cioc‐ 25 min 3, vassoio muffin su ripiano a filo colato Torta di pane 50 min...
-
Seite 165: Funzioni Del Timer
FUNZIONI DEL TIMER Piatto Peso Livello / Accessorio ripiano Durata Patate grati‐ 1 - 1,5 kg 60 min 1 casseruola su ripiano a filo nate (patate Ruotare il piatto a metà del tempo di cot‐ crude) tura. Pizza fresca, 2 lamiera dolci rivestita con 35 min sottile carta da forno... - Seite 166 FUNZIONI DEL TIMER 8.2 Come impostare: Funzioni Orologio Come impostare: Imposta ora Passaggio 1 Passaggio 2 Passagio 3 Per modificare l'ora, accedere al menu e Impostare l’orologio. Premere: selezionare Impostazioni, Ora. Come impostare: Contaminuti Passaggio 1 Passaggio 2 Passaggio 3 Il display vi‐...
- Seite 167 COME USARE: ACCESSORI Come impostare: Ritardo Pas‐ Passag‐ Passag‐ Passag‐ Passag‐ Passag‐ saggio gio 2 gio 3 gio 4 gio 5 gio 6 Il di‐ Il display splay visualiz‐ mostra: l'ora del --:-- giorno Selezio‐ STOP Premere nare la Imposta‐ START Imposta‐...
- Seite 168 COME USARE: ACCESSORI Lamiera dolci / Teglia profonda: Spingere la lamiera tra le guide del sup‐ porto ripiano. Ripiano a filo, Lamiera dolci / Teglia profonda: Spingere il vassoio tra le guide del suppor‐ to ripiano e il ripiano a filo sulle guide so‐ vrastanti.
- Seite 169 COME USARE: ACCESSORI Pas‐ Inserire: Termosonda. saggio Carne, pollame e pesce Sformato Inserire la punta della Termosonda al centro Inserire la punta di Termosonda esattamente al della carne, del pesce nella parte più spessa, centro dello sformato. Il Termosonda dovrebbe ove possibile.
-
Seite 170: Funzioni Aggiuntive
FUNZIONI AGGIUNTIVE 10. FUNZIONI AGGIUNTIVE 10.1 Blocco Questa funzione evita che si cambi per sbaglio la funzione dell’apparecchiatura. Attivarla quando l’apparecchiatura è in funzione: la cottura impostata continua, il pannello dei co‐ mandi è bloccato. Attivarla quando l’apparecchiatura è spenta - l’apparecchiatura non può essere accesa, il pannello dei comandi è... - Seite 171 CONSIGLI E SUGGERIMENTI UTILI (°C) (min.) Roll dolci, 16 pez‐ vassoio di cottura o lec‐ 20 - 30 carda Panini, 9 pezzi vassoio di cottura o lec‐ 30 - 40 carda Pizza, surgelata, ripiano a filo 10 - 15 0,35 kg Rotolo con mar‐...
- Seite 172 CONSIGLI E SUGGERIMENTI UTILI (°C) (min.) Meringhe, 24 vassoio di cottura o lec‐ 25 - 35 pezzi carda Muffin, 12 pezzi vassoio di cottura o lec‐ 30 - 40 carda Pasta saporita, vassoio di cottura o lec‐ 25 - 30 20 pezzi carda Biscotti di pasta...
- Seite 173 CONSIGLI E SUGGERIMENTI UTILI 11.3 Tabelle di cottura per gli istituti di test Informazioni per gli istituti di test Test in conformità alla norma IEC 60350-1. (°C) (min.) Tortine, Cottura Lamiera 20 - 30 20 per convenzio‐ dolci teglia nale Tortine, Cottura Lamiera...
-
Seite 174: Pulizia E Cura
PULIZIA E CURA (°C) (min.) Pan di Cottura Ripiano a 2 e 4 40 - 60 Preriscaldare il Spagna, ventilata filo forno per 10 minu‐ stampo per torta Ø26 cm Frollini Cottura Lamiera 140 - 20 - 40 al burro ventilata dolci Frollini... - Seite 175 PULIZIA E CURA 12.1 Note sulla pulizia Pulire la parte anteriore dell’apparecchiatura con un panno in microfibra imbe‐ vuto di acqua tiepida e detergente delicato. Servirsi di una soluzione detergente per pulire le superfici metalliche. Agenti di pu‐ Pulire le macchie con un detergente delicato. lizia Pulire la cavità...
- Seite 176 PULIZIA E CURA 12.3 Istruzioni d'uso: Pulizia per pirolisi Pulire il forno con Pulizia per pirolisi. AVVERTENZA! Rischio di ustioni. ATTENZIONE! Se nello stesso armadietto sono installate altre apparecchiature, non utilizzarle allo stesso tempo di questa funzione. Il forno potrebbe subire danni. Prima della Pulizia per pirolisi: Spegnere il forno e atten‐...
- Seite 177 PULIZIA E CURA Al termine della pulizia: Spegnere il forno e atten‐ Pulire la cavità con un panno Rimuovere il residuo dal basso dere che si raffreddi. morbido. della cavità. 12.4 Promemoria Pulizia Il forno vi ricorda quando pulirlo con la pulizia pirolitica. Per disattivare il promemoria inserire il Menu e lampeggia sul display per 5 secondi dopo selezionare Impostazioni, Promemoria Pulizia.
- Seite 178 PULIZIA E CURA Al termine della pulizia: Spegnere il forno. Svuotare il serba‐ Sciacquare il serbatoio del‐ Pulire il tubo di sca‐ toio dell'acqua. Fare l'acqua ed eliminare i resi‐ rico con acqua tiepi‐ riferimento al capito‐ dui di calcare rimanenti con da e detergente de‐...
- Seite 179 PULIZIA E CURA Pas‐ Aprire completamente la porta e tene‐ saggio re le due cerniere. Pas‐ Sollevare e tirare i fermi fino a quan‐ saggio do non fanno clic. Pas‐ Chiudere la porta del forno fino alla saggio prima posizione di apertura. Quindi sollevare e tirare per rimuovere la porta dalla sua sede.
- Seite 180 PULIZIA E CURA Pas‐ Pulire i pannelli in vetro con acqua e sapone. Asciugare accuratamente i pannelli in saggio vetro. Non pulire i pannelli in vetro in lavastoviglie. Pas‐ Al termine della pulizia installare i pannelli in vetro e la porta del forno. saggio Se la porta è...
-
Seite 181: Risoluzione Dei Problemi
RISOLUZIONE DEI PROBLEMI Lampadina posteriore Pas‐ Girare il rivestimento di vetro per toglierlo. saggio Pas‐ Pulire il coperchio in vetro. saggio Pas‐ Sostituire la lampadina con una resistente al calore fino a 300 °C. saggio Pas‐ Installare il coperchio in vetro. saggio 13. - Seite 182 RISOLUZIONE DEI PROBLEMI Componenti La spia è spenta. Cottura ventilata umida - è acceso. La lampadina non funziona. La lampadina è bruciata. La Termosonda non funziona. La spina della Termosonda è completamente inserita nella presa. Codici di errore Il display visualizza… Controllare se...
-
Seite 183: Efficienza Energetica
Codice prodotto (PNC) ......... Numero di serie (S.N.) ......... 14. EFFICIENZA ENERGETICA 14.1 Informazioni sul prodotto e scheda informativa sul prodotto* Nome del fornitore BSB578270M 949494787 BSE578270M 949494772 Identificazione modello BSS57807BM 949494790 BSS578270M 949494786 Indice di efficienza energetica 81.2 183/188... -
Seite 184: Risparmio Energetico
0.69 kWh/ciclo circolazione d'aria forzata Numero di cavità Fonte di calore Elettricità Volume 72 l Tipo di forno Forno da incasso BSB578270M 33.7 kg BSE578270M 32.9 kg Massa BSS57807BM 34.8 kg BSS578270M 33.8 kg * Per l'Unione europea secondo i regolamenti UE 65/2014 e 66/2014. -
Seite 185: Struttura Del Menu
STRUTTURA DEL MENU Cucinare con ventola Ove possibile, servirsi delle funzioni di cottura con la ventola per risparmiare energia. Calore residuo La ventola e la lampada continuano a funzionare. Quando si spegne l’apparecchiatura, il display visualizza il calore residuo. Si può usare quel calore per mantenere le pietanze in caldo. Quando la durata di cottura è... - Seite 186 Impostazioni Imposta ora Modifica Luminosità 1 - 5 Volume toni 1 - Bip Volume acustico 1 - 4 2 - Fare clic 3 - Segnale acustico spento Termosonda Azione 1 - Allarme e Timer On/Off arresto 2 - Allarme Luce forno On/Off Riscaldamento rapi‐...
- Seite 187 187/188...
- Seite 188 www.aeg.com/shop...