Werbung
Quicklinks
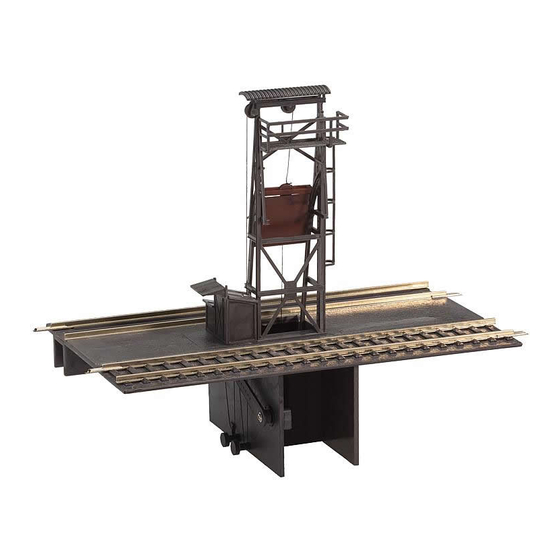
AUSSCHLACKANLAGE
MIT SERVOANTRIEB
HANDLING FACILITY WITH SERVO DRIVE
INSTALLATION DE DÉCRASSAGE AVEC SERVOCOMMANDE
ONTSLAKKINGSINSTALLATIE MET SERVOMOTOR-AANDRIJVING
D
Vor Beginn des Bastelns sollten Sie sich mit den Spritzlingen und der Anleitung vertraut machen.
Sollte es einmal vorkommen, dass ein Teil im Bausatz fehlt, kreuzen Sie bitte das fehlende Teil in
der Anleitung an und schicken Sie diese bitte an Fa. Gebr. FALLER GmbH, Abt. Kundendienst,
kundendienst@faller.de, Kreuzstraße 9, 78148 Gütenbach. Sie erhalten dann umgehend Ersatz.
Es kann vorkommen, dass bei einem Bausatz Einzelteile übrig sind.
GB
Before beginning with the assembly please familiarize yourself with the parts and read the instructions carefully.
In case of missing parts please indicate these on the instructions leaflet with a circle and return
the leaflet to Gebr. FALLER GmbH, kundendienst@faller.de, Kreuzstraße 9, D-78148 Gütenbach, Germany.
You will receive the replacement by return.
It may happen in a kit that some parts are not required.
F
Avant de commencer le montage de votre maquette bien lire la notice et repérer les grappes.
Si une pièce manque dans une boîte, cochez la pièce correspondante sur la notice et renvoyez-la-nous à
Gebr. FALLER GmbH, kundendienst@faller.de, Kreuzstraße 9, D-78148 Gütenbach (R.F.A.).
Nous vous ferons parvenir la pièce par retour.
Dans certains kits, il est possible que certaines pièces ne soient pas utilisées.
NL
Vóór het bouwen zou men de gietstukken en de handleiding moeten bestuderen.
Indien onverhoopt een onderdeel aan het bouwpakket ontbreekt, gelieve men het ontbrekende deel
in de handleiding aan te kruisen en deze te zenden aan Gebr. FALLER GmbH, kundendienst@faller.de,
Kreuzstraße 9, D-78148 Gütenbach. U ontvangt dan omgaand en gratis het ontbrekende onderdeel.
Het kan voorkomen dat u bij bepaalde bouwdozen onderdelen overhoudt.
Für den Zusammenbau des Modells empfehlen wir folgende FALLER-Artikel (sind nicht im Bausatz enthalten):
For the assembly of the kit we recommend following FALLER products (not included in the kit):
Pour l'assemblage du modèle, nous vous recommandons les articles FALLER suivants (non inclus dans le kit):
Om dit model te bouwen adviseren wij de volgende FALLER producten (maken geen deel uit van deze bouwset):
Art. Nr. 170492
FALLER-EXPERT
Flüssigkleber in Plastikflasche mit Spezialkanüle
für feinste Klebstoffdosierung.
Liquid cement in plastic bottle with canule
for very fine dosage.
Colle liquide en bouteille plastique
avec bec verseur pour un dosage précis.
Vloeibare lijm in plastic-flacon met doseerbuisje om
nauwkeurig te lijmen.
Art. Nr. 120242
Art. Nr. 170688
SPEZIAL-SEITENSCHNEIDER
zum gratfreien Abtrennen von feinsten Spritztei-
len.
Nur für Polystyrol geeignet.
Special side cutter for cutting off ultra-fine moul-
ded parts without burrs.
Only suitable for polystyrene.
Pince coupante spéciale pour couper sans bavure
les pièces miniatures moulées par
injection. Convient uniquement au polystyrène.
Speciale zijkniptang voor het braamloos afknip-
pen van de fijnste gietstukdelen.
Alleen geschikt voor polystyrol.
Inhalt
Spritzlinge
1
1 x
ontents
Sprues
2 A
1 x
ontenu
Moulages
2 B
1 x
Inhoud
Gietstukken
3
1 x
Sa. Nr. 120 242 1
Werbung

Verwandte Anleitungen für Faller 120242


Inhaltszusammenfassung für Faller 120242
- Seite 1 For the assembly of the kit we recommend following FALLER products (not included in the kit): Pour l’assemblage du modèle, nous vous recommandons les articles FALLER suivants (non inclus dans le kit): Om dit model te bouwen adviseren wij de volgende FALLER producten (maken geen deel uit van deze bouwset): Art. Nr. 170492 Art.
- Seite 2 Tüte ontents bag Inhalt ontenu sachet Inhoud zakje Nur für Märklin Mittelleiter-System ! Kabel zusammendrehen oder Only for Märklin three-rail track ! verlöten und isolieren! Seulement pour la voie conducteur central de Märklin ! Twist cables together or solder and Alleen voor Märklin middenleider ! insulate! Tordre les câbles ou les souder...
- Seite 3 3/14 3/30 3/29...
- Seite 4 3/15 nicht kleben do not glue ne pas coller niet lijmen Sekundenkleber verwenden. Inhalt Tüte ontents bag Use instant modelling cement. ontenu sachet Inhoud zakje Utilisez la colle rapide. ø1 x 4,5 mm Gebruik secondenlijm. nicht kleben do not glue ne pas coller niet lijmen...
- Seite 5 3/13 3/18 3/19 3/21 3/17 3/12 3/16 3/20 3/22 3/24 3/24 3/27 3/26 3/23 3/25...
- Seite 6 Inhalt Tüte ontents bag Faden verknoten und den Knoten Faden, ca. 300 mm ontenu sachet zakje mit Sekundenkleber fixieren! Inhoud Thread Knot the thread and fix the thread Garen with instant cement! Nouer le fil et renforcer le noed Loch durchstechen avec une goutte de colle rapide! Pierce hole through Piquez le trou...
- Seite 7 Mit Klebeband fixieren. Secure with adhesive tape. Fixer avec une bande adhésive. Met plakband vastzetten. Inhalt Tüte ontents bag ontenu sachet Inhoud zakje...
- Seite 8 Inhalt Tüte ontents bag ontenu sachet Inhoud zakje Inhalt Tüte Nur eindrücken, nicht kleben. ontents bag Press in only, do not glue. ontenu sachet Ne pas enfoncer, ne pas coller. Alleen indrukken, niet lijmen. Inhoud zakje Nur eindrücken, nicht kleben. Press in only, do not glue.
- Seite 9 3/31 Den Servo mittels Steuerung 180725 gegen den Uhrzeigersinn bis zum Anschlag drehen. Das Zahnrad des Micro Servos (Art. Nr. 180726) darf nicht von Hand bewegt werden! Inhalt Tüte Turn the Servo with the command 180725 anticlockwise up to the end. ontents bag The toothed wheel of the Micro Servo (Art.
- Seite 10 Der Hebel (Pos. f) steht nun auf 0 bis -90°. Das Zahnrad des Micro Servos (Art. Nr. 180726) darf nicht von Hand bewegt werden! Den 1. Haltepunkt (Hebel oben!) mittels Steuerung 180725 programmieren. Dann die 2. Halteposition programmieren. Den Hebel entsprechend dem Bild umstecken. Reicht das Bewegungsfeld in eine der beiden Richtungen nicht aus, muss der Hebel umgesteckt werden.
- Seite 12 Den Faden um die hintere Rolle des Hebels legen. Den Faden mit leichter Vorspannung um den Zapfen wickeln, verknoten und mit Sekundenkleber fixieren. Lay the thread around the rear pulley of the lever. Wind the thread, with slight tension, around the stud, make a knot and secure it with instant adhesive. Faire passer le fil sur la poulie arrière du levier.
- Seite 13 Das Klebeband auf dem Modell entfernen. Remove the adhesive tape from model. Enlever la bande adhésive présente sur le modèle. Het plakband op het model verwijderen.
- Seite 14 Den Faden um die vordere Rolle des Hebels legen. Den Faden mit leichter Vorspannung um den Zapfen wickeln, verknoten und mit Sekundenkleber fixieren. Lay the thread around the front pulley of the lever. Wind the thread, with slight tension, around the stud, make a knot and secure it with instant adhesive.
- Seite 15 3/11 Nur für Märklin Mittelleiter-System ! Only for Märklin three-rail track ! Seulement pour la voie conducteur central de Märklin ! Alleen voor Märklin middenleider !