
Verwandte Anleitungen für Klarstein Silent Service


Inhaltszusammenfassung für Klarstein Silent Service
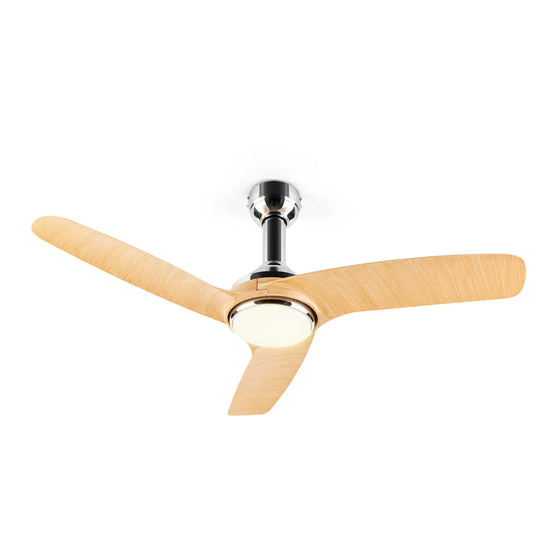
- Seite 1 Silent Service Deckenventilator Ceiling Fan Ventilateur de plafond Ventilatore da soffitto Ventilador de techo 10034685 10034686...
- Seite 3 Sehr geehrter Kunde, wir gratulieren Ihnen zum Erwerb Ihres Gerätes. Lesen Sie die folgenden Hinweise sorgfältig durch und befolgen Sie diese, um möglichen Schäden vorzubeugen. Für Schä- den, die durch Missachtung der Hinweise und unsach- gemäßen Gebrauch entstehen, übernehmen wir keine Haftung.
-
Seite 4: Technische Daten
TECHNISCHE DATEN Artikelnummer 10034685, 10034686 Stromversorgung 220-240 V~ AC 50 Hz Fernbedieng Betriebsfrequenz 433,82 MHz Übertragungsleistung Max. -27 dbm LED-Lampe 22 W Luftdurchsatz 193,23 m /min Geräuaschpegel Max. 50,3 dB(A) Gewicht 6,9 kg SICHERHEITSHINWEISE • Entfernen Sie die Verpackung und versichern Sie sich, dass kein Teil während des Transports beschädigt wurde. - Seite 5 • Falls das Netzkabel oder der Stecker beschädigt sind, müssen sie vom Hersteller, einem autorisierten Fachbetrieb oder einer ähnlich qualifizierten Person ersetzt werden. • Schließen Sie das Gerät nicht an Mehrfachsteckdosen an. • Benutzen Sie kein Verlängerungskabel. • Schließen Sie das Gerät nicht an Zeitschaltuhren oder ferngesteuerte Steckdosen an. •...
-
Seite 6: Bedienung
BEDIENUNG LIGHT ON/OFF ON/OFF Ventilator ein/aus Lampe ein/aus Rotationsrichtung Timer (2, 4, 8 Stunden) Ventilatorstufe (1–5) Lampenhelligkeit Farbtemperatur (3000K, 4300K, 6500K) Vor der erste Benutzung: Koppeln der der Fernbedienung Bei der ersten Verwendung ist die Fernbedienung bereits mit dem Gerät gekoppelt. Sie müssen die Fernbedienung in folgenden Fällen neu koppeln: •... - Seite 7 Ventilator Ventilator einschalten 1. Schalten Sie die Stromversorgung für den Deckenventilator ein. 2. Drücken Sie die Taste FAN ON/OFF (1). LIGHT Ventialtorstufe einstellen ON/OFF ON/OFF Drücken Sie eine der Zifferntasten (1–5,) um die Ventilatorstufe von niedrig bis hoch einzustellen. Drehrichtung wechseln Mit der Taste F/R ändern Sie die Drehrichtung des Ventilators.
- Seite 8 MONTAGE Montageteile Schrauben H x2...
- Seite 9 oder...
- Seite 10 220-240V~...
- Seite 13 STOP...
-
Seite 16: Reinigung Und Pflege
REINIGUNG UND PFLEGE • Trennen Sie das Gerät immer von der Stromversorgung, bevor Sie es reinigen oder warten. • Verwenden Sie niemals einen nassen Schwamm, um das Gerät zu reinigen. • Um das Gerät nicht zu beschädigen, ist es ratsam geeignete Produkte zu verwenden, welche die empfindlichen Oberflächen nicht beschädigen. - Seite 17 FEHLERBEHEBUNG Problem Möglicher Grund Vorgeschlagener Grund Die Sicherung ist Überprüfen Sie die durchgebrannt. Sicherungen im Stromkreis und am Hauptschalter. Die Kabel zum Überprüfen Sie die Der Ventilator startet nicht. Ventilator ist lose. Verkabelung. Die Ventilatorsteuerung Überprüfen Sie die ist nicht in der Position der Steuerung.
- Seite 18 HINWEISE ZUR ENTSORGUNG Befindet sich die linke Abbildung (durchgestrichene Mülltonne auf Rädern) auf dem Produkt, gilt die Europäische Richtlinie 2012/19/EU. Diese Produkte dürfen nicht mit dem normalen Hausmüll entsorgt werden. Informieren Sie sich über die örtlichen Regelungen zur getrennten Sammlung elektrischer und elektronischer Gerätschaften. Richten Sie sich nach den örtlichen Regelungen und entsorgen Sie Altgeräte nicht über den Hausmüll.
- Seite 19 Dear Customer, Congratulations on purchasing this equipment. Please read this manual carefully and take care of the following hints to avoid damages. Any failure caused by ignoring the items and cautions mentioned in the instruction manual are not covered by our warranty and any liability. Scan the QR code to get access to the latest user manual and other information about the product.
-
Seite 20: Technical Data
TECHNICAL DATA Item number 10034685, 10034686 Power supply 220-240 V~ AC 50 Hz Remote control Operation frequency 433.82 MHz Transmission power Max. -27 dbm 22 W Max. fan flow rate 193.23 m /min Fan sound power level Max. 50.3 dB(A) Weight 6.9 kg SAFETY INSTRUCTIONS... - Seite 21 • Do not connect the device to multiple sockets. • Do not use an extension cable. • Do not connect the device to timers or remote controlled sockets. • Do not operate or store the unit near heat sources such as heaters. •...
- Seite 22 OPERATION LIGHT ON/OFF ON/OFF Fan on/off Lamp on/off Direction of rotation Timer (2, 4, 8 hours) Fan speed (1-5) Lamp brightness Colour temperature (3000K, 4300K, 6500K) Before first use: Pairing of the remote control. For the first use, the fan and the remote control are already paired. Pair setting may occur in following situations: •...
- Seite 23 Switching on the fan 1. Switch on the power supply for the ceiling fan. 2. Press the FAN ON/OFF button (1). LIGHT Adjusting the valve gate stage ON/OFF ON/OFF Press one of the number keys (1-5) to set the fan speed from low to high. Changing the direction of rotation Before pushing the reversible slide switch,it is necessary to stop the action of the blades by turning of he fan.
- Seite 24 INSTALLATION Parts Screws H x2...
- Seite 26 220-240V~...
- Seite 29 STOP...
-
Seite 32: Cleaning And Care
CLEANING AND CARE • Always disconnect the appliance before cleaning or doing maintenance. • Never use a wet sponge to clean the appliance. • In order to not damage the product,it is advisable to use adapted equipment to the fragile surfaces and products slowing the wear on the appliance. - Seite 33 TROUBLESHOOTING Problem Possible Cause Suggested Remedy Fuse or circuit Check main and branch breaker blown. circuit fuses or circuit breakers. Fan will not start. Loose power line con- Check line wire con- nections to the fan. nections to fan. Speed controller not Check speed con- in correct positon.
-
Seite 34: Disposal Considerations
DISPOSAL CONSIDERATIONS According to the European waste regulation 2012/19/EU this symbol on the product or on its packaging indicates that this product may not be treated as household waste. Instead it should be taken to the appropriate collection point for the recycling of electrical and electronic equipment. -
Seite 35: Inhaltsverzeichnis
Chère cliente, cher client, Toutes nos félicitations pour l’acquisition de ce nouvel ap- pareil. Veuillez lire attentivement et respecter les instruc- tions de ce mode d’emploi afin d’éviter d’éventuels dom- mages. Nous ne saurions être tenus pour responsables des dommages dus au non-respect des consignes et à la mauvaise utilisation de l’appareil. -
Seite 36: Fiche Technique
FICHE TECHNIQUE Numéro d'article 10034685, 10034686 Alimentation 220-240 V~ AC 50 Hz Télécommande Fréquence de fonctionnement 433,82 MHz puissance d’émission Max. -27 dbm Lampe ²LED 22 W Débit d'air 193,23 m /min Niveau sonore Max. 50,3 dB(A) Poids 6,9 kg CONSIGNES DE SÉCURITÉ... - Seite 37 • Si le cordon d'alimentation ou la fiche sont endommagés, faites-les remplacer par le fabricant, par un spécialiste agréé ou par une personne de même qualification. • Ne connectez pas l'appareil à une multiprise. • Ne pas utiliser de rallonge. •...
-
Seite 38: Utilisation
UTILISATION LIGHT ON/OFF ON/OFF Ventilateur marche/arrêt Lampe marche/arrêt Sens de rotation Minuterie (2, 4, 8 heures) Vitesse du ventilateur (1–5) Luminosité de la lampe Température de couleur (3000K, 4300K, 6500K) Avant la première utilisation : associer la télécommande La télécommande est déjà associée à l'appareil. Vous devrez reconnecter la télécommande dans les cas suivants : •... - Seite 39 Ventilateur Pour allumer le ventilateur 1. Allumez l'alimentation du ventilateur. 2. Appuyez sur la touche FAN ON/OFF (1). LIGHT Réglage de la vitesse du ventilateur ON/OFF ON/OFF Appuyez sur l’une des touches numériques (1-5,) pour régler la vitesse du ventilateur de faible à...
-
Seite 40: Montage
MONTAGE Pièces de montage H x2... - Seite 41 oder...
- Seite 42 220-240V~...
- Seite 45 STOP...
-
Seite 48: Nettoyage Et Entretien
NETTOYAGE ET ENTRETIEN • Déconnectez toujours l'appareil du secteur avant de le nettoyer ou de le réparer. • N'utilisez jamais d'éponge humide pour nettoyer l'appareil. • Afin de ne pas endommager l'appareil, il est conseillé d'utiliser des produits appropriés qui n'endommagent pas les surfaces sensibles. -
Seite 49: Résolution Des Problèmes
RÉSOLUTION DES PROBLÈMES Problème Cause possible Résolution Le fusible est hors service. Vérifiez les fusibles dans le circuit et à l'interrupteur principal. Le ventilateur ne Les câbles du ventilateur Vérifiez le câblage. démarre pas. ne sont pas assez serrés. La commande du Vérifiez la position ventilateur n'est pas de la commande. -
Seite 50: Informations Sur Le Recyclage
INFORMATIONS SUR LE RECYCLAGE Vous trouverez sur le produit l’image ci-contre (une poubelle sur roues, barrée d‘une croix), ce qui indique que le produit se trouve soumis à la directive européenne 2012/19/ UE. Renseignez-vous sur les dispositions en vigueur dans votre région concernant la collecte séparée des appareils électriques et électroniques. - Seite 51 Gentile Cliente, La ringraziamo per aver acquistato il dispositivo. La pre- ghiamo di leggere attentamente le seguenti istruzioni per l’uso e di seguirle per evitare possibili danni tecnici. Non ci assumiamo alcuna responsabilità per danni scaturiti da una mancata osservazione delle avvertenze di sicurez- za e da un uso improprio del dispositivo.
-
Seite 52: Dati Tecnici
DATI TECNICI Numero articolo 10034685, 10034686 Alimentazione 220-240 V~ AC 50 Hz Telecomando Frequenza di funzionamento 433,82 MHz Potenza di trasmissione Max. -27 dbm Lampada LED 22 W Flusso d’aria 193,23 m /min Rumorosità Max. 50,3 dB(A) Peso 6,9 kg AVVERTENZE DI SICUREZZA •... - Seite 53 • Non collegare il dispositivo a ciabatte multipresa. • Non utilizzare prolunghe. • Non collegare il dispositivo a timer o a prese elettriche con comando a distanza. • Non utilizzare o stoccare il dispositivo vicino a fonti di calore, come riscaldamenti. •...
-
Seite 54: Utilizzo
UTILIZZO LIGHT ON/OFF ON/OFF Accendere/spegnere ventilatore Accendere/spegnere lampada Direzione di rotazione Timer (2, 4, 8 ore) Livello di ventilazione (1-5) Luminosità lampada Temperatura di colore (3000K, 4300K, 6500K) Prima di procedere all’utilizzo: accoppiare il telecomando Al primo utilizzo, il telecomando è già accoppiato al dispositivo. Il telecomando deve essere nuovamente accoppiato nei seguenti casi: •... - Seite 55 Ventilatore Accendere il ventilatore 1. Accendere l’alimentazione per il ventilatore. 2. Premere FAN ON/OFF (1). LIGHT Impostare il livello di ventilazione ON/OFF ON/OFF Premere uno dei tasti numerici (1-5) per impostare il livello di ventilazione da basso a alto. Cambiare la direzione di rotazione Con F/R si cambia la direzione di rotazione del ventilatore.
-
Seite 56: Montaggio
MONTAGGIO Componenti di montaggio Viti H x2... - Seite 58 220-240V~...
- Seite 61 STOP...
-
Seite 64: Pulizia E Manutenzione
PULIZIA E MANUTENZIONE • Scollegare sempre il dispositivo dall’alimentazione prima di pulizia e manutenzione. • Non utilizzare mai una spugna bagnata per pulire il dispositivo. • Per non danneggiare il dispositivo, si consiglia di utilizzare prodotti appositi per non danneggiare superfici delicate. -
Seite 65: Correzione Degli Errori
CORREZIONE DEGLI ERRORI Problema Possibile causa Soluzione consigliata Il fusibile è bruciato. Controllare i fusibili nel circuito elettrico e sull’interruttore principale. Il cavo verso il Controllare il cablaggio. Il ventilatore non parte.. ventilatore è allentato. Il controllo del Assicurarsi che il controllo ventilatore non è... -
Seite 66: Smaltimento
SMALTIMENTO Se sul prodotto è presente la figura a sinistra (il bidone dei rifiuti con le ruote), si applica la direttiva europea 2012/19/ UE. Questi prodotti non possono essere smaltiti con i rifiuti normali. Informarsi sulle disposizioni vigenti per la raccolta di dispositivi elettrici ed elettronici. - Seite 67 Estimado cliente: Le felicitamos por la compra de este producto y le agra- decemos su confianza. Lea atentamente el manual de instrucciones para evitar posibles daños. No nos respon- sabilizamos de los daños causados si no se han tenido en cuenta las instrucciones de este manual. Escanee el código QR para descargar el manual de instrucciones más reciente en su idioma y más informaciones acerca de este producto.
-
Seite 68: Datos Técnicos
DATOS TÉCNICOS Número del artículo 10034685, 10034686 Corriente eléctrica 220-240 V~ AC 50 Hz Mando a distancia, frecuencia de transmisión 433,82 MHz Max. -27 dbm Lámpara LED 22 W Corriente de aire 193,23 m /min Decibelios Max. 50,3 dB(A) Peso 6,9 kg INSTRUCCIONES DE SEGURIDAD •... - Seite 69 autorizado o a una persona cualificada que pueda reparar el daño. • No enchufe el aparato en un ladrón o en una regleta de enchufes. • No utilice un cable alargador. • No use el aparato cerca de fuentes de calor, como radiadores. •...
-
Seite 70: Uso
LIGHT ON/OFF ON/OFF Ventilador encendido/apagado Lámpara encendido/apagado Dirección de la rotación Temporizador (2, 4, 8 horas) Velocidad (1–5) Brillo de la lámpara Temperatura del color (3000K, 4300K, 6500K) Antes del primer uso: sincronizar el mando a distancia Para el primer uso el mando a distancia y el aparato ya están conectados. Debe configurarlo en los siguientes casos: •... - Seite 71 Ventilador Encender el ventilador 1. Encienda el interruptor del ventilador. 2. Pulse la tecla FAN ON/OFF (1). LIGHT Velocidad del ventilador ON/OFF ON/OFF Pulse una de las teclas numéricas (1–5,) para seleccionar la velocidad del ventilador de más baja a más alta. Dirección de la rotación Con la teclaF/R puede cambiar la dirección de la rotación.
-
Seite 72: Instalación
INSTALACIÓN Partes Tornillos H x2... - Seite 73 oder...
- Seite 74 220-240V~...
- Seite 77 STOP...
-
Seite 80: Limpieza Y Mantenimiento
LIMPIEZA Y MANTENIMIENTO • Desenchufe el aparato antes de limpiarlo. • No utilice un paño mojado para limpiar el aparato. • Para no dañar el aparato le recomendamos utilizar productos específicos que no estropeen las superficies delicadas. -
Seite 81: Solución De Errores
SOLUCIÓN DE ERRORES Problema Posible causa Propuesta Se han caído los fusibles Compruebe los fusibles principales. El cable no está bien Compruebe la conexión. El ventilador no conectado al ventilador. se enciende El control de velocidad Compruebe la posición. no está en la posición adecuada. -
Seite 82: Retirada
RETIRADA Si el aparato lleva adherida la ilustración de la izquierda (el contenedor de basura tachado) entonces rige la normativa europea, directiva 2002/96/CE. Este producto no debe arrojarse a un contenedor de basura común. Infórmese sobre las leyes territoriales que regulan la recogida separada de aparatos eléctricos y electrónicos.