Kenwood KMM-106 Schnellstartanleitung
Vorschau ausblenden
Andere Handbücher für KMM-106:
- Schnellstartanleitung (61 Seiten) ,
- Bedienungsanleitung (80 Seiten)
Inhaltsverzeichnis
Werbung
Verfügbare Sprachen
Verfügbare Sprachen
Quicklinks
PHONES
0 (800) 800 130
(050) 462 0 130
(063) 462 0 130
(067) 462 0 130
CAR RECEIVERS — Receivers • Media receivers and stations • Native receivers • CD/DVD changers • FM-modulators/USB adapters • Flash memory • Facia plates and adapters • Antennas • Accessories |
CAR AUDIO — Car audio speakers • Amplifiers • Subwoofers • Processors • Crossovers • Headphones • Accessories | TRIP COMPUTERS — Universal computers • Model computers • Accessories |
GPS NAVIGATORS — Portable GPS • Built-in GPS • GPS modules • GPS trackers • Antennas for GPS navigators • Accessories | VIDEO — DVR • TV sets and monitors • Car TV tuners • Cameras • Videomodules
• Transcoders • Car TV antennas • Accessories | SECURITY SYSTEMS — Car alarms • Bike alarms • Mechanical blockers • Immobilizers • Sensors • Accessories | OPTIC AND LIGHT — Xenon • Bixenon • Lamps
• LED • Stroboscopes • Optic and Headlights • Washers • Light, rain sensors • Accessories | PARKTRONICS AND MIRRORS — Rear parktronics • Front parktronics • Combined parktronics • Rear-view mirrors
• Accessories | HEATING AND COOLING — Seat heaters • Mirrors heaters • Screen-wipers heaters • Engine heaters • Auto-refrigerators • Air conditioning units • Accessories | TUNING — Vibro-isolation
• Noise-isolation • Tint films • Accessories | ACCESSORIES — Radar-detectors • Handsfree, Bluetooth • Windowlifters • Compressors • Beeps, loudspeakers • Measuring instruments • Cleaners • Carsits
• Miscellaneous | MOUNTING — Installation kits • Upholstery • Grilles • Tubes • Cable and wire • Tools • Miscellaneous | POWER — Batteries • Converters • Start-charging equipment • Capacitors
• Accessories | MARINE AUDIO AND ELECTRONICS — Marine receivers • Marine audio speakers • Marine subwoofers • Marine amplifiers • Accessories | CAR CARE PRODUCTS — Additives • Washer fluid •
Care accessories • Car polish • Flavors • Adhesives and sealants | LIQUID AND OIL — Motor oil • Transmission oil • Brake fluid • Antifreeze • Technical lubricant
In store "130" you can find and buy almost all necessary goods for your auto in
Kyiv and other cities, delivery by ground and postal services. Our experienced
consultants will provide you with exhaustive information and help you to chose
the very particular thing. We are waiting for you at the address
https://130.c om.ua
Internet store of
autogoods
SKYPE
km-130
Werbung
Inhaltsverzeichnis

Verwandte Anleitungen für Kenwood KMM-106


Inhaltszusammenfassung für Kenwood KMM-106
- Seite 1 Internet store of PHONES SKYPE 0 (800) 800 130 autogoods km-130 (050) 462 0 130 (063) 462 0 130 (067) 462 0 130 CAR RECEIVERS — Receivers • Media receivers and stations • Native receivers • CD/DVD changers • FM-modulators/USB adapters • Flash memory • Facia plates and adapters • Antennas • Accessories | CAR AUDIO —...
-
Seite 2: Краткое Руководство По Началу Работы
ITALIANO ESPAÑOL PORTUGUÊS РУCCKИЙ KMM-106 DIGITAL MEDIA RECEIVER For detailed operations and information, refer to the INSTRUCTION MANUAL on the following website: Quick Start Guide Pour les opérations et les informations détaillées, reportez-vous au MODE D’EMPLOI sur le site web suivant: RÉCEPTEUR MULTIMÉDIA NUMÉRIQUE... - Seite 3 Informatie over het weggooien van elektrische en elektronische apparatuur en batterijen (particulieren) Dit symbool geeft aan dat gebruikte elektrische, elektronische producten en batterijen niet bij het normale huishoudelijke afval mogen. Lever deze producten in bij de aangewezen inzamelingspunten, waar ze gratis worden geaccepteerd en op de juiste manier worden verwerkt, teruggewonnen en hergebruikt.
- Seite 4 Срок службы (годности), кроме срока хранения дополнительных косметических материалов, упомянутых в предыдущих двух пунктах, не затрагивает никаких других прав потребителя, в частности, гарантийного обслуживания KENWOOD, которое он может получить в соответствии с законом о правах потребителя или других законов, связанных с ним.
- Seite 5 SOFTWARE LICENSE AGREEMENT Article 4 Right pertaining to the Licensed Software The software embedded in the Product (hereinafter the "Licensed Software") provided by Licensor is Any and all copyrights and other rights pertaining to the Licensed Software and related documents copyrighted to or sublicensable by the Licensor, and this Agreement provides for the terms and conditions shall belong to the Licensor or the original holder of the right who granted to the Licensor the license or which Users shall follow in order to use the Licensed Software.
- Seite 6 Important Notice concerning the Software Article 10 Protection of Copyright -jansson 1. The copyright and all the other intellectual property rights relating to the Licensed Software shall belong to the Licensor Copyright (c) 2009-2012 Petri Lehtinen <petri@digip.org> and the Original Rightholder, and in no event shall they be Permission is hereby granted, free of charge, to any person obtaining a copy of this software and associated documentation files (the "Software"), under the ownership of the User.
- Seite 7 Conformiteitsverklaring met betrekking tot de RE-richtlijn Declaração de conformidade relativa à Directiva RE van de Europese Unie (2014/53/EU) 2014/53/EU Conformiteitsverklaring met betrekking tot de RoHS richtlijn Declaração de conformidade relativa à Directiva RoHS van de Europese Unie (2011/65/EU) 2011/65/EU Declaration of Conformity with regard to the RE Directive 2014/53/EU Fabrikant: Fabricante:...
- Seite 8 Slovensko Hiermit erklärt JVCKENWOOD, dass das Funkgerät “KMM-106” der Niniejszym, JVCKENWOOD deklaruje, że sprzęt radiowy “KMM-106” S tem JVCKENWOOD izjavlja, da je radijska oprema » KMM-106 « v Richtlinie 2014/53/EU entspricht. jest zgodny z dyrektywą 2014/53/UE. skladu z Direktivo 2014/53/EU.
- Seite 9 Eesti HRVATSKI / SRPSKI JEZIK Русский Käesolevaga JVCKENWOOD kinnitab, et „KMM-106“ raadiovarustus JVCKENWOOD ovim izjavljuje da je radio oprema “KMM-106” u skladu JVCKENWOOD настоящим заявляет, что радиооборудование on vastavuses direktiiviga 2014/53/EL. s Direktivom 2014/53/EU. «KMM-106» соответствует Директиве 2014/53/EU. ELi vastavusdeklaratsiooni terviktekst on kättesaadav järgmisel Cjeloviti tekst deklaracije Europske unije o usklađenosti dostupan je...
- Seite 10 Autogoods “130” viii...
-
Seite 11: Basic Procedure
Installation/Connection Basic procedure Remove the key from the ignition switch, then disconnect the terminal of the car battery. This section is for the professional installer. Connect the wires properly. See “Wiring connection” on page 3. For safety’s sake, leave wiring and mounting to professionals. Consult the Install the unit to your car. - Seite 12 Part list (supplied) Removing the unit (A) Faceplate (×1) (B) Trimplate (×1) (C) Mounting sleeve (×1) (D) Extraction key (×2) (E) Wiring harness (×1) Wiring connection a Light blue/yellow: To the steering wheel remote control adapter b Blue/white: To the power control terminal when using the optional power amplifier or to the antenna control terminal in the vehicle c Brown: To the terminal that is grounded when the telephone rings or during Antenna terminal...
-
Seite 13: Before Use
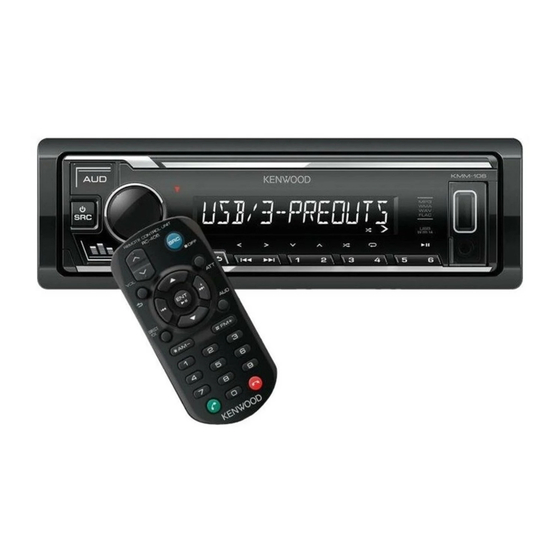
Before Use Basics IMPORTANT Faceplate • To ensure proper use, please read through this Guide before using this Volume knob Display window* product. It is especially important that you read and observe Warnings and Cautions in this Guide. • Please keep the Guide in a safe and accessible place for future reference. USB input WARNING terminal... -
Seite 14: Getting Started
Getting Started Turn the volume knob to make the settings, then press the knob. Set the date in the order of “Day” “Month” “Year” or “Month” “Day” “Year”. Select the display language and cancel the 11 Press and hold to exit. demonstration To return to the previous setting item, press When you turn on the power or after you reset the unit, the display shows:... -
Seite 15: Functions Settings
To return to the previous setting item, press • Refer to the INSTRUCTION MANUAL on the following website for the detailed explanation of each item: <www.kenwood.com/cs/ce/> • The availability of each item vary depending on the model. Autogoods “130”... -
Seite 16: Other Information
Other Information For playback operations of AUX sources, refer to the INSTRUCTION MANUAL Audio Settings on the following website: <www.kenwood.com/cs/ce/> You can set your preferred audio settings by entering [AUDIO CONTROL] menu. Note for specifications Example of Subwoofer Level Setting Speaker Impedance: 4 Ω — 8 Ω... -
Seite 17: Procédure De Base
Installation/Connexion Procédure de base Retirez la clé de contact, puis déconnectez la borne de la batterie de la voiture. Cette section est réservée aux installateurs professionnels. Connectez les fils correctement. Voir “Connexions” à la page 3. Pour des raison de sécurité, laissez le travail de câblage et de montage des Installez l’appareil dans votre voiture. - Seite 18 Liste de pièces (fourni) Retrait de l’appareil (A) Façade (×1) (B) Plaque de garniture (×1) (C) Manchon de montage (×1) (D) Clé d’extraction (×2) (E) Faisceau de fils (×1) Connexions Bleu clair/jaune: À l’adaptateur de télécommande volant Bleu/blanc: À la borne de commande d’alimentation lorsque vous utilisez l’amplificateur de puissance en option, soit à...
-
Seite 19: Avant L'utilisation
Avant l’utilisation Fonctionnement de base IMPORTANTES Façade • Pour utiliser correctement l’appareil, veuillez lire ce Guide complément avant Bouton de volume Fenêtre d’affichage* de l’utiliser. Il est particulièrement important que vous lisiez et acceptiez les avertissements et les précautions de ce Guide. •... -
Seite 20: Prise En Main
Prise en main Tournez le bouton de volume pour faire les réglages, puis appuyez sur le bouton. Réglez la date dans l’ordre “Jour” “Mois” “Année” ou “Mois” “Jour” “Année”. Sélectionne la langue d’affichage et annule la Maintenez enfoncée pour quitter. démonstration Pour retourner à... -
Seite 21: Réglages Des Fonctions
Pour retourner à l’option de réglage précédente, appuyez sur • Reportez-vous au MODE D’EMPLOI sur les sites web suivant pour une explication détaillée de chaque élément: <www.kenwood.com/cs/ce/> • La disponibilité de chaque élément varient en fonction du modèle. Autogoods “130”... -
Seite 22: Réglages Audio
Pour les opérations de lecture des sources , reportez-vous au Vous pouvez effectuer vos réglages audio préférés en accédant au menu [AUDIO MODE D’EMPLOI sur le site web suivant: <www.kenwood.com/cs/ce/> CONTROL] Exemple de Réglage du niveau de caisson de grave Remarque pour les spécifications Impédance d’enceinte:... -
Seite 23: Grundlegendes Verfahren
Einbau/Anschluss Grundlegendes Verfahren Ziehen Sie den Schlüssel aus dem Zündschloss, und trennen Sie dann den -Klemme der Autobatterie ab. Dieser Abschnitt ist für den professionellen Einbautechniker gedacht. Schließen Sie die Kabel richtig an. Siehe “Verdrahtungsanschluss” auf Überlassen Sie aus Sicherheitsgründen die Arbeiten zur Montage Seite 3. - Seite 24 Teileliste (mitgeliefert) Entfernen der Einheit (A) Frontblende (×1) (B) Frontrahmen (×1) (C) Einbauhalterung (×1) (D) Ausziehschlüssel (×2) (E) Kabelbaum (×1) Verdrahtungsanschluss Hellblau/Gelb: Zum Lenkrad-Fernbedienungsadapter Blau/weiß: Bei Verwendung des optionalen Leistungsverstärkers entweder einen Anschluss an den Stromsteuerungsanschluss oder an den Antennenanschluss Antennensteuerungsanschluss des Fahrzeugs durchführen Braun: An den geerdeten Anschluss anschließen, während das Telefon klingelt oder während Sie einen Anruf erledigen...
- Seite 25 Vor der Inbetriebnahme Grundlagen WICHTIG Frontblende • Um richtige Verwendung sicherzustellen, lesen Sie die Anleitung vor der Verwendung des Produkts sorgfältig durch. Es ist besonders wichtig, dass Sie die Warnungen und Vorsichtshinweise in dieser Anleitung lesen und beachten. Lautstärke-Regler Displayfenster* •...
-
Seite 26: Erste Schritte
Erste Schritte Drehen Sie den Lautstärke-Regler zum Wählen von [DD/MM/YY] oder [MM/DD/YY] , und drücken Sie dann den Regler. [DATE SET] Drehen Sie den Lautstärke-Regler zum Wählen von , und drücken Sie dann den Regler. Wählen Sie die Anzeigesprache und brechen Sie die Drehen Sie den Lautstärke-Regler, um die Einstellungen vorzunehmen, und drücken Sie dann den Regler. -
Seite 27: Suche Nach Einem Sender
Wiederholen Sie Schritt 2, bis der gewünschte Gegenstand gewählt oder aktiviert ist. Halten Sie zum Beenden gedrückt. Zum Zurückschalten zum vorherigen Einstellelement drücken Sie • Siehe BEDIENUNGSANLEITUNG auf der folgenden Seite für detaillierte Erklärungen jedes Elements: <www.kenwood.com/cs/ce/> • Die Verfügbarkeit jedes Elements ist nach dem Modell unterschiedlich. Autogoods “130”... -
Seite 28: Audioeinstellungen
[DEMO MODE] : Aktiviert oder deaktiviert die Displaydemonstration. Andere informationen Audioeinstellungen Für Wiedergabebedienungen von -Quellen siehe BEDIENUNGSANLEITUNG auf der folgenden Website: <www.kenwood.com/cs/ce/> Sie können Ihre bevorzugten Audio-Einstellungen durch Eingabe im [AUDIO CONTROL] -Menü einstellen. Hinweis zu technischen Daten Lautsprecherimpedanz: Beispiel der Subwoofer-Pegeleinstellung 4 Ω — 8 Ω... - Seite 29 Installeren/Verbinden Basisprocedure Haal de sleutel uit het contactslot en ontkoppel vervolgens de aansluiting van de auto-accu. Dit gedeelte is voor de professionele installateur. Verbind de draden juist. Zie “Verbinden van draden” op pagina 3. Laat het monteren en verbinden voor de veiligheid door een vakman Installeer het toestel in de auto.
- Seite 30 Onderdelenlijst (bijgeleverd) Verwijderen van het toestel (A) Voorpaneel (×1) (B) Sierplaat (×1) (C) Bevestigingshuls (×1) (D) Verwijdersleutel (×2) (E) Bedradingsbundel (×1) Verbinden van draden Lichtblauw/geel: Naar de stuur-afstandsbedieningsadapter Blauw/wit: Naar de spanningsaansluiting wanneer u een los verkrijgbare Antenne-aansluiting eindversterker gebruikt, ofwel naar de antenne-aansluiting van de auto Bruin: Naar de aansluiting die is geaard tijdens ontvangst van of gedurende een telefoongesprek Geel: Accukabel...
-
Seite 31: Alvorens Gebruik
Alvorens gebruik Basispunten BELANGRIJK Voorpaneel • Lees alvorens dit product in gebruik te nemen deze handleiding door voor Volumeknop Displayvenster* een juist gebruik. Het is vooral belangrijk dat u de Waarschuwingen en Voorzorgsmaatregelen in deze handleiding goed doorleest en opvolgt. •... - Seite 32 Starten Draai de volumeknop om de instellingen te maken en druk vervolgens op de knop. Stel de datum in de volgorde van “Dag” “Maand” “Jaar” of “Maand” “Dag” “Jaar” in. Kies de displaytaal en annuleer de demonstratie Houd even ingedrukt om te voltooien. Druk op om naar het voorgaande instelonderdeel terug te keren.
-
Seite 33: Starten Van De Weergave
Druk op om naar het voorgaande instelonderdeel terug te keren. • Raadpleeg de GEBRUIKSAANWIJZING op de volgende website voor een gedetailleerde uitleg over elk item: <www.kenwood.com/cs/ce/> • De beschikbaarheid van elk item varieert afhankelijk van het model. Autogoods “130”... -
Seite 34: Audio-Instellingen
[DEMO MODE] : Activeert of deactiveert de displaydemonstratie. Andere informatie Audio-instellingen Raadpleeg de GEBRUIKSAANWIJZING op de volgende website voor het afspelen -bronnen: <www.kenwood.com/cs/ce/> U kunt uw gewenste audio-instellingen instellen door het invoeren van het [AUDIO CONTROL] -menu. Opmerking voor specificaties... -
Seite 35: Installazione E Collegamenti
Installazione e collegamenti Procedura di base Sfilare la chiave di accensione e scollegare la presa della batteria del veicolo. Questa sezione è destinata agli installatori. Collegare correttamente i cavi elettrici. Vedere la sezione “Collegamento Per motivi di sicurezza si raccomanda di affidare l’installazione e i collegamenti dei cavi”... - Seite 36 Elenco delle parti (in dotazione) Rimozione dell’apparecchio (A) Frontalino (×1) (B) Piastrina di finitura (×1) (C) Supporto di montaggio (×1) (D) Chiavetta di estrazione (×2) (E) Fascio dei cavi (×1) Collegamento dei cavi Azzurro/giallo: All’adattatore per telecomando da volante Blu/bianco: Alla presa di alimentazione in caso d’uso dell’amplificatore di potenza Presa d’antenna opzionale, oppure alla presa dell’antenna del veicolo Marrone: Alla presa collegata a massa quando il telefono squilla oppure durante una...
-
Seite 37: Prima Dell'uso
Prima dell’uso Fondamenti IMPORTANTE Frontalino • Prima di usare l’apparecchio, e per usarlo in modo corretto, si raccomanda di Manopola del volume Finestra del display* leggere a fondo questa Guida. È particolarmente importante leggere e osservare gli avvisi e le note di attenzione nella Guida. •... -
Seite 38: Operazioni Preliminari
Operazioni preliminari Ruotare la manopola del volume sino a selezionare [DATE SET] e quindi premerla. Ruotando la manopola del volume eseguire le varie impostazioni e quindi premerla. Selezionare la lingua da usare per le visualizzazioni e Impostare la data nella sequenza “Giorno” “Mese”... -
Seite 39: Avviare La Riproduzione
Per ritornare all’impostazione precedente premere • Fare riferimento al ISTRUZIONI PER L’USO disponibile nel seguente sito web per la spiegazione dettagliata di ciascuna voce: <www.kenwood.com/cs/ce/> • La disponibilità di ciascuna voce varia a seconda del modello. Autogoods “130”... -
Seite 40: Impostazioni Audio
: Attiva o disattiva la dimostrazione del display. Altre informazioni Impostazioni audio Per la riproduzione delle sorgenti vedere le ISTRUZIONI PER L’USO all'indirizzo <www.kenwood.com/cs/ce/> È possibile impostare le impostazioni audio preferite entrando nel menu [AUDIO CONTROL] Nota per le specifiche Impedenza altoparlanti: Esempio d'impostazione del livello del subwoofer 4 Ω — 8 Ω... -
Seite 41: Procedimiento Básico
Instalación/Conexión Procedimiento básico Quite la llave del interruptor de encendido; después, desconecte el terminal de la batería del automóvil. Esta sección es para los instaladores profesionales. Conecte los cables correctamente. Consulte “Conexión del cableado” en la Para fines de seguridad, deje que un profesional realice el cableado y página 3. - Seite 42 Lista de piezas (suministradas) Desmontaje de la unidad (A) Placa frontal (×1) (B) Placa embellecedora (×1) (C) Manguito de montaje (×1) (D) Herramienta de extracción (×2) (E) Mazo de conductores (×1) Conexión del cableado Luz azul/amarilla: Al adaptador del mando a distancia del volante de la dirección Terminal de la antena Azul/blanco: Al terminal de control de potencia, cuando utiliza el amplificador de potencia opcional, o al terminal de control de la antena en el vehículo...
-
Seite 43: Antes Del Uso
Antes del uso Puntos básicos IMPORTANTE Placa frontal • Antes de utilizar este producto y para asegurar su uso correcto, lea esta guía por Rueda de volumen Ventanilla de visualización* completo. En especial, lea y observe las Advertencias y Precauciones incluidas en esta guía. -
Seite 44: Procedimientos Iniciales
Procedimientos iniciales Gire la rueda de volumen para seleccionar [DATE SET] y, a continuación, pulse la rueda. Gire la rueda de volumen para realizar los ajustes y, a continuación, pulse la rueda. Seleccione el idioma de visualización y cancele la Ajuste la fecha en el orden de “Día” “Mes”... - Seite 45 Para volver al elemento de ajuste anterior, pulse • Para obtener más detalles sobre cada una de las opciones, consulte el MANUAL DE INSTRUCCIONES en el siguiente sitio web: <www.kenwood.com/cs/ce/> • La disponibilidad de cada opción varía según el modelo.
-
Seite 46: Ajustes De Audio
Con respecto a las operaciones de reproducción de las fuentes , consulte el MANUAL DE INSTRUCCIONES en el siguiente sitio web: Puede establecer sus ajustes de audio preferidos accediendo al menú <www.kenwood.com/cs/ce/> [AUDIO CONTROL] Ejemplo de ajuste del nivel de subwoofer Nota sobre las especificaciones Pulse AUD para ingresar a [AUDIO CONTROL]... - Seite 47 Instalação/Conexão Processo básico Retire a chave do interruptor de ignição e, em seguida, desconecte o terminal da bateria do automóvel. Esta secção é para o instalador profissional. Conecte os fios adequadamente. Consulte “Conexão da cablagem” na Para o propósito de segurança, encarregue as ligações e a montagem a página 3.
- Seite 48 Lista de peças (fornecidas) Remoção do aparelho (A) Painel frontal (×1) (B) Placa de guarnição (×1) (C) Manga de montagem (×1) (D) Chave de extração (×2) (E) Cablagem (×1) Conexão da cablagem Azul claro/amarelo: Ao adaptador do controlo remoto do volante de direção Azul/branco: Ao terminal de controlo de energia quando utilizar o amplificador de potência opcional, ou ao terminal de controlo de antena no automóvel Terminal de antena...
-
Seite 49: Antes De Utilizar
Antes de utilizar Fundamentos IMPORTANTE Painel frontal • Para garantir a utilização adequada, leia atentamente este Guia antes de utilizar Botão de volume Visor* o produto. É especialmente importante que leia e observe os Avisos e Cuidados neste Guia. • Guarde o Guia em um lugar seguro e acessível para futuras consultas. Terminal AVISO entrada... - Seite 50 Introdução Rode o botão de volume para fazer as definições e, em seguida, prima-o. Defina a data na ordem de “Dia” “Mês” “Ano” ou “Mês” “Dia” “Ano”. Mantenha premido para sair. Para voltar ao item de definição anterior, prima Selecione o idioma de visualização e cancele a demonstração Configure as outras definições opcionais Ao ligar a alimentação elétrica ou depois de reiniciar o aparelho, o visor mostrará:...
- Seite 51 Para voltar ao item de definição anterior, prima • Consulte o MANUAL DE INSTRUÇÕES no website abaixo para uma explicação detalhada de cada item: <www.kenwood.com/cs/ce/> • A disponibilidade de cada item varia dependendo do modelo. Autogoods “130”...
-
Seite 52: Outras Informações
Pode fazer suas definições de áudio preferidas no menu [AUDIO CONTROL] Para as operações de reprodução de fontes , consulte o MANUAL DE Exemplo de Definição do Nível do Subwoofer INSTRUÇÕES no website abaixo: <www.kenwood.com/cs/ce/> Prima AUD para selecionar [AUDIO CONTROL] Nota para as especificações Impedância do altifalante: 4 Ω — 8 Ω... -
Seite 53: Установка И Подключение
Установка и Подключение Стандартная процедура Извлеките ключ из замка зажигания, затем отсоедините разъем автомобильного аккумулятора. Данный раздел предназначен для специалиста по установке. Правильно подключите провода. См. “Подключение проводов” на В целях безопасности работа по подключению проводов и монтажу стр. 3. должна выполняться специалистами. Обратитесь к поставщику Установите... - Seite 54 Список деталей (входят в комплект поставки) Демонтаж устройства (A) Передняя панель (×1) (B) Декоративная панель (×1) (C) Посадочный корпус (×1) (D) Ключ для демонтажа (×2) (E) Жгут проводов (×1) Подключение проводов Лампа синяя/жёлтая: К адаптеру дистанционного управления с руля Синий/белый: К гнезду управления питанием, если Вы используете дополнительный...
-
Seite 55: Передняя Панель
Перед использованием Основные сведения ВАЖНО Передняя панель • В целях обеспечения надлежащей эксплуатации, пожалуйста, перед тем Pучка регулировки громкости Дисплей* как приступить к эксплуатации данного изделия, внимательно прочтите настоящее руководство. Особенно важно, чтобы вы прочли и соблюдали все указания в данном руководстве, отмеченные словами Предупреждение и... -
Seite 56: Начало Эксплуатации
Начало эксплуатации Поверните ручку регулировки громкости для выбора элемента [DATE SET] , а затем нажмите ее. Поворачивайте ручку регулировки громкости, чтобы выбрать значения параметров, а затем нажмите ее. Выбор языка отображения и отмена демонстрации Установите дату в порядке “День” “Месяц” “Год” или “Месяц” “День”... -
Seite 57: Настройки Функций
и удерживайте ее нажатой для выхода. Для возврата к предыдущему элементу настройки нажмите кнопку • За подробными объяснениями касательно каждого пункта обращайтесь к ИНСТРУКЦИИ ПО ЭКСПЛУАТАЦИИ на следующем веб-сайте: <www.kenwood.com/cs/ce/> • Доступность каждого элемента отличается в зависимости от модели. Autogoods “130”... - Seite 58 : Включение или выключение демонстрации на дисплее. Другая информация Звуковые настройки За информацией по операциям воспроизведения источника обращайтесь к ИНСТРУКЦИИ ПО ЭКСПЛУАТАЦИИ на следующем веб-сайте: <www.kenwood.com/cs/ce/> Вы можете установить предпочитаемые звуковые настройки, перейдя в меню [AUDIO CONTROL] Замечание по техническим характеристикам Пример настройки уровня низкочастотного динамика...
- Seite 59 Autogoods “130”...
- Seite 60 Autogoods “130”...
- Seite 61 Microsoft and Windows Media are either registered trademarks or trademarks of Microsoft Corporation in the United States and/or other countries. Autogoods “130”...