
Verwandte Anleitungen für Klarstein Skyscraper 2G


Inhaltszusammenfassung für Klarstein Skyscraper 2G
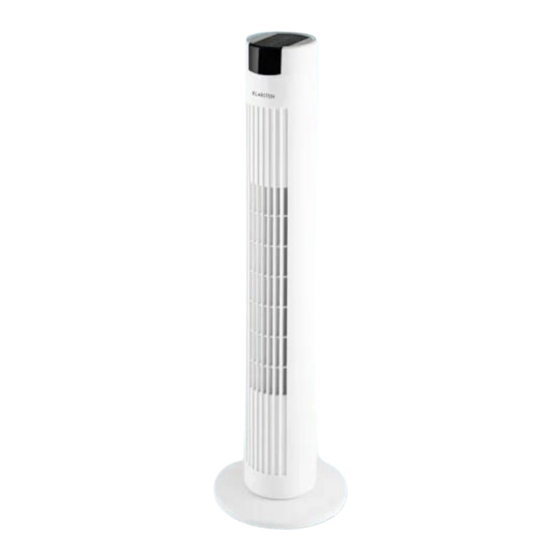
- Seite 1 Skyscraper 2G Ventilator Ventilador Ventilateur Ventilatore 10027944 10027946 10027947...
-
Seite 3: Inhaltsverzeichnis
Sehr geehrter Kunde, wir gratulieren Ihnen zum Erwerb Ihres Gerätes. Lesen Sie die folgenden Hinweise sorgfältig durch und befolgen Sie diese, um möglichen Schäden vorzubeugen. Für Schäden, die durch Missachtung der Hinweise und unsachgemäßen Gebrauch entstehen, übernehmen wir keine Haftung. Scannen Sie den folgenden QR-Code, um Zugriff auf die aktuellste Bedienungsanleitung und weitere Informationen rund um das Produkt zu erhalten. -
Seite 4: Sicherheitshinweise
SICHERHEITSHINWEISE • Entfernen Sie die Verpackung und versichern Sie sich, dass kein Teil während des Transports beschädigt wurde. Falls Teile beschädigt wurden wenden Sie sich umgehend an den Kundendienst. • Kinder könnten sich an den Verpackungsmaterialien und Altgeräten verletzen. Entsorgen Sie das Verpackungsmaterial daher umgehend. •... -
Seite 5: Geräteübersicht
• Hängen Sie das Gerät nicht an der Decke oder Wand auf, außer es ist für diesen Betrieb ausgelegt. • Lassen Sie um das Gerät herum genug Platz zu Wänden, Möbeln oder anderen Geräten, um eine bestmögliche Leistung zu erzielen. •... -
Seite 6: Montage Und Inbetriebnahme
MONTAGE UND INBETRIEBNAHME Nehmen Sie das Gerät aus dem Karton, entfernen Sie den Plastiksack und entrollen Sie das Kabel. Bringen Sie die Basis an der Unterseite des Ventilators an: Entfernen Sie die 3 Flügelschrauben Legen Sie das Netzkabel zwischen die von der Unterseite des Ventilators. -
Seite 7: Bedienung Und Funktionstasten
BEDIENUNG UND FUNKTIONSTASTEN Funktionstasten Das Gerät verfügt über 4 Funktionstasten. Die Tasten finden Sie auf dem Bedienfeld oben am Ventilator und auf der Fernbedienung. Drücken Sie mehrfach auf die Timer-Taste, um den Timer in 1-Stunden Schritten zu programmieren. Wenn Sie bei 7 sind, springt der Timer beim nächsten Tastendruck auf 0. -
Seite 8: Reinigung Und Pflege
REINIGUNG UND PFLEGE • Ziehen Sie immer den Stecker aus der Steckdose, bevor Sie das Gerät reinigen. Tauchen Sie Stecker, Netzkabel oder das gesamte Gerät nie komplett in Wasser oder andere Flüssigkeiten. • Benutzen Sie zur Reinigung kein Spülmittel, Gas, Benzin oder andere Lösemittel, um das Gerät nicht zu beschädigen. -
Seite 9: Technical Data
Dear Customer, Congratulations on purchasing this equipment. Please read this manual carefully and take care of the following hints to avoid damages. Any failure caused by ignoring the items and cautions mentioned in the instruction manual is not covered by our warranty and any liability. Scan the QR code to get access to the latest user mannual and other information about the product. -
Seite 10: Safety Instructions
SAFETY INSTRUCTIONS • Remove the packaging and make sure that the appliance is intact. If in doubt, do not use it and contact qualified personnel only. • Packaging materials (plastic bags, polystyrene, staples etc.) Must be kept out of the reach of children as they could be hazardous. -
Seite 11: Product Overview
• Do not hang the fan on the wall or ceiling unless this type of installation is provided and explained in this manual. • Place the device at a proper distance from the objects or surrounding walls making sure that its functioning will not cause accidental damages. •... -
Seite 12: Mounting The Unit
MOUNTING THE UNIT Carefully remove the appliance from the plastic bag and the carton, and unwind the cord. Assemble the base of the fan onto the bottom of the body: Remove the 3 thumb screws on the Place the power cord between the bottom of the main body. -
Seite 13: Use And Controls
USE AND CONTROLS Controls There are 4 control buttons on the control panel (top of tower fan body) and the remote control. A timer can be set for 0-7 hours (in 1 hour increments). Press this button to cycle up from 1 to 7 and then back to 0 (selected timer option is displayed on the control panel –... -
Seite 14: Cleaning And Care
CLEANING AND CARE • Always unplug the unit before moving or servicing. • Do not immerse the power cord, plug and the whole unit into water or rinse under the tap. • Do not use detergent, gasoline, benzene, thinner, or other solvents to clean the unit to avoid damage of the appliance. -
Seite 15: Datos Técnicos
Estimado cliente: Le felicitamos por la adquisición de este producto. Lea atentamente el siguiente manual y siga cuidadosamente las instrucciones de uso con el fin de evitar posibles daños. La empresa no se responsabiliza de los daños ocasionados por un uso indebido del producto o por haber desatendido las indicaciones de seguridad. -
Seite 16: Indicaciones De Seguridad
INDICACIONES DE SEGURIDAD • Retire el embalaje y asegúrese de que no se ha dañado ninguna pieza durante el transporte. Contacte con el servicio de atención al cliente en caso de que alguna pieza esté dañada. • Los niños podrían provocarse lesiones con el material de embalaje y los artículos viejos. -
Seite 17: Visión General Del Aparato
• No cuelgue el aparato del techo o de una pared a menos que se haya concebido para ese tipo de instalación. • Deje suficiente espacio alrededor del aparato con respecto a paredes, mobiliario u otros objetos para obtener el mejor rendimiento posible. •... -
Seite 18: Montaje Y Puesta En Marcha
MONTAJE Y PUESTA EN MARCHA Extraiga el aparato de la caja, retire la bolsa de plástico y desenrolle el cable. Monte la base en la parte inferior del ventilador: Retire los tres tornillos de mariposa de Coloque el cable de alimentación la parte inferior del ventilador entre las dos mitades de la base y vuelva a juntarlas. - Seite 19 MANEJO Y BOTONES DE FUNCIÓN Botones de función El aparato dispone de cuatro botones de función. Los botones se encuentran en el panel de control situado en la parte superior del aparato y en el mando a distancia. Pulse varias veces el botón del temporizador para programarlo en intervalos de una hora.
-
Seite 20: Limpieza Y Cuidado
LIMPIEZA Y CUIDADO • Desenchufe el aparato antes de limpiarlo. • Nunca sumerja el aparato, el cable de alimentación ni el enchufe en agua ni en ningún otro líquido. • No utilice detergentes, gas, gasolina u otros productos de limpieza para limpiar el aparato. -
Seite 21: Fiche Technique
Chère cliente, cher client, Toutes nos félicitations pour l’acquisition de ce nouvel appareil. Veuillez lire attentivement et respecter les instructions de ce mode d’emploi afin d’éviter d’éventuels dommages. Le fabricant ne saurait être tenu pour responsable des dommages dus au non- respect des consignes de sécurité... -
Seite 22: Consignes De Sécurité
CONSIGNES DE SÉCURITÉ • Retirez l‘emballage et assurez-vous qu‘aucune pièce n‘a été endommagée pendant le transport. Si des pièces ont été endommagées, contactez immédiatement le service clientèle. • Les matériaux d‘emballage et les vieux appareils peuvent blesser les enfants. Jetez le matériel d‘emballage immédiatement. -
Seite 23: Aperçu De L'appareil
• Ne suspendez pas l‘appareil au plafond ou au mur sauf s‘il est conçu pour cette utilisation. • Laissez suffisamment d‘espace entre l‘appareil et les murs, meubles ou tout autre équipement afin d‘obtenir les meilleures performances possibles. • N‘utilisez pas l‘appareil à proximité de cuisinières à gaz ou d‘appareils de chauffage au gaz. - Seite 24 MONTAGE ET MISE EN MARCHE Sortir l’appareil du carton, enlever le revêtement en plastique et dérouler le câble. Installer le socle sous le ventilateur : Retirer les 3 vis à ailettes du dessous Faire passer le cordon d’alimentation du ventilateur. entre les deux moitiés du socle et assembler les deux moitiés.
-
Seite 25: Utilisation Et Touches De Commande
UTILISATION ET TOUCHES DE COMMANDE Touches de commande L’appareil dispose de 4 touches de commande. Les touches se trouvent sur le panneau de commande sur le dessus du ventilateur ainsi que sur la télécommande. Appuyer plusieurs fois sur la touche « Timer » pour programmer le minuteur par paliers de 1 heure. -
Seite 26: Nettoyage Et Entretien
NETTOYAGE ET ENTRETIEN • Toujours débrancher l’appareil avant de le nettoyer. • Ne jamais plonger entièrement la fiche d’alimentation, le cordon d’alimentation ou l’appareil dans l’eau ou tout autre liquide. • Ne pas utiliser de liquide vaisselle, de gaz, d’essence ou tout autre solvant pour nettoyer l’appareil, afin de ne pas l’endommager. -
Seite 27: Dati Tecnici
Gentile cliente, La ringraziamo per aver acquistato il dispositivo. La preghiamo di leggere attentamente le seguenti istruzioni per l’uso e di seguirle per evitare possibili danni tecnici. Non ci assumiamo alcuna responsabilità per danni scaturiti da una mancata osservazione delle avvertenze di sicurezza e da un uso improprio del dispositivo. -
Seite 28: Avvertenze Di Sicurezza
AVVERTENZE DI SICUREZZA • Rimuovere l’imballaggio e assicurarsi che nessun componente si sia danneggiato durante il trasporto. Se ci sono componenti danneggiati, rivolgersi immediatamente al servizio di assistenza ai clienti. • I bambini possono ferirsi con materiali d’imballaggio e vecchi dispositivi. Smaltire immediatamente tutti i materiali d’imballaggio. -
Seite 29: Descrizione Del Dispositivo
• Non appendere il dispositivo alla parete o al soffitto, a meno che non sia adatto a questo tipo di utilizzo. • Lasciare abbastanza spazio libero tra il dispositivo e pareti, mobili o altri dispositivo, in modo da ottenere le migliori prestazioni possibili. •... -
Seite 30: Montaggio E Installazione
MONTAGGIO E INSTALLAZIONE Togliere il dispositivo dalla scatola, rimuovere l’involucro di plastica e srotolare il cavo. Applicare la base alla parte inferiore del ventilatore: Rimuovere le 3 viti ad alette dalla Posizionare il cavo di rete tra le due parte inferiore del ventilatore. metà... - Seite 31 USO E TASTI FUNZIONE Tasti funzione Il dispositivo dispone di 4 tasti funzione. I tasti si trovano sul panello di controllo situato sulla parte superiore del ventilatore e sul telecomando. Premere più volte il tasto Timer per programmare il timer a intervalli di un’ora. Se il timer è posizionato su 7, premendo di nuovo il tasto questo si posizionerà...
-
Seite 32: Pulizia E Manutenzione
PULIZIA E MANUTENZIONE • Disinserire sempre la spina dalla presa di corrente prima di eseguire la pulizia del dispositivo. • Non immergere la spina, il cavo di alimentazione o l’intero dispositivo in acqua o altri liquidi. • Per la pulizia non utilizzare prodotti detergenti, gas, benzine o altri solventi che possono danneggiare il dispositivo.